Working with animations in Skyrim
Contents
Overview
This is a simple workflow for working with animations in Skyrim. Basic 3d modeling tool competency is assumed. This tutorial will extract animations from Skyrim, modify them in 3ds max or a similar editor, and export then back into Skyrim.
Extracting animations from Skyrim
- Get a BSA Unpacker. Some choices include Fallout Mod Manager, or you could do a search on SkyrimNexus.com.
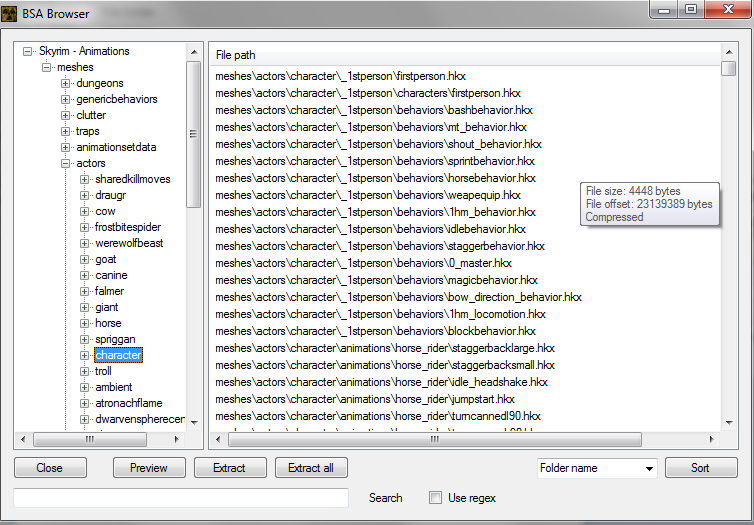
- Open up "Skyrim - Animations.bsa".
- Browse to the actors\characters folder, select everything in there, and extract to a temporary folder. Make sure the directory structure is intact.
-
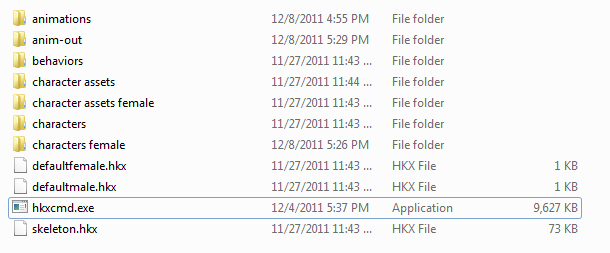
- Go grab Havok Command Line Tools 1.3. Install this preferably in the same folder as your temporary folder with the animations.
- Make a new temporary subfolder (i.e. "anim-out") in the temporary folder you used above. The resulting folder structure looks something like this:
-
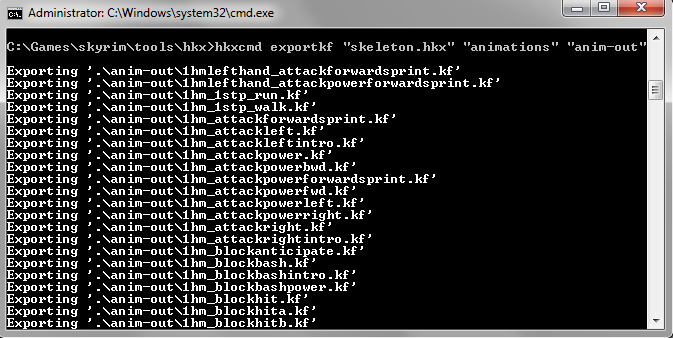
- Open up a command prompt in that directory and type (change "anim-out" to your temporary subfolder):


hkxcmd exportkf "skeleton.hkx" "animations" "anim-out"
-
- Now the files should be ready to load into 3ds max.

Animations in 3ds max
This example will use 3ds max 2012. Really, you can use any version you want.
- Import a skeleton.nif. You may have to use your BSA unpacker again, this time on "Skyrim - meshes.bsa", to obtain that file.
- Not sure how much the settings matter here, but be sure "import skeleton" is checked.
-
- Import a .kf file that you just extracted. This demo will use "1hm_attackleft.kf". Make sure all boxes are checked in the import dialog.
- Edit your animation. Covering animating is beyond the scope of this tutorial, and frankly enough I'm not an artist.
-
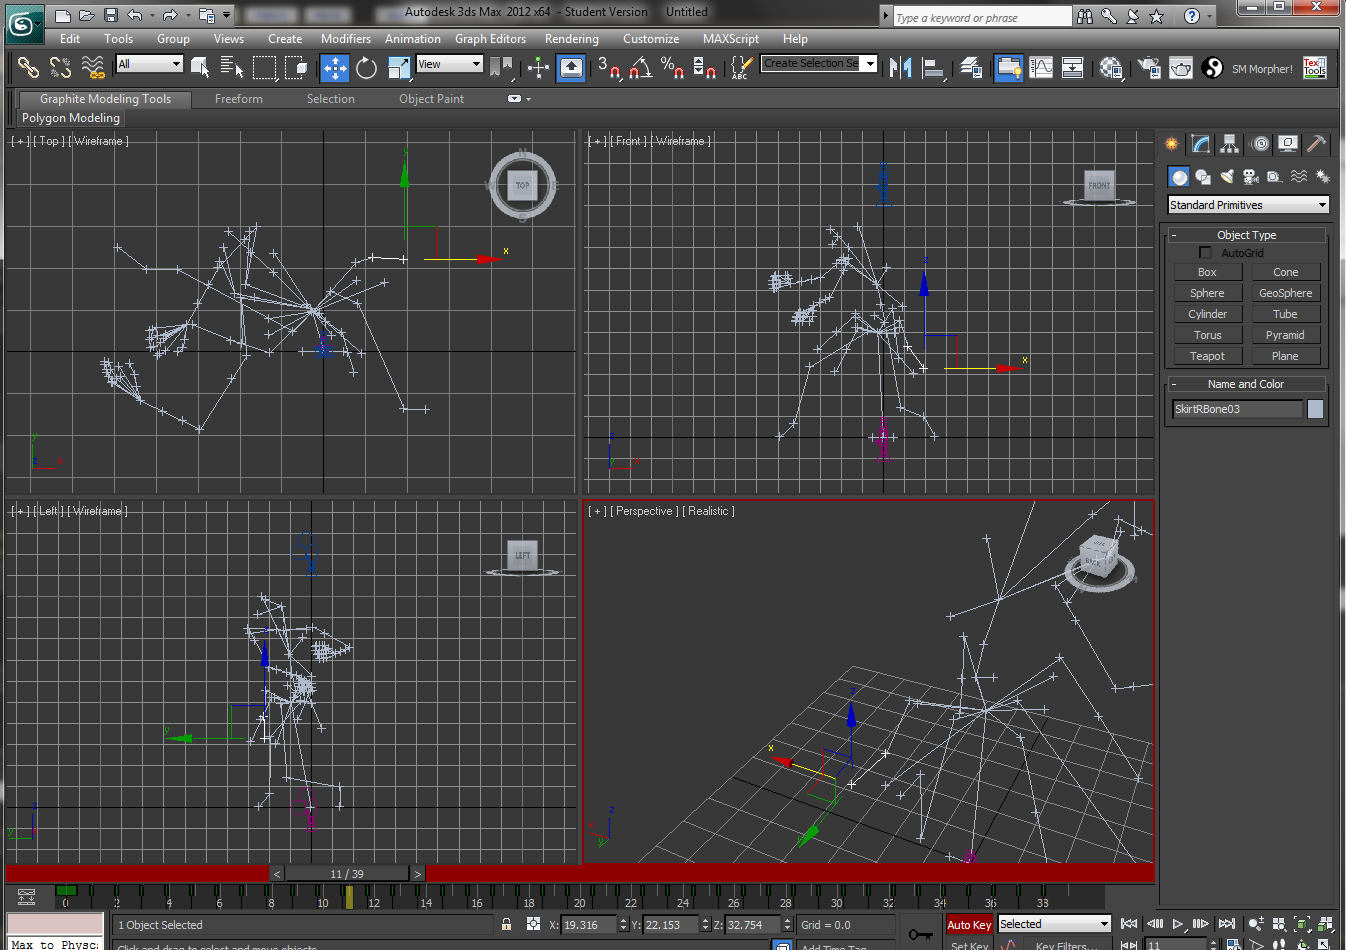
- Be sure to have proper "note" blocks for your animations, which are visible under Graph Editors > Track View - Dope Sheet. You may wish to refer to previous TES tutorials for this.
-

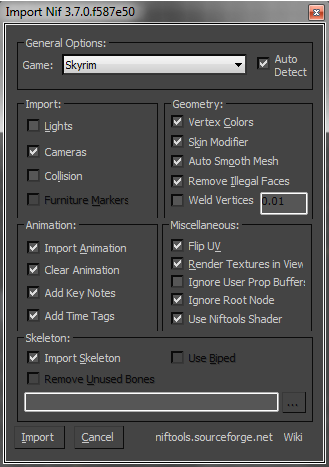
- When finished, export the animation. Make sure to use these EXACT settings as shown below.
-


Exporting animations to Skyrim
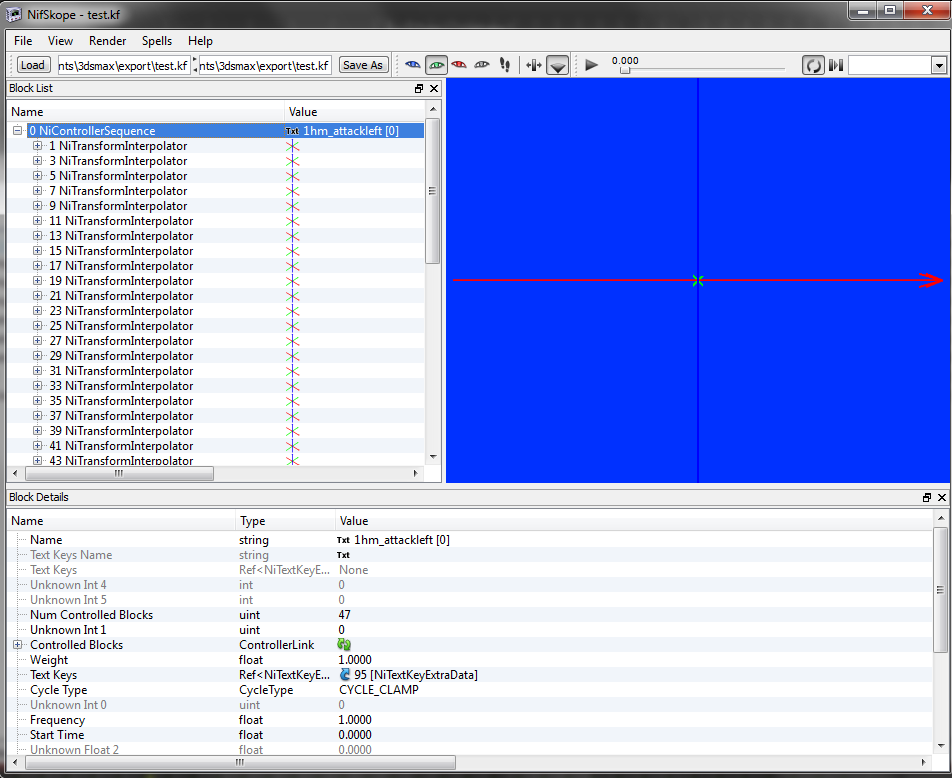
- Open up your animation in NifSkope to make sure it's not empty, etc:
-
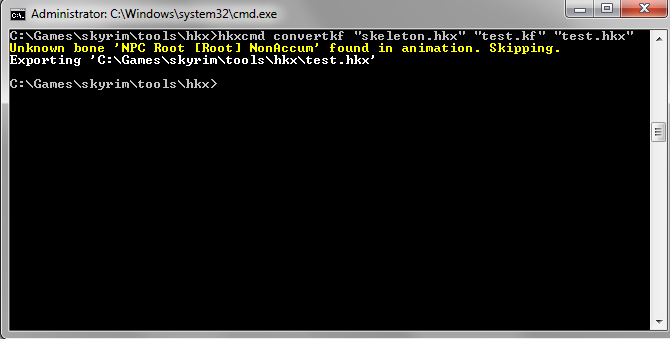
- Open up a command prompt in that directory and type (where "test" is the name of your animation):

hkxcmd convertkf "skeleton.hkx" "test.kf" "test.hkx"
-
- Put your animation back into the Data folder under the appropriate directory. Try it out in game!

Notes
- You may see missing nodes (such as the one shown above). I don't know at this time what effect that will have in game.
- Certain animations (notably the paired killmoves) will NOT work with the converter, as explained by SaidenStorm. There is currently no fix for this.
Credits
- The Hologram, for his excellent Havok Command Line tools.
- The NifTools team.
- Autodesk.
- Bethesda, for an awesome game.
Author
You may contact the author of this tutorial for questions or comments. Note that response times may be delayed.


