Importing custom videos into FNV/F3/Skyrim/Oblivion
By Martin Purvis This basic tutorial shows how you can import your own custom videos into Fallout: New Vegas, Fallout 3, Skyrim and Oblivion. I haven't seen any tutorials on getting this to work, I worked out how to do it by spending a bit of time experimenting. You can watch the Video tutorial below or if you prefer I have written a text version. This particular tutorial will be Fallout New Vegas
Video Tutorial
Text Tutorial
Tools Required for Tutorial:
-GECK (For other games use their own creation kits)
Steps
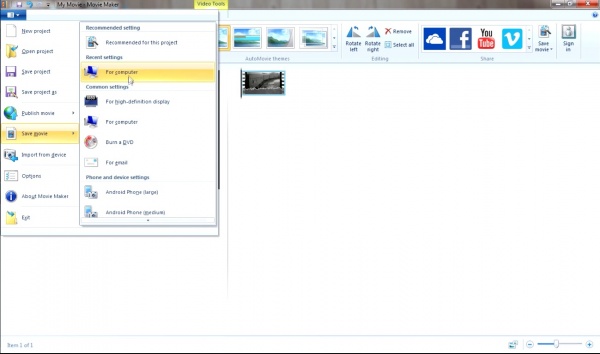
1. Open Windows Movie Maker and import the video you want to put into the game. Click File > Save Movie > For Computer and save the video to your desktop as customvid and make sure it's a WMV file (MPEG didn't work for me). When saved, close Windows Movie Maker.
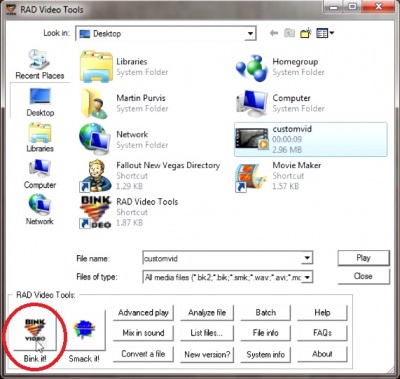
2. Open RAD Video Tools and select your newly saved WMV file, you now want to press the Bink It! button.
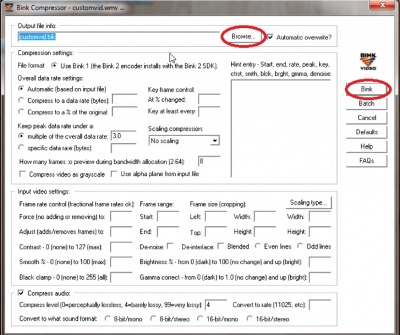
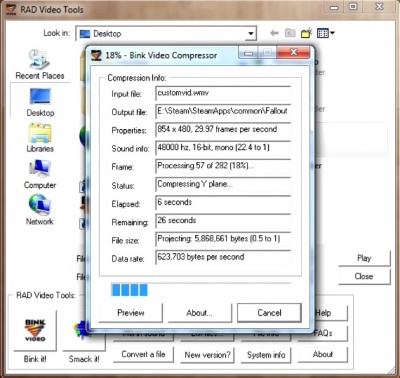
The window that appears might look confusing but you only need to change the file output by clicking Browse at the top. Navigate to your games directory (for me it's E:\Steam\SteamApps\common\Fallout New Vegas\) and in the Data\Video\ folder, create a new folder called custom and save the file there as customvid. New press Bink on the right and wait for the video to compress. When finished, press done and then close down RAD Video Tools.
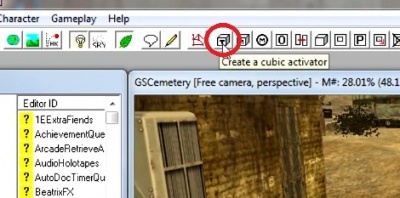
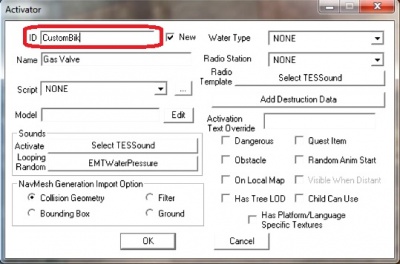
3. Open up the GECK and load up your ESP or ESM, go to Goodsprings in the render window right between the Prospector Saloon and the Goodsprings General Store. Click on the Cubic Activator (button with a T on it) and in the render window click and drag on the ground to create and resize your activator. After the activator is created, a window appears. In the ID field put CustomBik and press OK.
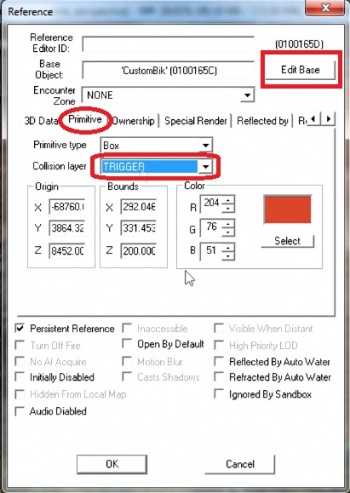
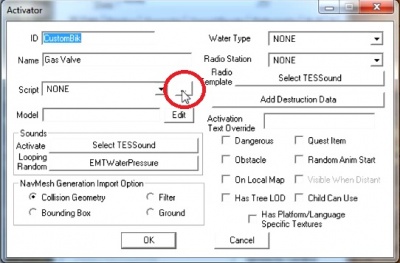
Save your progress and double click on the activator, on the Primitive tab make sure that Collision Layer drop down box is on TRIGGER and then press Edit Base. Now press the button next to the script field.
4.The Script window will open. Click File > New and make sure that Script Type is Object.
TYPE this script in (or use your own if you're experienced enough)
 SCN CustomBikVideo
 int doOnce
 Begin OnTriggerEnter Player
  if (doOnce == 0)
   PlayBink "custom\customvid.bik"
   Set doOnce to 1
  endif
 End
Once you have finished, save the script and close the Script window. Now SAVE your progress in the GECK otherwise your script will not attach to your activator.
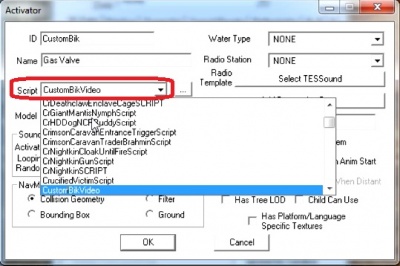
5. Again, double click on your activator and then click Edit Base. On the script drop down box, select the script you have just made CustomBikVideo and press OK and OK again to shut the two windows. Save your progress in the GECK and close the program.
6. Open Nexus Mod Manager and make sure your plugin is ticked and launch the game. 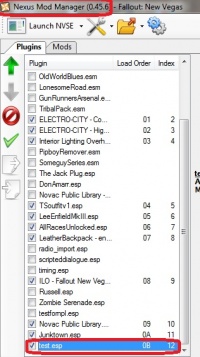
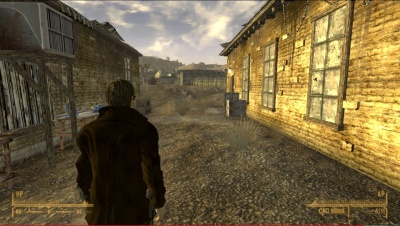
7. Ingame, go to where you placed your trigger and walk into it. Your video file will be played and afterwards you will return to where you were. Congratulations! You have successfully imported a custom video into the game.
Notes
- In the script, after writing PlayBink "custom\customvid.bik" you can change video options
In the below script, the first 1 means the video can be Interrupted , the second 1 means the games World Audio will be muted, the third 1 means the games Music will be muted and the fourth 1 means that the video will play in full screen. Changing a 1 to a 0 will reverse the option.
PlayBink "custom\customvid.bik" 1 1 1 1
- The file location after the PlayBink command needs to be in Quotes.
- PlayBink filename.bik [interruptable] (optional(default=0)) [mute audio] (optional(default=1)) [pause music] (optional(default=1)) [letterboxed] (optional(default=1))
References
- You can find information on the PlayBink function here.
