Difference between revisions of "Fallout NV Mod Conflict Troubleshooting"
m (→Issue: SweetFX not working) |
(→Issue - MAIN - Nipton: Neither Vulpes Inculta nor Oliver Swanick appear: clarification) |
||
| Line 1: | Line 1: | ||
| − | <div name=" | + | <div name="Development Box" class="boilerplate metadata" id="Development Box" |
| − | style="color: red;background-color: # | + | style="margin:0px 10px 10px 10px;border:1px solid #00C600;color: green; |
| − | border: 1px | + | background-color:#fff5f5;padding:3px;white-space: pre-wrap; |
| + | white-space: -moz-pre-wrap; | ||
| + | white-space: -pre-wrap; | ||
| + | white-space: -o-pre-wrap; | ||
| + | word-wrap: break-word;"> | ||
| + | '''This article is under development.''' | ||
| + | It is essentially complete at this time, but new problems and solutions are discovered all the time and added. | ||
| + | |||
| + | If you have solutions, corrections, or suggestions for improvement, either make them directly, post to the [http://forums.nexusmods.com/index.php?/topic/5495032-fallout-nv-mod-conflict-troubleshooting-guide/ "Fallout NV Mod Conflict Troubleshooting" thread] in the "Fallout New Vegas Mod Troubleshooting" forum, or contact [http://wiki.nexusmods.com/index.php/User:Dubiousintent the current maintainer] by Private Message (PM). | ||
| + | </div> | ||
| + | <br> | ||
| + | |||
| + | == Overview == | ||
| + | This a collection of specific common problems and solutions, along with a general checklist of things known to contribute to problems, collected from around the web. The [https://forums.nexusmods.com/index.php?/topic/5495032-fallout-nv-mod-conflict-troubleshooting-guide/ "Fallout NV Mod Conflict Troubleshooting" thread] in the "Fallout New Vegas Mod Troubleshooting" forum is for questions, suggestions, and discussion of this article's contents. | ||
| + | |||
| + | The article is organized around various generic topics, with specific mod conflicts or issues that don't fit into the other categories under "Solutions to Miscellaneous problems". | ||
| + | |||
| + | <div name="Note Box" class="boilerplate metadata" id="Notice Box" | ||
| + | style="margin:0px 10px 10px 0px;border:1px solid #00C600;color: green; | ||
| + | background-color:#fff5f5;padding:3px; | ||
| + | word-wrap: break-word; /* Internet Explorer 5.5+ */ | ||
| + | ">Don't overlook the power of a simple "cold restart" (aka "cold boot"). Before spending a lot of time chasing a problem, see if it's merely temporary by having Windows "Shut down" (power off) your computer, waiting 30 seconds (so RAM completely discharges it's contents), and powering on again.</div> | ||
| + | |||
| + | If you haven't already, it is suggested to read the wiki article [[FNV_General_Mod_Use_Advice|FNV General Mod Use Advice]] first to understand basic terminology as used here and differences in FNV from other games you may be used to modding. | ||
| + | |||
| + | Troubleshooting is a logical process of elimination. If all logic fails, you have to revert back to a vanilla game and slowly re-install mods, testing each one thoroughly before adding the next. It is a trade-off of "time" versus "effort". Where that tipping point lies is up to you. This is why you are always advised to follow a slow "install and test each mod one at a time" procedure when first setting up your game. Then you know specifically which mod is causing your problem, which saves time. | ||
| + | |||
| + | The [[#How_to_ask_for_help|How to ask for help]] wiki article applies to any game. Read it before posting your next problem in the forums to speed up getting to the correct solution. The time you are wasting otherwise is not just your own. | ||
| + | |||
| + | == Checklist == | ||
| + | Standard list of things to ask yourself about your current FNV problem:<br> | ||
| + | 00. Did you install Steam under the default location of the "C:\Program Files" tree? This causes many "strange" problems not otherwise explainable. As painful as it may sound, read the wiki article [http://wiki.nexusmods.com/index.php/Installing_Games_on_Windows_Vista%2B Installing Games on Windows Vista+] and move at least FNV. That article has a link to the official Steam Procedure (a good indication that they now recognize the need to correct this). This should be the first solution you try. Otherwise you will spend a lot of time and effort trying other solutions, and still have to move the game files in the end anyway.<br> | ||
| + | : Note that the GOG DRM-free version of FNV default install location is "C:\GOG Games\Fallout New Vegas". It does not have this issue, in addition to already being 4GB memory enabled. <span style="color: red; | ||
| + | background-color:#fff5f5;">DO NOT run the 4GB Patcher against the GOG version.</span> This situation has been known to prevent the ability to save any game files. Other unpredictable problems may occur.<br> | ||
| + | 01. Are you getting an error message? What is that pointing to as the source of the problem: the game, Steam, or Windows?<br> | ||
| + | {{Nexus EU-GDPR Login}} | ||
| + | 02. What most recently changed (as far as what you have deliberately done to your game is concerned: New, updated, or removed mods or plugins)?<br> | ||
| + | 02b. Did any of the following which interact with the game get updated or changed recently. They are prime suspects if nothing in the game itself changed: | ||
| + | : a. Video driver. (The latest is not always tested against an older game.) | ||
| + | : b. Sound driver. | ||
| + | : c. Mouse driver. ("Advanced features" are not always compatible with the game.) | ||
| + | : d. Power Outage? Run a [http://www.howtogeek.com/howto/windows-vista/guide-to-using-check-disk-in-windows-vista/ chkdsk] on the drive to fix any errors that might have occurred. | ||
| + | : e. Windows system update (consider rolling back to the previous [http://www.howtogeek.com/howto/windows-vista/using-windows-vista-system-restore/ restore point]). | ||
| + | 03. If you have recently "verified local files" or "re-installed" the game, try renaming both the INI files in the "C:\Users\<YourAccountName>\Documents\My Games\FalloutNV" folder, and let the game rebuild them. (There might have been some unexpected changes.) Rename to anything you choose. I usually just add to the extension: from "<filename>.ini" to "<filename>.ini.old". The purpose is to be able to examine the old files for things you want to be able to replicate in the new versions of the same file.<br> | ||
| + | : Before you make any changes to the game INI files, please make backups and put them in a safe place. See the [[FNV General Mod Use Advice#Game_INI_files|Game INI files]] section of the "FNV General Mod Use Advice" article for details.<span style="margin:0px 10px 10px 0px;border:1px solid #00C600;color: red; | ||
| + | background-color:#fff5f5;padding:3px; | ||
| + | word-wrap: break-word; /* Internet Explorer 5.5+ */ | ||
| + | ">You have been warned!</span> | ||
| + | : If you make any changes to any of the game INI files, remember to change it in all three files (after you have backups of the originals): the "Fallout_default.ini" in the game root folder (which only gets used to recreate the other two when they are not found), and the two in "C:\Users\<YourAccountName>\Documents\My Games\FalloutNV" folder ("FALLOUT.ini" and "FalloutPrefs.ini"). Otherwise you tend to lose track of which you actually changed if you have to "verify files".<br> | ||
| + | :<span style="margin:0px 10px 10px 0px;border:1px solid #00C600;color: green; | ||
| + | background-color:#fff5f5;padding:3px; | ||
| + | word-wrap: break-word; /* Internet Explorer 5.5+ */ | ||
| + | ">Note that if you are currently or have used "Mod Organizer", MO uses its own copies of "Fallout.ini" and "FalloutPrefs.ini" (from when the MO profile was created), located in the "<Steam install path>\steamapps\common\Fallout New Vegas\Mod Organizer\profiles\<Your Profile Name>" folder. These files need to be changed as well.</span> | ||
| + | 04. Does the most recent mod change use [http://nvse.silverlock.org/ New Vegas Script Extender] (NVSE) or supplemental plugins like [http://www.nexusmods.com/newvegas/mods/58277/ JIP NVSE Plugin] or "Lutana NVSE Plugin"? Check that log (in the game's root folder: i.e. "<Steam install path>\steamapps\common\Fallout New Vegas"). | ||
| + | |||
| + | : According to [http://forums.nexusmods.com/index.php?/topic/2619794-jip-nvse-plugin/?view=findpost&p=48608157 this post] in the JIP NVSE thread, mods are supposed to use and expect the following results when checking which version has been loaded, either in scripts or the game console ("<~>"); even from the Main Menu (without loading a "save game" file). | ||
| + | : * GetNVSEVersion: returns integer (e.g. "5") | ||
| + | : * GetJIPLNVersion / GetLNVersion: returns loaded JIP LN main version as float (xx.xxxx) | ||
| + | : * GetPluginVersion "<string>": (quotes are required) | ||
| + | ::* "JIP NVSE Plugin": returns loaded JIP LN main version as float (xx.xxxx) | ||
| + | ::* "lutana_nvse": returns loaded JIP LN main version as float (xx.xxxx) | ||
| + | :* IsPluginInstalled: | ||
| + | ::* "lutana_nvse" returns 1 | ||
| + | |||
| + | : If you previously had the "lutana nvse" plugin installed, make sure you have removed all "lutana*.*" files from both the game root and "Data\NVSE\Plugins" folders. Otherwise this can cause the "GetJIPLNVersion" command to fail with the error "command not found". | ||
| + | |||
| + | :<span style="margin:0px 10px 10px 0px;border:1px solid #00C600;color: green; | ||
| + | background-color:#fff5f5;padding:3px; | ||
| + | word-wrap: break-word; /* Internet Explorer 5.5+ */ | ||
| + | ">NVSE and related plugins must be manually installed because most mod managers assume everything in them needs to go into the "Data" folder instead of their respective specific locations. Check their documentation carefully.</span> | ||
| + | {{NVSE Configuration}} | ||
| + | : See also entirety of the [[#Issue: CTD without warning, "Out of Memory error", or stops responding after the Main Menu|Issue: CTD without warning, "Out of Memory error", or stops responding after the Main Menu"]] in this guide. | ||
| + | : For help interpreting an error log, please see the [http://wiki.nexusmods.com/index.php/How_to_read_most_Bethesda_game_error_logs How to read most Bethesda game error logs] wiki article. | ||
| + | <br> | ||
| + | : {{Lutana NVSE Plugin Status}} | ||
| + | 05. Did the mod need to be added to [http://www.nexusmods.com/newvegas/mods/42507/? Mod Configuration Menu (MCM)] / [http://www.nexusmods.com/newvegas/mods/44757/? One HUD (oHUD)] / [http://www.nexusmods.com/newvegas/mods/57174/? User Interface Organizer (UIO)]? (Those mods need to see it when they are installed. See the wiki article [http://wiki.nexusmods.com/index.php/HUD-UI-Menu_issues HUD-UI-Menu issues] and re-install them.)<br> | ||
| + | 06. Is your version of Windows 32 or 64-bit? (32-bit may require BOOT.INI changes to use more than 2GB of memory. See this [http://wiki.nexusmods.com/index.php/2-4GB_game_memory_limits_and_solutions 2-4GB game memory limits and solutions] article.) FNV is a 32-bit game, so you need the 32-bit versions of any downloadable tools or libraries, like "C++ Runtimes" or "DirectX drivers" installed on your 64-bit system. 32-bit libraries are not interchangeable with 64-bit versions. They install to different locations. There is a reason MS makes both versions available.<br> | ||
| + | 07. Are you using a FNV4GB Loader such as [http://www.nexusmods.com/newvegas/mods/55061/? 4GB Fallout New Vegas Updated] or an LAA flag Patcher like [http://www.nexusmods.com/newvegas/mods/62552/? FNV 4GB Patcher]? (Increases available memory. But see the previous question about 32/64-bit Windows. It's related.) Did you turn off any "anti-virus" checking software before patching? (They see any attempts to alter programs as "malware".)<br> | ||
| + | : How can you tell if the 4GB Patch is working? | ||
| + | : The [http://www.nexusmods.com/newvegas/mods/58277 JIP LN NVSE Plugin] has a function which can be run from the console: "GetIsLAA" (not case sensitive). | ||
| + | : Possible return codes: | ||
| + | :* 0=patch is not applied | ||
| + | :* 1=patch was applied to the executable, but extra memory is not being allocated | ||
| + | :* 2=successfully allocated extra memory from the patch and is fully working. | ||
| + | : If "GetIsLAA" is returning code "1", try running the game from a "local administrator" account. If that is succesfull, you need to move the game install location out of the "C:\Program Files" folder tree, or correct the "permissions" on the folder you moved it to, as you are going to have other problems down the road. Please see the wiki "[http://wiki.tesnexus.com/index.php/Installing_Games_on_Windows_Vista%2B Installing Games on Windows Vista+]" article for details. | ||
| + | : Alternatively: if the Windows "Task Manager" indicates the "FalloutNV.exe" program has more than 2GB (2,000,000KB) of "Memory (Private Working Set)", then the 4GB Patch is in effect. However, to the contrary: less does not mean it is not working. The game simply hasn't needed that much memory as yet.<br> | ||
| + | 08. Are you using an [http://enbdev.com/index_en.html ENB] preset? (Alters the graphics environment, including INI changes.) If you aren't sure, then probably not. This is a "third party tool" you would have to manually add. You should wait until you have a stable game before adding a "post-processor" like it to the mix.<br> | ||
| + | 09. Are you using [http://reshade.me/sweetfx Reshade/SweetFX]? (Alters the graphics environment, including INI changes.) You should wait until you have a stable game before adding a "post-processor" like it to the mix.<br> | ||
| + | 10. Check the game graphic & ENB/SweetFX options do not conflict with video driver settings. (Anti-aliasing, ambient occlusion, anisotropic sample size, v-sync, anything else that is mentioned.) If you didn't install either of these then the question does do not apply.<br> | ||
| + | 11. Are you using [http://loot.github.io/ LOOT] to sort your mod "load order" (LO)? (Reduces mod conflicts.) If you don't like LOOT's results, or wish total control over your LO, see the wiki article [http://wiki.nexusmods.com/index.php/Load_order_and_you Load order and you] for an approach to organizing the LO and creating a "merge patch" file to manually resolve conflicts.<br> | ||
| + | : It's always useful to post your "Load Order" (LO) with your problem description. (Use the "Special BBCode" button in the Forum "Reply" menu bar to put the LO in "Spoiler" tags. See the article [[#How_to_markup_images_(etc)_in_forum_posts_and_comments)|How to markup images (etc) in forum posts and comments]].) Screenshots are not the best way to convey your LO, because they usually can't include everything in one image and (depending upon where you took the shot) may not show the actual "load order". [http://loot.github.io/ LOOT] can copy your LO into a list suitable for posting on forums. (It's under the ":" with three dots to the extreme right in it's menu bar. Current [http://tes5edit.github.io/docs/index.html Tome of xEdit] online documentation here.) Most "mod managers" have a similar "LO List" capability. But the total number of mods you have installed in the DATA folder is also important, because even inactive plugins are counted against the so-called "140 cap". LOOT provides both numbers: active and total installed. | ||
| + | |||
| + | 12. Do you have more than 130 active plugins in your LO, or more than 140 plugins installed (active or not) in the game DATA folder? The game can have problems with anywhere from roughly 130-140 active, or too many installed, depending upon your system. This may manifest in any number of strange ways to include apparent missing meshes and textures that were there before, along with CTDs.<br> | ||
| + | 13. If you are having a "red icon" problem, see the [[#ArchiveInvalidation (by Manager)|ArchiveInvalidation (by Manager)]] sub-topic.<br> | ||
| + | :* When in doubt, it will never harm things to try toggling "ArchiveInvalidation" off and then on again. | ||
| + | 14. Are you missing any of the "game fixer" mods? See the [[#Issue: Vanilla game bugs|Issue: Vanilla game bugs]] sub-topic for a list of specific recommendations.<br> | ||
| + | 15. If any LOD files (distant landscape terrain) have been added, re-run '''TES4LL''' (from [http://www.nexusmods.com/oblivion/mods/40549/? Nexus Oblivion] or [https://github.com/Gruftikus/tes4ll GitHub]). ''''TES4LL''' is used to "fix up" LOD/VWD mesh files, and works along with [http://www.nexusmods.com/newvegas/mods/58562/? FNVLODGen]. The [http://web.archive.org/web/20170713081056/http://www.darkcreations.org/testg/wiki/Category:VWD-OB#TES4LL_process_sequence VWD/LOD Overview page] includes a basic batch file for assistance in automating the TES4LL process. Edit in the following parameters in the "tes4ll_make_..." files for FNV: <div style="margin:0px 10px 10px 30px; border:1px dashed #DAA520; color: lightgray; background-color:#424242; padding:3px;">... _gamemode=FalloutNV _worldspace=WastelandNV _worldspaceid=894758 _worldspaceidhex=000DA726 ...</div> | ||
| + | :* A more recent alternative to '''TES4LL''' is [http://forum.step-project.com/topic/13451-xlodgen-terrain-lod-beta-for-fnv-fo3-fo4-fo4vr-tes5-sse-tes5vr-enderal/ xLODGen - Terrain LOD beta for FNV, FO3, FO4, FO4VR, TES5, SSE, TES5VR, ENDERAL] by '''sheson''', an updated version of the basic '''xLODGen''' tool (of which '''FNVLODGen''' is a game specific implementation) which now has the option to generate LOD meshes and textures "exactly" like the CK. Read '''at least''' the first post instructions carefully. Specifying an "output file" should be considered mandatory.<br> | ||
| + | : See the [http://web.archive.org/web/20170713081056/http://www.darkcreations.org/testg/wiki/Main_Page TESTG] site for a glossary of terms and descriptions of/links to these and other utilities. | ||
| + | 16. If the LO has changed, re-run [http://www.nexusmods.com/newvegas/mods/58562/? FNVLODGen] after [https://loot.github.io/ LOOT]. (Rebuilds LOD quadrants (quads), which are "load order" dependent.)<br> | ||
| + | 17. Use [http://www.nexusmods.com/newvegas/mods/34703/? FNVEdit] (loading the entire LO) to check for Masters that are missing or loading after Dependencies. See the wiki tutorial [http://wiki.nexusmods.com/index.php/Missing_Masters Missing Masters]. There is full documentation of FNVEdit (for both FO3 and FNV) in the online docs [http://tes5edit.github.io/docs/index.html Tome of xEdit] and the downloadable PDF [http://www.nexusmods.com/newvegas/mods/38413/? FNVEdit Training Manual].<br> | ||
| + | 18. Are you using a [http://www.nexusmods.com/newvegas/mods/35003/? Wrye Flash] Bashed Patch or a manually created "merge patch" file? (Resolves record level conflicts.) See [http://wiki.step-project.com/Guide:Merging_Plugins S.T.E.P. Merging Plugins Guide] which covers both approaches, or the video [https://www.youtube.com/watch?v=yq-fqpL5LqE Making a Merge Patch by Roy Batty] for the "merge up" approach. (Use of "Mod Organizer" is not required.) Use the [http://www.nexusmods.com/oblivion/mods/35230/? Wrye Bash Pictorial Guide] to quickly get functional with "Wrye Flash", which I think is the easier approach for a novice modder.<br> | ||
| + | 19. If you are using "Wrye Flash" to create a "Bashed Patch", have you gotten all "green" checkboxes for all your mods? See the first post in the pinned thread [https://forums.nexusmods.com/index.php?/topic/2247404-fallout-new-vegas-beginners-guide-to-modding/ Fallout New Vegas Beginners guide to modding] by '''gromulos'''.<br> | ||
| + | 20. Was there an update to a mod that has been included in a "merged plugins" or "merge patch" file? Rebuild the "merge" file.<br> | ||
| + | 21. Did any system or driver updates occur? (Third party processes might be the cause if nothing else changed.)<br> | ||
| + | 22. Does your hardware meet the game's [http://www.systemrequirementslab.com/cyri/requirements/fallout-new-vegas/11035 minimum requirements]?<br> | ||
| + | 23. Have you tried running the game in "windowed mode"? This has been known to unexpectedly fix CTDs and "out of memory" errors on some older hardware. If you prefer the "borderless" version of "windowed mode", install [http://nvse.silverlock.org/ New Vegas Script Extender (NVSE)] and use the [http://www.nexusmods.com/newvegas/mods/59266/? One Tweak for FNV] mod.<br> | ||
| + | : Alternatively, there are free third-party tools that run games (not just FNV) in "borderless windowed mode", such as [https://github.com/Codeusa/Borderless-Gaming/releases Borderless Gaming]. | ||
| + | 24. Try turning off any unnecessary background processes, such as "anti-virus" or "anti-malware" programs (unneeded if you are running your game in "offline" mode), multiplayer "overlays" like "OverWolf" (this is single-player after all), the Steam overlay, etc., at least on a temporary basis to see if they are interfering.<br> | ||
| + | 25. Finally, the problem might be an overheating hardware component. This usually shows up after a period of time which is typically fairly consistent but unpredictable as to when it manifests. Try installing and keeping an eye on a temperature monitor, such as [http://www.almico.com/speedfan.php Speedfan] (freeware). Your motherboard manufacturer probably has one available as well. And it never hurts to clean out any dust collecting in the computer case. Be sure to block any fans from rotating when you blow it out, so they don't send any unfiltered power surges through the system. | ||
| + | |||
| + | <span id="ArchiveInvalidation (by Manager)"></span> | ||
| + | |||
| + | == ArchiveInvalidation ''by Manager'' == | ||
| + | "ArchiveInvalidation" (AI) is a method by which the game is told to look for "loose files" in preference to those in the vanilla BSA files. This is the reliable method to get a mod's own texture and mesh files utilized, assuming you have properly installed those "assets". [https://forums.nexusmods.com/index.php?/topic/3538840-should-i-really-need-to-update-my-invalidation-file-by-hand/#entry31870835 This post on manual invalidation] explains the problem and history quite well. | ||
| + | |||
| + | Check you have "ArchiveInvalidation" (AI) enabled. You may need to "toggle" it off and then on again. | ||
| + | |||
| + | (For links to tutorials and documentation for the individual mod managers, please see the '[http://wiki.nexusmods.com/index.php/FNV_General_Mod_Use_Advice#Mod_Managers Mod Managers]' section of the wiki "[http://wiki.nexusmods.com/index.php/FNV_General_Mod_Use_Advice FNV General Mod Use Advice]" article.) | ||
| + | |||
| + | * Open your mod manager. | ||
| + | :* [http://www.nexusmods.com/newvegas/mods/42572/ Mod Organizer (MO)]: Select your "Profile". Turn on "Automatic Archive Invalidation" in the "Configure Profiles" dialog. Close the mod manager. | ||
| + | :: Some have found "AI" more difficult to get working in MO. In these cases the following steps are suggested: | ||
| + | ::1. In MO Settings 'Workarounds': uncheck 'Force-enable game files'. | ||
| + | ::2. Get a copy of "Fallout - AI!.bsa" (From FOMM or NMM) and copy it to your "Data" directory. (Basically this is an empty BSA file.) | ||
| + | ::3. Go to the 'Archives' tab in the right MO window. Make sure MO is managing BSA files. Move the "Fallout - AI!.bsa" to the top of the list. | ||
| + | ::4. Try "Automatic Archive Invalidation" in the Profile both OFF and ON. | ||
| + | :* [http://forum.step-project.com/forum/102-mod-organizer-2-support/ MO2 Support] STEP Forum. [http://forum.step-project.com/topic/13308-mo-or-mo2-for-fnv/ Recommendations] are mixed regarding it's use with FNV. | ||
| + | ::* [http://www.youtube.com/watch?v=DG3eqyNOByw Mod Organizer 2 Installation and Settings] Video 1 of 5 by '''GamerPoets'''. | ||
| + | :* [http://www.nexusmods.com/newvegas/mods/36901/ Fallout Mod Manager (FOMM)]: Depending on the version you have, find "Archive Invalidation" either under the tools tab or find the button "Toggle Archive Invalidation". | ||
| + | :* [http://www.nexusmods.com/newvegas/mods/modmanager/ Nexus Mod Manager (NMM)] or the newer [http://www.nexusmods.com/newvegas/mods/54991/ Fallout Mod Manager - Forked (FOMM-Forked)]: if there is a "check mark" shown next to "Archive Invalidation", remove it and close the mod manager. Open the mod manager, open the "Tools" and place a "check mark" next to "Archive Invalidation". | ||
| + | :*: If there is not a "check mark" next to "Archive Invalidation", place one there and close the mod manager. | ||
| + | :* [http://www.nexusmods.com/site/mods/1?tab=files Vortex]: the new "official" Nexus mod manager handles "Archive Invalidation" with an '''''extension''''' called "Gambryo Archive Invalidation". It's enabled when '''Vortex''' is installed, and it works automatically for certain '''Bethesda''' games. | ||
| + | :: It now has a dedicated button on the '''Vortex''' dashboard. | ||
| + | |||
| + | :: Per the author '''Tannin''' [http://forums.nexusmods.com/index.php?/topic/6685182-is-there-a-archive-invalidation-button-in-vortex/#entry62183357 here]: | ||
| + | <div name="Note Box" class="boilerplate metadata" id="Notice Box" | ||
| + | style="margin:0px 10px 10px 50px;border:1px dashed #DAA520;color: lightgray; | ||
| + | background-color:#333333;padding:3px; | ||
| + | word-wrap: break-word; /* Internet Explorer 5.5+ */ | ||
| + | ">For the newer games [Curator: Creation Engine based], "Archive Invalidation" is relatively simple, you just have to change the date of the original BSAs. '''Vortex''' will give you a notification when you have to do that and it may appear again if the game was updated or something else changed the date of the files again. | ||
| + | |||
| + | For the older games (prior to Skyrim) [Curator: Gamebryo Engine based] a BSA redirection plugin has to be installed. This can be done from '''settings->workarounds''' or from the dashboard (if you haven't removed the button already). | ||
| + | |||
| + | Please note that this will create a new mod called "Vortex Archive Invalidation". You can disable or remove that mod like any other but for invalidation to work you should keep it enabled on every profile. | ||
| + | </div> | ||
| + | :: Note that '''Vortex''' is now in "Production Release" state, meaning it is "stable", "feature complete", and "bug free" for the majority of users, but bugs may still be found and dealt with. See the [http://www.nexusmods.com/news/14078 Nexus news article] for details. Please report problems to the [http://forums.nexusmods.com/index.php?/forum/4301-vortex/ Vortex Forum]. | ||
| + | <div name="Note Box" class="boilerplate metadata" id="Notice Box" | ||
| + | style="margin:0px 10px 10px 50px;border:1px dashed #DAA520;color: lightgray; | ||
| + | background-color:#333333;padding:3px; | ||
| + | word-wrap: break-word; /* Internet Explorer 5.5+ */ | ||
| + | ">Thanks to user '''browniefox''' for the basis of the following. | ||
| + | : Adding '''Vortex''' ''ArchiveInvalidation'' for older '''Gamebryo engine''' games: | ||
| + | # Download your mod with replacement files, choose '''Options''' (ignore the "failure to validate" part at the start: just tick the box and choose your preferences) and '''Enable'''. (This is an optional step, but without such a mod installed you won't see the effect of adding AI in the last step.) | ||
| + | # Go to '''Settings''', click '''Workarounds''', and click the 'BSA Redirection' (the type of AI) option to "On" (so it goes green). | ||
| + | #: (Now this is typically where people get to or already got to and are having issues. This adds a MOD (the "BSA redirection plugin" mentioned by '''Tannin''' above). It doesn't do the "Archive Invalidation" check automatically, and you do NOT need to repeat this step again when you add future mods.) | ||
| + | # Go back to your '''Mods''' tab. Find '''Vortex Archive Invalidation''' on the dashboard. "Disable" and then "Enable" it (or vice versa. Just make sure you turn it "off" and then leave it "on" again). | ||
| + | # You're done. You just did the "Archive Invalidation" toggle (in Step 3). In the top right a blue box should come up that whizzes through all your mods (this is the AI check). | ||
| + | </div> | ||
| + | :* [http://www.nexusmods.com/newvegas/mods/35003/ Wrye Flash (WF)]: click on the "Installers" tab, then right-click on the "Package" column header (gray bar) and click to place a "check mark" on the "BSA Redirection" context menu entry. Then right-click on the "Package" column header again and select "Anneal All". | ||
| + | * If you don't use a "mod manager", you should. But there are mods out there that provide the same "BSA Redirection" functionality (the currently more effective form of "ArchiveInvalidation") as an addon. | ||
| + | * If a mod manager's AI doesn't seem to be working, check the INI files under "[Archive]" for the "bInvalidateOlderFiles=" setting. Try switching the value between "=0" and "=1". (Some seem to need it one way, and others the opposite.) See also the wiki article [[Archive_invalidation|Archive invalidation]] for details on where the "fake bsa" file needs to go in the "sArchiveList=" line. | ||
| + | * Note that various mod managers can implement "BSA Redirection" in the same way, but be using different BSA filenames. This filename gets inserted in the INI files (under the "[Archive]" section in the "sArchiveList=" setting string of files) using variation names such as "Fallout - AI!.bsa", "Fallout - ArchiveInvalidation.bsa", etc. If you switch mod managers, make sure your INI files are using the correct filename as that manager is expecting. In general this file is placed first or second in the "sArchiveList=" list. | ||
| + | |||
| + | <div name="Note Box" class="boilerplate metadata" id="Notice Box" | ||
| + | style="margin:0px 10px 10px 30px;border:1px dashed #DAA520; | ||
| + | color: red; background-color:#fff5f5;padding:3px; | ||
| + | word-wrap: break-word; /* Internet Explorer 5.5+ */ | ||
| + | ">Do not attempt to use the ArchiveInvalidation mechanism from more than one mod manager at a time. That will cause all kinds of confusion.</div> | ||
| + | |||
| + | : If you are using the [http://www.nexusmods.com/newvegas/mods/58277 JIP LN NVSE Plugin] optional "FalloutCustom.ini" file to override the standard INI file settings, make sure it has been changed as well. | ||
| + | * For other texture problems, see the [http://web.archive.org/web/20170713081056/http://www.darkcreations.org/testg/wiki/Troubleshooting TESTG Troubleshooting] section. | ||
| + | |||
| + | == Mod Conflict Isolation == | ||
| + | If you have to isolate a mod conflict, try first "disabling" half your mods, and testing. If the problem disappears, then you know the mod conflict lies in the "disabled" half of the mods. Re-enable half of the "disabled" half of the mods (i.e. now down to 1/4 of the total) while disabling the entirety of the other (previously enabled) half, and test. Keep repeating this "halving the remainder" process until you have narrowed it down to the mod that causes the problem only when it is active. This is the quickest way to isolate a problem mod. | ||
| + | |||
| + | Whenever you "disable/deactivate/uninstall" a mod, make a "clean save" file before testing the result. For FNV a "clean save" from an existing game save seems to be just a "full save" file (not a "quick save") that has been loaded, displayed the "missing content" message for the disabled plugin(s), and you continued on into the game; and then waiting about 10 seconds for scripts to initialize before saving again. This is a minimal clean save procedure. (If you appear to still have "residue" remaining after trying this procedure, try the more complete process laid out in the [http://www.uesp.net/wiki/Tes4Mod:Clean_Save Tes4Mod:Clean_Save procedure] for '''Oblivion'''.) However, it is usually preferable to test using a "new" game "full save" file from just after you create a "new" character with a different name. This avoids the possible issue of any corruption or problems "burned into" the save file. | ||
| + | : Please see also the 'Fourth Rule: Reloading "save game" files' section of the wiki [[#FNV_General_Mod_Use_Advice | FNV General Mod Use Advice]] article. | ||
| + | |||
| + | If disabling mods does not pin down the culprit, then you have to uninstall them to completely remove their influence, because they overwrote something which is causing the problem. You can use the same "halving" technique but often it will be quicker to just uninstall everything and start over from a "vanilla" game that you have tested has no problems. | ||
| + | |||
| + | If you uninstalled and re-installed the game but even without mods it crashes on startup, likely you forgot to clear out your "C:\Users\<YourAccountName>\Documents\My Games\FalloutNV" folder. The game places your specific versions of the '''Fallout''' and '''FalloutPrefs''' INI files there, along with your "save games". Try renaming the "Users" folder INI files first. I usually just add to the extension: from "<filename>.ini" to "<filename>.ini.old", but it can be anything. The purpose is to be able to examine the old files for things you want to be able to replicate in the new versions of the same file. Then if that fails: move the "saves" elsewhere, delete that FalloutNV folder's content, and re-install again. If you have to re-install again anyway, be sure to install to a folder that is not under the default "C:\Program Files" folder tree. See [http://wiki.nexusmods.com/index.php/Installing_Games_on_Windows_Vista%2B Installing Games on Windows Vista+] for the rationale and guidance. (Actually, you should move your game from the default location regardless, but I realize this is unwelcome advice to most people. It is still the single best "fix" you can do for yourself. Read that article.) | ||
| + | |||
| + | When the above is not sufficient to resolve your problem, please report what steps you have tried so we don't waste time suggesting you repeat something. In such cases, report the actual steps: not just "I followed the guide". We need to know you didn't miss or misinterpret something. | ||
| + | |||
| + | It's always useful to post your Load Order (in "Spoiler" tags. Use the "Special BBCode" button in the Forum "Reply" menu bar, just to the left of the "Fonts" pick-list). Screenshots are not the best way to convey your LO, because they usually can't include everything in one image and make it difficult to determine if you have too many plugins. [https://loot.github.io/ LOOT] can copy your LO into a list suitable for posting on forums. (It's under the ":" with three dots to the extreme right in it's menu bar.) Most "mod managers" have a similar "LO List" capability. But the total number of mods you have installed in the DATA folder is also important, because even inactive plugins are counted against the so-called "140 cap". | ||
| + | |||
| + | == Towards Game Stability == | ||
| + | * The videographer '''GamePoets''' has recently (30 Oct 2018) released a definitive 12:11 minute [http://www.youtube.com/watch?v=KkVWoccWoXY Performance & Stability Guide] YouTube video for "Tale of Two Wastelands (TTW)" covering many of the suggestions in this article. However, while it does not conflict with any advice here and works just as well for FNV, it also does not cover quite as many options. It does make an excellent and recommended starting point for initially dealing with such issues. | ||
| + | |||
| + | * If you want a stable game, don't make any changes to your setup once you start playing and making "save game" files. Even updates to current mods run the risk of making things unstable after the point they are added. If you do update, ensure you know which save to revert to prior to that update if it goes wrong, and test it thoroughly immediately. | ||
| + | |||
| + | * Removing a mod that has stored some elements in a "save file" will leave residue (even with a "clean save") that can cause problems down the road. In particular you have to watch out for mods that use scripts to permanently change form and leveled lists (such as, purely as an example, the popular Millenia's Weapon mods). This is not, in and of itself, a bad thing as there are compatibility advantages to using this "script" technique. Such mods usually point this out in their description. But it is something to pay attention to when experimenting. It's better to find out what causes problems before you start to play in earnest. The general rule is: NEVER remove a mod from your load order once you have it in a "save game" file unless you are prepared to start over at some (possibly considerably) later point. | ||
| + | |||
| + | * Do not use the game's "auto-save" feature. See the sub-topic [[#Issue: CTD on interior/exterior/"fast travel" cell change|Issue: CTD on interior/exterior/"fast travel" cell change]] for the explanation and alternatives. | ||
| + | |||
| + | === NVSE Installation issues === | ||
| + | If you are having a problem installing '''NVSE''' with your mod manager, first of all: DON'T! Install it manually to the "game root" folder. (This point is where mod managers get it wrong.) But if you installed it manually and still wonder if you did it correctly, here is where the various (original "[http://nvse.silverlock.org/ Silverlock]") files belong. The later, forked "[https://github.com/xNVSE/NVSE xNVSE]" version (v6.x.x and later) may include or move other files, but for "backwards compatibility" should keep these files in the same location. | ||
| + | |||
| + | :* In the "game root" folder (where '''FalloutNV.exe''' resides): | ||
| + | ::* ''nvse.log'' (only once NVSE is successfully used.) | ||
| + | ::* ''nvse_1_4.dll'' | ||
| + | ::* ''nvse_1_4ng.dll'' (when installed after the [https://geckwiki.com/index.php?title=Garden_of_Eden_Creation_Kit GECK].) | ||
| + | ::* ''nvse_editor.log'' (only once NVSE is successfully used with the '''GECK'''.) | ||
| + | ::* ''nvse_editor_1_4.dll'' (when installed after the '''GECK'''.) | ||
| + | ::* ''nvse_extender.log'' (only once NVSE is successfully used with the [https://www.nexusmods.com/newvegas/mods/64888 GECK Extender] mod.) | ||
| + | ::* ''nvse_extender_ng.log'' (only once NVSE is successfully used with the '''GECK Extender'''.) | ||
| + | ::* ''nvse_loader.exe'' (use instead of '''FalloutNV.exe''' to launch the game if you haven't run [http://www.nexusmods.com/newvegas/mods/62552 FNV 4GB Patcher]. Once patched, use '''FalloutNV.exe''' as usual.) | ||
| + | ::* ''nvse_loader.log'' (only once NVSE is successfully launched.) | ||
| + | ::* ''nvse_readme.txt'' | ||
| + | ::* ''nvse_steam_loader.dll'' (only needed by the Steam version of FNV.) | ||
| + | ::* ''nvse_whatsnew.txt'' | ||
| + | |||
| + | :* In the "Data\NVSE" folder (various files other than '''nvse_config.ini''' are optional; some may not be present by default): | ||
| + | ::* ''nvse_config.ini'' | ||
| + | ::* ''nvse_config.testAnim'' | ||
| + | ::* ''nvse_plugin_geckpu_ew.ini'' (from the older [https://www.nexusmods.com/newvegas/mods/41642 Geck 1.4 PowerUp] mod. Not used with '''GECK Extender'''.) | ||
| + | ::* ''TestAnim.txt'' | ||
| + | |||
| + | :* Everything else belongs under "Data\NVSE\Plugins" and it's sub-folders. When in doubt, just use the folder structure and files under each folder you find in the archive file. | ||
| + | :* If you ran the '''FNV 4GB Patcher''' before installing '''NVSE''', you may need to re-run the '''patcher''' so it will detect that '''NVSE''' has now been installed. | ||
| + | |||
| + | == Solutions to Starting the game problems == | ||
| + | |||
| + | <span id="Issue: After moving game from the default install location, FNV4GB fails to launch"></span> | ||
| + | === Issue - After moving game from the default install location FNV4GB fails to launch === | ||
| + | The '''FNV4GB.log''' looks similar to the following when trying to launch it: | ||
| + | <div name="Simulated code box" class="boilerplate metadata" id="Warning Notice" | ||
| + | style="margin:0px 10px 10px 30px; border:1px dashed #DAA520; color: lightgray; background-color:#333333; padding:3px; | ||
/* Remove the next four 'white-space' lines to restore default white-space processing. */ | /* Remove the next four 'white-space' lines to restore default white-space processing. */ | ||
| + | white-space: pre-wrap; /* css-3 */ | ||
| + | white-space: -moz-pre-wrap; /* Mozilla, since 1999 */ | ||
| + | white-space: -pre-wrap; /* Opera 4-6 */ | ||
| + | white-space: -o-pre-wrap; /* Opera 7+ */ | ||
word-wrap: break-word; /* Internet Explorer 5.5+ */ | word-wrap: break-word; /* Internet Explorer 5.5+ */ | ||
"> | "> | ||
| − | ''' | + | # Loader: Getting windows version - 6.2.9200 |
| + | # Loader: Address Space Size = 0xFA5D1000 | ||
| + | # Loader: Getting executable name - D:\Games\Steam Library\steamapps\common\Fallout New Vegas\fnv4gb.exe | ||
| + | # Loader: Parsing Command Line... | ||
| + | # Loader: Trying to get game path from Bethesda Softworks registry key | ||
| + | # Loader: Attempting to open HKLM\SOFTWARE\Bethesda Softworks\FalloutNV - Failed | ||
| + | # Loader: Trying to get game path from Steam registry key | ||
| + | # Loader: Attempting to open HKLM\SOFTWARE\Valve\Steam - Succeeded | ||
| + | # Loader: Attempting to query size of "InstallPath" value - Succeeded | ||
| + | # Loader: Attempting to query "InstallPath" value - Succeeded | ||
| + | # Loader: Changing directory to C:\Program Files (x86)\Steam\steamapps\common\fallout new vegas | ||
| + | # Loader: Unable set current dir to game dir. - The system cannot find the file specified.</div> | ||
| + | : The "Executable name" (3rd line) points to the correct location. The registry key "HKLM\SOFTWARE\Valve\Steam" value "InstallPath" (9th line; value content shown in 11th line) does not. | ||
| + | |||
| + | * Cause: The registry has not been properly updated. | ||
| + | :* Solution: Running the vanilla EXE launcher (from the Steam Client or 'FalloutNVLauncher.exe') first after moving (at least once) updates the registry addresses. After that FNV4GB will work correctly. | ||
| + | |||
| + | <span id="Issue: Application load Windows error(s)"></span> | ||
| + | === Issue - Application load Windows errors === | ||
| + | *Cause-1: Specifically error codes: "P:0000065432" or "5:0000065434" indicatea problem with the '''Steam Client'''. | ||
| + | |||
| + | :The "P:" prefix seems to show up when the '''Steam Client''' is not running. | ||
| + | :The "5:" prefix appears to occur when starting the game from it's EXE (such as the Launcher or the "FalloutNV.EXE"), but then it fails to locate the '''Steam Client''' executable on local disk even though it is already running and loaded into memory. Which seems to be confirmed as it disappears when the '''SteamClient.exe''' (and only that one file) is placed in the game root folder. | ||
| + | :Both instances produce the same "error code" message with only the prefix different. | ||
| + | |||
| + | : | ||
| + | :*Solution-1a: The '''Steam Client''' may be in "Offline" mode and minimized to the system tray, but must remain running while launching the game, even with "nvse_launcher" or "fnv4gb". | ||
| + | ::Note that the '''Steam Client''' is what displays the "Library", "Store", etc. It is a separate piece of software from "the game" and performs the authentication that your copy of the game is legitimate. | ||
| + | |||
| + | : | ||
| + | :*Solution-1b: Sometimes all that is needed is to open the "Task Manager" (<Ctrl+Alt+Del> or right-click on the "Task Bar" | "Start Task Manager"), switch to the "Processes" tab, and right-click the "image name" '''Steam.exe''' task and select "End Process Tree". Then restart the game again. | ||
| + | |||
| + | : | ||
| + | :*Solution-1c: When this occurs with the "FalloutNVLauncher.exe" file (whether or not after installing NVSE), some people have found that '''COPYing''' the '''Steam.EXE''' file (usually located in the "<install path>\Steam\" folder), into the game root folder (i.e. along with the game and NVSE EXE files in "<install path>\SteamLibrary\steamapps\common\Fallout New Vegas"), resolves the problem. This copy of '''Steam.EXE''' may need to be updated as well after the '''Steam Client''' has updated. | ||
| + | |||
| + | *Cause-2: For some people, the game will not run without "Multi-threaded AI" enabled. | ||
| + | |||
| + | : | ||
| + | :*Solution-2: In all three INI files, under the "[General]" section set the following values: | ||
| + | ::<pre>bUseThreadedAI=1</pre> | ||
| + | |||
| + | |||
| + | | ||
| + | |||
| + | : | ||
| + | ::and add the line: | ||
| + | ::<pre>iNumHWThreads=</pre> | ||
| + | |||
| + | |||
| + | and set that to however many cores your processor has. Note this added line is not a "performance" tweak (the game does multi-threading by default and the "iNumHWThreads=" setting may restrict it) and is not recommended for everyone in general. Some people have experienced adverse effects. Use with caution and test the result. When in doubt, start with "2". | ||
| + | |||
| + | *Cause-3: Error message "Application was unable to start correctly", and Windows "Event Viewer" '''Application''' Error: "Exception code: 0xc0000005". | ||
| + | |||
| + | :Generally this error code means the program is trying to access protected memory or outside of the space allocated to it. It's one of the most common OS errors seen. In this case the game is failing to start as a result. | ||
| + | :*Solution-3a: The Nov 2016 Win10 updates should fix any WDDK based issues with video drivers or previous updates. Try applying system updates first. | ||
| + | :*Solution-3b: See the article [http://www.errorlive.com/exception-code-0xc0000005 Exception Error Code 0xc0000005 Fixed on Windows 7 & 10]. | ||
| + | :*Solution-3c: See the article [http://www.eassos.com/how-to/fix-error-code-0xc0000005.php How to fix error code 0xc0000005] under "application was unable to start correctly" for other things to do to fix it. | ||
| + | :*Solution-3d: The mod [http://www.nexusmods.com/newvegas/mods/66537 New Vegas Tick Fix (NVTF)] was developed to correct specific problems encountered with Windows 10 as an alternative to the older "New Vegas Stutter Remover (NVSR)". Among it's NVTF.INI file settings is the entry "bInlineCommonFunctions=". Some have reported that disabling this entry ("=0") corrects this specific error, particularly if it occurs after the game has started. | ||
| + | |||
| + | *Cause-4: Error message "The application was unable to start correctly (0xc000007b)" has several possible causes. The [http://www.tomshardware.com/faq/id-3114816/solve-windows-error-0xc000007b.html TomsHardWare] site has a good list of these. But when the problem only occurs with FNV on a Windows 10 or later system, the most likely reason is due to the age of the game. At the time it was released, the game was designed to look for DirectX9 files with specific versions in the file names. Later versions of DirectX might be "backwards compatible", but the file names are not the same and the game does not recognize them as being equivalent. | ||
| − | + | : | |
| + | :*Solution-4a: Please see "Cause-1" in the [[#Issue:_Vanilla_game_Hangs_on_startup|Issue: Vanilla game Hangs on startup]] section. | ||
| − | This | + | *Cause-5: Generally this only applies if you are unable to get the game to start at all, ever. If it had been running but suddenly starts failing for no apparent reason, most likely it is due to something on the OS side that recently changed: a Windows Update, or a new video/ mouse/ sound/ keyboard driver. See also: [[#Issue:_CTD_after_10-20_minutes_of_play_.28post-Win10_2017_FCU.29|Issue: CTD after 10-20 minutes of play (post-Win10 2017 FCU)]]. |
| − | + | ||
| + | :It is common advice to update video drivers, but manufacturers often stop testing for older game compatibility. Experience suggests you only update drivers when necessary to resolve a specific problem, and be prepared to "rollback" to an older driver version. Keep at least one version that is known to work "in reserve". | ||
| + | :*Solution-5a: If running the game in '''online mode''' through '''Steam''', Set/Change Steam Compatibliity: | ||
| + | :: | ||
| + | ::#Run the '''Steam Client''' and login '''online'''. | ||
| + | ::#Right-click on the '''Steam Icon''', choose '''Properties''', and if it is on, turn '''Compatibility off'''. | ||
| + | ::#Close out '''Steam Client''' entirely. | ||
| + | ::#Open '''Steam''' again it and attempt to load the game. | ||
| + | |||
| + | : | ||
| + | :*Solution-5b: If running the game in '''offline mode''' by launching from your computer desktop, or if setting "Steam Compatibliity" is not sufficient, Set/Change Windows Compatibility: | ||
| + | :: | ||
| + | ::*Note that the Windows 10 "Fall Creator's Update" (FCU, v1709; aka "RedStone 3") reportedly no longer requires this compatibility setting. | ||
| + | ::#Right-click on the ''Fallout: New Vegas'' launcher application (FalloutNVLauncher.exe) in the game root folder. (This is ''C:\Program Files (x86)\Steam\steamapps\common\Fallout New Vegas'' (by default), but that location is not recommended. Please see the wiki [[Installing_Games_on_Windows_Vista+|Installing Games on Windows Vista+]] article for why not and help on moving it.) | ||
| + | ::#Select '''Troubleshoot Compatibility'''. | ||
| + | ::#Choose the '''Troubleshoot Compatibility''' option. | ||
| + | ::#Check the box that says '''The Program requires additional permissions'''. | ||
| + | ::#Select '''Yes''' for the next window and then '''Test the Program'''. | ||
| + | ::#Choose '''Save these settings'''. | ||
| + | ::#Try to launch the game from your desktop again. | ||
| + | |||
| + | <span id="Issue: Black Screen on startup"></span> | ||
| + | |||
| + | === Issue - Black Screen on startup === | ||
| + | * Cause-1: Usually if the game "freezes" but doesn't CTD during the loading screens, it's due to a missing or incorrectly referenced "master file". Usually this is a file with an ESM extension, but less commonly might be one with an ESP extension. (It is a "flag" internally in the file header that makes a file a "master"; not the extension.) | ||
| + | :: A "missing master" problem can result just from a plugin being in the wrong sequence in the "load order". | ||
| + | |||
| + | :* Solution-1: Use [http://www.nexusmods.com/newvegas/mods/34703/? FNVEdit] (loading the entire LO) to check for Masters that are missing or loading after Dependencies. See the wiki article [http://wiki.nexusmods.com/index.php/Missing_Masters Missing Masters] for more detailed instructions. | ||
| + | |||
| + | :: In general, make sure all your ESM files are loaded first with the game ESM (FalloutNV.ESM) as the very first file and those of the DLC next in the order they were released: | ||
| + | ::* FalloutNV.ESM | ||
| + | ::* DeadMoney | ||
| + | ::* HonestHearts | ||
| + | ::* OldWorldBlues | ||
| + | ::* LonesomeRoad | ||
| + | ::* GunRunnersArsenal | ||
| + | ::*: and then the "pre-order packs": | ||
| + | ::* ClassicPack | ||
| + | ::* MercenaryPack | ||
| + | ::* TribalPack | ||
| + | ::* CaravanPack | ||
| + | |||
| + | :: Mod EMS files should follow. | ||
| + | |||
| + | :: Use [https://loot.github.io/ LOOT] to get a basic sorted mod order. Note that some mods have ESMs that use the ESP extension, so if LOOT sorts them into the ESM group, leave them as it is determining that from the file headers and they really are flagged as ESMs. | ||
| + | |||
| + | * Cause-2: A Black screen but you can hear sounds and the game seems to be running usually means you have too many plugins active. You can start to have problems anywhere with between 130-140 active plugins depending upon your system. Here "plugins" refers to both ESM and ESP files that are active in your "load order", ''or present in the game "Data" folder even if not active''. | ||
| + | |||
| + | :* Solution-2: Try temporarily disabling enough plugins to get under the cap and see if that gets your screen back. If so, then you need to look into permanently reducing the active plugin count by means of a "bashed" or "merged" patch file, and "merged plugin" files. See the wiki article [http://wiki.nexusmods.com/index.php/Merged_Plugin_Guidelines_for_Personal_Use Merged Plugin Guidelines for Personal Use] where the subject is discussed. | ||
| + | |||
| + | * Cause-3: A Black screen but you can hear sounds and the game seems to be running could mean you have corrupted a HUD-UI-Menu XML file, or have installed a mod that overwrites one. This can usually be confirmed by loading the game without any active mods or "save game" (i.e start a new game). If the screen remains black, you have an XML file issue. | ||
| + | |||
| + | :* Solution-3: See the wiki article [http://wiki.nexusmods.com/index.php/HUD-UI-Menu_issues HUD-UI-Menu issues]. | ||
| + | |||
| + | * Cause-4: A Black screen with CTD (or hang) during the loading screens is usually an indication of a mod conflict or a dependent plugin (i.e. an ESP) loaded before a master plugin (i.e. ESM for the same mod). See the wiki article [http://wiki.nexusmods.com/index.php/Missing_Masters Missing Masters] for more detailed instructions to check for these problems. | ||
| + | |||
| + | :* Solution-4a: Check the date/timestamp on the files in question. Even [https://loot.github.io/ LOOT] can occasionally set the times too close to each other when sorting. They need to have at least a full minute difference to not be considered "the same time" by the game. The ESP must have a later time than it's related ESM. You can use a "file properties" tool like [https://www.petges.lu/home/ Attribute Changer] (freeware) to manually adjust any or all three timestamps (created, modified, accessed) on the files, or try manually moving files around in your mod manager. Note that no two files should have the same "modified" date/timestamp in your "load order" or other problems will arise. | ||
| + | |||
| + | :* Solution-4b: To isolate a mod conflict, see the [[#Mod Conflict Isolation|Mod Conflict Isolation]] sub-topic. | ||
| + | |||
| + | :* Solution-4c: Installing HUD-UI-Menu mods in the wrong order can cause corruption of an XML file in a form of "mod conflict". Please see the wiki "[http://wiki.nexusmods.com/index.php/HUD-UI-Menu_issues HUD-UI-Menu issues]" article. | ||
| + | * Cause-5: A Black screen during the game loading screen with the rotating roulette wheel, and no sound might be a problem with the audio driver. | ||
| − | + | :* Solution-5: Locate the sound card or integrated audio device driver for your version of Windows on the vendor site and re-install. (These are often different from those available from "Microsoft Updates".) | |
| − | |||
| − | == | + | <span id="Issue - ReinstallFreeze"></span> |
| − | + | === Issue - Game freezing on launch after re-install === | |
| + | : Thanks to Kitty Black (Purr4me) for the basis of the following in a reply to the Nexus Fallout New Vegas Technical Support thread "[http://forums.nexusmods.com/index.php?/topic/7940008-game-freezing-at-launch-im-stumped/ Game freezing at launch - I'm stumped]": | ||
| + | Upon launching the game after re-installing, it freezes upon getting to the Main Menu screen (where you choose to either "start a new game" or "continue to play"). | ||
| − | * | + | * Cause: When you "change" the game executable to be "4GB/LAA aware", you are using an '''external''' program. |
| + | :: That external program is NOT part of the game's structure. | ||
| + | :: The registry values of the external program are hidden from the Steam and GOG game systems. | ||
| + | :: The registry retains the updated information BY that "third party" program (e.g. 4GB Patcher, NTCore, etc.); not by the game publisher entry. | ||
| + | :: Windows uses a "Prefetch", a hyperlink to that executable namesake. ("Prefetch" is an algorithm introduced in '''WinXP''' that helps anticipate cache misses (times when Windows requests data that isn’t stored in the disk cache), and stores that data on the hard disk for easy retrieval. See [http://windowsground.com/what-is-windows-prefetch-in-windows-10/ What is windows prefetch in windows 10? super-simplified] for a basic explanation, or [http://helpdeskgeek.com/help-desk/delete-disable-windows-prefetch/ What is Windows Prefetch and Superfetch?] for more details and tuning.) | ||
| + | :: Software cleaners, & uninstaller programs will not touch "Prefetch" files. (They saved in the "C:\Windows\Prefetch" folder with a ".PF" extension if you want to try deleting them.) | ||
| + | :: The "Prefetch" files do not belong to the games software nor installers programing. | ||
| + | :: Windows uses those hyperlinks on launch OR verifying valid updates to the executable. | ||
| + | :: The 4GB/LAA enabler is not part of the game so it's changes will override Steam and GOG systems "validation certificate", making them "invalid". | ||
| + | :: To bypass the system you need to update the certificate that is downloaded and currently being blocked from installing. | ||
| + | :: The Steam verifier will show at least 1 invalid or 1 file is in error. (That's the executable it downloaded.) | ||
| − | * | + | :* Solution-1: <span style="color: red; background-color:#fff5f5;">Do not tamper with the properties of the executable unless you know what you are doing.</span> |
| + | ::* If you just installed the game and the "Steam Client" Interface is running in "online mode", you will get access to the systems utility for certification. If a program refused to run, the utilities will be there in the file's '''properties''' menu to install certificates. Otherwise leave the software alone. | ||
| + | :::* <Right-click> on the game executable file (FalloutNV.EXE), and bring up it's '''properties'''. Follow the instructions given. | ||
| + | ::* If the "Steam Client" Interface is NOT running in "online mode" and the game is operational, you will NOT be given access to these utilities. | ||
| − | * | + | :* Solution-2: Delete the existing "Pre-fetch" files. |
| + | ::* Run the "Steam Client" in "online mode". | ||
| + | ::* Open the "Library" tab, and select "Properties | Local Files | Verify Integrity of Game Cache". | ||
| + | ::* Once the files have been "verified" and updated, run the "FalloutLauncher.exe" BEFORE you patch the game for 4GB. | ||
| − | * | + | :* Solution-3: Corrupted Steam "ClientRegistry.blob" file. |
| + | ::* Use the Windows "Task Manager". End all the Steam related tasks starting from “Steam Client Bootstrapper”. | ||
| + | ::* Navigate to the location of your "Steam" folder (default is "C:\Program Files (x86)\Steam"). | ||
| + | ::* Locate and rename the "ClientRegistry.blob" file to another name such as "ClientRegistry.blob.old". | ||
| + | ::* When you next restart Steam this file will be recreated. | ||
| + | ::* If that still doesn't resolve the problem, return to that same directory, locate and run "Steamerrorreporter.exe", and relaunch Steam again. | ||
| − | * | + | :* Solution-4: Make a backup copy elsewhere first, and then delete the "Steam\AppCache" folder contents. It will be recreated when Steam next launches. |
| − | * | + | :* Solution-5: Ensure your "Time Zone" is set correctly. This can affect Steam's attempts to collect "real time" data. |
| + | ::* Open the Windows "Control Panel | Date and time". | ||
| + | ::* From the three tabs, choose “Internet Time” and click on “Change Settings”. | ||
| + | ::* Check the dialogue box which says “Synchronize with Internet time server”. Click on "Update now". Click on "OK" after the time is updated successfully, and restart Steam. | ||
| − | * | + | :* Solution-6: Opening Steam in "Big Picture Mode" ('''Win10'''). |
| + | ::* Right–click on the “Steam.exe” icon on the desktop. | ||
| + | ::: Note: If you don’t have a "Steam" shortcut on the desktop, you can find the “Steam.exe” in the installation directory. | ||
| + | ::* Select the “Pin to Taskbar” option from the "context menu" list. | ||
| + | ::* <Right–click> on the “Steam” icon ''in the taskbar'' and select “Open in Big Picture Mode“. | ||
| + | ::* Sign in to your account and press <Alt+Enter> to access Steam in Big Picture mode. | ||
| + | ::* Open the Game and check to see if the issue persists. | ||
| − | * | + | :* Solution-7: Unplug any JoyStick. (The presence of one sometimes prevents a game from starting until it has been properly configured.) |
| − | + | <span id="Issue: ExploitProtection"></span> | |
| + | === Issue - Game will not launch on Win10 for security reasons === | ||
| + | : Thanks to '''rubjonny''' of the Nexus "New Vegas Technical Support" forum for investigating and reporting [https://forums.nexusmods.com/index.php?/topic/9869713-fix-found-for-fose-and-new-vegas-not-working-on-windows-10-20h2/ this issue] and it's solution. | ||
| + | Symptoms: The game won't start despite all the usual resolution attempts (installed outside of the default "C:\Program Files(x86)" location, "verified local files", running as "System Admin", different methods of launching, etc.). | ||
| − | * | + | * Cause: More recent System defaults in "Windows Exploit Protection" security settings which are causing portions of the game code to be placed randomly in memory. |
| + | :* Solution: Set a "Program" specific exemption for "FalloutNV.exe" as follows. | ||
| + | [[File:WinExploitPreventionSetting.PNG|thumbnail|x400px|Exploit Prevention Setting]] | ||
| + | ::* Login as a "System Admin" account. | ||
| + | ::* <Right click> the '''Start Menu''' icon & select '''settings'''; or navigate to '''Settings''' (the "gear icon" in the left-hand navigation pane) from the '''Start Menu''' as usual. | ||
| + | ::* Select '''Update & Security''' in the left-hand navigation pane. | ||
| + | ::* Select '''Windows Security''' in the left-hand navigation pane. | ||
| + | ::* Select '''Virus & Threat detection''' in the right-hand main window under "Protections Areas". (A new window will open.) | ||
| + | ::* Select '''App & browser control''' in the left-hand navigation pane. | ||
| + | ::* Select '''Exploit protection settings''' in the right-hand main window under "Exploit protection". (The right-hand main window will change to show the list of "System settings". | ||
| + | ::* Select '''Program settings''' in the right-hand main window. | ||
| + | ::* Select the "'''+'''" icon to the left of '''Add program to customize''' in the right-hand main window. | ||
| + | ::* Select '''Choose exact file path''' from the "drop down list" that appears. | ||
| + | ::* Browse to and select '''FalloutNV.exe''' (or whichever executable is appropriate) as the file to Open. (A list of the current "Program settings: FalloutNV.exe" will now appear.) | ||
| + | ::* Move your cursor into that list and a scroll bar will appear on the right edge of the window. Scroll down to and select '''Force randomization for images (Mandatory ASLR)''' and make sure its set to '''Override system settings''' and '''Off'''. | ||
| + | ::: (See figure [[:File:WinExploitPreventionSetting.PNG|Exploit Prevention Setting]]. {{Thumbnail_enlargement_message}}) | ||
| + | ::* Select '''Apply'''. (The '''Program settings''' screen should be redisplayed.) | ||
| + | ::* Check that fully qualified path to the game executable is now listed with one more "system override" than previously indicated (e.g. "1 system override" for a newly added entry). | ||
| + | :: Close the various windows. | ||
| − | + | :: This procedure will also work for '''Fallout 3'''; and may for other programs which seem to have a similar problem. | |
| − | + | <span id="Issue: GOG DRM-free, non-steam version of FNV compatibility"></span> | |
| − | |||
| − | |||
| − | |||
| − | |||
| − | |||
| − | |||
| − | |||
| − | |||
| − | + | === Issue - GOG DRM-free non-Steam version of FNV compatibility === | |
| + | On 01 Jun 2017, GOG.COM, the on-line game store that licenses DRM-free versions of games released their versions of "Oblivion", "Fallout 3", and "Fallout New Vegas". As "DRM-free", they do not communicate with Steam. They have been modified to work with the [https://www.gog.com/galaxy GOG Galaxy] client, which is similar to Steam's Client for an online community. | ||
| − | + | Thanks to '''vulchor''' and '''pixelhate''' on the Nexus "New Vegas Technical Support" forum for quickly assisting with the following information: | |
| − | * | + | * By default, GOG installs the game to "C:\GOG Games\Fallout New Vegas". This avoids the problems with Steam's default location under the "C:\Program Files" tree. |
| − | * | + | * GOG provides a customized set of INI files. Be sure to backup the "Fallout_default.ini" file before making any changes as a precaution. |
| + | :* Includes new line "STestFile2=FalloutNV_lang.esp". This file's function has not been determined, but removing the file itself does not prevent the game from running. It's removal may be related to the warning about content no longer being present, listed below. | ||
| − | * | + | * 4GB patching attempts don't work, but this is because that feature is already incorporated into the GOG versions of the games (and GECK). Patching is not required. They already will use up to 4GB of memory for the game. (NOTE: The latest versions of the "4GB Patcher" program are fully compatible and do not break the GOG version any more, but do cause the GOG version to automatically load the NVSE plugin if present. This feature may be required and tested for by some mods.) |
| − | * | + | * "NVSE" v5.0b3 (Stable) installs and works without modification. Problems reported are most likely due to attempting to install by way of mod managers. See [[#Checklist| Checklist item #4]]. |
| − | * | + | * "LOOT" v0.11.0 works without modification. |
| − | * | + | * "xEdit/[http://www.nexusmods.com/newvegas/mods/34703/? FNVedit]" should work, but might have trouble locating the GOG game folder until updated if not installed there. |
| − | * | + | * Warning message "Unable to start steam automatically. Your game may not launch correctly" is given when starting the game through FOMM (which has recognized it automatically). This warning can be ignored. |
| − | * | + | * Trying to start a save after installing NVSE v5.0b3 will prompt "This save relies on content that is no longer present. Some object may no longer be available" even for the first save after the Doc Mitchell "chargen" sequence, with no mod installed at the time. This warning can be ignored. |
| − | * | + | * The "G.E.C.K." is pre-installed, but has the original GECK.INI file. This needs to be modified to enable loading multiple masters. See [[#Issue: GeckCustom.INI file|Issue: GeckCustom.INI file]]. |
| − | == | + | * The "GOG Galaxy" support, however, requires Windows 7 so this has "broken" XP and Vista support by default. A post on the GOG forum says their tech support responded: |
| − | + | <div name="Simulated code box" class="boilerplate metadata" id="Warning Notice" | |
| + | style="margin:0px 10px 10px 20px; border:1px dashed #DAA520; color: lightgray; background-color:#424242; padding:3px; | ||
| + | /* Remove the next four 'white-space' lines to restore default white-space processing. */ | ||
| + | white-space: pre-wrap; /* css-3 */ | ||
| + | white-space: -moz-pre-wrap; /* Mozilla, since 1999 */ | ||
| + | white-space: -pre-wrap; /* Opera 4-6 */ | ||
| + | white-space: -o-pre-wrap; /* Opera 7+ */ | ||
| + | word-wrap: break-word; /* Internet Explorer 5.5+ */ | ||
| + | ">- We no longer perform compatibility tests for Windows XP and Vista, so I'm unable to guarantee that the game will work correctly on Windows XP as it was not tested. | ||
| + | - The game can be installed and played on a computer without an Internet connection. Downloading the standalone installer and moving it manually to the offline computer will be required.</div> | ||
| + | : There's a workaround for getting functional on systems older than Windows 7 that is reported to be effective involving taking a '''"steam_api.dll"''' from any Steam game, renaming it '''"GalaxyWrp.dll"''' and replacing the one in the GOG FNV folder with the renamed Steam file. Or you can simply delete (suggest rename by adding something to the extension) if you don't need the additional languages that file provides. Doing this will break "GOG Galaxy" integration, but since Galaxy doesn't run on older Windows versions any longer anyway, supposedly that doesn't matter to you. However, if you care about achievements, "local file verification", and cloud saving, those are "GOG Galaxy" only features as well. Suggest burning your downloaded files to a CD/DVD/Blu-ray in case you need to reinstall again and have a slow internet connection or are worried about losing access to the GOG servers. Check the game release thread on the [https://www.gog.com/forum/fallout_series#1496664056 GOG forums] for more info. | ||
| + | : The "workaround" has been confirmed to work on Windows XP. | ||
| − | + | <span id="Issue: GOG version won't start from FOMM"></span> | |
| − | + | === Issue - GOG version will not start from FOMM === | |
| + | You get the error message: "Unable to start steam automatically. Your game may not launch correctly." | ||
| + | * Cause: Unknown. | ||
| + | :* Solution: The very first time, use the "FalloutNVLauncher.exe" so it will setup your specific hardware settings. The "load order" you established in FOMM will not change and NVSE should also work. Thereafter you can simply use the NVSE launcher "nvse_loader.exe", which FOMM can be configured to launch. | ||
| + | :: Note that the GOG version does not need or work with any version of the 4GB patcher. It is already modified to use 4GB of RAM. See [[#Issue: GOG DRM-free, non-steam version of FNV compatibility|Issue: GOG DRM-free, non-steam version of FNV compatibility]]. | ||
| − | + | <span id="Issue: How to disable the Steam Overlay"></span> | |
| + | === Issue - How to disable the Steam Overlay === | ||
| + | Sometimes it is necessary to turn off the Steam Overlay in the Steam Client in order to resolve a conflict. | ||
| + | * Cause: The Steam Overlay uses a technique that can conflict with other applications or tools using a similar technique. This solution assumes disabling the Steam Overlay is the preferred method of resolving this conflict. | ||
| − | + | * Solution: | |
| + | ** Open the Steam Client. | ||
| + | ** Select "Steam | Settings" from the top menu bar. This will open a "Settings" window. | ||
| + | *** Select the "In-Game" option. | ||
| + | *** Disable (uncheck) the "Enable the Steam Overlay while in-game" option. | ||
| + | *** Click on the "OK" button to close the "Settings" window. | ||
| + | ** (Optionally) Select "Go off-line". Without the Overlay, there is no real reason for the processing overhead of being "on-line" to the Steam Server. This will require restarting the Steam Client, but will thereafter remain in effect until you choose to change it again. | ||
| + | ** Minimize the Steam Client. (Even in "off-line" mode, it is necessary to start the Steam Client for the DRM licensing engine to enable play.) | ||
| + | ** Launch your game from a shortcut on the desktop. | ||
| − | == | + | <span id="Issue: Incomplete save game load"></span> |
| + | === Issue - Incomplete save game load === | ||
| + | After loading a savegame (almost always in an exterior cell) most of the in-game sounds won't play, a lot of references won't render, some of the landscapes might be incomplete, and entering menus/console has a long delay; even though you are not using the built-in "auto savegame" feature. | ||
| − | * | + | * Cause: This seems to be related to the NVSR "post FCU" problem, even when using the '''redmaxblower''' configuration. (See '[[#Issue:_CTD_after_10-20_minutes_of_play_.28post-Win10_2017_FCU.29|Issue: CTD after 10-20 minutes of play (post-Win10 2017 FCU)]]'). |
| + | :* Solution: User '''VariableEagle''' discovered that disabling three Win10 background "local services" seems to resolve this. He happened to disable all three at the same time, and is not certain all three are required to resolve the problem. | ||
| + | ::* Logon using a local "Administrator" account. | ||
| + | ::* Open the Windows "Task Manager" (either by "< Right-click >" on the Taskbar and selecting it from the "context menu" that appears, or one of the other methods in the article [https://www.windowscentral.com/how-identify-and-terminate-high-resource-processes-using-task-manager-windows-10 How to use Windows 10 Task Manager to kill processes that drain resources]). | ||
| + | ::* Select "Services" tab and then "< Right-click >" on "Open Services". | ||
| + | :::* Find the service: '''GraphicsPerfSvc''', "< Right-click >" on it and select "Stop". | ||
| + | :::* Then go to the "Properties" of that service and change the "startup type" to "Disabled". | ||
| + | :::: According to [http://servicedefaults.com/10/graphicsperfsvc/ GraphicsPerfSvc Service Defaults in Windows 10]: "GraphicsPerfSvc is a Win32 service. In Windows 10 it is starting only if the user, an application or another service starts it." Apparently it was added in build 1709 ("FCU" aka "Redstone 3"), but existed as far back as [http://procpedia.com/file/10789/What-is-GraphicsPerfSvc-dll-and/ Win7]. There a number of reports in the past of this service consuming 100% of CPU resources continuously. It is also a suspect in game stuttering problems (especially in "full screen" mode). It's default "startup type" is supposed to be "manual". | ||
| + | :::* Repeat the last two steps for the service: '''GameRecorderSVC'''. | ||
| + | :::: This appears to be the service required by the "screen capture button" (at least on Lenova laptops; it is not listed on the site [http://servicedefaults.com/10/ ServiceDefaults] or other sites listing similar service defaults). | ||
| + | ::* Use the "registry editor" ''regedit'' to disable the '''Xbox Game Monitor''' service by going to '''HKEY_LOCAL_MACHINE\SYSTEM\CurrentControlSet\Services\xbgm''' and change '''Start REG_DWORD''' from "3" to "4". Restart Windows after making those changes. | ||
| + | ::: This service is used by the Win10 "Game Bar" DVR. - Source: [https://www.windowscentral.com/how-disable-and-remove-game-bar-windows-10-creators-update How to disable the Game Bar and DVR in Windows 10]. | ||
| − | + | <span id="Issue: LongLoads"></span> | |
| + | === Issue - Long loading times === | ||
| + | Symptoms: Loading a "save game file" takes longer than it used to, by several (e.g. 5-10) minutes. It does eventually complete loading, so this is not the "infinite roulette wheel" problem discussed in "Issue - Incomplete save game load". | ||
| − | * | + | * Cause: Varies but is generally an indication the engine is processing more information in the save game file or having difficulty locating/reading the file. This may be the result of "save game bloat". The following are things to check first to determine the cause of the problem. |
| + | :* Diagnostic checklist. | ||
| + | ::# Have you tried "defragging" your disk drive? | ||
| + | ::# Have you checked the [https://www.nexusmods.com/newvegas/mods/53635 NVAC] and [https://www.nexusmods.com/newvegas/mods/67883 NVSE] logs for loading errors? | ||
| + | ::# Are you using the same "file slot" for your saves or "quick saves"? (Not recommended. There are mods which ensure a new file is created for each of those purposes, such as "[https://www.nexusmods.com/newvegas/mods/45652 CASM]" and "[https://www.nexusmods.com/newvegas/mods/57465 Clean Quick Saves]".) | ||
| + | ::# Have you tried loading the save game immediately after exiting to the desktop and re-launching instead of from the main menu, and if so does the time to load vary? (This suggests the problem is with some plugin(s) that are loading when the game starts as opposed to something when the game is saved, or vice versa.) | ||
| + | ::# Does the game re-load fine upon the death of your character or using a quicksave file created in that game session? (This suggests the problem is with some plugin(s) that are loading when the game starts as opposed to something when the game is saved.) | ||
| + | ::# Did you check that you are using exactly the same mod manager "profile" (i.e. current game configuration) with the exact same "load order" as previously? | ||
| + | ::# Have you "merged plugins" together into custom ESP files to reduce the number of used plugin slots, and then possibly added the same plugin to multiple merged plugins or even loaded that plugin again separately? If the file names are NOT the same, the engine will load multiple copies of a plugin and uselessly add to it's processing load. | ||
| + | ::# Are you using a number of mods which spawn more "actors" (NPCs or Creatures) into the game? | ||
| + | :::: When you first add mod plugins, they don't have the same impact as later on because they haven't spawned as many actors in the beginning as later. The longer you play such a plugin, the more spawned actors the save game file has to keep track of (even when they are "dead", because each actor/corpse is also a "container"). At some point you cross the "tipping point" where you start to see the impact in terms of loading times. This is unlikely to be early in the game, unless you have a number of mods which spawn in the same cells. (The "Mojave Wasteland" exterior is primarily one large cell.) | ||
| + | :::: The same applies to everything you move (e.g. a door is opened but not closed again, as well as "loot" you pickup). If it is something unique to a mod (only that plugin has it defined), then the record for that item has to be found in that plugin, which is why you will corrupt your save game if you remove that plugin later on. The record is no longer valid. If you are a "hoarder" (like me) you have to be careful to sell off unique plugin items to keep the bloat down. Selling items lets the game reset them back to their default location. | ||
| + | :* Solution: If you determine the problem is "bloat", follow the "[[FNV_General_Mod_Use_Advice#Clean_Saves|Clean Saves]]" procedure after disposing of the items which create "bloat". Then, if you still have issues, you can try the tool "[https://www.nexusmods.com/newvegas/mods/49396?tab=description New Vegas Save Cleaner]" after you have made backups of the save game files. Please read the instructions in the downloaded package carefully. If you don't understand what it is doing, then read the comments page or ask in the [https://forums.nexusmods.com/index.php?/forum/354-new-vegas-mod-talk/ forum]. | ||
| − | = | + | <span id="Issue: MissingVCRuntime"></span> |
| − | === Issue | + | === Issue - Missing MSVCR120.dll === |
| − | + | <div name="Note Box" class="boilerplate metadata" id="Notice Box" | |
| − | * | + | style="margin:0px 10px 10px 10px;border:1px dashed #DAA520;color: lightgray; |
| + | background-color:#333333;padding:3px; | ||
| + | word-wrap: break-word; /* Internet Explorer 5.5+ */ | ||
| + | ">Being an older game, FNV looks for a number of "runtime library" (DLL) files from specific older packages. It does not know about later releases which may be fully "backwards compatible". One of these packages is the Visual Studio C++ 2013 redistributable (aka "MSVC2013 Runtime") or individual files from this package (such as "MSVCR120.dll"). It is common to have multiple versions of such libraries (both release year and 32 or 64-bit versions) installed at the same time. Even if you are running a 64-bit version of Windows, you need the 32-bit version of this package for FNV (which is a 32-bit game). | ||
| − | + | Most people find the [https://www.microsoft.com/en-us/download/details.aspx?id=40784 Visual C++ 2013 Redistributable package (x86)] resolves this problem for them. Note there are "File Paths" for both 32-bit (x86) and 64-bit (x64) versions on the same download page. Scroll all the way to the bottom and double check which you are downloading. | |
| + | </div> | ||
| − | = | + | <span id="Issue: Modded game CTDs on startup"></span> |
| − | |||
| − | |||
| − | * | + | === Issue - Modded game CTDs on startup === |
| + | * Cause-1: If the CTD occurs '''before''' you get to the Main/Pause Menu, likely it is a "missing master file" required by a mod plugin. | ||
| + | :* Solution-1: Load your entire "load order" into [http://www.nexusmods.com/newvegas/mods/34703/? FNVedit] and see if it reports any "missing master" errors for any plugins. See the wiki article [http://wiki.nexusmods.com/index.php/Missing_Masters Missing Masters] for a tutorial on how to determine the missing file and fix this problem. | ||
| + | ::* Re-check the mod download page for any required files you may have missed or removed. | ||
| − | * | + | * Cause-2: If the CTD occurs during an initial loading screen '''after''' you get past the Main/Pause Menu, likely it is a plugin that is sorted in the wrong order. |
| + | :* Solution-2: | ||
| + | ::* Re-check the mod download page for any required files you may have missed or removed. | ||
| + | ::* Try sorting your "load order" with [https://loot.github.io/ LOOT]. You may need to make some manual adjustments to meet mod requirements to the "load order". | ||
| + | ::* Remove any unused plugins (ESM or ESP extensions) from the "Data" folder. They count against the "plugin cap" and the game loads all that it sees in that folder before determining if they are part of the "load order". As a result, even "Inactive" plugins can cause a "Missing Master" error. | ||
| − | + | <span id="Issue: NVSE - fails to load after update KB4058043 to Win10 FCU (v1709)"></span> | |
| − | * | + | === Issue - NVSE - fails to load after update KB4058043 to Win10 FCU ''v1709'' === |
| + | This can also manifest as a general slowdown and loss of some sounds. | ||
| + | : Once it has been installed previously functioning NVSE logs report the following when the game is launched: | ||
| + | <pre> | ||
| + | old winmain = 01E1F720 | ||
| + | couldn't write memory (update winmain) | ||
| + | couldn't init hook | ||
| + | Couldn't inject DLL. | ||
| + | terminating process</pre> | ||
| + | : Many thanks to '''Derialund''' of the "Fallout New Vegas Technical Support" forum for initial reporting and investigation of mitigation regarding this issue. | ||
| + | * Cause: Windows Update [http://support.microsoft.com/en-us/help/4058043/microsoft-store-reliability-improvements-for-windows-10-version-1709-d KB4058043, December 15, 2017] to Win10 FCU (v1709), also known as the "Meltdown and Spectre Vulnerability" patch. There are other KB numbers for the same patch applied to various build numbers. See the articles referenced below. | ||
| + | : According to Microsoft Support: | ||
| + | :<span style="margin:0px 10px 10px 0px;border:1px solid #DAA520;color: lightgray; background-color:#424242;padding:3px; | ||
| + | word-wrap: break-word; /* Internet Explorer 5.5+ */ | ||
| + | ">''This update makes reliability improvements to Microsoft Store and fixes an issue that could cause app update failures and cause Microsoft Store to generate unnecessary network requests.''</span> (Presumably (based upon timing and effect) this is part of the mitigation effort against the '''Meltdown''' and '''Spectre''' vulnerabilities in processors' “speculative execution” architecture existing since 1995. For a "layman's explanation" of this vulnerability. please see the [http://www.redhat.com/en/blog/what-are-meltdown-and-spectre-here%E2%80%99s-what-you-need-know What are Meltdown and Spectre] article.) | ||
| + | : Microsoft is continuing to roll out a series of patches to fix this vulnerability. This article on [http://www.techarp.com/guides/microsoft-spectre-meltdown-patch/ Techarp] dated 23 Feb 2018 has the rollout schedule and Knowledge Base article numbers for various builds. The official Microsoft word on this vulnerability is [http://support.microsoft.com/en-us/help/4073757/protect-your-windows-devices-against-spectre-meltdown here]. | ||
| + | : The problem occurs with FNV even when it is installed on a different drive from the default install location (i.e. NOT "C:\Program Files(x86)") and the executables have been added to the "Data Execution Prevention" ('''DEP''') exception list. | ||
| + | : FCU now includes [http://blogs.technet.microsoft.com/srd/2017/08/09/moving-beyond-emet-ii-windows-defender-exploit-guard/ Windows Defender Exploit Guard (WDEG)]. This is the successor to "Enhanced Mitigation Experience Toolkit" ('''EMET'''), and "to prevent possible compatibility, performance, and stability issues, Windows will automatically block or remove EMET on Windows 10 systems starting with the Windows 10 Fall Creators Update." (Details in the linked article.) A 1:04:51 minute [http://www.youtube.com/watch?v=ABuFjGBbyWA video] focused on '''WDEG''' and how it fits into Microsoft's "End to End Protection" strategy is available as well. Configuration instructions are found in [http://www.ghacks.net/2017/10/25/configure-windows-defender-exploit-guard-in-windows-10/ Configure Windows Defender Exploit Guard (WDEG) in Windows 10]. '''WDEG''' works with '''DEP''' but apparently it's settings override those set in '''DEP'''. | ||
| + | :* Solution: Unknown. The problem has been reported to the '''NVSE''' team. | ||
| + | :* Mitigation (For Windows 10): As for the '''FNV''' and '''NVSE''' problem in particular, inside '''WDEG''', there are two main configuration ''profiles'': "System settings" and "Program/Application settings". To solve this problem it is necessary to add an entry for both '''FalloutNV.exe''' and '''NVSE_loader.exe''' to '''WDEG''' under "Program/Application settings". There, every security option must be ''override'' and/or ''superimposed on deactivate''. | ||
| + | :: Practically, you have to: | ||
| + | ::# Open the '''Windows Defender Security Center'''. | ||
| + | ::# Go to "App & Browser control". | ||
| + | ::# Scroll down the page and go to "Exploit Protection" section. Then click on "Exploit Protection Settings". | ||
| + | ::# Inside the result page, click on "Program Settings" tab. | ||
| + | ::# Click on "Add program to customize". | ||
| + | ::# Click on "Choose exact file path" and search for the game root folder (with the main game executables, where '''FalloutNV.exe''' and '''NVSE_loader.exe''' should be). | ||
| + | ::# In the "Program Settings" page should appear the entry with the full path (e.g. "D:\Fallout\FalloutNV.exe"). | ||
| + | ::# Mouse over such an entry and click on it, and then on the button "Edit". | ||
| + | ::# Inside the resulting settings page, there are various entries like: | ||
| + | ::#* Arbitrary Code Guard (ACG) | ||
| + | ::#* Block low-integrity images | ||
| + | ::#* etc. | ||
| + | ::#: Then under each entry there's a check box with the description: "Override system settings". Under it there's an '''On/Off''' "switch" or "slide-box". | ||
| + | ::#:: That checkbox must be checked for every entry; and then every "slide-box" must be turned to OFF. | ||
| + | ::: Overall, 21 System overrides should be indicated under the "Fallout Executable" entry list, indicating that everything is turned "off". | ||
| + | :* Mitigation (for older versions of Windows: untested): Those without access to '''WDEG''' can see if [http://support.microsoft.com/en-us/help/2458544/the-enhanced-mitigation-experience-toolkit Enhanced Mitigation Experience Toolkit (EMET) 5.52] will suffice in the same manner instead. This free tool is approaching "end of life" on 31 July 2018 (at the moment). After that, only Windows 10 will be supported and security patched. Note that the "EMET User Guide" is a separate download. | ||
| − | === Issue | + | <span id="Issue: Problems point to Steam as the source"></span> |
| + | === Issue - Problems point to Steam as the source === | ||
Errors such as a "Preparing to Launch" message loop, or nothing apparently happening when you click to start any Steam game, or system error messages ask to troubleshoot Steam. | Errors such as a "Preparing to Launch" message loop, or nothing apparently happening when you click to start any Steam game, or system error messages ask to troubleshoot Steam. | ||
* Cause: A corrupted "ClientRegistry.blob" file. | * Cause: A corrupted "ClientRegistry.blob" file. | ||
| Line 127: | Line 625: | ||
** Now when you try launching your game the issue should be solved (or at least you should get a different error). | ** Now when you try launching your game the issue should be solved (or at least you should get a different error). | ||
| − | === Issue: How to | + | <span id="Issue: Regional Non-English language version of the game displaying English dialogue"></span> |
| − | + | === Issue - Regional Non-English language version of the game displaying English dialogue === | |
| − | * | + | Why are my DLCs in English instead of my Regional language? |
| + | |||
| + | * Cause: The menu and interface (text) files language is determined by the language you select when download/updating the game through Steam/GOG. You should have "<DLC>_lang.esp" files for your Regional language installed, but they are not "active". There should be corresponding "<DLC>_lang.nam" files, but aren't. Even when present the "*_lang.esp" files cannot normally be "made active", as the default "*.nam" files force the game to load the "INT (English)" versions of the DLCs instead. | ||
| + | :* Solution-1a: Remove the incorrect language code "*.nam" files. | ||
| + | ::* If these "*.nam" files are not present, try to "activate" the "*_lang.esp" files. Then engage in conversation with a DLC NPC to verify you are now getting the dialogue in your Regional language. | ||
| + | |||
| + | :* Solution-1b: The mod [http://www.nexusmods.com/newvegas/mods/65508 Voice Actor BSA files] lets you swap the language Voice Actor BSA file (Fallout - Voices1.bsa) to a different one of your choice. This enables you to have the text in one language and the voices in another. | ||
| + | |||
| + | :* Solution-1c: See also [[#Issue: Regional Non-English language version of the game with different language audio?|Issue: Regional Non-English language version of the game with different language audio?]] solution as that is a similar (though reversed) situation. | ||
| + | |||
| + | :* Otherwise, contact your Regional Steam provider about the problem. | ||
| + | |||
| + | <span id="Issue: Regional Non-English language version of the game with different language audio?"></span> | ||
| + | === Issue - Regional Non-English language version of the game with different language audio === | ||
| + | How do I get the audio in one language (e.g. "English") along with my Regional language (e.g. "Italian") for subtitles?<br> | ||
| + | (With thanks to '''PipBoyUser''' of the Nexus Fallout "New Vegas Discussion" forum for investigating and reporting the following.) | ||
| + | |||
| + | * Cause: The language used for the Audio (voices) and subtitles installed for the game depend upon which Regional language version of the game you install. (The general process of making a game compatible with different Regional languages is described for Steam developers in this [http://partner.steamgames.com/doc/store/localization localization] article.) | ||
| + | |||
| + | :* Solution-1: In order to "mix" different voice and subtitle languages, you need to install both language versions (in the correct order) and copy files from one install into the other language version. You want to install the game for the language you want the Audio to be voiced in (to preserve the Audio filenames and paths used), and then replace the "*.ESM" and "*.NAM" files with those from the Regional language version. (Examination has shown the "*.ESM" files contain at least some "in-game" text in the Regional language. The "*.NAM" files tell the game engine to load certain "master" (i.e. the DLC ESM) files automatically even if they are not selected as part of the "load order", and come in language specific versions.) | ||
| + | :: This is a multi-step process, taken in the following order: | ||
| + | ::# Install the game in your Regional language version (the one you want the subtitles to be using). | ||
| + | ::# Open the "Fallout_default.INI" file: "[General]" section, "sLanguage=" entry, and note for later use the exact language name used (e.g. "ITALIAN"). | ||
| + | ::# Copy all the vanilla and DLC game "*.ESM" and "*.NAM" files somewhere else safe for later use. | ||
| + | ::# Now re-install the game, this time choosing the language version which you wish to hear spoken (e.g. "ENGLISH"). | ||
| + | ::# Replace the the current install's "*.ESM" and "*.NAM" files with those you backed up from the Regional language version earlier. | ||
| + | ::# Edit the three INI files (see the [http://wiki.nexusmods.com/index.php/FNV_General_Mod_Use_Advice#Game_INI_files Game INI files] section of the wiki "FNV General Mod Use Advice" article), find the "[General]" section entry "sLanguage=" and change the value of that (e.g. "ENGLISH") to that of your desired subtitle language noted earlier. (Case and spelling are significant.) | ||
| + | :: You should now hear the voices in the installed language and see the subtitles in your designated regional language. <span style="color: green;background-color:#fff5f5; | ||
| + | word-wrap: break-word; /* Internet Explorer 5.5+ */ | ||
| + | ">Remember that if you "verify local files", the "*.ESM" and "*.NAM" files will probably get restored to those of the Audio language, so you will probably have to replace them with your copies from the Regional language backup.</span> | ||
| + | |||
| + | <span id="Issue: NVSE - Regional Non-English language version of the game won't load NVSE"></span> | ||
| + | |||
| + | :* Solution-2: See also [[#Issue: Regional Non-English language version of the game displaying English dialogue|Issue: Regional Non-English language version of the game displaying English dialogue]] solutions as that is a similar (though reversed) situation. | ||
| + | |||
| + | <span id="Issue: Regional Non-English language version of the game won't load NVSE"></span> | ||
| + | === Issue - Regional Non-English language version of the game will not load NVSE === | ||
| + | Example: Various methods to start the "enplczru" version of the game (Eastern Europe: Czech Republic, Poland, Hungary, and Slovakia; aka "PL/CZ/RU" version) with NVSE gets Steam error: "P:0000065432" or "5:0000065434". Normally this error indicates the Steam Client app is not running, but in this instance it is merely the closest guess by the game as to the cause of the problem. | ||
| + | |||
| + | * Cause: NVSE does not accept "language" parameters on the command line. | ||
| + | :* Solution-1: NVSE should be launched indirectly from [http://www.nexusmods.com/newvegas/mods/55061/? 4GB Fallout New Vegas Updated] or [http://www.nexusmods.com/newvegas/mods/62552/? FNV 4GB Patcher] modified game executables, which will accept a language (i.e. "SteamAppID") parameter, and then launch NVSE. Each regional version of the game has a unique SteamAppID. Here is how to identify what this AppID is and apply it: | ||
| + | :# Right click your '''FalloutNV.exe''' file in the Steam game folder, and create a shortcut to the desktop. | ||
| + | :# Right click the newly created desktop shortcut and open "properties". | ||
| + | :# It should say something like "steam://rungameid/22490". Copy that last number (the game's SteamAppID). | ||
| + | :# Right click the 4GB launcher shortcut, and open "properties". | ||
| + | :# In the "Target" text box, change the number in the " -SteamAppId 22380" parameter to your actual SteamAppID number (i.e. "22490"). | ||
| + | : Note that because the path to the game contains embedded spaces, the entire path needs to be placed within quotation marks (i.e. "<path>") everywhere it is used in the shortcut. The AppID parameter goes outside of the quotes, on the "target" property line ... as in ("E:\Games\SteamLibrary\steamapps\common\Fallout New Vegas enplczru\fnv4gb.exe" -SteamAppID 22490) without the "(parentheses)". | ||
| + | |||
| + | :* Solution-2: Some people reported early success by renaming their regional version named game folder (i.e. "Fallout New Vegas enplczru" to "Fallout New Vegas": the English version name). It is not reported if this causes issues later on with language specific patches, which is why it is the secondary solution. | ||
| + | |||
| + | :* Solution-3: : User '''sanassar''' in the "New Vegas Mod Troubleshooting" forum [http://forums.nexusmods.com/index.php?/topic/3148629-nvse-with-enplczru-version/#entry64689921 thread] provided the following solution. It has been [edited] and reformatted for clarification. | ||
| + | <div name="Note Box" class="boilerplate metadata" id="Notice Box" | ||
| + | style="margin:0px 10px 10px 50px;border:1px dashed #DAA520;color: lightgray; | ||
| + | background-color:#333333;padding:3px; | ||
| + | word-wrap: break-word; /* Internet Explorer 5.5+ */ | ||
| + | ">I managed to get my "enplczru" [regional version] with the "application error P:0000065432" and "couldn't read arguments" errors working. | ||
| + | |||
| + | This is what I did and I have no idea which one of these steps fixed it but there is no harm in doing all of these, please bear with me: | ||
| + | |||
| + | * Install NVSE first by following the instructions at http://nvse.silverlock.org/. [If you have problems, see the '[[#Checklist|Checklist]] Item #4' entry in this document.] | ||
| + | |||
| + | * This part is only for the normal people, like me, who do '''not''' have "Fallout NV" installed in the default directory where windows is installed - "C:\[Program Files]". If you are not normal and have it installed in "C:\[Program Files]" - ignore this step. | ||
| + | : Also bear in mind that if you are not normal and have the game in "C:\[Program Files]" but the folder's name is '''"Fallout New Vegas enplczru"''', you should do this as well!! | ||
| + | |||
| + | :* I went to "C:\Program Files (x86)\" and created a folder called "Steam" and in it a folder called "SteamApps" and in it a folder called "common". So the whole path looks like this now: | ||
| + | :: <span style="margin:0px 10px 10px 10px; border:1px dashed #DAA520; color: lightgray; background-color:#424242; padding:3px; | ||
| + | word-wrap: break-word; /* Internet Explorer 5.5+ */ | ||
| + | ">C:\Program Files (x86)\Steam\SteamApps\common</span> | ||
| + | |||
| + | :* I opened Command Prompt and wrote this: | ||
| + | :: <span style="margin:0px 10px 10px 10px; border:1px dashed #DAA520; color: lightgray; background-color:#424242; padding:3px; | ||
| + | word-wrap: break-word; /* Internet Explorer 5.5+ */ | ||
| + | ">cd c:\program files (x86)\steam\steamapps\common</span> - which basically navigates Command Prompt to the file you created. | ||
| + | |||
| + | :* Then I typed in the following: | ||
| + | :: <span style="margin:0px 10px 10px 10px; border:1px dashed #DAA520; color: lightgray; background-color:#424242; padding:3px; | ||
| + | word-wrap: break-word; /* Internet Explorer 5.5+ */ | ||
| + | ">mklink /d "Fallout New Vegas" "<Your full Fallout NV enplczru directory>"</span> [- replace "<Your full Fallout NV enplczru directory>" with your actual "target" (NOT "C:\Program Files") folder name.] | ||
| + | :: Mine looks like this: | ||
| + | :: <span style="margin:0px 10px 10px 10px; border:1px dashed #DAA520; color: lightgray; background-color:#424242; padding:3px; | ||
| + | word-wrap: break-word; /* Internet Explorer 5.5+ */ | ||
| + | ">D:\Games\Steam\SteamApps\common\Fallout New Vegas enplczru</span> | ||
| + | :: so my command line looked like this: | ||
| + | :: <span style="margin:0px 10px 10px 10px; border:1px dashed #DAA520; color: lightgray; background-color:#424242; padding:3px; | ||
| + | word-wrap: break-word; /* Internet Explorer 5.5+ */ | ||
| + | ">mklink /d "Fallout New Vegas" "D:\Games\Steam\SteamApps\common\Fallout New Vegas enplczru"</span> | ||
| + | :* To check if this worked you now must have a "Fallout New Vegas" folder in your "C:\Program Files (x86)\Steam\SteamApps\common" with a little arrow on it. This is a ''[http://www.howtogeek.com/howto/16226/complete-guide-to-symbolic-links-symlinks-on-windows-or-linux/ symbolic link]''. It means any program looking for "Fallout New Vegas" in "C:\Program Files (x86)\Steam\SteamApps\common" [tree] will find it, but the folder itself will be located on another drive, which is cool. | ||
| + | |||
| + | * The second part is about getting NVSE to load [with the game] properly. For this I only managed to do it through the "[http://www.nexusmods.com/newvegas/mods/55061/ 4GB Fallout New Vegas - Updated]" mod. (This mod is superseded by [http://www.nexusmods.com/newvegas/mods/62552 FNV 4GB Patcher] (by the same author) which now supports '''US-EU-AU / DE (No Gore) / ENPLCZRU''' versions as well.) This is a tool that let's you load "Fallout New Vegas" with lots of Mods and Texture Packs without getting crashes. It sets a "4GB Virtual Memory Address Space" for the game to use, hence its name. | ||
| + | |||
| + | :* So [download the 4GB mod]. | ||
| + | :* Download and install the mod, either by using [a mod manager such as Vortex or "Nexus Mod Manager") or manually - just read the [mod] instructions. | ||
| + | :* Then go to the mod folder (mine is at "D:\Games\Steam\steamapps\common\Fallout New Vegas enplczru\Mods\FNV4GB-55061-1-9\FNV4GB-1-9"), and ... | ||
| + | :* Create a shortcut of "fnv4gb.exe" either on your desktop or the start menu [or somewhere you will find it easily]. | ||
| + | :* Right click the shortcut and add this string: | ||
| + | :: <span style="margin:0px 10px 10px 10px; border:1px dashed #DAA520; color: lightgray; background-color:#424242; padding:3px; | ||
| + | word-wrap: break-word; /* Internet Explorer 5.5+ */ | ||
| + | ">-SteamAppId 22490</span> at the end of the "Target:" field. | ||
| + | :: So [my shortcut] looks like this: | ||
| + | :: <span style="margin:0px 10px 10px 10px; border:1px dashed #DAA520; color: lightgray; background-color:#424242; padding:3px; | ||
| + | word-wrap: break-word; /* Internet Explorer 5.5+ */ | ||
| + | ">"D:\Games\Steam\steamapps\common\Fallout New Vegas enplczru\Mods\FNV4GB-55061-1-9\FNV4GB-1-9\fnv4gb.exe" -SteamAppId 22490</span>. | ||
| + | |||
| + | You are done! | ||
| + | |||
| + | Now if you want to run the game: | ||
| + | * Make sure that Steam [Client] is running. [This can be in either "online" or "offline" mode.] | ||
| + | * Start the game using the shortcut you created and modified in the previous step. | ||
| + | * TADAA! | ||
| + | |||
| + | If you want to check whether the NVSE works just press the " <`> " command line key in the game main menu and type getNVSEversion. You should get a version number. Mine is 5. | ||
| + | </div> | ||
| + | |||
| + | <span id="Issue-FNC-MO2"></span> | ||
| + | === Issue - Unable to install FNC with MO2 === | ||
| + | Often described as being unable to find the FNV or FNC ESM files after installation. | ||
| + | |||
| + | : Thanks to '''Purr4me''' (Kitty Black) for the basis of following: | ||
| + | |||
| + | The "Fallout New California (FNC)" mod comes as an EXE installer. This causes confusion among users of the "Mod Organizer 2 (MO2)" manager. DO NOT point the installer to the game "Data" folder if you intend to operate the game from within MO2. Here is how to install FNC for use with MO2. (The basis of this may or may not work with other similar managers. It has not been tested with them like it has with MO2, so use at your own risk.) | ||
| + | |||
| + | # Install the base Fallout New Vegas game and NOTHING ELSE. | ||
| + | # Run the initial game setup from the "Steam Client" or GOG "Galaxy" if needed so it has detected and is configured for your hardware. | ||
| + | #: DO NOT patch the Steam version to use 4GB of memory (GOG doesn't need it); and do not install NVSE or any other addons or mods. Just leave the raw base game files and folders alone. | ||
| + | # Install MO2 and point it's FNV profile setup to the location of the raw game files (where FalloutNV.EXE is located). | ||
| + | # Run MO2, and launch the FNV game from within it. | ||
| + | #: Create a "save game" file and exit the game. | ||
| + | # Close MO2. (This is important to get the base game profile established correctly.) | ||
| + | # Open MO2 (again) and add the "Fallout New California (FNC)" EXE file as a "1 time executable" to the drop-down menu. | ||
| + | #: The files from the "FNC EXE" should then be extracted into an isolated folder. | ||
| + | #: MO2 will automatically create the appropriate folders for the game files as needed. | ||
| + | # When the "1 time executable" process is done: | ||
| + | ## hit the "Sort" button, and then, | ||
| + | ## run the game. | ||
| + | #: Once the game has been entered and you can confirm you are now running "Fallout New California (FNC)", you can exit and apply the 4GB Patch (if needed), as well as NVSE and other plugins and mods as needed without any major problems beyond the usual mod conflicts. | ||
| − | + | <span id="Issue: Vanilla game bugs"></span> | |
| − | |||
| − | |||
| − | |||
| − | |||
| − | |||
| − | |||
| − | |||
| − | |||
| − | === Issue | + | === Issue - Vanilla game bugs === |
| − | Most that have been officially patched or are XBox or PS console only are available on the [http://fallout.wikia.com/wiki/Fallout:_New_Vegas_bugs Wikia Fallout Portal] page. | + | Most that have been officially patched or are XBox or PS console only are available on the [http://fallout.wikia.com/wiki/Fallout:_New_Vegas_bugs Wikia Fallout Portal: Bugs] page. |
* Solution: Community "game fixer" mods. The following are specifically recommended, though their effectiveness varies by system. Install and test individually in the following order: | * Solution: Community "game fixer" mods. The following are specifically recommended, though their effectiveness varies by system. Install and test individually in the following order: | ||
| − | ** [http://www.nexusmods.com/newvegas/mods/34832/? New Vegas Stutter Remover (NVSR)] (requires [http://nvse.silverlock.org/ NVSE]. The 5.0 beta versions are stable. Check version requirements of other mods when choosing.) | + | :* [http://www.nexusmods.com/newvegas/mods/53635/? New Vegas AntiCrash (NVAC)] (Essential: solves most common CTDs). |
| − | ** "Sheson memory patch" | + | :* [http://www.nexusmods.com/newvegas/mods/66537 New Vegas Tick Fix (NVTF)] (Win7-10 alternative to NVSR, with fewer features.) |
| − | ** [http://www.nexusmods.com/newvegas/mods/ | + | :* [http://www.nexusmods.com/newvegas/mods/34832/? New Vegas Stutter Remover (NVSR)] (requires [http://nvse.silverlock.org/ NVSE]. The 5.0 beta versions are stable. Check version requirements of other mods when choosing which version of NVSE to use.) |
| − | + | ::* There are several reports in the download page "comments" that NVSR causes CTDs after 10-20 minutes of play once the Win10 "Fall Creator's Update" (FCU) of Nov 2017 has been installed where previously everything had been stable. Those experiencing this problem are recommended to see [[#Issue:_Recent_(post-Win10_FCU)_CTDs_after_10-20_minutes_of_play|Issue: Recent (post-Win10 FCU) CTDs after 10-20 minutes of play]]. (Windows 7+ users are advised to consider using mod [http://www.nexusmods.com/newvegas/mods/66537 New Vegas Tick Fix (NVTF)] instead, as it is designed to avoid the problems though with fewer features than NVSR.) | |
| − | ** [http://www.nexusmods.com/newvegas/mods/ | + | ::* Core processors prior to I5 or I7 are suggested to use '''NVSR_4-1-32''' (simpler options) with the [https://taleoftwowastelands.com/content/ttw-performance-guide nvsr_older_processors] file of INI edits from the first post on the linked TTW page. |
| − | ** [http://www.nexusmods.com/ | + | ::* Those with later processors are advised to use '''NVSR_4-1-36 or later''' with the [https://taleoftwowastelands.com/content/ttw-performance-guide nvsr_newer_processors] file of INI edits from the first post on the linked TTW page. |
| − | ** [http://www.nexusmods.com/newvegas/mods/ | + | ::: (The only differences for 4.1.36 should be removing the overrides for previous versions as they aren't needed.) |
| + | ::: These INI edits are advised as performance settings suitable for FO3, FNV, and TTW. | ||
| + | :* [http://nvse.silverlock.org/ New Vegas Script Extender] "Sheson memory patch". (Increases "heap size". Use either the "heap replacement" feature of NVSR or this. Both together do not conflict (different "heaps"), but seem to be "overkill" at the cost of almost 1GB of game memory.) See the [[#Issue: CTD without warning, "out of memory error", or stops responding|Issue: CTD without warning, "out of memory error", or stops responding]] sub-topic for simple but detailed instructions for enabling this feature. | ||
| + | :* [http://www.nexusmods.com/newvegas/mods/51664/? Yukichigai Unofficial Patch (YUP)] (and the various optional patches for it and other mods. Highly recommended. There are other YUP patch files than on that page you may have to search out for other mods). | ||
| + | :* [http://www.nexusmods.com/newvegas/mods/45104/? Mission Mojave Ultimate Edition - FNV Community Patch (MMUE)] (and it's various optional mod compatibility patches). <span style="margin:0px 10px 10px 0px;border:1px solid #00C600;color: green; | ||
| + | background-color:#fff5f5;padding:3px; | ||
| + | word-wrap: break-word; /* Internet Explorer 5.5+ */ | ||
| + | ">Use either YUP or MMUE, but not both as they overlap considerably and cause unresolved conflicts. YUP is more actively updated.</span> | ||
| + | :* [http://www.nexusmods.com/newvegas/mods/44204/? New Vegas Enhanced Content (NVEC)] (optional: Notice it has separate "bugfix" modules if you don't want the "complete version" with enhancement mod inclusions). | ||
| + | :* [http://www.nexusmods.com/newvegas/mods/51871/? Better Game Performance] (optional: some reports of minor slowdowns. It removes "unessential" things that some mods or quests might rely upon). | ||
| + | |||
| + | <span id="Issue: Vanilla game CTDs on startup"></span> | ||
| + | |||
| + | === Issue - Vanilla game CTDs on startup === | ||
| + | Uninstalled and re-installed the game but even without mods it crashes on startup. | ||
| + | * Cause-1: Likely you forgot to clear out your "C:\Users\<YourAccountName>\Documents\My Games\FalloutNV" folder when you had Steam "verify local files". The game places your specific versions of the "Fallout" and "FalloutPrefs" INI files there, along with your save games. These are not replaced when you verify/re-install the game if they are found to already exist there. | ||
| + | <div name="Note Box" class="boilerplate metadata" id="Notice Box" | ||
| + | style="margin:0px 10px 10px 50px;border:1px solid #00C600;color: green; | ||
| + | background-color:#fff5f5;padding:3px; | ||
| + | word-wrap: break-word; /* Internet Explorer 5.5+ */ | ||
| + | "> | ||
| + | Note that if you are currently or have used "Mod Organizer", MO uses its own copies of "Fallout.ini" and "FalloutPrefs.ini" (from when the MO profile was created), located in "\Steam\steamapps\common\Fallout New Vegas\Mod Organizer\profiles\<Your Profile Name>". These files need to be changed as well.</div> | ||
| + | |||
| + | :* Solution-1a: Try renaming the "Users" folder INI files first. Recall that the "Prefs" INI file gets created only when you run the original "FalloutNVLauncher.exe" and identify your hardware under "Options" on the first menu. Subsequently if that fails move the "saves" elsewhere, delete that "Users" FalloutNV folder's content, and re-install again. If you have to re-install again anyway, be sure to install to a folder that is not under the default "C:\Program Files" folder tree. See [http://wiki.nexusmods.com/index.php/Installing_Games_on_Windows_Vista%2B Installing Games on Windows Vista+] for the rationale and guidance. | ||
| + | |||
| + | :* Solution-1b: Consider if the problem happens with other Steam games. If so, check out the [[#Issue: Problems point to Steam as the source|Issue: Problems point to Steam as the source]] entry. | ||
| + | |||
| + | * Cause-2: A third-party program running in the background is interfering with the game. | ||
| + | :* Solution-2: Try turning off any unnecessary background processes, such as "anti-virus" or "anti-malware" programs (unneeded if you are running your game in "offline" mode), multiplayer "overlays" like "OverWolf" (this is single-player after all), the Steam overlay, etc.; at least on a temporary basis to see if they are interfering. | ||
| + | |||
| + | * Cause-3: In mid 2016, nVidia and AMD driver updates and some Windows 10 WDDM updates started to cause CTDs upon startup to previously trouble-free games. This was determined to be caused by changes to the "Windows Device Driver Kit" (WDDK) at that time. | ||
| + | :* Solution-3a: Win10 November 2016 updates have fixed these issues. Make sure you have applied your system updates. | ||
| + | |||
| + | :* Solution-3b: The "[http://www.nexusmods.com/newvegas/mods/53635/? New Vegas Anti-Crash]" (NVAC) mod as of v7.5.0.0 (released 25 Oct 2016) has been reported to fix the conflict with the broken video drivers from nVidia and AMD. | ||
| + | |||
| + | :* Solution-3c: Rolling back to nVidia drivers 368.81 or 368.69; or AMD driver 16.8.3 have been reported to successfully resolve the problem with Win10. In general, avoid upgrading your video card drivers unless the latest fixes a particular problem you are encountering. (Support and testing for older games can get dropped in newer versions.) To prevent Win10 automatically doing such upgrades to any drivers in future updates, see this article on [http://www.makeuseof.com/tag/take-back-control-driver-updates-windows-10/ Taking back control of Windows 10 driver updates]. | ||
| + | |||
| + | :* Solution-3d: Depending upon the nature of the Windows update (all updates provide a link to a MS Knowledge Base article explaining the update in detail), reverting to the "system restore point" prior to the update may be a reasonable temporary solution if this occurs in the future. However, in the long term this might prove to be a security risk, so be sure to report the problem and track the status of the update for possible fix and re-release. | ||
| + | |||
| + | <span id="Issue: Vanilla game Hangs on startup"></span> | ||
| + | === Issue - Vanilla game Hangs on startup === | ||
| + | When you open the launcher, it functions as it should with the music in the background. Also have audio by the time the main menu loads. Whenever you load a game, the loading screen with the roulette wheel has no audio and this screen will freeze for one to two seconds (as evidenced by the ball in the roulette wheel stopping). Screen will then go black for a few seconds, and the game will load, but have no audio at this point and there is severe lag. | ||
| + | |||
| + | * Cause-1: Win10 has DirectX12 drivers, but the DX9 driver the game is expecting is not being found. | ||
| + | : While Win10 comes with DirectX12 installed and is backwards compatible with older DX versions, older games do not know that and are looking for specific versions of DX library files (i.e. d3d9'''''_32'''''.dll) and not finding them. So you need to install the appropriate "DirectX End-User Runtimes" as well: ones which are compatible with Win 8.1+.<span style="margin:0px 10px 10px 10px;border:1px solid #00C600;color: green; | ||
| + | background-color:#fff5f5;padding:3px; | ||
| + | word-wrap: break-word; /* Internet Explorer 5.5+ */ | ||
| + | ">Note that you need the 32-bit version for 32-bit games.</span> (I make it a practice to always download both the 32-bit and the 64-bit versions of any libraries I manually install, so I am covered either way. There is a reason they published a version for both 32-bit and 64-bit. They are not "interchangeable", and are separate installs going into different locations.) | ||
| + | : (Games that used DX7 and 8 are murky territory. Many will run on OS's newer than XP, but may require fixes/tweaks. Always use the latest available "runtime" versions of those DX libraries.) | ||
| + | : Some games try to install an older DX version they come bundled with. Those versions may not be compatible with the later versions of Windows, which is why you should manually install the version you know is compatible. Then those games will see that DX version is already installed and not try to install their bundled version causing incompatibility problems. | ||
| + | |||
| + | :* Solution-1: For DX9, manually install the [https://www.microsoft.com/en-us/download/details.aspx?id=8109 DirectX End-User Runtimes (June 2010)] which is Win 8.1+ compatible. Download the full runtime package. DO NOT use the "Web Installer" version. | ||
| + | ::* When the DX installer asks where to install the files to, you choose any folder you like, but generally have it unpack the files to a folder on the desktop or one dedicated to that purpose anywhere, because this folder can be deleted or emptied after the final install is done. (DirectX does not actually get installed at this point. The files are only 'unpacked' from an archive) | ||
| + | ::* Once the files are unpacked to this folder you open the folder and locate DXSETUP.exe (the actual installer). | ||
| + | ::* Run this installer (as an Administrator) to finalize the DirectX re-installation. | ||
| + | ::* When the installer is finished delete this folder. | ||
| + | :: Each game uses a specific DX file, or files, (e.g. d3dx9_32). | ||
| + | :: A newer game may use two DX files (e.g. d3dx9_42 and d3dx10_42). | ||
| + | :: See the MS article [https://answers.microsoft.com/en-us/windows/forum/games_windows_10/how-to-make-win10-run-directx-90/c7b61bc6-0b5e-4233-aefe-cfbe3c49d930 How to make Win10 run DirectX 9.0] for more details. | ||
| + | |||
| + | * Cause-2: The game is not finding all the asset and resource files it requires. Especially under Windows 10, some files upon installation can get "black listed", which means they get deleted immediately without the installer realizing it. | ||
| + | |||
| + | :* Solution-2a: If you haven't already, move the game out of the default "C:\Program Files" folder. See the wiki article [http://wiki.tesnexus.com/index.php/Installing_Games_on_Windows_Vista%2B Installing games on Windows Vista+] for instructions. | ||
| + | |||
| + | :* Solution-2b: If your graphics card is an "Intel" brand or on-board graphics chip, you need to install the mod [http://www.nexusmods.com/fallout3/mods/17209/? Intel HD graphics Bypass package] (from the FO3 section of the Nexus mod site but it works for FNV as well). This "by-passes" an issue with those chips by placing an expected DLL file in the game root folder. | ||
| + | |||
| + | :* Solution-2c: Some have reported that playing in "windowed mode" (see [[#Issue: Playing at greater than 1920x1080 resolution|Issue: Playing at greater than 1920x1080 resolution]], Solution-2) has made the game playable when other solutions didn't. | ||
| + | |||
| + | :* Solution-2d: If you are having any audio problems, check the manufacturer of your sound card for any updated drivers. The "default" drivers provided to the manufacturer of your computer or included with the original install of Windows may have updates that fixed problems surfacing after that point in time. Microsoft does not always distribute the latest versions of all subsystem drivers. | ||
| + | |||
| + | :* Solution-2e: There are "behind the scenes" interactions between the video, sound, and mouse subsystems. Logitech brand mouse drivers have a long history of their more advanced features causing problems with games (such as the "jump to new button" or "locate cursor" features). Other vendor products are not immune to similar problems. Try using only the basic features and gradually add features after testing. If that is not sufficient, then see if an updated driver helps. Consider as well the possibility of rolling back to a previous driver which was known to work. | ||
| + | |||
| + | :* Solution-2f: If you are still having problems, then you need to determine which assets are missing. Install the 32-bit version of the [http://www.dependencywalker.com/ Dependency Walker] tool. Then run "Dependency.exe", pointing to the game EXE to examine. You are looking for red entries which signal "missing assets", which means it is not finding files the game requires. Some of these will be Windows system files (typically 32-bit versions if you are running a 64-bit system; which is expected). Initially you are looking for missing game files. If there are none, then either the game files are corrupted or the "load order" needs to be fixed. | ||
| + | ::* If you have more than a few "missing assets" (i.e. files from Steam for Windows compatibility), then fire up the game with the Steam Client in "online mode" and launch it from the Steam Library (so it will install those assets it considers "temporary" while in game that it installs upon launch. If you can get to the main menu in "windowed mode", use <Alt+Tab> to switch out of the game and then run "Dependency.exe" again against the game EXE file (while it is loaded into memory). You should now find all or most of those "red" entries are now "black". | ||
| + | ::* If you still have "missing assets" from the game the files may be corrupted (in which case you can try to re-install or "verify local files"), or they are getting "black listed", in which case you may need to install them while in "Safe Boot" mode. | ||
| + | ::* Otherwise, make note of which are missing and seek assistance on the [https://forums.nexusmods.com/index.php?/forum/350-new-vegas-technical-support/ New Vegas Technical Support] forum. Be sure to include your version of Windows, hardware specs, where you have the game installed, and what steps you have already taken. | ||
| + | |||
| + | == Solutions to Performance problems == | ||
| + | |||
| + | <span id="Guide: Performance Tutorial Videos"></span> | ||
| + | === Guide - Performance Tutorial Videos === | ||
| + | |||
| + | As many people prefer to view a video over reading instructions, the following "performance setup" tutorials are recommended: | ||
| + | |||
| + | *[http://www.youtube.com/watch?v=sJOrDhghr60 Fallout New Vegas | FPS & Stability (definitive guide)] 12:11 minutes, 2018 video by '''GamerPoets'''. | ||
| + | ::See also [[#Issue: TTW Performance Guide abstract|Issue: TTW Performance Guide abstract]]. | ||
| + | *[http://www.youtube.com/watch?time_continue=488&v=plWow9dGI70 Modding Fallout NV 'Ultimate Edition' part 7 : Performance] 19:05 minutes, 2012 Video by '''Gopher'''. | ||
| + | |||
| + | : | ||
| + | ::Please bear in mind that there are later alternatives to many of the specific mods he mentions in this video if any of them don't work for you. | ||
| + | |||
| + | Videos usually do not cover any particular part of their subject in depth. They are useful for getting started, but as they are seldom updated written guides are intended to provide more supplementary information when you encounter difficulties. | ||
| + | |||
| + | <span id="Issue: FPS drops over time"></span> | ||
| + | === Issue - FPS drops over time === | ||
| + | |||
| + | *Cause-1: This problem has been associated with [https://www.nexusmods.com/newvegas/mods/42180/ FNV Project Reality MkI] by '''JJC71''' settings. (E.g. Initial FPS around 60, but over time it drops to roughly 30 FPS.) The mod was last updated in 2011. | ||
| + | |||
| + | : | ||
| + | :*Solution-1: Go into "Mod Configuration Manager" (MCM) and enable all the options in '''Project Reality''', then exit out of MCM and wait a few seconds. Now go back in and disable all the options under '''Project Reality''' in MCM again. Instantly your FPS should be restored to what it was initially. See the comments tab on the download page regarding other issues. | ||
| + | |||
| + | *Cause-2: There is some fairly compelling evidence that the game's texture cache system "leaks memory" over time. This generally means it allocates memory but fails to release it all properly when no longer needed; eventually leading to lowering FPS and CTDs. There is evidence that larger image sizes (aka "higher resolution images") speed up the problem to occurring after roughly 20-60 minutes of play. | ||
| + | |||
| + | : | ||
| + | :*Solution-2: While not really a "fix", try using "low graphics quality" settings to see if this increases the amount of time you can play before seeing the same symptoms. If so, this is an indicator such leakage is your problem. If you have "texture replacements", try switching to low to moderate resolution images (1024x1024 or 2048x2048 pixels; the game default size is 512x512). Choose what you replace with care. "Post-processors" such as ENB and SweetFX, as well as mods that "improve" images and textures (e.g. "Fallout Character Overhaul" (FCO), "New Vegas Redesigned" (NVR), and "Freeside Open") can also contribute to the problem due to their increased demand upon the video stream. Use such in moderation and with careful examination of their impact on performance over time. Remember that the game engine has not been updated since 2010. | ||
| + | |||
| + | <span id="Issue: "Full screen mode" exhibits CTDs and stutters or micro-stutters"></span> | ||
| + | === Issue - '''Full screen mode''' exhibits CTDs and stutters or micro-stutters === | ||
| + | |||
| + | *Cause: Newer or "high powered" systems seem more prone to exhibit these symptoms. Recall the game was designed for Windows Vista+ and Xbox systems with no more than two CPUs and single monitors at 60 FPS. | ||
| + | |||
| + | : | ||
| + | :*Solution: Try running the game in "windowed mode". This is a built-in game setting (under "Options" when you use the "FalloutNVLauncher.exe" to start) that has been reported to completely eliminate both stutter/micro-stutter and CTDs on some "high powered" systems. | ||
| + | ::If you don't like the appearance in "windowed mode", try installing and using the (2015) mod "[http://www.nexusmods.com/newvegas/mods/59266/? OneTweak for NVSE]" by '''virusek''' instead of the older (2011) "[http://rd.nexusmods.com/newvegas/mods/41381 Fake fullscreen]" mod suggested in Gopher's video, or the slightly newer, more full featured (2013) version called "[http://rd.nexusmods.com/newvegas/mods/42956 Game Companion - Fake FullScreen]". All of these make "windowed mode" look as if "full screen". | ||
| + | ::There is also an "open source" app called "[http://github.com/Codeusa/Borderless-Gaming Borderless Gaming]" which works with virtually any game (including those from Steam). It's free, but confusingly talks about "buying it on Steam"; by which it means if you do choose to buy it ($3.99 USD) the proceeds support it's development. | ||
| + | |||
| + | <span id="Issue: Game in slow motion"></span> | ||
| + | === Issue - Game in slow motion === | ||
| + | |||
| + | The foundation of game performance is to first optimize your system for gaming. The wrong settings can actually hurt performance, and the defaults are very conservative. | ||
| + | |||
| + | *[http://www.nexusmods.com/newvegas/mods/53635/? New Vegas Anti-Crash (NVAC)] | ||
| + | *[http://www.nexusmods.com/newvegas/mods/34832/? New Vegas Stutter Remover (NVSR)] (Win 10 users: See also [[#Issue:_CTD_after_10-20_minutes_of_play_.28post-Win10_2017_FCU.29|Issue: CTD after 10-20 minutes of play (post-Win10 2017 FCU)]]. | ||
| + | *[http://www.tweakguides.com/TGTC.html Complete System customization and optimization for Windows]. | ||
| + | * [https://web.archive.org/web/20161008023921/http://www.tweakguides.com/TGTC.html Complete System customization and optimization for Windows]. | ||
| + | * [https://web.archive.org/web/20161004212522/http://www.tweakguides.com/ATICAT_1.html Tweakguide's ATI Catalyst Guide] (driver optimizations for all games.) | ||
| + | * [https://web.archive.org/web/20160719081231/http://www.geforce.com/whats-new/guides/new-vegas-tweak-guide#1 Tweakguide's nVidia GeForce Guide] (driver optimizations for all games.) | ||
| + | * [https://web.archive.org/web/20161025065631/http://www.tweakguides.com/Fallout3_1.html Tweakguide's General Fallout game guide] (specifically for FO3 and FNV.) | ||
| + | *[http://www.geforce.com/whats-new/guides/new-vegas-tweak-guide#1 Tweakguide's nVidia specific FNV Guide.] | ||
| + | |||
| + | [[File:FNVLauncher OptionsMenu Detail.jpg|thumb|LauncherOptionsDetail Figure]] The "FalloutNVLauncher" "Options" screen has a section labelled "Detail" in the middle of the screen. This has four buttons labelled "Low", "Medium", "High", and "Ultra". (See [[:File:FNVLauncher_OptionsMenu_Detail.jpg|LauncherOptionsDetail Figure]]. {{Thumbnail_enlargement_message}}) These are predefined sets (presets) of specific graphics setting configurations, the details of which can be found in INI files of the same names (e.g. "Low.INI") located in the game root folder. Most of these same settings can individually be adjusted by selecting the "Advanced" button in that section. They are described in the "TweakGuide's General Fallout game guide" article. The Launcher runs DirextX diagnostics to determine video card capabilities in determining which preset to recommend. They DO NOT (as has been suggested elsewhere) have anything to do with image sizes or resolution. | ||
| + | |||
| + | '''Queued''', the author of the NVAC mod, reports in the [https://forums.nexusmods.com/index.php?/topic/1197661-nvac-new-vegas-anti-crash/page-352#entry15646425 NVAC support thread]: | ||
| + | <blockquote> | ||
| + | 'I looked through New Vegas code as I was making that list to determine if they read the setting and then if they actually used the variable set after reading the setting, so I'm fairly confident in the "Does nothing" notes in particular. Aside from INI settings, there is also a crazy amount of Game Settings (set via esp / esm / script / console) that also are never used by the game.' | ||
| + | </blockquote> | ||
| + | :The "list" he mentions was from the tool [http://www.nexusmods.com/newvegas/mods/40442/? New Vegas Configator], which outside of that program must be translated to settings in the INI files as described in "Tweakguide's General Fallout game guide". It follows with '''Queued''''s comments on the values (which are ''not'' recommendations) used by someone having CTDs, given in "("parentheses")" for reference only: | ||
| + | :*Fullscreen (OFF) - No problem. | ||
| + | :*Anisotropic Filtering (8) - No problem. | ||
| + | :*Antialiasing (8x) - No problem, though 8x is ridiculously taxing; traditional MSAA is crazy inefficient and slow. | ||
| + | :*Shadows (ON) - No problem. | ||
| + | :*Shadow Quality (2) - No problem. | ||
| + | :*Shadow Filtering (2) - No problem. | ||
| + | :*Max Shadows in Interiors (12) - No problem. | ||
| + | :*Full Scene Reflections (ON) - Probably fine; I'm not sure which setting this maps to as the Configator made up descriptive names. | ||
| + | :*Water Reflections Width (2048) - No problem, though is Height also set to match? | ||
| + | :*Object fade distance (15) - No problem. | ||
| + | :*Item fade distance (15) - No problem. | ||
| + | :*Actor fade distance (15) - No problem. | ||
| + | :*Tree LOD fade (80000) - Technically no problem, but as far as I'm aware, vanilla New Vegas doesn't use the Tree LOD system and Tree LOD models are part of Object LOD instead. | ||
| + | :*Object LOD fade (100000) - No problem. | ||
| + | :*Land Quality (1.5) - No problem. | ||
| + | :*Threaded Morpher (ON) - Does nothing; the game reads the value but never uses it. | ||
| + | :*Threaded Blood (ON) - Does nothing; the game never even reads this value. | ||
| + | :*Threaded Particles (ON) - Does nothing; the game reads the value but never uses it. | ||
| + | :*Threaded AI (ON) - Possible cause of crashes; use at your own risk. | ||
| + | :*Models Cloned in Background (ON) - Does nothing; the game never even reads this value. | ||
| + | :*Load Files in Background (ON) - Likely safe; however, use at your own risk. | ||
| + | :*Load lip files in background (ON) - Unknown impact; use at your own risk. | ||
| + | :*Havok Threads (7) - Does nothing; the game never even reads this value. | ||
| + | :*Grids loaded (12) - LEAVE THIS AT 5. This needs to be an odd value (5, 7, 9, etc.) and the game has code that only works properly when this is at the default of 5. Turning this up drastically increases memory and processor use. Also, this is probably why you're crashing outdoors. [Larger values may cause scripts to prematurely trigger upon cell loading.] | ||
| + | |||
| + | Added: Note that 'uGridsToLoad=' is directly linked with 'uInterior Cell Buffer=' and 'uExterior Cell Buffer=' values. Best to leave all three alone. | ||
| + | |||
| + | : | ||
| + | :*Pre-Emptively Unload Cells (ON) - Possible cause of crashes; use at your own risk. | ||
| + | :*Unload cells on fast travel (ON) - Possible cause of crashes; use at your own risk. | ||
| + | :*Use hard drive cache (ON) - Unknown impact; use at your own risk. | ||
| + | :*Preload Size Limit (223) - Dumb setting; this is the data buffer for Bink video. | ||
| + | :Others who have looked at the code do not disagree with '''Queued'''. | ||
| + | :As system components vary, only experimentation will tell which values will improve your performance. | ||
| + | |||
| + | *Cause-1: Fallout INI files are configured with wrong (too high) an "iFPS=" setting. | ||
| + | |||
| + | : | ||
| + | :*Solution-1: Set the "FPS" setting to a maximum of "=60". | ||
| + | ::Note that too high an FPS over 60 can cause a "havok physics" problem with objects falling from clipping through geometry. | ||
| + | :::Make backups of the INI files before changing them. | ||
| + | ::*The Fallout INI files have an "iFPSClamp=" setting under the "[General]" section. Do not set this to other than "=0" if you have NVSR "bManageFPS = 1". | ||
| + | ::*New Vegas Stutter Remover (NVSR) "Data\nvse\plugins\NV_Stutter_Remover.ini" has to have "bManageFPS = 1" under the "Master = {" section before the setting "MaximumFPS = 60" under the "FPS_Management = {" section will take effect. Check that the "MinimumFPS" setting is not higher than the maximum; something like "= 20" is noticeable while still playable. If NVSR is managing FPS, do not leave the three Fallout INI files with a setting other than "iFPSClamp=0". | ||
| + | |||
| + | *Cause-2: For some people, the problem is [http://www.nexusmods.com/newvegas/mods/34832/? New Vegas Stutter Remover (NVSR)] "Data\nvse\plugins\NV_Stutter_Remover.ini" has "bManageFPS =" set to something other than 0. | ||
| + | |||
| + | : | ||
| + | :*Solution-2: Edit the "NV_Stutter_Remover.ini" setting to "bManageFPS=0" and have the three Fallout INI files use "iFPSClamp=60" or less. | ||
| + | :: | ||
| + | :::Make backups of the INIs before changing them. | ||
| + | |||
| + | *Cause-3: Many mod scripts running, especially during mod initialization. If specifically in Goodsprings, be aware that the "Weapons.of.the.New.Millenia" "cache cabinet"/"cheat chest" is known to cause this, but only in Goodsprings. | ||
| + | |||
| + | : | ||
| + | :*Solution-3: Review your mods and reduce the number that initialize only in that specific area. | ||
| + | |||
| + | *Cause-4: This seems to be a general problem with the FO3/FNV Gamebryo engine over time. The exact cause has not been pinned down. | ||
| + | |||
| + | : | ||
| + | :*Solution-4: Reboot your computer. This seems to restore things to normal frame rates, at least for a time. | ||
| + | |||
| + | *Cause-5: You are running Windows 10. Win10 is not the best platform for running older, 32-bit games. It flat out says it is incompatible with FO3 for instance. It is easy to demonstrate that even in various "compatibility modes" it is not performing the same as under previous versions. (Though try either "Win7" or "VistaSP2" compatibility mode. Some have reported improvement after the Win10 FCU {aka "Redstone 3"} update by disabling any compatibility mode.) One report went from 10-15 FPS (or less) with Win10 on a high-end desktop box to 30-40 FPS with Win7 on an older laptop. | ||
| + | |||
| + | : | ||
| + | :*Solution-5a: If possible, use a dedicated computer with an older OS such as Win7 for your 32-bit games. | ||
| + | |||
| + | : | ||
| + | :*Solution-5b: For advanced users: If you have a Windows 10 Education, Professional, or Enterprise edition you can use the included '''Win10 Hyper-V system''' and try running the game in a Win7 "virtual machine". A "virtual machine" can get around some OS incompatibilities even though it is running on the same hardware due to the different drivers in use. See [https://msdn.microsoft.com/virtualization/hyperv_on_windows/quick_start/walkthrough_compatibility HyperV on Windows compatibility] for the hardware requirements and a walk-through of the installation process. Note this requires you to have or obtain an ".iso" file of the desired OS install media. (If none of this option makes sense, you probably don't want to mess with it. Otherwise, educate yourself as it is beyond the scope of this wiki.) | ||
| + | |||
| + | *Cause-6: Your hardware can't cope. | ||
| + | |||
| + | : | ||
| + | :*Solution-6: either reduce game settings for texture quality and/or screen resolution to less demanding levels, or invest in better hardware. | ||
| + | :: | ||
| + | ::*Ensure you are using any Graphics card with it's own VRAM instead of your motherboard CPU to display and render your game. This means, if you have both an "addon" graphics card and a "builtin to the motherboard" graphics chip, use the addon card. An "onboard" graphics chip (typically without VRAM in a laptop) has to use "system ram", which is both slower than dedicated video VRAM, but also takes that memory away from what the game can use. This would just be a video driver (or possibly a BIOS selection) configuration change. | ||
| + | ::Specific component upgrades recommended are (in order of effectiveness for the price): | ||
| + | ::*System RAM, | ||
| + | ::*More Video RAM in a faster graphics card, | ||
| + | ::*Faster CPU processor (number of cores is much less important for 32-bit games like FNV; but this option will often require a motherboard and/or power supply upgrade as well, typical making it more expensive than any other options overall), | ||
| + | ::*Faster disk drive. (This is the slowest solution; even an SSD, though that is the best choice for this option, is not really suited to games. It's most effective holding the OS.) | ||
| + | |||
| + | <span id="Issue: Graphics (vanilla game) "glitchy" immediately after exiting Doc Mitchell's"></span> | ||
| + | |||
| + | === Issue - Graphics in vanilla game ''glitchy'' immediately after exiting Doc Mitchells === | ||
| + | |||
| + | Unless the camera is pointed at the sky or your feet, the ground and all other textures disappear. Messages would become "black boxes", the entire screen becomes black and occasionally flash different colors. Just "glitchy". Eventually after a short period of time the game will CTD. | ||
| + | |||
| + | *Cause: You have some incompatible video settings. | ||
| + | |||
| + | : | ||
| + | :*Solution: Re-run the game launcher (FalloutNVLauncher.exe) to re-detect your hardware. Try changing between "HDR" and "Bloom" in the game "Graphics Settings" under the game launcher menu. Note you want your video card adapter settings to be compatible with your game settings. Other common settings that may have been or need to be adjusted can be found the [[#Issue:_ENB_is_not_working|Issue: ENB is not working]] entry. See also the [[#Solutions_to_Graphics_problems|Solutions to Graphics problems]] section for other possible conflicts. | ||
| − | === Issue: Unable to draw weapons, fire, or crouch === | + | <span id="Issue: Lag or "microstutters" even with "New Vegas Stutter Remover" installed (or not)"></span> |
| + | === Issue - Lag or ''microstutters'' even with '''New Vegas Stutter Remover''' installed or not === | ||
| + | |||
| + | All visual stuttering problems are caused by the video stream having to wait for the "art assets" required to render the display. Mostly these are due to the disk drive being orders of magnitude slower than VRAM, with System RAM (e.g. "ENBoost") being in between. | ||
| + | |||
| + | "Microstuttering" is caused by the game engine updating at an unusual refresh rate that does not sync with your monitor's refresh rate. You can try getting NVSE and NVSR to alleviate "microstutter" at the cost of overall frame rate. | ||
| + | |||
| + | Keep in mind that this game was designed for older PC and XBox console systems, and it is now possible for your new "latest and greatest" gaming machine to be faster than it can handle. There are internal design choices that cannot be overcome. The following are "mitigations" that have been found to help some people. | ||
| + | |||
| + | *Cause-1: Companions impose heavy script processing penalties. More than two companions, while possible, will definitely cause lag according to the game developers. The game is unable to tell if a vanilla companion is "actually with you" or merely "befriended" but sitting elsewhere in another cell (such as in the Lucky 38 suite). | ||
| + | |||
| + | : | ||
| + | :*Solution-1: Release ("part ways" from) unused companions to return to where they were recruited. If you are not informed you have lost the Perk granted by that companion, you have not actually "released" them. There are "companion dismissal terminals" found in the game to help with this for companions, even those not currently with you. One is found in the Lucky 38 Casino by the Casino floor elevator and another in front of the Gun Runners HQ shack outside Freeside's East gate. | ||
| + | |||
| + | *Cause-2: Use of NVSR setting "bHookLightCriticalSections=1". | ||
| + | |||
| + | : | ||
| + | :*Solution-2: Disable NVSR hooking Critical Sections ("bHookLightCriticalSections=0)" if you are experiencing heavy stutter or see [[#Issue:_Recent_.28post-Win10_FCU.29_CTDs_after_10-20_minutes_of_play|Issue: Recent (post-Win10 FCU) CTDs after 10-20 minutes of play]]. | ||
| + | |||
| + | *Cause-3: The stutters can come from the game looking for control inputs from the attached game controller device first, then the keyboard/mouse though both are enabled. | ||
| + | |||
| + | : | ||
| + | :*Solution-3: Disconnect the controller if you are not using it. Regardless, in the "C:\Users\<YourAccountName>\Documents\My Games\FalloutNV\FalloutPrefs.INI" file look for "bGamePadRumble=" and ensure it is set to "0". | ||
| + | |||
| + | *Cause-4: Video card settings are not optimized for the game. | ||
| + | |||
| + | : | ||
| + | :*Solution-4a: nVidia - There is a third-party tool called [http://download.orbmu2k.de/download.php?id=51 nVidia Inspector]. (The author's [http://orbmu2k.de/tools/nvidia-inspector-tool#more-244 blog page] is in German, but does not appear to have been recently updated.) There is a [http://www.youtube.com/watch?v=syE55-jEzb8 Increase nVidia GTX performance with nVidia Inspector] video covering the basics of how to use the non-intuitive interface. If you are launching the game from any renamed executable other than the vanilla name (i.e. "FalloutNV.exe", which MO renames to "FalloutMO.exe"), you need to add it to the nVidia profile so it will recognize that name as "the game" and adjust it's performance settings accordingly. | ||
| + | :: | ||
| + | :::The driver profile for FNV/FO3 "Ambient Occlusion" (AO) is reported to be buggy ever since nVidia updated it to HBAO instead of SSAO years ago. You can use '''nVidia Inspector''' to change the AO profile though. The '''Wolfenstien profile''' is reported to work pretty well. | ||
| + | |||
| + | : | ||
| + | :*Solution-4b: There is a later spin-off of '''nVidia Inspector''' called [http://pcgamingwiki.com/wiki/NVIDIA_Profile_Inspector NVIDIA Profile Inspector], which is a tool created for pulling up and editing Application Profile settings within the Nvidia drivers. | ||
| + | |||
| + | : | ||
| + | :*Solution-4c: AMD/ATI - [http://www.amd.com/en-gb/innovations/software-technologies/catalyst AMD Catalyst Control Center] has game settings for CCC as well. While not as full featured as "nVidia Inspector", there is also [http://www.radeonpro.info/2013/04/download-radeonpro-preview-1-1-1-0-13apr2013-with-improved-overdrive-and-sweetfx-1-4-support/ Radeon Pro] which still works well even though development stopped in 2013 when it's author was hired to work with [http://www.radeonpro.info/2014/03/important-announcement-about-radeonpro/ AMD Gaming Evolved's Raptr]. | ||
| + | |||
| + | *Cause-5: Some older video systems may have to pull from the hard drive more often or need more processing room with "high definition" textures. | ||
| + | |||
| + | : | ||
| + | :*Solution-5a: [http://www.auslogics.com/en/software/disk-defrag/ Disk Defrag] (free) your hard drive. All hard drives that are not "solid state devices" (SSDs) require "defragmentation" periodically. This reduces the lag from the physical magnetic "head" movement to locate sections of file scattered the disk platter and increases efficiency. | ||
| + | |||
| + | : | ||
| + | :*Solution-5b: See the '[[#Issue:_Is_ENBoost_for_everyone.3F|Issue: Is ENBoost for everyone? ]]' entry which enables the dynamic use of more system memory (if available) to assist video processing. Some people have found this to help with stutters and lag. | ||
| + | |||
| + | *Cause-6: Some people have reported an improvement upon adjusting some INI settings. | ||
| + | |||
| + | : | ||
| + | :*Solution-6a: In all three INI files, under the "[General]" section set the following values: | ||
| + | ::<pre>bUseThreadedAI=1</pre> | ||
| + | |||
| + | |||
| + | | ||
| + | |||
| + | : | ||
| + | ::and add the line: | ||
| + | ::<pre>iNumHWThreads=</pre> | ||
| + | |||
| + | |||
| + | and set that to however many cores your processor has. Note this added line is not considered a general "performance" tweak (the game does multi-threading by default and the "iNumHWThreads=" setting may restrict it) and is not recommended for everyone as a matter of course. Some people have experienced adverse effects. Use with caution and test the result. When in doubt, start with "2". | ||
| + | |||
| + | : | ||
| + | :*Solution-6b: Some "sounds", such as large explosions, can cause video stuttering as well. (The video, mouse, and audio systems are all interconnected in that they compete for priority of resources at the same high level.) Some have found that adding more vanilla BSA files to the "sEssentialFileCacheList=" list under "[General]" in the INI files makes a difference. For example: | ||
| + | <div class="boilerplate metadata" id="Notice_Box" style="margin:0px 10px 10px 50px; border:1px dashed #DAA520; color: lightgray; background-color:#333333; padding:3px; word-wrap: break-word">sEssentialFileCacheList=Data\Fallout.esm|Data2\Fallout.esm, Data\Music\Special\MainTitle.mp3, Data\Fallout - Sound.bsa|Fallout - Sound.bsa, Data\Fallout - Voices1.bsa|Fallout - Voices1.bsa, Data\Fallout - Meshes.bsa|Data2\Fallout - Meshes.bsa, Data\Fallout - Textures.bsa|Data2\Fallout - Textures.bsa, Data\Fallout - Textures2.bsa | ||
| + | sUnessentialFileCacheList=Data\Music\Dungeon\*.xma, Data\Music\Base\*.mp3, Data\Music\Battle\*.mp3, Data\Music\Explore\*.mp3, Data\Music\Public\*.mp3, Data\Music\Special\*.mp3 | ||
| + | </div> | ||
| + | : | ||
| + | ::and increasing the size of the "Audio cache" under the "[Audio]" section as follows: | ||
| + | <div class="boilerplate metadata" id="Notice_Box" style="margin:0px 10px 10px 50px; border:1px dashed #DAA520; color: lightgray; background-color:#333333; padding:3px; word-wrap: break-word">iAudioCacheSize=4096 | ||
| + | iMaxSizeForCachedSound=512 | ||
| + | </div> | ||
| + | : | ||
| + | ::This basically allows the game to cache much more into memory then it otherwise would, as it seems textures and meshes are excluded from memory, as well as large sound effects, resulting in a momentary freeze whenever they are loaded. May not stop a slight lag on the first explosion, but should greatly reduce any lag on explosions shortly after that. Just bear in mind that memory given to "cache" is not available for other uses by the game engine. There is always a "trade-off". | ||
| + | |||
| + | *Cause-7: Some people has reported stuttering while standing in place and turning the camera. | ||
| + | |||
| + | : | ||
| + | :*Solution-7: Try disabling Windows [http://www.technipages.com/windows-enable-disable-superfetch Superfetch] and [http://helpdeskgeek.com/windows-7/windows-7-file-search-indexing-options/ File search indexing] features (available since Win7) to see if it improves the situation. (See [http://www.osnews.com/story/21471/SuperFetch_How_it_Works_Myths Superfetch: How it Works & Myths] for more detail.) Note that Windows system updates may restore these settings without notice as something MS thinks should be enabled. | ||
| + | |||
| + | *Cause-8: Writing files to disk is the slowest thing the game does. Whether these are "save game files" or "logs", you want to minimize the number of times these get written. | ||
| + | |||
| + | : | ||
| + | :*Solution-8a: Disable game logging unless you have an immediate need for it. | ||
| + | |||
| + | : | ||
| + | :*Solution-8b: If you are using CASM or some similar "auto-save" mod to manage your save game files (recommended), try increasing the "time between saves" set in the "save frequency"; and reducing the number of occasions it saves to the minimum (e.g. disable most "Autosave Events" in CASM) and see how that impacts the game seeming to freeze temporarily. | ||
| + | |||
| + | : | ||
| + | :*Solution-8c: The one modern thing the game does benefit from is being put on an SSD. Load times aren't improved that much; but stutter is greatly reduced, and the pause when the game autosaves with CASM is gone. | ||
| + | |||
| + | * Cause-9: See also [[#Issue_-_MOD_IMPACT_-_FPS_drop_or_stutter_on_semi-auto_hits|Issue - MOD IMPACT - FPS drop or stutter on semi-auto hits]]. | ||
| + | |||
| + | * Cause-10: There is a known game engine bug when firing a weapon that uses multiple projectiles (e.g. "shotguns"). | ||
| + | :* Solution-10: The mod [http://www.nexusmods.com/newvegas/mods/58277 JIP LN NVSE Plugin] has a solution for this: "bMultiProjectileFix - Fixes an engine bug where using weapons which fire multiple projectiles per shot could often cause brief lags and FPS drops when hitting live targets." Reportedly, it'll still lag if the number of pellets the shotgun fires is large, but vanilla numbers should be fine. | ||
| + | |||
| + | <span id="Issue: MouseSensitivty"></span> | ||
| + | === Issue - Mouse sensitivity reduced === | ||
| + | Symptoms: Mouse sensitivity inside any interior is about half that of the value in exteriors. | ||
| + | |||
| + | * Cause-1: "[https://geckwiki.com/index.php?title=ImageSpace Image Space]" systems can configure the base display effects for a cell or worldspace. This would allow designers to drive post-processed "film" effects through the editor, giving much greater control and more of a "film" feel. Some of the effects include blurring, coloring, and HDR/Bloom effects. The ImageSpace form can be opened from the [https://geckwiki.com/index.php/World_Spaces World Spaces] menu. Mods can make edits which damage how these work. | ||
| + | :* Solution-1: The mod "[https://www.nexusmods.com/newvegas/mods/42847/ PWV - Project Wasteland Vision]" makes some edits to "[https://geckwiki.com/index.php?title=ImageSpace_Modifier ImageSpace Modifier (IMOD)]" records for explosions, plasma, and scope FX. Removing those edits with [http://www.nexusmods.com/newvegas/mods/34703/? FNVedit] resolved the problem for the reporting user. | ||
| + | |||
| + | * Cause-2: Mouse driver, especially some brand "additional features" such as accelerators. | ||
| + | :* Solution-2a: Check the vendor brand support forums to see if there are any similar reports. | ||
| + | :* Solution-2b: Start troubleshooting by disabling any optional mouse driver features, test, and then add desired features one at a time. | ||
| + | :* Solution-2c: If you have more than one mouse available, try swapping out brands. | ||
| + | :* Solution-2d: Try an older version of the driver as well, as later versions often drop support/testing for older games. | ||
| + | :* Solution-2e: There are hidden interactions between the Audio, Mouse, and Video drivers. If there has been a recent update to one of these, test by rolling it back to the previous functional version to see if there is an improvement. | ||
| + | |||
| + | <span id="Issue: NPCs and Creatures are moving at "hyper-speed""></span> | ||
| + | |||
| + | === Issue - NPCs and Creatures are moving at ''hyper-speed'' === | ||
| + | |||
| + | See video [https://youtu.be/iV1V4P1uMjM FNV hypersped NPCs] for an example. The NPCs in the background are following their AI routines at a greatly accellerated speed or twitching while standing idle. | ||
| + | |||
| + | *Cause: There is an '''actor value''' called "speedmult" that does pretty much as the name implies; it's a multiplier for player and NPC movement speed. The default value is 100. In fact, its rare to see any humanoid with a speedmult greater than 100. So ranges from 700-27000 are ridiculous, but a buggy script can have this result. Once such a bugged script gets into a "save game" it (or it's results) may be impossible to remove, so always know which save you can revert to before adding a new mod to your "load order". Just one of the reasons why any mod (even updates) needs to be tested prior to adding to your saved game. | ||
| + | |||
| + | : | ||
| + | :*Solution: Isolate the mod causing the problem and report it to the author with detailed information as to how to replicate it so they can fix it. | ||
| + | ::You can test by selecting any NPC exhibiting this behavior in the console (< ~ > key and click on the NPC) and entering "getav speedmult" to see the current value and "setav speedmult 100", which should set the speed back to normal. (The "getavinfo" version of the command gets the current value of a '''skill/stat''' like "speedmult" as well as any modifiers (but not their source) that are being applied at the moment.) | ||
| + | ::However, you need to get the NPC to "reload" before this reset value will take effect. One way is to use the console "kill" command after selecting the target NPC, and then "resurrect" them. They should then behave at normal speed for them. (Note the console "kill" command will blame your character for their death.) Do not target "leveled list" generic NPCs such as those in a "faction" like "Raiders", "NCR", "Legion", etc.. The "resurrect" command respawns a random one from the "leveled list". You can use "resurrect 1" to get the same one you targeted to "stand up" as they are at the moment (i.e. naked if you stripped them of gear) as if they had been unconscious. "Named" NPCs are the safest targets for such tests. | ||
| + | |||
| + | *Known mods with the problem: | ||
| + | |||
| + | : | ||
| + | :*The "JIP LN" version (contributed by someone else) of [http://www.nexusmods.com/newvegas/mods/63348/? Awesome Crippling Effects] mod by '''PsychorGames'''. The main "non NVSE/JIP LN" file version is confirmed to not have the problem. It seems the problem can persist in save games even after reverting to the "vanilla" (non NVSE) version until the above "setav speedmult 100" solution is applied. | ||
| + | ::This mod has unresolved reported bugs which (as of v1.7) affect: | ||
| + | ::*'''Yes Man''' Quest: Change in Management - Because of the crippling effects, '''Yes Man''' dies when installing himself to the Mr. House terminal, breaking the quest, meaning that the quest doesn't progress and the Mr. House terminal cannot be interacted with. | ||
| + | ::*Securitrons in The Strip and/or Lucky38 suddenly become hostile for unknown reasons. | ||
| + | ::*Companions with crippled limbs stop following, or can't get up and the challenge "Knocked up" would get completed over and over again. | ||
| + | ::There are reports that removal of the mod resolved these additional bugs. | ||
| + | ::Version 1.8 of this mod has now been released to address these issues. Confirmation is needed. Check the "Comments" and "Bugs" tabs on the mod download page. | ||
| + | |||
| + | <span id="Issue: SOUND - Ambient music skips/jitters/hiccups/pops/stutters"></span> | ||
| + | === Issue - SOUND - Ambient music ''skips-jitters-hiccups-pops-stutters'' === | ||
| + | |||
| + | The ambient music is choppy in both vanilla and modded games. This doesn't happen to the radio music during normal gameplay, but does during loading screens or transitioning between tracks (i.e. going from ambient "explore" music to "combat", or entering new locations with different music). | ||
| + | |||
| + | *Cause: Old advice for FO3 was to uninstall '''"ffdshow"''', a codec mainly used for decoding of video in the MPEG-4 ASP (e.g. encoded with DivX or Xvid) and H.264/MPEG-4 AVC video formats, but it supports numerous other video and audio formats as well. (The user configures '''ffdshow''''s audio and video settings by launching the '''"ffdshow video decoder configuration program"''' independently of any media player.) Alternatively one could try to add FO3 to it's "exception" list. | ||
| + | |||
| + | : | ||
| + | :*Solution-1: FNV appears to require at least some of the codec features provided by '''"ffdshow"'''. If needed it can be re-installed as part of the [http://www.cccp-project.net/ CCCP codec pack] or directly from the [http://ffdshow-tryout.sourceforge.net/ ffdshow tryouts] website. (Alternative codecs may also provide the needed features.) Be sure to install the '''32-bit''' version, as that is what the game needs. Some have reported that only the '''"CCCP codec"''' (without '''"ffdshow"''') is needed. Install the same as any other '''Windows''' program. | ||
| + | :: | ||
| + | ::*Remove '''falloutnv.exe''' and '''falloutnv4gb.exe''' programs from the list of '''"ffdshow"''' exceptions. | ||
| + | |||
| + | : | ||
| + | :*Solution-2: Edit the "Users" INI files under the "[Audio]" section, and change the following settings as indicated: | ||
| + | <div class="boilerplate metadata" id="Notice_Box" style="margin:0px 10px 10px 50px; border:1px dashed #DAA520; color: lightgray; background-color:#424242; padding:3px; word-wrap: break-word">iAudioCacheSize=2048 to "=8192" | ||
| + | iMaxSizeForCachedSound=256 to "=1024"<br/> bMultiThreadAudio=0 to "=1" | ||
| + | </div> | ||
| + | : | ||
| + | :*Solution-3: De-fragment your disk drive and reduce background programs to the essential minimum. | ||
| + | |||
| + | : | ||
| + | :*Solution-4: The [http://www.nexusmods.com/newvegas/mods/61265 OGG Vorbis Libraries] have an update mod which has solved a stutter occurring every 15 seconds for some users. (These libraries are used by the vanilla game.) The '''Vorbis OGG Library''' is a set of DLL files which you have to manually install/copy into the game root folder (where the "FalloutNV.exe" file is found). Mod managers don't recognize or place them properly. They will need to '''''overwrite''''' the existing files. '''GamerPoets''' has a "[http://www.youtube.com/watch?v=KkVWoccWoXY Performance & Stability Guide]" YouTube video which covers this library at the 3:07 minute mark. (Note the different section timemarks are displayed at the top of the screen.) The mod [http://www.nexusmods.com/newvegas/mods/65854 FNV BSA Decompressor] transcodes all sound '''fx''' in ".*OGG" format to ".WAV" so they function in the game. It's installation is described at the 10:12 minute mark of '''GamerPoets''' previously linked "Performance & Stability" video. | ||
| + | |||
| + | : | ||
| + | :*Solution-5: You may need to use a '''Windows''' tool such as [http://docs.microsoft.com/en-us/sysinternals/downloads/process-explorer Process Explorer] to track down which app or service is grabbing cycles. | ||
| + | |||
| + | <span id="Issue: SOUND - Combat causes audio desync"></span> | ||
| + | |||
| + | === Issue - SOUND - Combat causes audio desync === | ||
| + | Upon entering combat: an audio desync occurs for the duration of the battle. This desync is a long (5+ second) delay in audio effects, and during this delay cannot switch weapons using hotkeys. Reported as an issue running "Tale of Two Wastelands". | ||
| + | |||
| + | * Cause: the AVAST anti-virus program specifically has been identified as causing this problem, even when "shields" are turned off and "falloutnv.exe" is excluded. | ||
| + | :* Solution: Disable or uninstall AVAST anti-virus completely. | ||
| + | :: If you play the game in "offline mode", you shouldn't need to have any anti-virus or anti-malware service running. There are programs (search the web on "game boosters") which help you shut down services which are not essential while playing a game. | ||
| + | |||
| + | <span id="Issue: SOUND - Combat causes infinite loop sound"></span> | ||
| + | |||
| + | === Issue - SOUND - Combat causes infinite loop sound === | ||
| + | |||
| + | A "weird" AmbientFX (special effect) noise appears during combat (freqently by firing a Laser weapon) and won't terminate unless you either quit the game or reload a save game.<br/> (Thanks to users '''harlandgg''' for discovering the cause, and '''HadToRegister''' for reporting it to the FNV Forum so it could be included here.) | ||
| + | |||
| + | *Cause: Following instructions for installing the mod [http://www.nexusmods.com/newvegas/mods/64807? Vanilla Restored Audio Patch] causes the folder "\Data\Sound\fx\amb\steampuddle" to be installed/restored. The files in this folder do not appear to have set "loop end" points, causing them to play infinitely. This problem is common to EVE, YUP and UPP (Unofficial Patch Plus) users as they will flag ash/goo piles and impact sounds with ''AMBSteamPuddleLP''. | ||
| + | |||
| + | : | ||
| + | :*Solution: Delete the entire "\Data\Sound\fx\amb\steampuddle" folder. (The rest of the mod works fine.) | ||
| + | |||
| + | <span id="Issue: SOUND - No music or sound"></span> | ||
| + | === Issue - SOUND - No music or sound === | ||
| + | |||
| + | (See also [[#Issue:_Radio_station_music_doesn.27t_play|Issue: SOUND - Radio station music doesn't play]] for that specific problem.) | ||
| + | |||
| + | *Cause-1: If this problem occurs when you first start the game, then it's likely there may be an audio "codec" conflict between what you have installed under Windows and what the game in question requires, or a necessary "codec" is missing. (A "codec" is a "DirectShow filter", and there is a chain of them in the registry establishing which order to try them in to determine which to use. "DirectShow" is a component of the DirectX (DX#) API system used by games running under Windows.) | ||
| + | |||
| + | : | ||
| + | :*Solution-1a: Win10 has DirectX12 drivers, but the DX9 driver the game is expecting is not being found. See "Cause-1" under [[#Issue:_Vanilla_game_Hangs_on_startup|Issue: Vanilla game Hangs on startup]]. | ||
| + | |||
| + | : | ||
| + | :*Solution-1b: Some have found that installing a third-party "DirectX: DirectShow codec" resolves the problem. There are a number available on the internet. The [http://www.codecguide.com/ K-Lite Codec Pack] is often mentioned especially for older versions of Windows. Be sure to get the 32-bit version, as FNV is using 32-bit libraries. | ||
| + | |||
| + | *Cause-2: If you are suddenly having a "slowdown" or lag; or a lack of sound; or problems getting NVSE to load, or really anything new unexpectedly, please see the 'Issue: NVSE - fails to load after update KB4058043 to Win10 FCU (v1709)' entry in the wiki "[http://wiki.nexusmods.com/index.php/Fallout_NV_Mod_Conflict_Troubleshooting Fallout NV Mod Conflict Troubleshooting]" guide. This may be due to a Windows Update for the "Meltdown and Spectre Vulnerabilities". | ||
| + | |||
| + | :See also the related [[#Issue:_Incomplete_save_game_load|Issue: Incomplete save game load]]. | ||
| + | :*Solution-2a: Not all "codecs" are created equal, and sometimes Windows versions and specific games are very particular. Codec uninstall routines often fail to completely remove all signs from the registry, and the residue can create problems. The mod [http://www.nexusmods.com/newvegas/mods/35868/? DirectShow Filter _Codec_ Reset] by '''Blade FireLight''' is designed to "reset" the chain of "codecs" to the defaults used by Windows 7. However, it may not work with later versions of Windows. [http://www.howtogeek.com/howto/windows-vista/using-windows-vista-system-restore/ HEED THE WARNING ABOUT CREATING A 'SYSTEM RESTORE POINT' FIRST!] Anything affecting the registry has the potential to turn your computer into "a brick", unable to do anything but sit there. A power outage can happen to anyone at any time. | ||
| + | :: | ||
| + | ::*Do not, I repeat, DO NOT follow the advice you can find on the internet about installing AC3 encoder and configuring it… two of us in the forum lost *all* sounds because of that. | ||
| + | |||
| + | : | ||
| + | :*Solution-2b: You might be able to resolve the problem with another tool designed to "reset" your codecs back to Windows defaults. There are a number of free tools avaialbe to deal with this listed on [http://www.raymond.cc/blog/fix-video-playback-problems-by-removing-bad-codecs/ this web page] | ||
| + | |||
| + | *Cause-3: If your problem occurs after you attempted to uninstall something and no solution you've tried has worked, you may need more drastic measures. | ||
| + | |||
| + | : | ||
| + | :*Solution-3: Either return to a [http://www.howtogeek.com/howto/windows-vista/using-windows-vista-system-restore/ Windows system restore point] prior to your installation of the problematic software, or use MS's own [http://www.microsoft.com/en-us/download/details.aspx?id=49975 Use Reset to restore your Windows 10 PC]. | ||
| + | |||
| + | <span id="Issue: SOUND - Radio station music doesn't play"></span> | ||
| + | === Issue - SOUND - Radio station music does not play === | ||
| + | |||
| + | Everything (ambient sound, footsteps, dialogue, radio announcer) is working fine except the radio music is missing.<br/> (See instead [[#Issue:_No_music_or_sound|Issue: SOUND - No music or sound]] for the more general problem.) | ||
| + | |||
| + | *Cause-1: There is an audio "codec" conflict between what you have installed under Windows and what the music in question requires, or a necessary "codec" is missing. (A "codec" is a "DirectShow filter", and there is a chain of them in the registry establishing which order to try them in to determine which to use. "DirectShow" is a component of the DirectX (DX#) API system used by games running under Windows.) | ||
| + | |||
| + | : | ||
| + | :*Solution-1a: Win10 has DirectX12 drivers, but the DX9 driver the game is expecting is not being found. See "Cause-1" under [[#Issue:_Vanilla_game_Hangs_on_startup|Issue: Vanilla game Hangs on startup]]. | ||
| + | |||
| + | : | ||
| + | :*Solution-1b: Some have found that installing a third-party "DirectX: DirectShow" "codec" resolves the problem. There are a number available on the internet. The [http://www.codecguide.com/ K-Lite Codec Pack] is often mentioned especially for older versions of Windows. Be sure to get the 32-bit version, as FNV is using 32-bit libraries. | ||
| + | |||
| + | : | ||
| + | :*Solution-1c: Not all "codecs" are created equal, and sometimes Windows versions and specific games are very particular. Codec uninstall routines often fail to completely remove all signs from the registry, and the residue can create problems. The mod [http://www.nexusmods.com/newvegas/mods/35868/? DirectShow Filter _Codec_ Reset] by '''Blade FireLight''' is designed to "reset" the chain of "codecs" to the defaults used by Windows 7. [http://www.howtogeek.com/howto/windows-vista/using-windows-vista-system-restore/ HEED THE WARNING ABOUT CREATING A 'SYSTEM RESTORE POINT' FIRST!] Anything affecting the registry has the potential to turn your computer into "a brick", unable to do anything but sit there. A power outage can happen to anyone at any time. | ||
| + | :: | ||
| + | ::*Do not, I repeat, DO NOT follow the advice you can find on the internet about installing AC3 encoder and configuring it… two of us in the forum lost *all* sounds because of that. | ||
| + | |||
| + | : | ||
| + | :*Solution-1d: Sometimes the music is there, but the volume (even with the settings to max) is so low you can barely tell it's there. This is likely a "codec" problem. See the earlier possible "codec" solutions. | ||
| + | :: | ||
| + | ::*Alternatively, [http://www.youtube.com/watch?v=vpQShdafsFA Tutorial - Fallout New Vegas Radio Fix] video by '''KitsuneJimmy''' explains that in the game "Data\Sound\songs\radionv" folder, the MP3 files are recorded at 72 decibels, while normally commercial music is recorded at 89 decibels. The tool [http://mp3gain.sourceforge.net/ MP3Gain] analyzes and adjusts MP3 files so that they have the same target volume (89 decibels). It can process the entire folder at once; but it's always a good idea to back it up first in case of problems. The first time you load the game after doing so, it may take longer than usual to get to the main menu. | ||
| + | |||
| + | : | ||
| + | :*Solution-1e: The game doesn't like USB speakers/headsets and non-stereo setups. It is always worth a try to set your audio setup to 2.0 stereo in the Windows Control Panel. | ||
| + | |||
| + | : | ||
| + | :*Solution-1f: Sometimes there is a technical difference between the jacks on the front and back panels of the computer chassis. Be sure to test using both sets. | ||
| + | |||
| + | : | ||
| + | :*Solution-1g: Possibly your issue is speaker related. For example with 7.1 sound speakers: after testing them in control panel, found 2 of them werent working so set it to 5.1. Then they worked. | ||
| + | |||
| + | : | ||
| + | :*Solution-1h: A known problem with the audio in this game is if you have that Razer driver installed that lets you hear surround sound on the headphones. Since it is an incompatibility issue, you cannot use both: either remove the Razer drivers entirely and use the headphone as stereo 2.0, or get another speaker/headphone that plugs into the standard audio-out jack. | ||
| + | |||
| + | : | ||
| + | :*Solution-1i: Windows Control Panel "Realtek HD Audio Manager" control was set for 5.1 sound properly, except that there was a "speaker fill" setting that was unchecked and this little setting apparently turns the stereo-only signal into a 5.1 surround signal. | ||
| + | |||
| + | : | ||
| + | :*Solution-1j: The last resort is trying to reinstall the drivers of your sound card. Either the latest one or the one that it came with on cd or from the manufacturer's site. This will put the default codec up top in the Windows preferred codecs list. | ||
| + | ::Locate the sound card or integrated audio device driver for your version of Windows on the vendor site and re-install. (These are often different from those available from "Microsoft Updates".) [http://www.howtogeek.com/howto/windows-vista/using-windows-vista-system-restore/ Create a Windows System Restore Point] first! | ||
| + | |||
| + | *Cause-2: By default the game only plays radio music while the Mojave Wasteland is enabled/loaded. When you load a DLC worldspace, the Mojave worldspace (and thus the music) is disabled. Sometimes it is not re-enabled upon returning to the Wasteland. This is usually confined to the save game made at that time, but it might be an unknown vanilla game bug or a mod conflict in your particular "load order", and can be carried forward thereafter. People have performed a "speed-run" through the same DLC from a save game made prior to entering it the first time and not had the problem occur upon exit. Others have had it happen only on subsequent runs through the DLC. It's a fairly rare problem. | ||
| + | |||
| + | : | ||
| + | :*Solution-2a: You can use nearly any script command in the console. The difference is mainly that you'll need to use the numerical '''Reference-ID''' (next to the text '''Editor-ID''' or '''Base-ID''' in wiki tables). On that note, you can use these commands in-game on any reference if you have the correct ID it is expecting. | ||
| + | ::(Here's a good comprehensive reference for console commands: [http://fallout.gamepedia.com/Gamebryo_and_Creation_console_commands_(all) Gamebryo and Creation console commands (all)]. Even though a command is listed, that doesn't guarantee full functionality. Best thing to do is to test it.) | ||
| + | ::Fortunately, for every actor or object in the vanilla game, including the DLCs, these numbers are available on all the Fallout wiki sites, like Wikia's Nukapedia or Gamepedia's The Vault for example. But, unfortunately, NOT for the Radio Stations, which use Talking Activators (form type "TACT"). You will need to know their "common name", which you can look up by their "Editor-ID" in [http://www.nexusmods.com/newvegas/mods/34703/? FNVedit] under "Name" field. Then in the game console, enter the command: | ||
| + | <div class="boilerplate metadata" id="Warning_Notice" style="margin:0px 10px 10px 50px; border:1px dashed #DAA520; color: lightgray; background-color:#424242; padding:3px; white-space: pre-wrap; white-space: -moz-pre-wrap; white-space: -pre-wrap; white-space: -o-pre-wrap; word-wrap: break-word">save <SomeFileName> 1</div> | ||
| + | : | ||
| + | ::This will create a text "dump file" '''<SomeFileName>.fos.txt''' in your "My Games\FalloutNV\Saves" folder. This file is a list of various information (including Ref-IDs) currently in your loaded save game. (It's not documented what other parameters than "1" will produce.) Now search that file for the "common name" of the radio station you want. (Check the type of entry. You don't want quest or script references.) The first column entry is the "Ref-ID" of that station. Make a note of it. | ||
| + | ::The Common Name "Mojave Music Radio" has Editor-ID "vCountryRadio" and a Base-ID of 0016B46F, but does not have a location marker as it is enabled by script automatically when you leave Doc Mitchell's house at the beginning of the game. At least in my "dumpfile" it did not appear as a Ref-ID. | ||
| + | <div class="boilerplate metadata" id="Warning_Notice" style="margin:0px 10px 10px 50px; border:1px dashed #DAA520; color: lightgray; background-color:#424242; padding:3px; white-space: pre-wrap; white-space: -moz-pre-wrap; white-space: -pre-wrap; white-space: -o-pre-wrap; word-wrap: break-word">Editor-ID (Ref-ID): | ||
| + | Radio New Vegas (0014DF03) Black Mountain Radio (000E6188) Sierra Madre Broadcast (010062B4) Happy Trails Expedition Broadcast (0200E74A) | ||
| + | </div> | ||
| + | : | ||
| + | ::There's the command [http://geckwiki.com/index.php/GetBroadcastState GetBroadcastState] to make sure that it's not broadcasting. And then there's [http://geckwiki.com/index.php/GetDisabled GetDisabled] to confirm it's not a disabled reference. Then you can try [http://geckwiki.com/index.php/SetBroadcastState SetBroadcastState] from the console; as well as disabling and then enabling the radios' Talking Activator references. You can try [http://geckwiki.com/index.php/MoveTo Player.MoveTo <stationRef>] to have a look at the "station" as well but many are buried inside terrain features such as mountains. | ||
| + | ::Examples: | ||
| + | <div class="boilerplate metadata" id="Warning_Notice" style="margin:0px 10px 10px 50px; border:1px dashed #DAA520; color: lightgray; background-color:#424242; padding:3px; white-space: pre-wrap; white-space: -moz-pre-wrap; white-space: -pre-wrap; white-space: -o-pre-wrap; word-wrap: break-word">prid 0014DF03 ; sets the following command to apply to the Ref-ID of 'Radio New Vegas'. | ||
| + | GetBroadcastState ; returns "0" if OFF (static); "1" if broadcasting OR "0014DF03".GetDisabled ; returns "1" if disabled; otherwise "0" for Ref-ID of 'Radio New Vegas' "0014DF03".SetBroadcastState 1 ; "0" turns OFF; "1" turns ON continuous broadcast. | ||
| + | </div> | ||
| + | : | ||
| + | ::Note that range considerations still apply. You won't pick up '''Black Mountain Radio''' if you aren't near it. | ||
| + | ::The above are probably all you will need. But for completeness sake, here is the information on the '''JIP LN NVSE Plugin''' ''music'' functions: (parameter in brackets is [optional]). | ||
| + | |||
| + | : | ||
| + | ::Note the "ambient or atmospheric music" is dependent upon the current cell and is separate and distinct from the radio "songs". They are controlled independently. These are '''JIP NVSE''' addon functions. As such they require '''JIP LN NVSE''' to be installed, and are intended to be used in scripts. Their use as console commands has not been verified. | ||
| + | |||
| + | : | ||
| + | ::"(musicState:int) IsMusicPlaying [musicType:form]". Returns the playback state of the game's current background (ambience) music: | ||
| + | ::*0 Not playing | ||
| + | ::*1 Paused | ||
| + | ::*2 Playing | ||
| + | ::The ''musicType'' argument may be either a Music Type form, a Media Location Controller form, or it may be entirely omitted. Omitted paraemter returns currently playing music (if any). | ||
| + | ::Examples: | ||
| + | <div class="boilerplate metadata" id="Warning_Notice" style="margin:0px 10px 10px 50px; border:1px dashed #DAA520; color: lightgray; background-color:#424242; padding:3px; white-space: pre-wrap; white-space: -moz-pre-wrap; white-space: -pre-wrap; white-space: -o-pre-wrap; word-wrap: break-word">set iMusicState to IsMusicPlaying | ||
| + | printc "Current Music state is %g" iMusicState | ||
| + | </div> | ||
| + | : | ||
| + | ::"SetMusicState musicState:int{0, 1, 2}". Sets the playback state of the game's current background music: | ||
| + | ::*0 Stop Playback | ||
| + | ::*1 Pause Playback | ||
| + | ::*2 Resume Playback | ||
| + | ::Note: The Stop Playback state will stop music played by [http://geckwiki.com/index.php/PlayMusic PlayMusic], otherwise it will replay the current music from the beginning. | ||
| + | |||
| + | : | ||
| + | ::Example: | ||
| + | ::*"SetMusicState 2" ; (resume Playback.) | ||
| + | |||
| + | | ||
| + | |||
| + | : | ||
| + | :*Solution-2b: Failing the use of Ref-IDs and console commands, there is a mod [http://www.nexusmods.com/newvegas/mods/62555 Radio New Vegas Everywhere] uploaded on the Nexus that keeps Radio New Vegas enabled always (as long as the Player is enabled), so you can try downloading that. The mod [http://www.nexusmods.com/newvegas/mods/62551/? Music Pack for Radio NV - ver 1.3] by the same author adds 250 tracks (nearly every song in the game) to RNV. | ||
| + | |||
| + | : | ||
| + | :*Solution-2c: [http://geckwiki.com/index.php/FadeSFX FadeSFX] disabled all the sounds except the music. This is useful when showing Bink Video files. FadeSFX is reversable, it appears, by simply [http://geckwiki.com/index.php/PlayBink playing a Bink video file]. As soon as the video ends, sound is restored. As far as can be told, it is still irreversible without playing a video. | ||
| + | ::The Bink video has to be on disk and not in a BSA. The only one on disk by default is "Data\Video\FNVIntro.bik". So try the console command: 'playbink "FNVIntro.bik" 1 1 1 1'. (The double-quotes around the ".bik" filename are required.) You can use the <ESC> key to interrupt the video, which should restore your music if "FadeSFX" was what disabled it. | ||
| + | |||
| + | <span id="Issue: System Network configuration"></span> | ||
| + | |||
| + | === Issue - System Network configuration === | ||
| + | |||
| + | Unless you are running a LAN, there are some default configuration settings you can change to improve your Internet download performance and reduce system memory use. It may also reduce incidents of CTDs. | ||
| + | |||
| + | *Cause: Anything that searches for system updates, or all the computers in a home or business network; or tries to determine the Internet Bandwidth while online: all use RAM to run as "services" in the background. When you are running your game in "Offline" mode, you don't need any of those functions running at all. Most of the time you only need them when the computer boots up and not again until something changes. | ||
| + | |||
| + | : | ||
| + | :*Solution: Read the following carefully. Not all will apply to your situation. Be prepared to revert to a known good configuration. YOU have to know what that configuration is. The system does not maintain "save files" for device configurations. | ||
| + | :: | ||
| + | ::*Open the "Network and Sharing Center/Internet" Control Panel applet. | ||
| + | ::*"< Left-Click >" on the "Change adapter settings" option in the left hand edge. | ||
| + | ::*"< Right-click >" on the "Ethernet" adapter icon, and select "Properties". (This will require you to enter an "Administrator" password to proceed.) | ||
| + | ::*You should see a "Networking" tab which lists various "protocols" in the large white box under the identification of your network adapter model. Those with a "Check" in the box are "enabled". Any that are listed are "installed". | ||
| + | ::: | ||
| + | :::*"[http://support.microsoft.com/en-us/help/322267/removing-client-for-microsoft-networks-removes-other-services Client for Microsoft Networks]". This protocol is intended for a "home" or "small business" Local Area Network (LAN) that cannot be seen across the Internet. It is actually the '''Workstation''' service. If you remove this service, the '''Netlogon''' and '''RPC Locator''' services are also removed. Unless you have such a setup, it is not of use to you, so disable it by unchecking the box. | ||
| + | <div class="boilerplate metadata" id="Notice_Box" style="margin:0px 10px 10px 90px; border:1px dashed #DAA520; color: red; background-color:#ffffffff; padding:3px; word-wrap: break-word">Note that if you have your own router (or WiFi connection) between your computer and your ISP modem, you have a "home LAN". Disabling this protocol could cause you to lose your Internet connection immediately. Test!</div> | ||
| + | : | ||
| + | :: | ||
| + | ::: | ||
| + | :::*"[http://blogs.technet.microsoft.com/windows_vpc/2009/12/06/networking-in-windows-virtual-pc/ Virtual PC Network Filter Driver]" is only of use if you run a "Virtual PC with networking". The "Virtual PC" is not available at all on the "Home Edition" of any Windows verson. Unless you have a need, disable it. | ||
| + | :::*"[http://answers.microsoft.com/en-us/windows/forum/windows8_1-performance/qos-packet-scheduler-bug/5793456c-a5be-48de-abd8-839d9fcbf452 QoS Packet Scheduler]" is installed by default for Local Area Networks (LAN). It's purpose is to prioritize particular types of application traffic (e.g. "Voice over Internet Protocol" ('''VoIP''')) where having a certain amount of bandwidth is crucial. If you do not need to prioritize network traffic and its works fine without '''QoS packet scheduler''' you may choose to keep it disabled. Testing to see it's effects is recommended. | ||
| + | :::*"[http://support.microsoft.com/en-us/help/199346/disable-file-and-printer-sharing-for-additional-security File and Printer Sharing for Microsoft Networks]" works in conjunction with the "Client for Microsoft Networks" protocol. Again it is of use only with a "home" or "business" LAN and it does require the "Client for Microsoft Networks" protocol to be installed and active. Even then, it can be disabled if you don't need to directly access files and printers between different devices in the network. Microsoft advises unbinding it from the '''TCP/IP''' protocols if possible and binding it only to a LAN protocol such as "Client for Microsoft Networks" for security reasons. See the linked article. | ||
| + | :::*"[http://en.wikipedia.org/wiki/Link_Layer_Topology_Discovery Link-Layer Topology Discovery]" has two protocols: | ||
| + | :::: | ||
| + | ::::*"Mapper I/O Driver" | ||
| + | ::::*"Responder". | ||
| + | ::::"Link-Layer Topology Discovery" is used by Microsoft's "Network Map" feature to display a graphical representation of the local area network (LAN) or wireless LAN (WLAN), to which the computer is connected. It operates strictly on a given local network segment. It cannot discover devices across routers, an operation which would require Internet Protocol level routing. Unless your LAN needs it, disable both protocols. | ||
| + | |||
| + | <span id="Issue: TTW Performance Guide abstract"></span> | ||
| + | === Issue - TTW Performance Guide abstract === | ||
| + | |||
| + | From the [http://taleoftwowastelands.com/viewtopic.php?t=6050 TTW Performance guide] thread, and updated from '''GamerPoets'''' latest revised [http://www.youtube.com/watch?v=sJOrDhghr60 Fallout New Vegas | FPS & Stability (definitive guide)] YouTube video. | ||
| + | |||
| + | <span style="margin:0px 10px 10px 10px; border:1px solid #00C600; color: green; background-color:#fff5f5; padding:3px; word-wrap: break-word">Note: [http://taleoftwowastelands.com/viewtopic.php?f=48&p=59475#p59475 Tale of Two Wastelands (TTW)] rewrite/update from v2.9.4b to v3.2 has been released as of 10 Nov 2018. It is only available on the TTW site.</span> | ||
| + | |||
| + | For those not familiar with TTW, it is a conversion of FO3 (purchased separately) to run on the FNV game engine. You can effectively and seamlessly play the FO3 (East Coast campaign) storyline through into the FNV (Mojave Desert campaign) with the same character. [http://www.nexusmods.com/newvegas/mods/45138 Fallout New California (FNC)] conceptually is a separate campaign (located in California) that occurs before both of FO3 and FNV, with a different character generation and requires a "new game" start, but is intended to eventually (currently in Beta test) allow you to continue as the "Courier" (or not) into the Mojave. TTW is not officially supported by FNC, but some have reported that they do work together. (Check the [http://docs.google.com/document/d/1Iciq_jIMJvZLMjkDQdCP0tDHmezpFme9nUKjDiZ1HGU/mobilebasic FNC Recommended Mods List] AND the [http://docs.google.com/document/d/14OpRnF5zW4x-qZMQ62JZgM5A4Xq02TAsDoKwKd41P_s/mobilebasic FNC Incompatibilities List] for the latest information.) | ||
| + | |||
| + | As a result, the "Performance Guide" for TTW is applicable for FNV (and probably FNC) players as well. | ||
| + | |||
| + | Required: | ||
| + | |||
| + | *[http://nvse.silverlock.org/ New Vegas Script Extender (NVSE)] v5.1b4+. | ||
| + | *[http://www.nexusmods.com/newvegas/mods/53635 New Vegas Anti Crash (NVAC)]. | ||
| + | *[http://www.nexusmods.com/newvegas/mods/62552 FNV 4GB Patcher] The newest 4GB patcher by '''RoyBatty''' and '''LuthienAnarion'''. | ||
| + | |||
| + | Recommended: | ||
| + | |||
| + | *[http://www.guru3d.com/files-details/nvidia-inspector-download.html Nvidia Profile Inspector] highly recommended for Nvidia users, but aging. | ||
| + | *[http://wiki.step-project.com/Guide:AMD_Catalyst_Control_Center S.T.E.P. AMD Catalyst Control Center Guide] For ATI users: you need to create a new profile in CCC. | ||
| + | *[https://taleoftwowastelands.com/download/file.php?id=2998 NVSR INI for Newer Processors] Last updated 15 Dec 2017. Login to the TTW site is required for access. | ||
| + | *[https://taleoftwowastelands.com/download/file.php?id=2997 NVSR INI for Older Processors] Last updated 15 Dec 2017. Login to the TTW site is required for access. | ||
| + | |||
| + | Details:<br/> 1.) Video Driver Profiles. Note this step has been moved in the '''GamerPoets'''' video to be part of the '''ENBoost''' section, but no longer mentions "Nvidia Profile Inspector" or AMD's "Radeon Control Panel". It only refers to the "Nvidia Control Panel" (and by implication the "AMD Catalyst Control Center") which are part of the respective driver installation. "Inspector" instructions are included here from the thread for completeness for those looking into the original recommendations, but the recommendation applies regardless of the tool used. | ||
| + | |||
| + | *Search for "Fallout New Vegas" within the "Nvidia Profile Inspector". You have to add the game EXEs to the profile, then hit <apply> and exit "Inspector", and you never have to do it again until you update your drivers. | ||
| + | |||
| + | : | ||
| + | :*Set "Multi-display/mixed-GPU acceleration" to "Single display performance mode". | ||
| + | :*Finally set "Power Management Mode" to "Prefer maximum performance". | ||
| + | ::Here's a [http://i.imgur.com/6nYPWVX.png visual example]. | ||
| + | |||
| + | 2.) Fallout "User" INI files. Search through '''Fallout.ini''' and '''FalloutPrefs.ini''' within your "Users\Documents" game folder. | ||
| + | |||
| + | : | ||
| + | :*Under "[General]": | ||
| + | :: | ||
| + | ::*"bUseThreadedAI=0" to "1". | ||
| + | ::*insert "iNumHWThreads=2" below "bUseThreadedAI=1". | ||
| + | |||
| + | 3.) Fallout_Default INI file. Search through '''Fallout_default.ini''' within your "Steamapps\common\Fallout New Vegas" folder. (This so if your "Users" folder INI files get reuilt for any reason they will include these tweaks.) | ||
| + | |||
| + | : | ||
| + | :*Under "[General]": | ||
| + | :: | ||
| + | ::*"bUseThreadedAI=0" to "1". | ||
| + | ::*insert "iNumHWThreads=2" below "bUseThreadedAI=1". | ||
| + | :*Make a backup of this file, as it will be replaced if you ever use Steam's "verify local files" option. | ||
| + | ::Note: "FalloutCustom.INI" is used by "JIP LN NVSE" plugin to override settings in '''default''' game INI files only. | ||
| + | :Here's a [http://i.imgur.com/7rc6Gkq.png visual example]. | ||
| + | |||
| + | 4.) Cellpurging. If using '''Zan's AutoPurge Crash Protector''' mod, uninstall it and use the following superior INI setting changes in all three of the INI files from above: | ||
| + | |||
| + | : | ||
| + | :*Under "[General]": | ||
| + | :: | ||
| + | ::*"bPreemptivelyUnloadCells=0" to "1". | ||
| + | :*Under "[BackgroundLoad]": | ||
| + | :: | ||
| + | ::*"bSelectivePurgeUnusedOnFastTravel=0" to "1". | ||
| + | |||
| + | 5.) Audio. These may help with "audio stuttering" problems. However, some people have found these adjustments to cause some Win10 NVSR configurations to CTD. Test. | ||
| + | |||
| + | : | ||
| + | :*Under "[Audio]" | ||
| + | :: | ||
| + | ::*"iAudioCacheSize=2048" to "8192". | ||
| + | ::*"iMaxSizeForCachedSound=256" to "1024". | ||
| + | |||
| + | 6.) NVSE. Open the game "Data" folder, and search for the "NVSE" sub-folder. (This assumes you have installed NVSE.) | ||
| + | |||
| + | : | ||
| + | :*Once there, create a text file and name it "nvse_config.ini." Make sure to create it inside the "NVSE" folder, not the nested "plugins" sub-folder. | ||
| + | :*Add the following lines: | ||
| + | <div class="boilerplate metadata" id="Notice_Box" style="margin:0px 10px 10px 50px; border:1px dashed #DAA520; color: lightgray; background-color:#333333; padding:3px; word-wrap: break-word">[Memory] | ||
| + | DefaultHeapInitialAllocMB=400 | ||
| + | </div> | ||
| + | :Here's a [http://i.imgur.com/C1DLMyz.png visual example]. | ||
| + | |||
| + | 7.) NVSR. Stop by the [http://www.nexusmods.com/newvegas/mods/34832/? New Vegas Stutter Remover] Nexus page, and download file "NVSR_4-1-32" (under "Old Files") if you're processor predates i5 or i7. For newer processors, download "NVSR_4-1-36" or later. | ||
| + | |||
| + | : | ||
| + | :*Edit the "Data\NVSE\plugins\sr_New_Vegas_Stutter_Removers.ini" file as follows: | ||
| + | :: | ||
| + | ::*Under the "Master = {" section, set all settingsto "= 0" except: | ||
| + | ::: | ||
| + | :::*"bReplaceGetTickCount = 1" | ||
| + | :::*"bFastExit = 1" | ||
| + | ::*This is as far as the '''GamerPoets'''' [http://www.youtube.com/watch?v=sJOrDhghr60 Fallout New Vegas | FPS & Stability (definitive guide)] YouTube video takes things. Various security updates have complicated the NVSR configuration situation immensely. Things are still being discovered. The following were previous recommendations which still tend to work for versions of Windows prior to Win10. | ||
| + | |||
| + | : | ||
| + | :: | ||
| + | ::: | ||
| + | :::*Setting "bHookCriticalSections = 1" is generally recommended, but can be problematic for many Win10 users depending upon the level of updates installed. See the [[#Issue:_CTD_after_10-20_minutes_of_play_.28post-Win10_2017_FCU.29|Issue: CTD after 10-20 minutes of play (post-Win10 2017 FCU)]] entry and the [http://www.nexusmods.com/newvegas/mods/34832 Nexus NVSR download] comments page for various options. Expect to need "trial and error" testing. | ||
| + | :::*Note: If you do not use any texture mods you may enable ''bReplaceHeap = 1''. In that event, Set the "Heap = {" section" settings "iHeapSize = 384" and use "iHeapAlgorithm = 6". | ||
| + | :*When allowing NVSR to manage your FPS: "bManageFPS = 1" and settings under the "FPS_Management = {" section; "Vsync" provided by the game's engine or other sources must be shut off to avoid conflict between them. | ||
| + | |||
| + | 8.) V3.0 Shaders.<br/> <span style="margin:0px 10px 10px 10px; border:1px solid #cc3333; color: red; background-color:#fff5f5; padding:3px">WARNING: If you intend to use ENB's graphics post processing, it only works with v2.0 Shaders. DO NOT perform this step, nor enable the Fallout INI's "[Display]" setting "bAllow30Shaders=1". Leave it at "=0".</span> | ||
| + | |||
| + | :Edit both the "Users" folder '''Fallout INI''''s "[Display]" setting "bAllow30Shaders=0" to "1". This will ALLOW (not force) the use of v3.0 Shaders. | ||
| + | :Open the "Renderinfo.txt" within your documents; "Documents\My Games\FalloutNV". There will be a line for the "Shader Package : ##" (where "##" is "13" in the following example). This is the number suffix of the filename of the shader package expected to have a v3.0 Shader supported by your video card. If not present, your card was not detected by DirectX as able to support v3.0 Shaders. | ||
| + | :*Now, go to the Shaders folder within your game "Data" folder, and rename '''shaderpackage013.sdp''' to '''shaderpackage013.sdp_backup'''. Once done, make a copy of '''shaderpackage019.sdp''' (which is always the provided v3.0 Shader package), and rename it to '''shaderpackage013.sdp''' so it will get utilized. Ignore the periods ending my sentences of course. | ||
| + | :*Do note, 13 is solely an example; the shader package "19" should be renamed to depends on the number your "Renderinfo.txt" displays. | ||
| + | |||
| + | 9.) VORBIS Libraries. Download [http://www.nexusmods.com/newvegas/mods/61265/? Ogg Vorbis Libraries] to improve audio performance. The mod [http://www.nexusmods.com/newvegas/mods/65854 FNV BSA Decompressor] will automatically install these libraries if their archives are found in the game root folder. '''TTW''' will include the '''Decompressor''' as part of it's installer. | ||
| + | |||
| + | 10.) ENBoost. At this time the latest version is v0.322, which has been updated without changing the version number ... so be sure to download again. You should be able to use the "WrapperVersion". See this post about '''ENBoost''' from '''MajinCry''' [http://taleoftwowastelands.com/viewtopic.php?p=55126#p55126 Configuring ENB Fallout New Vegas]. The basic points (and quotations) are: | ||
| + | |||
| + | : | ||
| + | :*Play the game in "Windowed" mode if you don't want to crash upon "alt-tabbing" with '''EnableUnsafeMemoryHacks=true''' (below). "That setting is a game changer, as it greatly reduces stuttering if not completely eliminating it, when models and textures are being loaded (e.g, traveling across cells, transitioning from interior <-> exterior). So have New Vegas in windowed mode, and everyone's happy. Also, when a game is in windowed mode (Windows 7 and newer), the game gets triple buffering. This means you can have VSync enabled without the framerate juddering between 15 <-> 30 <-> 60fps." | ||
| + | :*Disable the Steam Overlay (actually any game overlays; this is not multi-player). "It causes issues when the interface pops up (e.g, recieving a message from another player) where many objects become fully transparent, and has caused issues for some users when '''ExpandSystemMemoryX64=true'''." | ||
| + | :*in the '''''video card driver''''' configuration, set: | ||
| + | :: | ||
| + | ::*Anisotropic Filtering = "Use Application Settings" | ||
| + | ::*Anti-Aliasing Mode = "Use Application Settings" | ||
| + | |||
| + | : | ||
| + | :*in the '''enblocal.ini''' file, set: | ||
| + | :*[GOBAL] | ||
| + | :: | ||
| + | ::*UseENBoostWithoutGraphics=true | ||
| + | ::*UsePatchSpeedhackWithoutGraphics=true (set "false" if using ENB Graphics as well) | ||
| + | :*If you want to use ENB's graphics modifications alongside the ENBoost part, set: | ||
| + | :: | ||
| + | ::*UseENBoostWithoutGraphics=false | ||
| + | ::*UsePatchSpeedhackWithoutGraphics=false | ||
| + | |||
| + | | ||
| + | |||
| + | : | ||
| + | :*[MEMORY] | ||
| + | :: | ||
| + | ::*ExpandSystemMemoryX64=true | ||
| + | ::*ReduceSystemMemoryUsage=false | ||
| + | ::*DisableDriverMemoryManager=false | ||
| + | ::*DisablePreloadToVRAM=false | ||
| + | ::*EnableUnsafeMemoryHacks=true (loads all images into VRAM, reducing "hitches" while loading cells) | ||
| + | ::*ReservedMemorySizeMb=512 (test by lowering in increments of 128) | ||
| + | ::*VideoMemorySizeMb=<value from ENB's "VRAMsizetest" tool> for a single GPU. (Win 8 users are limited to 4096 due to a bug in the DirectX driver.) | ||
| + | ::Notes: | ||
| + | ::*ReduceSystemMemoryUsage=true (for those hitting an out of memory issue (not necessarily GPU VRAM, but application virtual ram); noticable FPS increase; fires off multiple copies of '''enbhost.exe''' as needed, reducing "virtual game memoryy"). | ||
| + | ::*'''MajinCry''' found: "When '''EnableUnsafeMemoryHacks=true''', ENB will automatically disable '''ReduceSystemMemoryUsage'''." So, we might set '''ReduceSystemMemoryUsage''' to "true" and not worry about it whenever we change '''EnableUnsafeMemoryHacks=false'''. | ||
| + | ::*[ENGINE] | ||
| + | ::: | ||
| + | :::*ForceAnisotropicFiltering=false (uses the game settings instead) | ||
| + | <div class="boilerplate metadata" id="Warning_Notice" style="margin:0px 10px 10px 50px; border:1px solid #cc3333; color: green; background-color:#fff5f5; padding:3px; white-space: pre-wrap; white-space: -moz-pre-wrap; white-space: -pre-wrap; white-space: -o-pre-wrap; word-wrap: break-word">'''MajinCry''' comments (typo's corrected): '''EnableUnsafeMemoryHacks=true''' brings two major benefits. And these are brought about as the game's models and textures are no longer mirrored into RAM (as is standard with Direct3D 9). Stuttering is exceptionally reduced, as is memory usage in the '''FalloutNV.exe''' process. | ||
| + | If you have texture mods installed, with the amount of memory being used exceeding your GPU's VRAM, Set '''EnableUnsafeMemoryHacks=false''', '''ReduceSystemMemoryUsage=true''', '''AutodetectVideoMemorySize=true'''. We lose the benefit of reduced stuttering brought by '''EnableUnsafeMemoryHacks''', but gain the benefit of the game no longer crashing or corrupting when the VRAM is not able to hold all of the game's models, textures, shaders, render targets, and frame buffers. This is done by ENB launching multiple '''ENBHost.exe''' processes, that are then filled with the game's models and textures. | ||
| + | |||
| + | If you have a card with a large amount of memory (e.g. 8GB+), it's pretty much impossible for you to reach the limits of your VRAM, so you can just keep '''EnableUnsafeMemoryHacks=true''' and have the best of both worlds. | ||
| + | </div> | ||
| + | *Example '''enblocal.ini''' files for: | ||
| + | |||
| + | : | ||
| + | :*[https://pastebin.com/vhpRAFS0 best performance] (no texture replacers, 2GB VRAM). | ||
| + | :*[https://pastebin.com/ix9G7wfg game with texture mods & small GPU VRAM] (size of all loaded resources > GPU VRAM size). | ||
| + | |||
| + | <span id="Issue: Vsync (V-Sync) ON or OFF"></span> | ||
| + | === Issue - Vsync ''aka V-Sync'' ON or OFF === | ||
| + | |||
| + | "Short for Vertical Sync, Vsync is a display option found in some 3-D computer games that allow the gamer to synchronize the frame rate of the game with the monitor refresh rate for better stability. If the Vsync is turned off, gamers might obtain a higher frame rate but this action may introduce artifacts in the game." - Webopedia. Vsync can also have an effect on "lag". The purpose of Vsync is to eliminate "tearing", a disjointed image. For an in-depth explanation of how VSync (aka "V-Sync") affects "tearing", see the [http://hardforum.com/threads/how-vsync-works-and-why-people-loathe-it.928593/ How VSync works, and why people loathe it] article on the "HardForum.com" site. | ||
| + | |||
| + | *Cause: The short answer is: if you have "triple-buffering" on your video card, then use VSync, because "3buff" is designed to solve the problems with Vsync. If you don't have triple-buffering, then you have to make a choice based upon the effect on your game and FPS rate. Read the article! | ||
| + | |||
| + | : | ||
| + | :*Solution-1a: Some games (including FNV) have a setting for disabling VSync. Most modern video cards have an option for it in their driver control programs. Some "post-processors" (such as ENB) have an option as well. You need to check them all. | ||
| + | |||
| + | : | ||
| + | :*Solution-1b: FNV's hardware configuation option doesn't seem to actually have any effect. You can try manually setting this "off" in all three of the "Fallout.INI" files by changing the "iPresentInterval=1" variable to "iPresentInterval=0". Be sure you have a backup of the original INI files before making any changes. (See the [[FNV_General_Mod_Use_Advice#Game_INI_files|Game INI files]] section of the "FNV General Mod Use Advice" article for details if you don't know about the locations of the INI files.) | ||
| + | |||
| + | <span id="Issue: What INI edits seem to be most beneficial to performance"></span> | ||
| + | === Issue - What INI edits seem to be most beneficial to performance === | ||
| + | |||
| + | *Cause: There are many INI settings you can adjust across many utilities, but it can be difficult to tell which are most helpful to improving performance in general. | ||
| + | |||
| + | :Solution: The information provided in the [http://taleoftwowastelands.com/viewtopic.php?p=55250#p55250 Tale of Two Wastelands (TTW) Performance Guide] covers specific INI settings for a number of different utilities such as the three game INI files, NVSE, the correct version of NVSR to use depending upon your processor, and some nVidia card specific tweaks. These setting seem to be equally helpful for both FNV and FO3 as well as TTW. See also the [[#Issue:_TTW_Performance_Guide_abstract|Issue: TTW Performance Guide abstract]] entry. | ||
| + | |||
| + | == Solutions to Crash To Desktop ''aka CTD'' problems == | ||
| + | <div name="Note Box" class="boilerplate metadata" id="Notice Box" | ||
| + | style="margin:0px 10px 10px 10px;border:1px dashed #DAA520;color: green; | ||
| + | background-color:#fff5f5;padding:3px; | ||
| + | word-wrap: break-word; /* Internet Explorer 5.5+ */ | ||
| + | ">Anytime the game "Crashes to the Desktop" (CTD) it's typically going to generate an error message in the Windows Eventlog because the game engine was not able to predictably handle the error. Please see the "Windows Error Messages" section of the wiki "[http://wiki.nexusmods.com/index.php/How_to_read_most_Bethesda_game_error_logs How to read most Bethesda game error logs]" article. | ||
| + | |||
| + | Logs generated by the game itself (not Windows) are found in the game folder, where the "FalloutNV.EXE" file is located. | ||
| + | |||
| + | Checking such logs should always be your first step, as separating "Windows System" from "Game" generated errors will save you from fruitlessly spending lots of time looking in the wrong direction for the cause. | ||
| + | </div> | ||
| + | |||
| + | <span id="Issue: CTD after 10-20 minutes of play (post-Win10 2017 FCU)"></span> | ||
| + | === Issue - CTD after 10-20 minutes of play ''post-Win10 2017 FCU'' === | ||
| + | <span id="Issue: Recent (post-Win10 FCU) CTDs after 10-20 minutes of play">(Formerly: Issue: Recent (post-Win10 FCU) CTDs after 10-20 minutes of play)</span><br> | ||
| + | <span style="color: green;background-color:#fff5f5;">Update: The mod [http://www.nexusmods.com/newvegas/mods/66537 NVTF - New Vegas Tick Fix] is a lighter, fully Windows 10 compatible, completely rewritten version of the 64hz micro-stutter bug script fix from NVSR, including '''Fast Exit''' and a '''high FPS fix''' for exceeding 60FPS. NOTE: NVTF v3.0 is now NOT supported when used in conjunction with NVSR. | ||
| + | </span> | ||
| + | * There are several reports in the download page "comments" that NVSR causes CTDs after 10-20 minutes of play once the Win10 "Fall Creator's Update" (FCU) of Nov 2017 has been installed where previously everything had been stable. | ||
| + | : Please read ''ALL'' the proposed solutions before implementing any. Expect to need to engage in some "trial-and-error" testing. | ||
| + | :* Solution-1: The mods [https://www.nexusmods.com/newvegas/mods/69779/? New Vegas Heap Replacer (NVHR)] combined with [http://www.nexusmods.com/newvegas/mods/66537 NVTF - New Vegas Tick Fix] should round out all the needed functionality of NVSR, enabling it's complete removal. This is now the recommended solution for Windows 7 and 10 users. | ||
| + | :* Solution-2: Those experiencing this problem who still want to continue using NVSR can try setting the NVSR INI file "Master" section to ''bHookCriticalSections= 0'', which will disable the use of "CriticalSections" features and the heap related algorithm and size settings in NVSR. (The ''bFastExit'' fix still reportedly works.) Some have found it necessary to discontinue use of NVSR completely. Others have found that they could implement partial solutions (detailed below as "other" solutions). "Your mileage may vary." Note that this may re-introduce some stuttering and depressed FPS if using large texture replacement images (e.g. greater than 2048x2048). | ||
| + | |||
| + | :* Solution-3: If "Solution-2" eliminates the CTD problem, or once you have installed the Win10 April 2018 SCU "1803/Redstone 4" system update, you may be interested in trying the configuration posted by user '''redmaxblower''' [http://forums.nexusmods.com/index.php?/topic/249379-new-vegas-stutter-remover/page-188#entry59460386 here] in the NVSR thread which restores much of NVSR's stutter reduction functionality. It includes '''ENBLocal.ini''' settings for '''ENB Series''' users as well. | ||
| + | |||
| + | :* Solution-4: It has been found that you can set ''bHookCriticalSections= 1'', and then ''iDefaultMode = 1'' in the "CriticalSections" subsection of "sr_New_Vegas_Stutter_Remover.ini". The "1" value just means NVSR uses the vanilla mechanism anyway. Setting "iDefaultMode =" to anything other than "1" seems to cause the problem. (It defaults to "3".) | ||
| + | |||
| + | :* Solution-5: User '''Brad852''' (and others) has achieved a stable and stutter free game with the following tweaks to the NVSR v4-1-36 configuration: | ||
| + | ::* Make sure the settings under "Master = {" are: | ||
| + | :::* bManageFPS = 1 | ||
| + | :::* bHookCriticalSections = 1 | ||
| + | :::* bHookLightCriticalSections = 0 | ||
| + | :::* bHookHashtables = 1 | ||
| + | :::* bReplaceHeap = 1 | ||
| + | :::* bReplaceGetTickCount = 1 | ||
| + | :::* bLogToConsole = 0 | ||
| + | :::* bFastExit = 1 | ||
| + | :::* bFlushLog = 1 | ||
| + | :::* iSchedulingResolution = 1 | ||
| + | :::* bReplaceRandom = 1 | ||
| + | :::* bExperimentalStuff = 0 | ||
| + | :::* iMainHookPoint = 1 | ||
| + | |||
| + | ::* Under "CriticalSections = {, set: | ||
| + | :::* "iDefaultMode=3" | ||
| + | :::* "bUseOverrides=1" | ||
| + | |||
| + | ::* Under "OverrideList = {", third "Critical Section = {" ("CallerAddress = 0xA044FE") section: | ||
| + | :::* delete "Spin = 6000" | ||
| + | |||
| + | ::* This '''Brad852''' configuration seems to CTD for some users if the ''iAudioCacheSize'' or ''iMaxSizeForCachedSound'' values are altered in accordance with '''GamerPoets'''' latest revised [http://www.youtube.com/watch?v=sJOrDhghr60 Fallout New Vegas | FPS & Stability (definitive guide)] YouTube video (i.e. "[Audio]", "iAudioCacheSize=2048" to "8192"; "iMaxSizeForCachedSound=256" to "1024"). | ||
| + | |||
| + | :* Solution-6: User '''AnonymousPlum''' has posted a promising [http://www.nexusmods.com/newvegas/mods/65606?tab=description Stabilised NVSR ini File for Windows 10] after a number of experiments which can be used as a starting point. However, take the time to read the comments page as there are various reports of success, failure, and alternative settings from commenters (including user '''redmaxblower''', author of '''Solution-2'''). There is now a version of the file which disables the NVS[[R]] "heap replacement" in favor of the NVS[[E]] replacement technique (which was the most severe criticism). | ||
| + | |||
| + | :* Solution-7: '''Team Moki''' has posted a "mod" [http://www.nexusmods.com/newvegas/mods/66063 Ultimate Fallout New Vegas Stutter Removal for WIndows 10 and 7] consisting of a fully tweaked '''NVSR''' "\NVSE\Plugins\sr_New_Vegas_Stutter_Remover.ini" file. | ||
| + | |||
| + | :* Solution-8: See also the related [[#Issue: Incomplete save game load|Issue: Incomplete save game load]] which covers some background services that may need to be disabled. | ||
| + | |||
| + | <span id="Issue: CTD on interior/exterior/"fast travel" cell change"></span> | ||
| + | |||
| + | === Issue - CTD on interior or exterior or ''fast travel'' cell change === | ||
| + | * Cause-1: Most crashes on cell-change are caused by the autosave feature choking because it's trying to write data into a save it corrupted the last time you changed cells. Note this may mean your last several saves are corrupt. "Auto-saves" are dangerous because they are seldom able to tell when the game is in the middle of doing something else critical. | ||
| + | |||
| + | :* Solution-1: Most importantly, completely disable all manner of autosaves in the game options. The [http://www.nexusmods.com/newvegas/mods/36730/? CASM] and [http://www.nexusmods.com/newvegas/mods/45652/? CASM with MCM] mods attempt to provide more control over such situations. [http://www.nexusmods.com/newvegas/mods/62181/? Simple Saves] provides timed interval "full saves" without all the features of CASM, but only keeps 5 versions before it starts overwriting older files after the 5th save. They are all better than the built-in mechanism, but don't rely upon any auto-save exclusively. Manual "full saves" after waiting about five seconds with nothing happening are still safest. Also, you can use [http://www.nexusmods.com/newvegas/mods/57465 Clean Quick Saves] to create a new "quick save" file every time, which is safer than overwriting an existing file. You will need to periodically clean old ones out (they count against the total number of save files you are allowed), but the purpose of a quick save is as a "temp" for safety's sake rather than a place to resume the game session from. They do not save as much data as a "full save". QSaves are best reloaded when you are still in the same cell (preferably in the same position) as when you saved. | ||
| + | :: Please see also the 'Fourth Rule: Reloading "save game" files' section of the wiki [[#FNV_General_Mod_Use_Advice | FNV General Mod Use Advice]] article. | ||
| + | |||
| + | * Cause-2: Crashes on cell transition will happen more often the more mods you have that affect NPC's & levelled lists. | ||
| + | |||
| + | :* Solution-2: You can't run different mods like that, reliably, without a "bashed" or "merged" patch. See [http://wiki.step-project.com/Guide:Merging_Plugins S.T.E.P. Merging Plugins Guide] for a description of both approaches. | ||
| + | |||
| + | * Cause-3: The default game "heap size" is too small for some modded games. | ||
| + | |||
| + | :* Solution-3: See [[#Issue: CTD without warning, "out of memory error", or stops responding|Issue: CTD without warning, "out of memory error", or stops responding]] sub-topic. | ||
| + | |||
| + | <span id="Issue: CTD without warning, "Out of Memory error", or stops responding after the Main Menu"></span> | ||
| + | === Issue - CTD without warning or ''Out of Memory error'' or stops responding after the Main Menu === | ||
| + | Happens without error messages, as if the game runs out of memory, or the OoM error message. | ||
| + | |||
| + | *Cause-1: By default 32-bit games can only use 2GB of RAM not matter how much is installed, even if you are running a 64-bit version of the Operating System (OS). | ||
| + | :* Solution-1a: If you are on a 32-bit OS system with at least 3GB of RAM, see this [http://wiki.nexusmods.com/index.php/2-4GB_game_memory_limits_and_solutions 2-4GB game memory limits and solutions] article on configuring to use the maximum memory you can before implementing the next solution. 64-bit OS systems usually do not need to alter their configuration, but that article covers them as well. | ||
| + | :* Solution-1b: You need to be using a FNV4GB Loader such as [http://www.nexusmods.com/newvegas/mods/55061/? 4GB Fallout New Vegas Updated] or an LAA flag Patcher like the more recent [http://www.nexusmods.com/newvegas/mods/62552/? FNV 4GB Patcher]. This will give the game access of up to 3.8 GB of memory. (The remainder is used by the system.) | ||
| + | |||
| + | * Cause-2: The vanilla game's default "heap size" is very conservative and can easily be exhausted by a modded game. There are a couple of distinct types of "heap" and it is not clear which is running out of memory. One is used in programming to implement a data structure such as a ''priority queue'', and another in memory management as an area for ''dynamic memory allocation'' and swapping code around. Both types are commonly used. | ||
| + | |||
| + | :* Solution-2: Increase the heap allocation size. Initially it's recommended to enable the "New Vegas Script Extender" (NVSE) "Sheson memory patch". If that does not resolve the issue, you can try configuring "heap replacement" in "New Vegas Stutter Remover" (NVSR). The current NVSR (v4.1.36) "heap replacement" can also run into "out of memory" errors regardless of the algorithm chosen in some situations. It's effectiveness varies among users and systems. Both can work together, as they are not attempting to change the same heap allocation, but their combined effect with the suggested sizes is to use up almost 1GB of game memory (out of 2-3.8GB) for this purpose. NVSR's current "heap replacement/allocation" routines have problems and should be used with caution. See [[#Issue:_CTD_after_10-20_minutes_of_play_(post-Win10_2017_FCU)|Issue: CTD after 10-20 minutes of play (post-Win10 2017 FCU)]]. | ||
| + | ::* Solution-2a: Activate the "Sheson memory patch" (unknown type of heap) in NVSE.{{NVSE Configuration}} | ||
| + | ::* Solution-2b: Optionally, the mod [http://www.nexusmods.com/newvegas/mods/34832/? New Vegas Stutter Remover] (requires [http://nvse.silverlock.org/ NVSE]) contains both an adjustable heap size and alternative heap algorithms (unknown type of heap). These are disabled by default for maximum stability, so it is necessary to read the provided NVSR documentation and edit the "sr_New_Vegas_Stutter_Remover.ini" file, which is under the "Data\NVSE\Plugins" folder. | ||
| + | :::* That NVSR "heap" section is only used if you have "bReplaceHeap=1" in the "[Master]" section of that INI. You should want to implement it because you are still getting crashes after implementing "Sheson". It's effectiveness has varied results for different users. | ||
| + | :::* A larger heap size of 450(MB of RAM) is suggested, but Intel processors work more efficiently when they align with multiples of 16 bytes, so I suggest using a heap of 448, 464, or 496. Keep it under 500, which seems to be the limit for NVSE. | ||
| + | :::* There are several "heap algorithms" and only three algorithms that use the "heap size" setting (3,5, or 6), so some experimentation on your part will tell you which works best (if at all) for your system. This is documented in the INI file as well as the download page. | ||
| + | :::* The current NVSR (v4.1.36) "heap replacement" and algorithms can be reliably demonstrated to increase the number of CTDs and "out of memory" errors under certain circumstances, so only testing will tell if it is a solution for you. However, many have success with it in typical modded games. | ||
| + | :::* Other features of NVSR are still of practical use. Some people have found that disabling NVSR's heap ("Heap Replacement=0") solves their "out of memory" CTDs. | ||
| + | |||
| + | * Cause-3: Too many cells loaded consuming memory. | ||
| + | :* Solution-3: Enable two "purge cells" options in the three "INI" files: | ||
| + | ::<pre> | ||
| + | ::: [General] | ||
| + | ::: bPreemptivelyUnloadCells=1 | ||
| + | ::</pre> | ||
| + | :: and | ||
| + | |||
| + | ::<pre> | ||
| + | ::: [BackgroundLoad] | ||
| + | ::: bSelectivePurgeUnusedOnFastTravel=1 | ||
| + | ::</pre> | ||
| + | <div name="Note Box" class="boilerplate metadata" id="Notice Box" | ||
| + | style="margin:0px 10px 10px 10px;border:1px solid #00C600;color: green; | ||
| + | background-color:#fff5f5;padding:3px; | ||
| + | word-wrap: break-word; /* Internet Explorer 5.5+ */ | ||
| + | "> | ||
| + | Avoid auto-purge mods and NEVER use the ''PurgeCellBuffers'' (PCB) command. It's a debugging tool used for testing cell and reference loading, not a magic fix for memory problems. Overly aggressive purging will cause stutter as purged cells have to be loaded from disk into memory for rendering. Use the above INI settings if you want the game to clear buffers more aggressively than it does by default. | ||
| + | </div> | ||
| + | |||
| + | * Cause-4: Exhausting video memory. | ||
| + | :* Solution-4: See the sub-topic [[#Issue: Is ENBoost for everyone?|Issue: Is ENBoost for everyone?]] in this article about an option to increase available memory for rendering video related objects. | ||
| + | |||
| + | * Cause-5: Some have found it either necessary or desireable to configure their system to disable the "onboard" video adapter and use only the "addon" video card GPUs. Depending upon the hardware architecture of the system, this may not be optimal. | ||
| + | |||
| + | <div name="Note Box" class="boilerplate metadata" id="Notice Box" | ||
| + | style="margin:0px 10px 10px 30px;border:1px dashed #DAA520;color: lightgray; | ||
| + | background-color:#333333;padding:3px; | ||
| + | word-wrap: break-word; /* Internet Explorer 5.5+ */ | ||
| + | ">Most modern "MotherBoards" (MoBo) have an integrated video adapter chip built-in (aka "onboard"). This is connected to the "Central Processing Unit" (CPU), and may be slower than a dedicated video card. Modern video adapters come with one or more "Graphic Processor Units" (GPU), and "addon" video cards are installed into the "peripheral adapter" slots. | ||
| + | |||
| + | CPUs are not the same as GPUs. CPUs are "general" processors, and GPUs are "graphics" processors. There are differences in the hardware "buss" bandwidth, buffers, and speed used by both. GPUs are optimized for high precision numbers and complex mathematical and geometric calculations which are necessary to render graphics. Some CPUs (particularly laptops) sacrifice precision math processing to reduce power drain and increase battery life, and their "onboard" video chips come without dedicated VRAM for video memory (they have to share system RAM). (If the details are of interest, suggest you read [http://harrydawsonunit20task2and3.weebly.com/central-processor-unit.html this CPU article] and [http://harrydawsonunit20task2and3.weebly.com/graphic-processor.html this GPU article]. In particular pay attention to the neglected role of "L-caches".) | ||
| + | |||
| + | The CPU is responsible for directing the graphics data from memory and disk to the video adapter (just as for any "peripheral" device). Until it does so, the GPU has nothing to work on. So it is the first potential bottleneck. A MoBo integrated video adapter MAY be able to work in conjunction with an "addon" video card, or it may obstruct one. This is one of those specific design features nobody talks about and you can only work it out by trial and error. A video adapter and it's GPU(s) are essentially a "black box" to the CPU. However, it does recognize which "port" (connector) the display is plugged into. As far as the CPU is concerned, the video adapter and the "display" are basically the same: a one way street it sends graphics commands down with (at best) a stop light to prevent overflows. The video adapter handles the signaling requirements of the display. | ||
| + | </div> | ||
| + | :* Solution-5: As a general "rule of thumb": the more processors, the better. The video card may have a "device driver" or "control application" which will allow configuration of the use of the GPUs for specific purposes. Unless you have specific knowledge and reasons, it is best to let the system choose how to handle ALL the GPUs. A bad configuration may cause CTDs. | ||
| + | |||
| + | Solutions 1-4 can safely be combined, but those with less than 4GB of system RAM need to exercise caution and only implement one at a time, as they will come at the expense of memory otherwise needed by the game and OS. | ||
| + | |||
| + | <span id="Issue: CTD upon completion of DLC"></span> | ||
| + | === Issue - CTD upon completion of DLC === | ||
| + | For example: 'Fallout New Vegas keeps crashing to desktop, every time I complete the "Old World Blues (OWB)" DLC. In the "Think tank" after having the last conversation with Dr. Klein, and then exiting the think tank... It crashes to desktop. I can tell it's the end of Old World Blues, because of the fact that sometimes it will play music for a second, (like it does at the end of the other DLCs, along with your video ending). But it just crashes to desktop.' | ||
| + | |||
| + | * Cause-1: According to Bethesda Softworks Tech Support - This only happens when playing in "Hard Core" mode and your character is the least bit hungry. | ||
| + | :* Solution-1a: Simply feed your PC until they are full before the final exit from the DLC. | ||
| + | |||
| + | :* Solution-1b: There is the mod [http://www.nexusmods.com/newvegas/mods/56651 Skippable DLC Cutscenes], which skips the slideshow but cautions it is not a fix for CTDs. | ||
| + | |||
| + | * Cause-2: If not playing in "hard core mode", more than likely you are running out of "heap space" when the slideshows are started. | ||
| + | :* Solution-2: Please search this guide for the term "heap size" (several entries are primarily in the 'Solutions to Performance problems' and 'Solutions to "Crash To Desktop" (CTD) problems' sections. | ||
| + | |||
| + | <span id="Issue: CTD upon quitting a modded game"></span> | ||
| + | === Issue - CTD upon quitting a modded game === | ||
| + | Upon using the game menu to "Exit to desktop", it simply hangs and Windows reports FNV has stopped responding. It becomes necessary to use the Windows "Task Manager" ("<Ctrl+Alt+Del>") to terminate the current instance of the program before it can be restarted. As this can leave system memory in an unknown state, best practice is to reboot the system first. Naturally this is very annoying. | ||
| + | |||
| + | * Cause: This is a common problem with the game engine when enough mods have been added. | ||
| + | :* Solution: [http://www.nexusmods.com/newvegas/mods/34832/? New Vegas Stutter Remover (NVSR)] has a "fast exit" option in it's INI file that fixes this problem (among others). DO NOT install with a Mod Manager unless it recognizes that NVSE based plugins like NVSR need to go into the "Data\NVSE\plugins" folder. Follow the "manual install" instructions instead. Then edit the "sr_New_Vegas_Stutter_Remover.ini" file in the same location from "bfastexit 0" to "bfastexit 1". Note: This setting still works for most people having the problems addressed in [[#Issue:_Recent_(post-Win10_FCU)_CTDs_after_10-20_minutes_of_play|Issue: Recent (post-Win10 FCU) CTDs after 10-20 minutes of play]]. | ||
| + | :: Related: The NVSE plugin [http://www.nexusmods.com/newvegas/mods/53635/? New Vegas Anti Crash (NVAC)] implements structured exception handling and sanity checking to reduce frequency of game crashes. While this may not be directly related, it is a recommended stability improvement anyway. | ||
| + | |||
| + | <span id="Issue: Ash and Goo Piles cause random CTDs"></span> | ||
| + | === Issue - Ash and Goo Piles cause random CTDs === | ||
| + | When a spawned actor is killed with an energy weapon, they leave either an "ash" or "goo" pile instead of a body attached to the actor reference in the save game file. If not "cleaned up" these pile up and eventually lead to "save game corruption". The problem goes back to FO3 and a script which was supposed to be activated but wasn't. It can be particularly noticable in exterior "encounter spawn zones" when using energy weapons exclusively with mods that increase the number of encounters before the default cell reset timer kicks in or if the player lingers in the cell too long. | ||
| + | |||
| + | * Cause-1: Ash and Goo Piles not being cleaned up before they can cause a problem. This does not seem to occur with interior cells as the number of piles usually remains low and the default cell reset interval is usually fast enough. | ||
| + | :* Solution-1: There are mods intended to resolve this problem by various methods. Some of these are: | ||
| + | ::* [http://www.nexusmods.com/newvegas/mods/64229 EVE - JIP Ash Pile Tweaks] - replaces EVE's new ash and goo puddles' implementation, from one that uses containers and scripts to move the deceased's contents to them, to a NVSE + JIP LN one that replicates the vanilla mechanics of the piles being activators. The pile's own scripts has been changed to remain until a cell reset takes place, instead of disappearing right when you revisited them. | ||
| + | ::* [http://www.nexusmods.com/newvegas/mods/45484/ Ash and Goo Begone] - does also remove piles of "named NPCs" (including those of "quest NPCS") so don't use energy weapons on them. It does NOT affect the placed Ash piles in the sacked caravans (they use a different ID) nor the Ash pile left in the Silver Rush after the first time you enter. | ||
| + | ::* [http://www.nexusmods.com/newvegas/mods/44710/? FOOK Ash Goo Pile Fix - Complete] - only affects "vanilla" piles, but not those from EVE weapons. (This fix has been incorporated into YUP.) | ||
| + | ::: NOTE: This problem persists in the exterior "BigMT" sections of the DLC "Old World Blues" (and possibly in "Honest Hearts" as well) with all these mods, but not in the interiors. Until a fix is identified, it is suggested avoiding the use of energy weapons in "BigMT" exteriors unless you can somehow exit the cell (which can trigger the cleanup script upon returning). | ||
| + | |||
| + | <span id="Issue: Hi-Rez Texture mod causes CTD"></span> | ||
| + | |||
| + | === Issue - Hi-Rez Texture mod causes CTD === | ||
| + | Specific known example of this is the 26.3MB [http://www.nexusmods.com/newvegas/mods/65017/? Training Dummy Retexture] file from the mod of the same name. It is implied (by the alternate 3.1MB "Sane Edition" file) that this image is 6000x6000 pixels. | ||
| + | |||
| + | * Cause: Image files have to be sized as a power of 2 from the base of 512x512 pixels. (512: *2= 1024; *(2^2)= 2048; *(2^3)= 4096; *(2^4)= 8192.) Normally the GPU will attempt to re-scale images that do not fit, but a very large size may be sufficient to push GPU processing and VRAM limits enough to cause a CTD. The various images sizes of the textures rendered in a given scene are cumulative. | ||
| + | :* Solution: Either use a more normal sized image, or resize it using a tool such as [http://www.nexusmods.com/oblivion/mods/42116/? Optimizer Textures] that can correct the scale. Please see also the wiki [[Display_resolution_versus_Image_Size|Display resolution versus Image Size]] article before you decide to simply grab the largest possible size images. | ||
| + | |||
| + | <span id="Issue: Removing a Project Nevada Implant freezes the game or CTDs"></span> | ||
| + | === Issue - Removing a Project Nevada Implant freezes the game or CTDs === | ||
| + | This is particularly evident when removing a "skill-based" one (i.e. raises the Sneak skill). | ||
| + | * Cause: It appears that, by design with this mod, not only are there distinctions between individual doctors (all are not equally skilled; some need the "cybernetic surgery" book before they can install implants), but it also tracks which installed a particular implant. More investigation is needed into the untrapped error that is causing the freeze or CTD itself. | ||
| + | :* Solution: It seems the only safe way to remove a PN implant is to use the same doctor who installed it, especially with "book trained" doctors like Doc Mitchell. | ||
| + | |||
| + | <span id="Issue: Swap/Page file size and CTDs"></span> | ||
| + | === Issue - Swap ''aka Page'' file size and CTDs === | ||
| + | * Cause: The size set for your "page file" can make a difference as well in terms of something called the "commit limit". This is the sum of physical memory and the sizes of the paging files. The default system page file configuration does not follow this advice, so it's something to look into if you are still having CTDs. | ||
| + | :* Solution: To properly size the paging file requires determining the maximum total commit charge for the programs you like to have running at the same time. See "Page File Size and The Commit Limit" section in the wiki [http://wiki.tesnexus.com/index.php/2-4GB_game_memory_limits_and_solutions 2-4GB Game memory limits and solutions] article for details. | ||
| + | |||
| + | <span id="Issue: WIN10 Freezes/Hangs and you can't use Task Manager to kill the process"></span> | ||
| + | === Issue - WIN10 Freezes or Hangs and you can not use Task Manager to kill the process === | ||
| + | In Windows10 (Home or Pro versions at least) if the game freezes, even if you press "< Ctrl+Alt+Del >" and open the "Task Manager", you are unable to "< Alt+Tab >" from the game to the "Task Manager" in order to kill the process. However, you can press the "Windows Logo" key (assuming your keyboard has one). (Those without a "< Windows Logo >" key should read the thread [http://forums.windowssecrets.com/showthread.php/164357-Wndows-logo-key-equivalent-in-non-windows-keyboards Windows logo key equivalent in non-windows keyboards] if they feel the lack.) | ||
| + | |||
| + | * Cause: The game "freeze/hang" is preventing normal keyboard "< Alt+Tab >" function. | ||
| + | :* Solution: The "mod" [http://www.nexusmods.com/fallout3/mods/23188 Kill Fallout 3] by '''raz3rITA''' is really a simple BAT file that can be edited to kill the "Task Manager" process of Fallout3.exe, FalloutNV.exe, or Fallout4.exe, and so on, as a single command from the "start menu" accessed by the "< Windows Logo >". This will enable you to regain keyboard control. Customization and use instructions are in the mod description. | ||
| + | <div name="Note Box" class="boilerplate metadata" id="Notice Box" | ||
| + | style="margin:0px 10px 10px 50px;border:1px dashed #DAA520;color: lightgray; | ||
| + | background-color:#333333;padding:3px; | ||
| + | word-wrap: break-word; /* Internet Explorer 5.5+ */ | ||
| + | ">Note: While this does in effect enable you to attempt to resume the game immediately without rebooting, there are risks. You have no idea what state your system memory is in as a result of whatever hung game up in the first place. Something was not "normal" to cause the problem. Not rebooting can lead you on a "wild goose chase" of other problems as a result (such as the "0xC0000005 Invalid access" error). Starting from a "clean slate" is worth the delay caused by a reboot to my mind. But the choice is yours. At least this enables you to perform a normal orderly restart. | ||
| + | </div> | ||
| + | |||
| + | == Solutions to Control problems == | ||
| + | |||
| + | <span id="Issue: Console - How to access the in-game "console" command line"></span> | ||
| + | === Issue - Console - How to access the in-game ''console'' command line === | ||
| + | There is a setting of "bAllowConsole=1" under the "[Interface]" section of the "Fallout_Default" INI file that must be present as well. (This setting is also necessary for Oblivion and Fallout 3.) | ||
| + | |||
| + | To access the console in the game, press the <'''~'''> (tilde) key on the keyboard. For a complete list of the console commands, type '''help''' in the console. | ||
| + | |||
| + | NOTE: The Tilde key should be to the left of the 1 key on the top row. If you are in the UK, and have your keyboard configured for the UK, the key is not going to be the same. To get to the console, press the <'''`'''> (grave accent) key top left of keyboard, instead of the <'''~'''> (tilde) key. (That's where the tilde is on most US keyboards). | ||
| + | |||
| + | Source: [http://help.bethesda.net/app/answers/detail/a_id/16893/~/how-do-i-access-the-console-in-the-game%3F The Elder Scrolls III: Morrowind Support] page: | ||
| + | |||
| + | <span id="Issue: Console - in-game console ['''~'''] (tilde) key doesn't work"></span> | ||
| + | |||
| + | === Issue - Console - in-game console default key does not work === | ||
| + | Source: [http://help.bethesda.net/app/answers/detail/a_id/16893/~/how-do-i-access-the-console-in-the-game%3F The Elder Scrolls III: Morrowind Support] page: | ||
| + | |||
| + | If you have a system with the '''Microsoft eHome''' (remote sensor, aka "infrared") or '''MS Media Center''' devices, these will conflict with the program being able to read the scan code for the tilde key from the keyboard. Those Microsoft eHome devices or drivers need to be disabled in order to allow the game to 'see' the tilde key being pressed. The MIRC (Microsoft Infrared Remote Control, aka "Inf Transcvr") seems to disable the tilde <'''~'''> key in both Oblivion and Morrowind. Simply disconnecting the MIRC from the USB port will fix this issue. | ||
| + | |||
| + | <span id="Issue: Console - Can't open the in-game "console" command line under Windows 10"></span> | ||
| + | === Issue - Console - Can not open the in-game ''console'' command line under Windows 10 === | ||
| + | * Cause: The "key binding" to open the console is hard-coded in the game and apparently this binding is broken under Windows 10. There is no game provided mechanism to change this. | ||
| + | |||
| + | :* Solution: There are a couple of mods that use NVSE as a workaround that may help in this situation. | ||
| + | ::* [http://www.nexusmods.com/newvegas/mods/63735/? Console Fix Glasses] by Random Unit | ||
| + | ::* [http://www.nexusmods.com/newvegas/mods/63747/? Console Key Rebinder] by Random Unit | ||
| + | |||
| + | <span id="Issue: Console - troubleshooting"></span> | ||
| + | === Issue - Console - troubleshooting === | ||
| + | Source: [http://fallout.gamepedia.com/Gamebryo_and_Creation_console_commands Gamebryo and Creation console commands] | ||
| + | |||
| + | * To enable the "console" for use in-game, in the INI files you must first locate "bAllowConsole" under the "[Interface]" section and set it to "=1" and save, before starting the game. | ||
| + | * Furthermore, the console can be altered in these INI files to modify the text displayed on-screen. | ||
| + | : Assuming a minimum of 768 pixels of vertical display resolution (for 720p monitor), you can change the following values under the "[Menu]" heading to: <pre>iConsoleVisibleLines=XX</pre> | ||
| + | : Replace "XX" with a number of 25 or greater (depending on your screen resolution) to set the maximum number of text lines shown on screen at any one time in the console. | ||
| + | |||
| + | * Troubleshooting the console | ||
| + | : The left side of the console might not be visible if you are not using a widescreen display. In this case, type several <tab>s to move the cursor to the right before entering your commands to make typed commands visible. Commands either typed off-screen or tabbed into view will still work equally. | ||
| + | |||
| + | : Alternatively, The position of console text can be set in the INI files. | ||
| + | :* Set "iConsoleTextXPos" to 200 or so. Higher figures move console text to the right. This is the main problem. | ||
| + | :* "IConsoleTextYPos" should be approximately 100 or 200 less than your Y resolution. A lower figure moves it up (0 is the top of the screen). | ||
| + | |||
| + | : An example for a 1280x1024 (X x Y) 5:4 ratio display: | ||
| + | <div name="Note Box" class="boilerplate metadata" id="Notice Box" | ||
| + | style="margin:0px 10px 10px 30px;border:1px dashed #DAA520;color: lightgray; | ||
| + | background-color:#333333;padding:3px; | ||
| + | word-wrap: break-word; /* Internet Explorer 5.5+ */ | ||
| + | "> | ||
| + | {| class="wikitable" style="text-align: left; color: lightgray; background-color:#333333;" cellpadding="10" | ||
| + | |+ '''Console Text Table''' | ||
| + | ! Setting !! Default !! New Setting !! Notes | ||
| + | |- | ||
| + | | iConsoleTextXPos || 30 || 200 || X (left/right) position is higher (which moves it to the right) | ||
| + | |- | ||
| + | | iConsoleTextYPos || 940 || 900 || Y (up/down) pos is 100-200 less than your Y res (here, 1024) | ||
| + | |} | ||
| + | </div> | ||
| + | |||
| + | * Console improvements for "ease of use" are now available: | ||
| + | :* [http://www.nexusmods.com/newvegas/mods/65906 Console Paste Support] enables copy-and-paste from other documents. | ||
| + | :* [http://www.nexusmods.com/newvegas/mods/61843 Console Background] Adds a background to the console to enhance readability in bright surroundings. | ||
| + | :* [http://www.nexusmods.com/newvegas/mods/55898 Auto SCOF - Console Logging] Automatically creates a file in your FalloutNV folder titled "ConsoleOutputFile - mm_dd_yyyy" and starts the log with the time of creation to capture console output. | ||
| + | :* [http://www.nexusmods.com/newvegas/mods/63747 Console key rebinder] in the event your default key <'''~'''> doesn't work. | ||
| + | |||
| + | <span id="Issue - GamepadSupport"></span> | ||
| + | <span id="Issue: GamepadSupport"></span> | ||
| + | |||
| + | === Issue - Controls - GamePad Support missing === | ||
| + | Symptoms: GamePad or Controller does not natively recognize key and mouse controls. | ||
| + | |||
| + | * Cause: The game does not provide built-in support for the device. | ||
| + | :* Solution: Use a controller adapter keybard mapping program to add this functionality. See [[#Issue - KeyControllerConflict|Issue - Controls - Mouse and/or keyboard don't work with a game controller installed]] for some options. | ||
| + | ::: Note that FNV will also require reconfiguring INI file settings and the use of the [http://www.nexusmods.com/newvegas/mods/58277 JIP LN NVSE Plugin] to support the controller (see [[#Issue - RemoveControllerDefaultButtons|Issue - Controls - How to remove a game controller's default button bindings]]). | ||
| + | |||
| + | <span id="Issue - RemapDefaults"></span> | ||
| + | <span id="Issue: Have to remap some essential default key assignments"></span> | ||
| + | |||
| + | === Issue - Controls - Have to remap some essential default key assignments === | ||
| + | * Cause: Various. | ||
| + | :* Solution: For a hardware key failure, most laptops will let you use an external keyboard plugged into the PS2 or USB port. But if that is not an option, you can "re-map" most crucial key assignments. | ||
| + | ::* First of all you are going to need to find a copy of the DirectX "scan codes" that gives you the hex code values, such as [http://geck.bethsoft.com/index.php?title=Template:DirectX_Scancodes this '''GECK''' document]. | ||
| + | ::* Then open the "FalloutPrefs.INI" file in your "Users" folder and locate the "[Controls]" section. That lists various "functions" with the "hex scan code" for each. Change the ones you need (preserving leading zeros so each code is exactly 8 characters long) and save. | ||
| + | ::: (Suggest you only change what you have to there to get you into the game main menu where you can use the "Settings | Keyboard" menu interface to make most changes.) | ||
| + | ::* See '[[#Issue - KeystrokesPassed|Issue - How to determine what keystrokes are being passed]]' if you have problems. | ||
| + | |||
| + | <span id="Issue - RemoveControllerDefaultButtons"></span> | ||
| + | <span id="Issue: How to remove a game controller's default button bindings"></span> | ||
| + | |||
| + | === Issue - Controls - How to remove a game controller default button bindings === | ||
| + | * Cause: The game lacks a "User Interface" or "Menu" option to change the default keys assigned to console-game type controller buttons. | ||
| + | |||
| + | :* Solution-1: If you are using "Lutana's NVSE plugin" (now included as part of the [http://www.nexusmods.com/newvegas/mods/58277 JIP LN NVSE Plugin]), you can call it's [http://geck.bethsoft.com/index.php?title=DisableButton GECK: DisableButton] function from the console (default toggle key "~"), which will ignore the input from the specified controller button but still permit scripts to function. You can put a series of console commands into a "batch file" and call that to execute them all at once. See the "Batch Examples" section of [http://fallout.wikia.com/wiki/Gamebryo_console_commands Gamebryo Console Commands]. | ||
| + | :: {{Lutana NVSE Plugin Status}} | ||
| + | |||
| + | :* Solution-2: Edit the "FalloutPrefs.ini" file in your "C:\Users\<YourAccountName>\Documents\My Games\FalloutNV" folder as follows. | ||
| + | ::* Find the [Controls] section | ||
| + | ::* For the last 4 characters of each control that you want to unbind, put "FFFF". | ||
| + | ::: (ex: "Use=00FF0011" becomes "Use=00FFFFFF".) | ||
| + | ::* Save FalloutPrefs.ini | ||
| + | :* Now you should be able to use a controller-keyboard mapper program like '''Xpadder''' to assign new keys to the buttons. | ||
| + | |||
| + | <span id="Issue - SwitchWeaponsMouse"></span> | ||
| + | <span id="Issue: How to switch weapons using the mouse middle-button/wheel"></span> | ||
| + | |||
| + | === Issue - Controls - How to switch weapons using the mouse middle-button or wheel === | ||
| + | * Cause: This feature from "First Person Shooters" (FPS) is not implemented in FNV. | ||
| + | :* Solution: The mod [http://www.nexusmods.com/newvegas/mods/39997/ FPS Weapon Wheel] by '''vivanto''' provides this functionality to both assignable hotkey and mouse wheel. MCM menu configuration. | ||
| + | |||
| + | <span id="Issue - ModsLackControllerSupport"></span> | ||
| + | <span id="Issue: Mods don't seem to have controller support"></span> | ||
| + | |||
| + | === Issue - Controls - Mods do not seem to have controller support === | ||
| + | Some mods don't seem to work with a game controller, even though the game works fine in general. | ||
| + | |||
| + | * Cause: Select mods do have controller support, others require an addon such as the "Lutana NVSE plugin", and still others (like Project Nevada) don't have explicit support but can be used with Lutana's "DInput emulation" which maps controller buttons to keys on your keyboard. What they all have in common is that they require NVSE, another third-party tool. There just isn't any provision for modders to add controller support to their mods, or even custom keyboard hotkeys, without these community toolsets. | ||
| + | :* Solution-1a: Install the [http://nvse.silverlock.org/ New Vegas Script Extender (NVSE)] plugin. Note that this has to be installed at the game root folder, so your mod manager may not be able to deal with it properly. Best to install manually. | ||
| + | :: See [[#Checklist|Checklist item #4]] for how to followup installation and determine the plugin is loading properly. | ||
| + | |||
| + | :* Solution-1b: {{Lutana NVSE Plugin Status}} | ||
| + | :: See also [[#Issue_-_KeyControllerConflict|Issue - Controls - Keyboard and-or mouse don't work with a game controller installed]]. This plugin must be installed to the game "Data\NVSE\Plugins" folder. Your mod manager may not recognize that location, and manual installation may be required. | ||
| + | |||
| + | <span id="Issue - KeyControllerConflict"></span> | ||
| + | <span id="Issue: Mouse and/or keyboard don't work with a game controller installed"></span> | ||
| + | |||
| + | === Issue - Controls - Mouse and-or keyboard does not work with a game controller installed === | ||
| + | * Cause: The game checks for it before the keyboard, and if detected ... disables the use of the keyboard. Merely being connected can cause the game to ignore the keyboard and mouse. Game controllers usually do not have the ability to be programmed to send key strokes and mouse buttons to the game interface. FNV requires a controller (such as the XBox 360) which is "Xinput" compatible. Some mods will require DirectInput/"DInput" emulation to work with a controller. (See this [https://en.wikipedia.org/wiki/DirectInput DirectInput] Wikipedia article for an overview and comparison of the two Device Input APIs.) | ||
| + | |||
| + | :* Solution-1: Third-party controller adapter software. There are others, but the most commonly referenced is: | ||
| + | ::* [http://www.xpadder.com/?lang=english Xpadder] ($9.99) - maps keyboard keys and mouse button actions to your game controller buttons. | ||
| + | ::: Xpadder also allows you to map the mouse pointer to your game controller sticks. | ||
| + | ::: Xpadder can also handle combinations, sequences, toggles, triggers, shift sets, multiple controllers and more. | ||
| + | ::* [http://www.majorgeeks.com/files/details/xpadder_%28last_freeware_version%29.html Xpadder v5.3] (last freeware version: 13 Apr 2008) | ||
| + | :::: Note that you will lose rumble/vibration on your controller since you will have to choose the "keyboard" input device in the game options menu. Xpadder essentially treats the controller like a secondary mouse & keyboard. | ||
| + | ::* [https://sourceforge.net/projects/antimicro.mirror/ antimicro] (freeware) Gamepad device specific support with various '''Linux''' distributions, '''Windows''' (Vista and later), and '''FreeBSD''', but with limited support for '''FreeBSD''' and '''Windows XP'''. | ||
| + | :::* [https://www.nexusmods.com/newvegas/mods/70603 FNV Gamepad for mods (Antimicro Profile)] Mod: Gamepad profile for Antimicro configured to offer support for certain FNV specific mods. | ||
| + | |||
| + | :* Solution-2a: The "Lutana NVSE plugin" provides DirectInput (aka "DInput") emulation modes (as opposed to the newer, more current DirectX Input (aka "Xinput") mode) which enable controller input with mods that normally require the keyboard, such as Project Nevada. See the mod download page for instructions. As this plugin also provides many other additional functions, it is often required by other mods. | ||
| + | :: {{Lutana NVSE Plugin Status}} | ||
| + | :* Solution-2b: A missing configurable feature of '''JIP LN NVSE''' mod, and a cleaner implementation of the original '''Lutana''' version is: | ||
| + | ::* [https://www.nexusmods.com/newvegas/mods/71894 Controller Support NVSE] by '''Luthien Anarion''' (the LN of JIP LN), Emulates keyboard and mouse inputs when controller buttons are pressed. | ||
| + | |||
| + | :* Solution-3: A "Keyboard/Video/Mouse" (KVM) switch that mechanically let's you switch those devices between one computer and another MAY be a possible solution if your game controller will connect to it and you can disconnect the controller from the computer by means of the switch instead of unplugging it. | ||
| + | |||
| + | :* Solution-4: Disconnect your controller and use only the keyboard. | ||
| + | ::* Disconnect the game controller from your computer. | ||
| + | ::* In the game's Main Menu, select "Settings" and then "Key Mappings". | ||
| + | ::* In the bottom right corner click on "Device" and change it from "controller" to "keyboard/mouse". | ||
| + | ::* Then exit the game and restart it from the vanilla launcher. (This is necessary so it will update the hardware settings in your INI files.) | ||
| + | : See also the [[#Issue - ModsLackControllerSupport|Issue - Mods don't seem to have controller support]] entry. | ||
| + | |||
| + | <span id="Issue - MouseMisbehaves"></span> | ||
| + | <span id="Issue: Mouse controls"></span> | ||
| + | |||
| + | === Issue - Controls - Mouse misbehaves === | ||
| + | Your mouse doesn't behave "in-game" as it does on the desktop. | ||
| + | |||
| + | Pipboy hotkeys: | ||
| + | * TAB = Toggle Pipboy open/closed. Hold several seconds to toggle Pipboy "flashlight". | ||
| + | * F1 = Stats (submenus for reputation, challenges completed, etc.), | ||
| + | * F2 = Inventory (submenus for weapons, apparel, aid, miscellaneous), | ||
| + | * F3 = Data (submenus for map, quest status, notes, and the radio). | ||
| + | <br> | ||
| + | * Cause-1: Game INI "[Controls]" settings. | ||
| + | :* Solution-1: The default "fForeground=" and "iPresent=" values can conflict with the system mouse acceleration, but changes to them can make menu speeds crazy high, so you need the "bBackground=0" changed to "=1" to fix (slow) the menu speeds. Some users find that "bBackground Mouse=1" makes the mouse in menus too slow, so some experimentation may be needed. | ||
| + | |||
| + | :: Backup first (see the [[FNV_General_Mod_Use_Advice#Game_INI_files|Game INI files]] section for details), and then edit all three Fallout INI files so they use the following settings: | ||
| + | <div name="Note Box" class="boilerplate metadata" id="Notice Box" | ||
| + | style="margin:0px 10px 10px 50px;border:1px dashed #DAA520;color: lightgray; | ||
| + | background-color:#424242;padding:3px; | ||
| + | word-wrap: break-word; /* Internet Explorer 5.5+ */ | ||
| + | ">[Controls] | ||
| + | bAlwaysRunByDefault=1<br> | ||
| + | bBackground Mouse=1<br> | ||
| + | bBackground Keyboard=1 | ||
| + | </div> | ||
| + | :: Add: under [Controls] to disable mouse acceleration: | ||
| + | <div name="Note Box" class="boilerplate metadata" id="Notice Box" | ||
| + | style="margin:0px 10px 10px 50px;border:1px dashed #DAA520;color: lightgray; | ||
| + | background-color:#424242;padding:3px; | ||
| + | word-wrap: break-word; /* Internet Explorer 5.5+ */ | ||
| + | ">fForegroundMouseAccelBase=0 | ||
| + | fForegroundMouseAccelTop=0 | ||
| + | fForegroundMouseBase=0 | ||
| + | fForegroundMouseMult=0</div> | ||
| + | :: and Change: (from 1 to 0) | ||
| + | ::<pre>iPresentInterval=0</pre> | ||
| + | |||
| + | * Cause-2: Using a "more than one monitor" setup, and the mouse does not stay confined to the game screen/window, but unexpectedly moves onto the other monitor(s) causing unwanted events when configured to "extend/span" across the monitors. | ||
| + | : Video cards designed to drive multiple monitors have their own "video control panels" for configuring the monitor setup to either "span" (display a video screen across all the monitors at one as if one large monitor), or "duplicate" the same screen on each monitor. | ||
| + | :* Solution-2: Use the vendor provided control panel to configure the display to "span" the monitors. Then configure the game to run in "windowed" mode by changing the three INI files setting to "bFullScreen=0". (Full screen would span across all the monitors at once otherwise.) If you do not have a vendor "control panel" with multi-monitor setup for your monitors, try this tool: | ||
| + | ::* [http://dualmonitortool.sourceforge.net/ Dual Monitor Tools] (open source generic multi-monitor control). | ||
| + | ::: It has a setting to lock the mouse to a certain screen with a hotkey if necessary. | ||
| + | :: Finally use one of the following tools to "confine" the cursor to the game window by running it in a "fake fullscreen borderless window": | ||
| + | ::* [http://www.nexusmods.com/newvegas/mods/59266/? OneTweak] by virusek. Requires NVSE. (There is a Skyrim version as well.) | ||
| + | ::* [http://www.nexusmods.com/newvegas/mods/57843/? FullScreenWindowedMode] by TimThompson89. Also requires a "Script Extender", but works with OBSE, SKSE, FOSE, and NVSE. | ||
| + | |||
| + | * Cause-3: There are points in the game where scripts "DisablePlayerControls" deliberately. Usually this is to prevent the Player from interrupting messages or "cut-away scenes", but sometimes control is not returned to the Player, with the result that the Pipboy menu and other functions like attacking, blocking, and crouching (either with the mouse or the keyboard) fail to work. | ||
| + | :* Solution-3: Use the console command (<~> key) "EnablePlayerControls" (without the quotes). If this solution is only temporary, see the earlier "Causes" and the [[#Issue - KeyControllerConflict|Issue - Controls - Mouse and/or keyboard don't work with a game controller installed]] entry. | ||
| + | |||
| + | <span id="Issue - Mouse(Logitech)"></span> | ||
| + | <span id="Issue: Mouse (Logitech) doesn't highlight or select menu choices"></span> | ||
| + | |||
| + | === Issue - Controls - Mouse ''notably Logitech'' does not highlight or select menu choices === | ||
| + | This issue occurs with the vanilla game and no mods installed. It may have worked fine with older versions of Windows, but now fails with the latest. | ||
| + | * Cause: Logitech drivers have a long history of problems working with Windows games if any of their "advanced" driver features are used. | ||
| + | |||
| + | :* Solution-1: Obtain the latest version of the Logitech "SetPoint" driver, and disable any advanced features like "snap to default button", etc. If there are "game compatibility" options, select those. | ||
| + | |||
| + | :* Solution-2: Uninstall all Logitech drivers and add-on software like "SetPoint". Reboot, and install the bare bones "Microsoft Mouse compatible" driver and any updates instead. If the Logitech mouse won't work with a bare bones MS certified driver, use a different more compatible mouse. | ||
| + | |||
| + | <span id="Issue - RemapAmmoSwap"></span> | ||
| + | |||
| + | === Issue - Controls - Remapping the ''ammo swap'' hotkey from key -2- === | ||
| + | The issue revolves around the fact the game control configuration permits you to remap the "ammo swap" key from the default < 2 > hotkey to something else. | ||
| + | * Cause: Contrary to expectations, this ability to remap "ammo swap" to a different key does not enable you then use the < 2 > key like the other number hotkeys. '''You cannot get the use of the < 2 > key as an 8th hotkey.''' Once you unassign the < 2 > key, it won't ever seem to function again. The game control configuration menu simply ignores any attempts to remap < 2 > to any command; not even back to "ammo swap" again. | ||
| + | |||
| + | :* Solution: Edit the "FalloutPrefs.INI" file (located in the "Users" folder). | ||
| + | ::* Locate the "[Controls]" section. | ||
| + | ::* Find the "Hotkey2" entry; which is called "AmmoSwap" instead. | ||
| + | ::* To restore "AmmoSwap" back to using the < 2 > key, change the value to "0003FFFF". | ||
| + | :* There is an optional ability to consolidate the 7 hotkeys to the number key sequence "1-7", and move the "swap ammo" function to the number "8", as follows. (Everything after a semi-colon is a comment which should not be entered.) This one won't re-order the icons in the inventory, but it'll still work. In the inventory, if you press the < 2 > key, it'll basically light up slot 8, is all. | ||
| + | <div name="Simulated code box" class="boilerplate metadata" id="Warning Notice" | ||
| + | style="margin:0px 10px 10px 50px; border:1px dashed #DAA520; color: lightgray; background-color:#424242; padding:3px; | ||
| + | /* Remove the next four 'white-space' lines to restore default white-space processing. */ | ||
| + | white-space: pre-wrap; /* css-3 */ | ||
| + | white-space: -moz-pre-wrap; /* Mozilla, since 1999 */ | ||
| + | white-space: -pre-wrap; /* Opera 4-6 */ | ||
| + | white-space: -o-pre-wrap; /* Opera 7+ */ | ||
| + | word-wrap: break-word; /* Internet Explorer 5.5+ */ | ||
| + | "> | ||
| + | * Hotkey1=0002FFFF ; key < 1 > | ||
| + | * Hotkey3=0003FFFF ; key < 2 > | ||
| + | * Hotkey4=0004FFFF ; key < 3 > | ||
| + | * Hotkey5=0005FFFF ; key < 4 > | ||
| + | * Hotkey6=0006FFFF ; key < 5 > | ||
| + | * Hotkey7=0007FFFF ; key < 6 > | ||
| + | * Hotkey8=0008FFFF ; key < 7 > | ||
| + | * Ammo Swap=0009FFFF ; key < 8 ></div> | ||
| + | |||
| + | <span id="Issue - GazingFreeze"></span> | ||
| + | |||
| + | === Issue - Gazing in certain directions causes a ''freeze'' === | ||
| + | In certain locations the game appears to freeze when looking in certain directions. Attempting to use the mouse to turn in place takes 10-30 seconds to respond in changing the direction of view.<br> | ||
| + | Known problem locations: | ||
| + | # Looking South of '''Matthews Animal Husbandry Farm'''. | ||
| + | # Looking West from the '''Searchlight Airport''''s Western fence. | ||
| + | # Looking North of '''Guardian Peak'''. | ||
| + | # Looking South from '''The Devil's Throat'''. | ||
| + | |||
| + | * Cause: Mod conflict. | ||
| + | :* Solution: The "Fallout Character Overhaul" (FCO) mod's included "Glowing Ghouls" optional file "FCO - GlowingOne.esp" has been identified as at least one source of this problem. No reports of any patches to this file correcting the situation. | ||
| + | |||
| + | <span id="Issue - GrenadeThrow"></span> | ||
| + | |||
| + | === Issue - Grenade throw always falls at my feet === | ||
| + | * Cause: The "grenade throw" (thrown explosive) weapon has been separated in FO3 and FNV from other "throwing" weapons and is now based upon "explosives skill". The "grenade throw" key is not clearly documented in the list of [http://fallout.wikia.com/wiki/Fallout:_New_Vegas_(PC) PC Controls for Mouse and Keyboard]. | ||
| + | :* Solution-1: Once a "grenade type"/"thrown explosive" is selected, just press and hold the "attack/fire" key/button for a couple of seconds. The longer you hold it, the further the distance thrown (depending in part upon your aim and trajectory). | ||
| + | :: NOTE: [http://fallout.wikia.com/wiki/Thrown_explosive thrown explosives] doesn't work as well as expected in VATS mode as explained in that section of the link. | ||
| + | |||
| + | :*Solution-2: [http://www.nexusmods.com/newvegas/mods/40040/? Project Nevada] has an option to have the distance thrown based on your Strength (STR) instead of the default of "explosives" skill, in addition to using a "hotkey" to combine the selection and throw. | ||
| + | |||
| + | :* Solution-3: There are also two other "grenade key" mods that are intended to make "grenade" (explosive) throwing easier: | ||
| + | ::* [http://www.nexusmods.com/newvegas/mods/38808/? Grenade Hotkey] by vivanto | ||
| + | ::* [http://www.nexusmods.com/newvegas/mods/58171/? Grenade Key] by svartberg | ||
| + | |||
| + | <span id="Issue - KeystrokesPassed"></span> | ||
| + | <span id="Issue: How to determine what keystrokes are being passed"></span> | ||
| + | |||
| + | === Issue - How to determine what keystrokes are being passed === | ||
| + | Sometimes "strange things happen" when you press a key and you wonder just what keystrokes were being sent. | ||
| + | |||
| + | * Cause: Either a mechanical fault in the keyboard or a remapped key function in the software. Unfortunately there is no universal way to tell just which software has remapped conflicting keys. These are usually "context specific", meaning they are part of the application and depend upon what it is expecting at that particular moment. In the case of mods, the last to assign the key mapping "wins". | ||
| + | |||
| + | :* Solution: Software has been developed for showing even unprintable keystrokes (i.e. mouse-clicks) in real-time for streaming screencasts. This can be used for troubleshooting as well. The following are representative examples of available free programs: | ||
| + | ::* [http://github.com/Phaiax/PxKeystrokesForScreencasts PxKeystrokesForScreencasts] by '''Phaiax'''. | ||
| + | ::* [http://aalapshah.in/qipress/ QiPress] by '''aalapshah'''. Lite version is free; Pro version requires a license. | ||
| + | |||
| + | <span id="Issue - HUD-UI-MenuCorrupted"></span> | ||
| + | |||
| + | === Issue - HUD-UI-Menu messed up or unreadable or missing === | ||
| + | * Cause-1: You are using an HUD-UI-Menu mod such as [http://ui.darnified.net/wip/DUIFONV/v1/DUINVv04.7z DarNified UI] (DarnUI) which requires fonts other than the vanilla provided ones to display properly. | ||
| + | |||
| + | :* Solution-1: DarNified UI comes with a set of "DarN" fonts which must be added to the INI files, but there are other fonts available such as: | ||
| + | ::* [http://www.nexusmods.com/newvegas/mods/40471/? Alternative fonts for DarNified UI] | ||
| + | ::* [http://www.nexusmods.com/newvegas/mods/51066/? Alternative Fonts Pack for DarNifiedUI (with cyrillic support)] | ||
| + | ::* [http://www.nexusmods.com/newvegas/mods/60847/? HD More Alternate Fonts for DarNified UI] (in double resolution) | ||
| + | :: DarnUI instructions to edit the "Fallout_default.ini" file come from the [http://forums.bethsoft.com/topic/1143482-wipzbeta-darnified-ui-nv/ DarnUI support thread], but it is recommended to edit all three INI files to be sure ("Fallout_default" in the game root folder and the two in the "Users" folder). The mod [http://www.nexusmods.com/newvegas/mods/54611/? DarnifiedUI Configuration] is a script to automatically make the edits to the default INI file. | ||
| + | :: Manual edit instructions are to replace the existing [Fonts] section with the following: | ||
| + | <pre> | ||
| + | [Fonts] | ||
| + | ; sFontFile_1=Textures\Fonts\Glow_Monofonto_Large.fnt | ||
| + | sFontFile_1=Textures\Fonts\DarN_FranKleinBold_14.fnt | ||
| + | ; sFontFile_2=Textures\Fonts\Monofonto_Large.fnt | ||
| + | sFontFile_2=Textures\Fonts\DarN_FranKleinBold_16.fnt | ||
| + | sFontFile_3=Textures\Fonts\Glow_Monofonto_Medium.fnt | ||
| + | ; sFontFile_4=Textures\Fonts\Monofonto_VeryLarge02_Dialogs2.fnt | ||
| + | sFontFile_4=Textures\Fonts\DarN_Sui_Generis_Otl_10.fnt | ||
| + | sFontFile_5=Textures\Fonts\Fixedsys_Comp_uniform_width.fnt | ||
| + | ; sFontFile_6=Textures\Fonts\Glow_Monofonto_VL_dialogs.fnt | ||
| + | sFontFile_6=Textures\Fonts\DarN_Sui_Generis_Otl_13.fnt | ||
| + | ; sFontFile_7=Textures\Fonts\Baked-in_Monofonto_Large.fnt | ||
| + | sFontFile_7=Textures\Fonts\DarN_Libel_Suit_Otl_24.fnt | ||
| + | sFontFile_8=Textures\Fonts\Glow_Futura_Caps_Large.fnt | ||
| + | sFontFile_9=Textures\Fonts\NVFont_Test.fnt | ||
| + | </pre> | ||
| + | :: Note a semi-colon (";") at the beginning of a line "comments out" that line so it is not read but remains for reference. Other alternative fonts can be used in place of the "DarN_<style>_<size>.fnt" entries, but in that instance it is recommended to add them and comment out the DarN fonts as well. The "<size>" portion of the name is the number of "points tall" for that font. A large number equals a larger character size, so "6" is very small (short) and "24" is quite large (tall). Either "10" or "12" is normal for most text. | ||
| + | |||
| + | * Cause-2: An XML file is missing an expected element. Usually this is caused by a mod installation overwriting the XML file in question. | ||
| + | |||
| + | * Solution-2: It can get complicated. Read this [http://wiki.nexusmods.com/index.php/HUD-UI-Menu_issues HUD-UI-Menu issues] wiki article. | ||
| + | |||
| + | <span id="Issue - MouseAfterFastTravel"></span> | ||
| + | <span id="Issue - MOUSE - not working after fast travel"></span> | ||
| + | |||
| + | === Issue - MOUSE - not working after fast travel === | ||
| + | * Cause: Unknown | ||
| + | :* Solution-1a: After "fast travel", enter the Pipboy "map" tab (see [[#Issue - MouseMisbehaves|Issue - Mouse Misbehaves]] for hotkeys), move the mouse cursor around a bit and then "<Right-Click>" on the map to enter into the "marker placement" menu to see if it is working again. It may take more than one attempt at wiggling the mouse cursor around, but once it responds to the mouse click it should work until the next time you "fast travel". | ||
| + | |||
| + | :* Solution-1b: Rename the "Fallout.INI" and "FalloutPrefs.ini" files located in the "C:\Users\<UserAccountName>\Documents\My Games\FalloutNV" folder to some different name. (Just adding a different extension such as ".org" works.) Then use the game "FalloutNVLauncher.exe" program to cause them to be rebuilt. Refer to the backed up original version files for your previous changes. | ||
| + | |||
| + | <span id="Issue - MouseSensitivity"></span> | ||
| + | |||
| + | === Issue - MOUSE - sensitivity or weapon aiming is off or similar issues === | ||
| + | Monitor is set to a higher than 1920x1080 resolution. | ||
| + | |||
| + | * Cause: FNV was designed for monitor resolutions common prior to 2010. "In 2010, 27-inch LCD monitors with the 2560 × 1440-pixel resolution were released by multiple manufacturers including Apple." - [https://en.wikipedia.org/wiki/Display_resolution Wikipedia on "Display resolution"]. "High Definition" (1920x1080, 16:9 aspect ratio) "FHD standard" was generally considered "high end" for gaming. Newer monitors may have a higher default resolution. | ||
| + | |||
| + | :* Solution: Use a lower, more standard (in 2010) display resolution. (Note the LED/Plasma monitors have a default resolution according to the screen size and "aspect ratio". Lower resolutions may not fill the screen, resulting in "black borders" (e.g. "letterbox style"). "Windowed mode" may be a way around this visual problem.) See the Wikipedia article quoted above for more on the subject, including a table of "resolution standards". | ||
| + | |||
| + | <span id="Issue - UnableAddWeaponMods"></span> | ||
| + | <span id="Issue - Unable to add either of two "weapon mods" to a weapon"></span> | ||
| + | |||
| + | === Issue - Unable to add either of two ''weapon mods'' to a weapon === | ||
| + | * Cause: The mod [http://www.nexusmods.com/newvegas/mods/44515 The Weapon Mod Menu (WMM)] only checks the first of 3 possible mod slots. If this is blank, it assumes there are no mods available. | ||
| + | |||
| + | <div name="Note Box" class="boilerplate metadata" id="Notice Box" | ||
| + | style="margin:0px 10px 10px 10px;border:1px solid #00C600;color: green; | ||
| + | background-color:#fff5f5;padding:3px; | ||
| + | word-wrap: break-word; /* Internet Explorer 5.5+ */ | ||
| + | "> | ||
| + | : NOTE: This is a '''''very rare''''' issue. See the entry [[#Issue - WMMBroke|Issue - WMM - "The Weapon Mod Menu" won't let me add a weapon mod in game]] first. If you do confirm this issue with WMM is the cause, please inform the "current maintainer" listed in the "WIP" notice at the top of this article of the specific weapon with a link to the mod in question so a list of offending plugins can be compiled. | ||
| + | </div> | ||
| + | |||
| + | :* Solution: Edit the "Items | Weapon" entry with GECK so the first and second "Mod Info" tab slots under "Game Effects" are not empty. Typically this will mean moving the second and third slot entries up by one. Be sure to make the plugin containing the Weapon in question the "active" one, as that is the plugin that will get saved. Note this edit will only work if there are already weapon mods available for that weapon. Adding weapon mods that do not already exist is a more involved "customization" process. | ||
| + | |||
| + | <span id="Issue - UnableDrawFireCrouch"></span> | ||
| + | <span id="Issue: Unable to draw weapons, fire, or crouch"></span> | ||
| + | |||
| + | === Issue - Unable to draw weapons or fire or crouch === | ||
Also related: Sunny Smile's initial greeting dialog is actually that from a later stage: | Also related: Sunny Smile's initial greeting dialog is actually that from a later stage: | ||
: Initial greeting: "Cheyenne, stay. Don't worry, she won't bite, unless I tell her to." | : Initial greeting: "Cheyenne, stay. Don't worry, she won't bite, unless I tell her to." | ||
| Line 163: | Line 2,069: | ||
** Permanent: Uninstall any mods that remove all tumbleweeds before creating a new character. Often this functionality is incorporated into "performance" mods, so if it isn't mentioned in the description some testing may be required. However, once the character has stepped outside of Doc Mitchell's so the scripted "tumbleweed" event occurs, they may be installed. | ** Permanent: Uninstall any mods that remove all tumbleweeds before creating a new character. Often this functionality is incorporated into "performance" mods, so if it isn't mentioned in the description some testing may be required. However, once the character has stepped outside of Doc Mitchell's so the scripted "tumbleweed" event occurs, they may be installed. | ||
| − | == | + | <span id="Issue - WMMBroke"></span> |
| − | * Cause | + | <span id="Issue - WMM - "The Weapon Mod Menu" won't let me add a weapon mod in game"></span> |
| + | |||
| + | === Issue - WMM - '''The Weapon Mod Menu''' will not let me add a weapon mod in game === | ||
| + | * Cause: There are a number of unspoken assumptions by [http://www.nexusmods.com/newvegas/mods/44515/? The Weapon Mod Menu (WMM)] that, when verified/resolved, are the usual solutions. | ||
| − | * Solution-1: | + | :* Solution-1: You are trying to "modify" the ''currently equipped weapon'' when you hit the "x" key. |
| − | * | + | :* Solution-2: You have a "weapon mod" that is appropriate for that specific weapon. Most "weapon mods" only apply to very specific weapons. There are (to the best of the collective knowledge) none that apply to ALL weapons. So you have to check the name of the mod very carefully as the differences in the names are subtle. The easiest way to determine the correct mod for a weapon in game is at the "green vending machines" provided by the additional mod [http://www.nexusmods.com/newvegas/mods/39651/? Weapon Mods Expanded (WMX)], which are generally found at all the "Gun Runners Arsenal" (GRA) storefronts. |
| + | |||
| + | :: (There are a very few instances where WMM will refuse to add weapon mods. See [[#Issue - UnableAddWeaponMods|Issue - Unable to add either of two "weapon mods" to a weapon]] entry, but it will require you to look at the mod plugin internals in either [http://www.nexusmods.com/newvegas/mods/34703/? FNVedit] or GECK to verify.) | ||
| + | |||
| + | :* Solution-3: You have installed both [http://www.nexusmods.com/newvegas/mods/42507/? Mod Configuration Menu (MCM)] and WMM in the correct order. (See the wiki article [[HUD-UI-Menu_issues|HUD-UI-Menu issues]].) | ||
| + | |||
| + | :* Solution-4: You do NOT have a game controller attached. If you do, see the [[#Solutions to Control Problems|Solutions to Control Problems]] section. | ||
| + | |||
| + | :* Solution-5: If none of the above are the problem, see if you can find anything in the "fallout_nv_error.log" file. (See [[#Checklist|Checklist item #4]].) | ||
| + | |||
| + | <span id="Issue - WMXLosesMods"></span> | ||
| + | <span id="Issue - WMX - loses my existing weapon mods to the 'Weathered 10mm pistol'"></span> | ||
| + | |||
| + | === Issue - WMX - loses my existing weapon mods to the ''Weathered 10mm pistol'' === | ||
| + | * Cause: This weapon has an unfortunate (seemingly hard-coded) bug that means that any weapon mods applied to it will not be visible on the weapon. | ||
| + | |||
| + | :* Solution: [http://www.nexusmods.com/newvegas/mods/39651 Weapon Mods Expanded (WMX)] detects that you have equipped the 'Weathered 10mm Pistol'. The WMX menu (in the Pip-boy "Inventory" screen for the selected weapon) allows you to swap the defective original Weathered 10mm Pistol for a fully-functional duplicate of it. Doing so will effectively erase any weapon mods already applied to the weapon, so it is recommended to remove them first using [http://www.nexusmods.com/newvegas/mods/44515 The Weapon Mod Menu (WMM)]. When you are ready to proceed, select the 'Swap Weapon' button. Select 'Cancel' if you are not ready to proceed (this menu will appear again when you next equip the bugged Weathered 10mm Pistol). | ||
| − | + | <span id="Issue - ZoomControls"></span> | |
| + | <span id="Issue: ZoomControls"></span> | ||
| − | + | === Issue - ZOOM controls === | |
| + | Symptoms: Suddenly vision "zoom" features (such as "scoped weapons" and dialog "close-in to observe the speaker's face") and related manual controls are no longer working. | ||
| − | * | + | * Cause: Likely a "Field of View (FoV)" setting or conflict. |
| + | :* Solution: Check FOV related setting in recently added mod INI files, such as (purely for example) "[https://www.nexusmods.com/newvegas/mods/65525 New Vegas Reloaded]" and "[https://www.nexusmods.com/newvegas/mods/55085 FOV Slider]", or enhanced configuration mod tools like [https://www.nexusmods.com/newvegas/mods/66347 lStewieAl's Tweaks]. | ||
| − | = | + | <span id="Solutions to "Garden of Eden Construction Kit" (G.E.C.K.) problems"></span> |
| − | |||
| − | |||
| − | + | == Solutions to '''Garden of Eden Construction Kit''' ''aka '''GECK''''' problems == | |
| + | {{GECK: Common Problems}} | ||
| − | + | == Solutions to Graphics problems == | |
| − | |||
| − | |||
| − | |||
| − | |||
| − | |||
| − | + | <span id="Issue: Aiming - 1st Person View (FPV) Iron Sights"></span> | |
| − | + | === Issue - Aiming - 1st Person View ''aka FPV'' Iron Sights === | |
| − | + | This is a built-in game Main Menu setting, under: "Settings | Game Play | True Iron Sights [ON | OFF]". It is also accessible from the "Pause Menu" screen during a game session. It is only visibly in effect in FPV. | |
| − | |||
| − | + | Only certain weapons have this "feature", though some mods add it to weapons that lack it in vanilla. When this setting is enabled, those weapons will switch:<br> | |
| − | < | + | * from "the weapon is shifted to the right of the center of the screen so it is not aligned between your 'eyes' and the target, and you aim using the crosshair" mode,<br> |
| − | + | * to "the weapon is centered in the screen between your 'eyes' and the target so you aim by lining up the front and rear 'iron sights' on the weapon (no crosshair) just as in real life";<br> | |
| − | + | : when you click using the (default) Right-Mouse button (aka "<RClick>") as if "blocking with a melee weapon" or "zooming in on the target with a scoped weapon". | |
| − | < | ||
| − | and | ||
| − | < | ||
| − | |||
| − | |||
| − | < | ||
| − | + | Without the "True Iron Sights" setting to ON, the same "weapon centered in the screen" view is displayed, but the "rear sight" on the weapon is lower down and you cannot "truly" align the front and rear sights. You use the "crosshair" instead. | |
| − | === Issue | + | <span id="Issue: Aiming - 1st Person View (FPV) is off center"></span> |
| − | + | === Issue - Aiming - 1st Person View ''aka FPV'' is off center === | |
| + | The situation is a bit more complex than it appears on the surface. Apparent weapon position is determined by the animation files. It is also tied in with whether or not you use the game's "Auto Aim" feature, which is active by default. In addition there are various "Field of View" (FOV) settings the game switches between under certain circumstances, which affect what is visible of the scene. | ||
| − | * | + | * Cause-1: This is controlled by a single variable: "fFirstPersonHandFollowMult". The default value is ".85", so this was a deliberate design decision to impose some inaccuracy by the developers, as a value of "1.0" is "dead center" of the aiming point. |
| + | :* Solution-1a: The mod [http://www.nexusmods.com/newvegas/mods/55709/? Gun Follows Crosshairs in First Person] by '''Grasscid''' applies this fix. | ||
| + | :: Note the mod [http://www.nexusmods.com/newvegas/mods/35781/? First Person Gun No Follow] by '''Azrael Dark''' combines nicely with "Gun Follows" so the gun doesn't follow the cross-hairs up out of the "neutral carry position" until you actually fire. | ||
| + | :* Solution-1b: Set "fFirstPersonHandFollowMult" to "1.0". (Some other mods use this setting as well, so conflicts are possible.) | ||
| − | + | * Cause-2: Your problem might be a result of changing the "Field of View" (FOV). | |
| − | * Cause- | + | <blockquote> |
| + | From [http://www.tweakguides.com/Fallout3_8.html TweakGuides]: | ||
| + | : fDefaultFOV=75.0000 - Shows the default Field of View in degrees for the game, which is 75 degrees. Changing the Field of View using this variable doesn't seem to work properly as it is not applied when the game starts, so instead you will need to use the FOV console command (See Console Commands section) each time you start them game to set a different field of view. | ||
| − | + | : Update: It has been discovered that by inserting the line fDefaultWorldFOV=75.0 at the bottom of the Display section of the Fallout.ini file, and assigning it a value equal to the FOV you want, you can now permanently change the default Field of View in the game. Remember however that if you change the default FOV, you may also need to change the FOV for other screen elements - see the fRenderedTerminalFOV and fPipboy1stPersonFOV commands below. Note also that you can alter the fDefault1stPersonFOV=55.0000 value to alter how much of your body/weapon is shown in front of you (Fallout.ini). | |
| − | + | </blockquote> | |
| − | * | + | :* Solution-2a: [http://www.nexusmods.com/newvegas/mods/55085/? FOV Slider] by '''Roy Batty''' is a simple mod that adds an MCM menu that allows for adjusting the Fields of View for all of the game's camera views. Look into "Weapon FOV scale" (to compensate for larger or smaller Player Fields of View and their affect on aim speed). |
| − | * Solution- | + | :* Solution-2b: Other than adjusting the various FOV settings, try tweaking the following default values (which set the camera position relative to the head node in FPV) in the INIs [General] section: |
*: Make backups of the INIs before changing them. | *: Make backups of the INIs before changing them. | ||
| + | <blockquote> | ||
| + | : fCameraPosX=0.0 | ||
| + | : fCameraPosY=9.5 | ||
| + | : fCameraPosZ=6.0 | ||
| + | : bUseThirdPersonArms=1 | ||
| + | : bTPArmsEnableIronSights=1 | ||
| + | </blockquote> | ||
| + | |||
| + | * Cause-3: A surprising number of vanilla weapons have misaligned meshes between the projectile nodes and the cross-hair. | ||
| + | :* Solution-3: The [http://www.nexusmods.com/newvegas/mods/65052 Weapon Mesh Improvement Mod (WMIM)] by '''Roy Batty''' is an on-going effort to fix the vanilla weapons wholesale. Similar issues with mod added weapons have to be taken up with their respective authors in comments on those mod download pages. There are various individual mods to be found by using the Nexus "search" function on the term "iron sights". | ||
| + | ::<span style="color: red;background-color:#fff5f5;">NOTE: While '''WMIM''' is "meshes" and [http://www.nexusmods.com/newvegas/mods/38285 Weapon Retexture Project (WRP)] by '''Millenia''' is "textures", the latter includes modified meshes that are required for his textures to display properly with their own sub-folder, so it's incompatible with any other mods that adjust vanilla weapon meshes. (Notably most "Nifskope Weapon" mods and '''WMIM'''. '''WRP v1.95''' from 2012 uses vanilla folder paths and is somewhat more compatible.) The [http://www.nexusmods.com/newvegas/mods/38927 Rifle 1st Person Accuracy Fix] mod by '''joefoxx082''' is an alternative solution to the accuracy issue, though obviously not as comprehensive as '''WMIM'''. As is often the case, you may have to give up one mod or the other.</span> | ||
| + | |||
| + | |||
| + | <span id="Issue: Aiming - 3rd Person View (TPV) is off center"></span> | ||
| + | |||
| + | === Issue - Aiming - 3rd Person View ''aka TPV'' is off center === | ||
| + | * Cause: This is a more complex issue than aiming in 1st Person View (FPV). The player is always viewing the action from the perspective of the camera. The camera location is independent of the character's eyes, and from the weapon. It is always "center of the screen". In FPV, it is positioned to simulate the eye view of the character. In 3rd Person View (TPV), the camera (and you) are not looking from the perspective of either the character or weapon. Instead the camera is positioned behind and off to the side so the back of the character and more of the scene to the opposite side of the character is in view. This camera setting is not generally adjustable, though there are mods that help. The cross-hair is positioned in the center of the screen. It is not accurately aligned with the character's eyes or the weapon. The "Field of View" (FOV) controls how much of the cell scene is visible. This is adjustable and there are actually a number of inter-related FOV settings. | ||
| + | : Please see the [[#Issue: Aiming - Disable Auto Aim or not?|Issue: Aiming - Disable Auto Aim or not?]] section first to understand the role of Auto Aim on the problem. As pointed out there, weapon animations are not aligned consistently the same. In TPV, if Auto Aim is disabled there is no expectation that the alignment of the weapon is with the cross-hair. As the camera position is behind and offset to the right (by default) from the center of the body so you are looking more or less along the angle of the weapon towards the cross-hair, but you can't even expect the cross-hair to be aligned with the position of the body facing either. | ||
| + | |||
| + | : It is important to understand: the game is not designed for accuracy while shooting in TPV. You are in essence always "shooting from the hip", while situational modifiers ("iron sights", crouching, weapon skill, etc.) affect the "spread" inherent in the weapon. (See [http://geck.bethsoft.com/index.php?title=Gun_Spread_Formula GECK: Gun Spread Formula].) If you need accuracy, then by design you need to be in FPV (which is why the game switches you to that mode ''when you use certain weapons or a "Scope"'' and have "True Iron Sights" enabled). Not all weapons have "Iron Sights" (i.e. some energy weapons) and some "Power Armor" mods are known to "break/replace" the vanilla "True Iron Sights" functionality. For accuracy, you want a smaller "fOverShoulderFOV" value to more closely align the center of the screen with the cross-hair. | ||
| + | |||
| + | :* Solution-1: Use a mod that allows you to adjust the left to right offset of the camera position. Either of works well combined with Solution-2 options: | ||
| + | ::* [http://www.nexusmods.com/newvegas/mods/34744/? Centered 3rd Person Camera] by '''Jahandar'''. | ||
| + | ::* [http://www.nexusmods.com/newvegas/mods/57588/? Dynamic Third Person Camera] by '''claustromaniac'''. | ||
| + | |||
| + | :* Solution-2: Use a mod that allows you to adjust how far behind the camera is offset from the PC's back. | ||
| + | ::* [http://www.nexusmods.com/newvegas/mods/44207/? 3rd-Person-Camera-FIX] by '''humannature66'''. | ||
| + | ::* [http://www.nexusmods.com/newvegas/mods/36773/? Further 3rd Person Camera] by '''Silverglade'''. | ||
| + | |||
| + | :* Solution-3: [http://www.nexusmods.com/newvegas/mods/55085/? FOV Slider] by '''Roy Batty''' is a simple mod that adds an MCM menu that allows for adjusting the Fields of View for all of the game's camera views. | ||
| + | :: Those interesting in fighting primarily while in TPV should experiment with "fOverShoulderFOV" and "Iron Sight FOV Zoom Time". | ||
| + | |||
| + | <span id="Issue: Aiming - Disable Auto Aim or not?"></span> | ||
| + | === Issue - Aiming - Disable Auto Aim or not === | ||
| + | * Cause: In Fallout 3 and New Vegas bullets can actually curve or shoot in a direction they shouldn't based on a dice roll (on top of the normal bullet spread). | ||
| + | : If we completely remove the Auto Aim features, the game fires your bullets from your weapon parallel to the 3D model (like it should be physically). The only issue is that every weapon is somehow differently aligned: the .44 Magnum is slightly pointing under the cross-hair, the Hunting Rifle is pointing to its right, etc .. So without Auto Aim enabled, the cross-hair is not really where you are aiming anymore and it's different for each weapon. | ||
| + | : Basically the Auto Aim feature redirects your bullets toward the center of the screen. This would be a great feature if it wasn't also used in combat as a targetting aid. When your cross-hair is near the bounding box of an enemy's limb, Auto Aim instead shifts the bullets towards the nearest limb. | ||
| + | |||
| + | :* Solution-1: [http://www.nexusmods.com/newvegas/mods/34723/? No Auto Aim] by '''EddieV223'''. Rather than completely disabling Auto Aim, this mod uses some settings with values so small the effect is negligible. Uses the following values (default = FalloutNV): | ||
| + | ::* fAutoAimMaxDistance: 50000.000000 (default: 1800.000000) | ||
| + | ::* fAutoAimScreenPercentage: 0.000100 (default: 10.000000) | ||
| + | ::* fAutoAimMaxDegrees: 0.000100 (default: 3.000000) | ||
| + | |||
| + | :* Solution-2: [http://www.nexusmods.com/newvegas/mods/36057/? Advanced VATS and FIXED Autoaim with Improved Binoculars] by '''orgolove'''. Sets the focus of the Auto Aim to the edge of the game engine's rendering distance, and thus ensures that any bullet accurately goes to wherever your crosshair is pointing. Uses the following values (default = FalloutNV): | ||
| + | ::* fAutoAimMaxDistance: 1000000.000000 (default: 1800.000000) | ||
| + | ::* fAutoAimScreenPercentage: 10.000000 (default: 10.000000) | ||
| + | ::* fAutoAimMaxDegrees: 3.000000 (default: 3.000000) | ||
| + | ::* fVATSH2HWarpDistanceMult: 0.100000 (default 0.270000) | ||
| + | ::* fVATSMeleeWarpDistanceMult: 0.100000 (default:0.320000) | ||
| + | ::* fVATSMaxChance: 100.000000 (default: NA, added by mod) | ||
| + | ::* fVATSMAXEngageDistance: 10000.000000 (default: NA, added by mod) | ||
| + | ::* fVATSMeleeMaxDistance: 1500.000000 (default: NA, added by mod) | ||
| + | |||
| + | :* Solution-3: [http://www.nexusmods.com/newvegas/mods/55085/? FOV Slider] by '''Roy Batty''' is a simple mod that adds an MCM menu that allows for adjusting the Fields of View for all of the game's camera views. | ||
| + | :: Those interesting in playing while in 3rd Person View (TPV) should look into "fOverShoulderFOV" (which isn't available in FO3 but is added by the mod [http://www.nexusmods.com/fallout3/mods/15319/? Greatly improved 3rd person aiming] by Peste.) | ||
| + | |||
| + | <span id="Issue: Aiming - Full-Auto Iron Sights animation jump"></span> | ||
| + | === Issue - Aiming - Full-Auto Iron Sights animation jump === | ||
| + | With "full auto" weapons, when aiming down the "iron sights" in 1st person and firing (even with "JIP Select Fire" set to single shot) the whole weapon seems to jump down so that the iron sights are below the actual aim point. When you stop firing it returns to normal. | ||
| + | |||
| + | : Files that modify "iron sight" firing animations always have the word "attack" in them, and end with "is" (for "iron sight"). They begin with the number of hands holding the weapon (1h/2h), followed by the general weapon type ("P"istol, "A"utomatic, "R"ifle, "M"elee, etc.), which combined make up the "weapon category". Automatic weapons all use one attack animation in their category: '''1hpattackloopis''' ("OneHandPistol" animation type in '''GECK''' or "Pistol - Ballistic" in [http://www.nexusmods.com/newvegas/mods/34703/? FNVedit]); '''2haattackloopis''' ("TwoHandAutomatic" or "Rifle - Automatic"); and '''2hrattackloopis''' ("TwoHandRifle" or "Rifle - Ballistic"). Other "iron sight" weapons have their attacks marked with a number ('''2hrattack''3''is''' for example). | ||
| + | |||
| + | : In order to know which animations cause problems, it would be beneficial to have '''FNVEdit''' installed, load all the mods affecting that weapon, and check which attack animation the weapon in question uses. Or if you use '''GECK''', you can discover this in the "Art & Sound" section of the weapon. | ||
| + | |||
| + | * Cause: When you fire it starts the full-auto attack loop and screws up aiming through the scope or iron sights. | ||
| + | :* Solution-1: Mod [http://www.nexusmods.com/newvegas/mods/48509/? Improved Automatic Ironsight animations] | ||
| + | |||
| + | :* Solution-2: Mod [http://www.nexusmods.com/newvegas/mods/65052?tab=posts Weapon Mesh Improvement Mod] | ||
| + | : There are other "weapon animation" replacement mods as well that may perform better with a particular weapon. Now you know enough to "pick and choose" which files to replace between mods. | ||
| + | |||
| + | <span id="Issue: Aiming - Weapon stays centered after releasing RMB"></span> | ||
| + | |||
| + | === Issue - Aiming - Weapon stays centered after releasing RMB === | ||
| + | Basically: when you fire your weapon in TPV and press the (default) "Right Mouse Button (RMB)" (switching to FPV "scope" or "iron sights" aiming) and IMMEDIATELY let go of the RMB, the weapon stays centered for a second or so before it goes back to normal. This DOES NOT happen if you fire and hold RMB/Aim for those 1-2 seconds; it's almost as if the weapon is stuck in it's FPV firing position for a second or so every time you fire. The camera zooms back out, but nothing else. | ||
| + | |||
| + | * Cause: This is a bug in some animations. It is particularly noticeable with the "plasma rifle". | ||
| + | :* Solution: Try an alternate source for the animation in question, and replace the vanilla ".kf" file. Search the Nexus on the keyword "animation". (There is also the mod [http://www.nexusmods.com/newvegas/mods/64339 Asurah Reanimation Pack] which will not get picked up by that keyword search.) The mod [http://www.nexusmods.com/newvegas/mods/57561 Animation Resources] by '''Fallout2AM''' includes some, as well as a "AnimTool (AnT)" which allows you to invoke an animation after you choose it from a menu, on you or on a target (NPC or Creature) for testing. | ||
| + | |||
| + | <span id="Issue: Animation Clipping"></span> | ||
| + | === Issue - Animation Clipping === | ||
| + | A common problem is "clipping" of the hand/fingers gripping a weapon while aiming or reloading. Sometimes this appears as a gap between the hand and the weapon; sometimes as the weapon cutting into the hand. | ||
| + | |||
| + | * Cause-1: IF you are using combinations of mesh/texture and animation replacements, or various "post processor" packages such as "ENB", "Reshade/SweetFX", or "NewVegasReloaded/NVGE" then there may be conflicts just as with other mods. | ||
| + | :* Solution-1: Engage in [[# Mod_Conflict_Isolation|Mod Conflict Isolation]] to identify where the conflicts reside. Identify a consistent, readily determined example of the conflict. In general, removing the most sweeping, broadly affecting "overhaul" addition first will be more efficient. It may even be necessary start from a bare-bones vanilla load order without any enhancements of any kind to determine the issue does not occur without any modifications. Then, gradually add and test. | ||
| + | |||
| + | * Cause-2: It's simply how the game handles weapon animations. Weapon animation is shared between weapons of the same type (e.g "two handed weapons"). For example, both the "Hunting rifle" and the "Varmint rifle" use the same animation set, based upon the vanilla meshes. Some weapon mesh used by a given mod might be thicker or thinner, resulting in clipping. | ||
| + | :* Solution-2: Not much can be done about it. As most of the time these are "transient" temporary issues, it's best to just ignore them. If it really bothers you, then you will have to give up whichever mod is providing the altered mesh causing the clipping. | ||
| + | :: Note that mods considered purely one thing or another (such as "texture replacers") still might include their own meshes. Every mesh has embedded in it the path to the texture file it uses. If the mod uses a unique folder structure, then it HAS to have altered the mesh as well in order to find the correct textures. Case in point: version 2.x of [http://www.nexusmods.com/newvegas/mods/38285 Weapon Retexture Project (WRP)] by '''millenia'''. Version 1 used a vanilla folder structure; version 2 has a unique one making it incompatible with some other popular mods (e.g. '''WMX''') and animation replacements. Always check both the general mod description and that of the individual files. | ||
| + | |||
| + | <span id="Issue: AuthorityGlasses"></span> | ||
| + | === Issue - Authority Glasses worn weirdly === | ||
| + | Symptoms: When worn, the Authority Glasses don't "sit right"; as in dangle off the face incorrectly hanging down the side as if from one ear. | ||
| + | |||
| + | * Cause: Conflict between "[http://www.nexusmods.com/newvegas/mods/51664/? Yukichigai Unofficial Patch - YUP]" and any mod that replaces the mesh for the Authority Glasses. | ||
| + | :* Solution: Let YUP overwrite those mods (somewhat difficult with just the "load order" as YUP should be loaded early/"low numbered" in the sequence) or resolve the conflict with a "Bashed/Merge Patch" file. Please see the '[[FNV_General_Mod_Use_Advice#Third_Rule:_The_Rule_of_One Third Rule:|The Rule of One]]' and '[[FNV_General_Mod_Use_Advice#Merge_Patch_File|Merge Patch File]]' sections of the wiki "[[FNV_General_Mod_Use_Advice|FNV General Mod Use Advice]]" article. When in doubt, create a "Merge Patch" file for your overall "load order" anyway. | ||
| + | |||
| + | <span id="Issue: Blood Decal Duration"></span> | ||
| + | |||
| + | === Issue - Blood Decal Duration === | ||
| + | Adjust how long the "decals" of blood spatter remain on things when they take damage. | ||
| + | * Cause: This is controlled by several settings in the game INI files. Change in all three files: see the [[FNV General Mod Use Advice#Game INI files|Game INI files]] section for the location and names of each. | ||
| + | :* Solution: The following information is collected from several sources. Just enter the numeric values given. The "[def: nn]" notation is the game default value for reference. The remainder of each entry is informational only and should not be entered. | ||
| + | :: Mod: [http://www.nexusmods.com/newvegas/mods/212/? Enhanced Blood textures(EBT)] by '''dDefinder'''. | ||
| + | :: See also: [http://forum.step-project.com/topic/8963-fallout-new-vegas-default-values-for-all-valid-ini-settings/ Fallout New Vegas Default Values for All Valid INI Settings] | ||
| + | <div style="margin:0px 10px 10px 50px; border:1px dashed #DAA520; color: lightgray; background-color:#424242; padding:3px;"> | ||
| + | [Display]<br> | ||
| + | ''fDecalLifetime=''[def: 10.0000] ; the lifetime of all decals. The number can be changed to further increase or decrease the duration. EBT increases this to 800.000.<br> | ||
| + | ''iMaxDecalsPerFrame=''[def: 10] ; maximum number of decals (mainly blood splatters on the ground) visible on screen at any time (FalloutPrefs.ini).<br> | ||
| + | ''fDecalLOD0=''[def: NA] ; increases the distance that blood decals appear. EBT adds & sets to 70000.<br> | ||
| + | ''fDecalLOD1=''[def: 1000.0000] ; undefined functionality but FNV default setting.<br> | ||
| + | ''fDecalLOD2=''[def: 1500.0000] ; undefined functionality but FNV default setting.<br> | ||
| + | ''iMaxDecalsPerFrame=''[def: 10]<br> | ||
| + | ''iMaxSkinDecalsPerFrame=''[def: 3]<br> | ||
| + | |||
| + | [Decals]<br> | ||
| + | ''uMaxDecalCount=''[def:100] ; This variable seems to determine how many decals will remain on screen for longer than a few seconds. It won't prevent multiple decals from being shown, but if you lower the number, additional decals above the value you set for this variable will fade out very quickly (FalloutPrefs.ini). | ||
| + | </div> | ||
| + | |||
| + | <span id="Issue: Blood, Gore, Limb Explosions & Dismemberment"></span> | ||
| + | === Issue - Blood-Gore-Limb Explosions and Dismemberment === | ||
| + | The Fallout series is known for being "bloody" and "gory" with dismembered limbs, exploding heads, and chunks of viscera ("gore globs") and splashes of blood lying about. The game does have a generally undocumented setting to turn ALL the blood and gore off, which is apparently enabled by default in the German regional "no gore" version; but no finer control over the chances of such occurring when sufficient damage is applied. | ||
| + | * Cause: This is by design. The points of dismemberment are defined in the mesh file as "animation nodes", and are called "meat caps". These "meat caps" are the visible stumps remaining on each end when the limb is dismembered or exploded. A detached limb can then be further dismembered into "gore chunks". | ||
| + | :* Solution-1: To completely disable all gore and blood effects: | ||
| + | :: Open Fallout "INI" files (located in both the game root folder and the "Users" folder). | ||
| + | :: Add under the "[General]" section of all three: | ||
| + | :: <pre>bDisableALLGore=1</pre> | ||
| + | :: Save the file. | ||
| + | |||
| + | :* Solution-2: To adjust the chance of Limb Dismemberment and Explosion in finer detail, the mod [http://rd.nexusmods.com/newvegas/mods/59147 Ragdolls] by '''MadAce''', under it's '''MCM''' menu has settings affecting: | ||
| + | ::* "Limb Explosion chance" | ||
| + | ::* "Limb Dismemberment Chance" | ||
| + | ::* "Limb Dismemberment Chance" | ||
| + | ::* "Explosion Strength" | ||
| + | ::* "Projectile Strength" | ||
| + | :: which can be set all the way down to zero percent (pt). Please note this does not distinguish between the damage inflicted by "projectile" and "energy" weapons. | ||
| − | + | <span id="Issue: BobbingNPCs"></span> | |
| + | === Issue - Bobbing NPCs === | ||
| + | Symptoms: All NPCs start to bob up and down whenever looked at from close range. Zooming in on them causes it from any distance, even with a vanilla game. | ||
| − | * Solution- | + | * Cause: Framerate higher than 60FPS. The more your framerate is above 60 fps, the more likely you'll see this problem. |
| + | :* Solution-1a: Make sure that your in-game framerate is capped below 120 FPS. Use some FPS counter within the game to double check if it really is below 120. | ||
| + | :* Solution-1b: There is a trade off between ''player foot dynamic placement'' efficiency and the absence of foot bouncing glitches for NPCs. It eliminates NPCs bouncing glitches almost entirely, but also makes ''player dynamic foot placement'' work slightly worse. | ||
| + | :: Set these lines in either "FalloutPrefs.ini" or "FalloutCustom.ini" to the following: | ||
| + | <div style="margin:0px 10px 10px 50px; border:1px solid #DAA520; color:#FF9933; background-color:#000000; padding:3px;"> | ||
| + | [FootIK]<br> | ||
| + | fOnOffGain=0.01<br> | ||
| + | bFootPlacementOn=0<br> | ||
| + | fPelvisUpDownBias=0<br> | ||
| + | fPelvisOffsetDamping=0<br> | ||
| + | fOriginalGroundHeightMS=0 | ||
| + | </div> | ||
| + | :* Solution-1c: Disable ''FootIK'' completely. | ||
| + | <div style="margin:0px 10px 10px 50px; border:1px solid #DAA520; color:#FF9933; background-color:#000000; padding:3px;"> | ||
| + | [RagdollAnim]<br> | ||
| + | bFootIK = 0 | ||
| + | </div> | ||
| − | + | <span id="Issue: Body Replacer - Big Head / Hair bug"></span> | |
| − | + | === Issue - Body Replacer - Big Head or Hair bug === | |
| − | + | When you unpack the BSA's to do modding for Fallout NV, the Actor's grow abnormally large foreheads which make people look half-bald, and make it so hair sticks out of hats, or hats become embedded in the heads. | |
| − | |||
| − | |||
| − | |||
| − | === Issue: Distant terrain/LOD flickers rapidly === | + | Cause: EGM files don't work outside of BSA archives in '''Fallout New Vegas'''. |
| + | : Meaning, you have to have the head / hairs / character files for the mod in a BSA file (named after the mod). The problem occurs when any of the files (even original vanilla ones) are "loose" outside of a BSA. It's a quirk of the game engine. | ||
| + | :* Solution: Package the modded loose files into a BSA when done. | ||
| + | :: The rules for naming a BSA are simple: the first significant portion (enough to distinguish it from any other similar but different mod name) must match that of the mod plugin ESP file, and have the ".BSA" extension. There can be more than one such BSA plugin, but usually this "matching significant portion of the ESP filename" is up to any embedded space (e.g. "Fallout - Textures.bsa"). It must be packaged as a "Bethesda Software Archive" (BSA) using a tool like "[http://www.nexusmods.com/newvegas/mods/64745 BSArch]", and containing the same folder paths as the loose files used by the mod in question. | ||
| + | :: See also the other "Issue: Body Replacer -" entries under 'Solutions to Graphics problems' section in the wiki "[http://wiki.nexusmods.com/index.php/Fallout_NV_Mod_Conflict_Troubleshooting Fallout NV Mod Conflict Troubleshooting]" guide. | ||
| + | |||
| + | <span id="Issue: Body Replacer - Custom Body Types"></span> | ||
| + | === Issue - Body Replacer - Custom Body Types === | ||
| + | Problems getting various custom body replacements, such as "Type 3" and "Type 6", to work correctly. (Since most of these are classified as "Adult" mods, you may need to change your Nexus Profile "Content Blocking" setting to access them.) | ||
| + | |||
| + | * Cause: Install failures, usually from not understanding what is involved. | ||
| + | :* Solution: This is a general guide to what is involved in replacing the vanilla body of one gender with a "Custom Race" one for the Player Character Only. Mods for NPCs are separate. There are separate mods for Males and Females or other Custom Races. Refer to the specific body mod install instructions for specific details appropriate to that mod. But understanding what is involved will make it easier to understand those options. For another detailed explanation, see the [http://wiki.nexusmods.com/index.php/FNV_General_Mod_Use_Advice#Body_Replacement_Basics Body Replacement Basics] section of the "FNV General Mod USE Advice" article. | ||
| + | |||
| + | :: Replacing the vanilla body involves two different sets of files: "meshes" and "textures", which usually come as separate mods. Mods labelled "body type" are actually "meshes" that have a different shape (proportions) in some regards to those used for the vanilla body. They are generally going to be found in the Nexus site [http://www.nexusmods.com/newvegas/mods/searchresults/?src_cat=66 New Vegas Models and Textures] category. | ||
| + | |||
| + | :: Body replacement only affects the "unclothed" body. "Clothing" and "armor" (collectively: "garments") have their own "body shape", which is independent of that of the underlying body. They do not "warp around" or "conform to" the underlying body; they completely replace it. If you have body replacement type "A" and clothing/armor for body type "B", what you see is type "B". So the "nude" body type does not appear at all; even the "bare skin" elements are part of the garment. ALL "garment" mods are based around some body type (assume "vanilla" if not specified). FNV does not have separate "slots" for different parts of the body: only distinguishing between the head, hands, and the remainder of the body (misleadingly called "upper body slot" as there is no "lower body" nor "legs" slot). Further on the consequences of this below. | ||
| + | |||
| + | :: The vanilla body "texture" has underwear included, so it is not removable. Custom body textures may have both a "nude" option and an "underwear" option texture. These are "all-or-nothing" choices: everyone is nude underneath their armor and clothing, or everyone wears underwear. Select a custom body ''texture'' mod that is designed to be compatible with your custom body type (i.e. the ''mesh'') mod. Otherwise you may have apparent "black bands" around the groin area or huge scars on the breasts because the ''vanilla texture'' (used by default) doesn't fit correctly to the adjusted body mesh. There is now at least one "nude body" texture mod for vanilla meshes: ''Simple Vanilla Nude Body Replacers'' by '''Jokerine''' (linked below under "NPC overhauls"). Toggling "ArchiveInvalidation" off-and-then-on again as with other texture replacements may be necessary. | ||
| + | |||
| + | :: As a consequence of these custom meshes, vanilla clothing and armor will have "clipping" issues where body parts show through or don't seem to "fit" correctly leaving gaps or seams. Some "clipping" is minor, but often it is major enough that you have to also install mods for clothing and armor that are made specifically for that body type. Note that armor usually has it's own "body mesh" included, avoiding this clipping. (This is not true for "accessories" that go on sub-sets of the body: such as gloves, bracers, and shoes.) This means armor ignores the underlying "body" shape and instead that you can choose among those using the same texture '''UVmapping''' based upon the same base model (i.e. Type 6M, Type 6, Type 4, Type 3M, Type 3F, and Type 3). As a consequence, your Type 6 naked body can "wear" a Type 3 armor, but will appear to be Type 3 in proportions until it is taken off. | ||
| + | |||
| + | :: "B-n-B" or "Bouncing Breasts and/or Butts" mods are meshes based upon a different "armature" or "skeleton" rigged with added "bones" (e.g. "breast bones") and weights to support the "bouncing" parts. (These different bones and weights are also the case with some "Havok" and "Power Armor" mods.) They will either provide or tell you to use a specific "skeleton" in order to work correctly. Without that customized skeleton, the "bouncing" parts will not bounce and may appear "deformed" (i.e. stretching out to the horizon) or otherwise appear "weird". There is only one skeleton used by each race in the game, so it will not adversely affect any "non-bouncing" meshes which will just ignore the added bones they don't know about. As a consequence, in order to see the "bouncing" effect in clothing and armors, you may need to install mods with those "bouncing" features enabled. Sometimes special animations for certain actions (i.e. walking, sneaking, jumping, swimming, dancing) are also available. Not all mods can use the same specialized skeleton, so check the description/documentation for each carefully. This "skeleton" choice can easily limit your options. There are three "universal compatibility skeleton" mods for FNV on '''Nexus''' designed to overcome this compatibility problem: | ||
| + | ::* [http://www.nexusmods.com/newvegas/mods/68776 NV Compatibility Skeleton] by '''Kicho666, Xilandro, Fallout2AM'''. A skeleton with compatibility for the latest mods (such as "Ragdolls", Xilandro's various B42 mods (Head Tracking, Quickthrow, Inertia etc.), and "Titans of the West"). | ||
| + | ::* [http://www.nexusmods.com/newvegas/mods/45229 Compatability Skeleton - BnB BodyExtender FAFF NVG] by '''Astymma'''. | ||
| + | ::* [http://www.nexusmods.com/newvegas/mods/56657 The Skeleton] by '''Deedes'''. | ||
| + | ::: Read their descriptions carefully. | ||
| + | |||
| + | :: Because the head is separate from the body, that means it too can have custom versions of it's mesh and textures. In all other regards it is similar to but independent of the body. As the head (hair and face) is a separate component from the rest of the body, custom meshes often have a problem with a visible "seam" where the head mesh joins with the body mesh. It is just a fact of life you will have to live with; nothing the mod creators can completely eliminate (though some come very close). There are "seam concealer" mods that provide necklaces and similar to hide this seam. | ||
| + | |||
| + | :: "Face mods" are yet another category subject to preference. You might want to look at the [http://www.nexusmods.com/newvegas/mods/67268/? Loose Comparison of Face Mods (Document)] PDF which compares 3 female NPCs (Cass, Sunny, and Veronica) among a number of separate mod treatments and combinations to get an idea of their differences. | ||
| + | |||
| + | :: Some features, such as scars and tattoos, are part of the texture and not a separate addition. Others have to use specific [http://geck.bethsoft.com/index.php?title=Race body part slots], which are broken down into "Body Data", "Face Data", and "FaceGen Race". Only one mesh can be assigned to each body part. For instance, "Face Data" has only "Eye colors" and "Hair styles". Which in turn means you can have "hair" or a "hat/helmet" but not both. If there is hair showing under a hat or helmet, it is part of that "hat" mesh. FNV does not have a separate slot for "facial hair" (i.e. beards, mustaches, "mutton chops", etc.). Mod authors have to cannibalize the use of a different slot for the purpose, or make the facial hair part of the texture itself. | ||
| + | |||
| + | :: Because they use a slot on the head, custom "Hair" and "Eye" mods can get complex to install. Sometimes they require using the GECK to add their mesh and textures to the "head" mod. Read their installation instructions carefully before choosing. | ||
| + | |||
| + | :: FAQs:<br> | ||
| + | :: Q: What are the common male body replacers? Female ones?<br> | ||
| + | :: A: This is subject to change, but as of this writing these "meshes" are often mentioned and can be found in the "New Vegas: Models and Textures" category unless otherwise indicated. As they are often in the gated "Adult" section of the site and feature nudity, the links are provided but may not be accessible without changing your site access permissions. With the full name AND authors you should easily find their descriptions using the "search" feature: | ||
| + | ::: Males: | ||
| + | :::* [http://www.nexusmods.com/newvegas/mods/35451 Breezes New Vegas Males] by '''sesom'''. | ||
| + | :::* [https://www.nexusmods.com/newvegas/mods/70160 Improved Vanilla Male Body - Seamless - 4k] by '''zzjay and 7thNighthawk'''. | ||
| + | :::* [http://www.nexusmods.com/newvegas/mods/54731 Roberts Male Body FNV] by '''Nivea and Favoredsoul'''. | ||
| + | :::* [https://www.nexusmods.com/newvegas/mods/70530 Robert N - Male Body Replacer] by '''Robert, Nivea, AlienSlof, and Allnarta'''. | ||
| + | :::* [http://www.nexusmods.com/newvegas/mods/64001 Roberts and Brawler Body Complementary Resource for FNV and TTW] by '''Good0593''' and '''Nivea''' and '''Favoredsoul''' and '''RocketLombax'''. | ||
| + | ::: Females: | ||
| + | :::* [http://www.nexusmods.com/newvegas/mods/67311 Beloved Girls Race Type4 body] by '''pr4ch'''. (Note the screenshots are taken using ENB.) | ||
| + | :::* [http://www.nexusmods.com/newvegas/mods/34702 BEWARE OF GIRL Type 3 HiRez HiDetailed Replacer] by '''BlackBlossom'''. | ||
| + | :::* [http://www.nexusmods.com/newvegas/mods/54438 DIMONIZED TYPE3 female body] by '''dimon99''' (Copied from FO3 section unmodified. Not ported, so clothing portion doesn't work. See FO3 version for full description.) | ||
| + | :::* [http://www.nexusmods.com/newvegas/mods/40401 Lings Playable Races] by '''Volek'''. | ||
| + | :::* [http://www.nexusmods.com/newvegas/mods/34825 Type3 Body and Armor replacer] by '''Exeter'''. | ||
| + | :::* [http://www.nexusmods.com/newvegas/mods/50612 Type3 Narrowed Shoulder BerryHD Acup body] by '''ChunchunMARU'''. | ||
| + | :::* [http://www.nexusmods.com/fallout3/mods/14359 Type3 F Body Replacer] by '''Exeter'''. (FO3 version) Not ported to FNV. | ||
| + | :::* [http://www.nexusmods.com/newvegas/mods/57627 Type3BG] by '''digimonkey'''. | ||
| + | :::* [http://www.nexusmods.com/newvegas/mods/44709 Type3M Body Replacer] by '''MAK'''. | ||
| + | :::* [http://www.nexusmods.com/newvegas/mods/66903 Type4 Female Body and Armors] by '''unkacc11'''. No neckseams and much improved arms and upperbody. Complete set of armor and clothing with support for all DLCs, TTW, and Impact. | ||
| + | :::* [http://www.nexusmods.com/newvegas/mods/67017 Berry and Aliceberry Type4 compatible Body] by '''ChunchunMARU'''. This is a Replacer mod for Type4 Female Body! Slim and breasts smaller than Type4. And, Type4 head file for Shojo race is also in the optional file. | ||
| + | :::* [http://www.nexusmods.com/fallout3/mods/5326 Type V Female Body and Armor Replacer] by '''Luchaire'''. ('Dimonized' FO3 version) Not ported to FNV. | ||
| + | :::* [http://www.nexusmods.com/newvegas/mods/65627? Type6 Sexy outfits with nude body (Replacer (T6) and Non-Replacer)] by '''munnibhai'''. The "replacer" version includes the original Type 6 Body (by '''Necroscope''', now hidden) for the Player character only. | ||
| + | :::* [http://www.nexusmods.com/newvegas/mods/67073 Type6 Nude Body Mod (BNB) Edition3] by '''munnibhai'''. This edition in the series adds BNB to the body and contains new outfits including denims, sexy frocks and a bonus Pakistani Lehenga. African Skin tone is working. | ||
| + | :::* [http://www.nexusmods.com/newvegas/mods/67104 Type(6) Sexy Outfits Merged BNB Compatible] by '''munnibhai'''. Type6 Sexy Outfits Edition 1 & 2 merged into 1 and made BNB compatible. 43 Outfits. | ||
| + | :::* [http://rd.nexusmods.com/newvegas/mods/45162 Type 6 Modification Body NV] (T6M) by '''Izumiko'''. This is often (incorrectly) called just "Type 6" by some mods. If it refers to '''Izumiko''''s version, then it means "Type 6M". | ||
| + | :::* [http://www.nexusmods.com/newvegas/mods/66839 Type6-P (T6P) nude body BNB Replacer] by '''munnibhai''' is a more "petite" version of the Type-6 body. | ||
| + | :::* [http://www.nexusmods.com/newvegas/mods/65697 Type C Body Replacer] by '''Cytiene/AusAllerWelt'''. | ||
| + | :::* [http://www.nexusmods.com/newvegas/mods/37820 Athletic Female Body] by '''skims'''. | ||
| + | :::* [http://www.nexusmods.com/newvegas/mods/47986 Athletic Body Type Bouncing BNB] by '''Tattooedillusions via Skims'''. | ||
| + | :::* [http://www.nexusmods.com/newvegas/mods/60731 Female bodybuilder race and companion] by '''Bernt '''. "Brenda" Race and NCCS companion. Together with a variety of outfits and a pose pack. Requires [http://www.nexusmods.com/newvegas/mods/38059/? NCCS companion system] and [http://www.nexusmods.com/newvegas/mods/38853/? ACM companion wheel for NCCS]. | ||
| + | :::* <del>[http://www.nexusmods.com/newvegas/mods/42569 Muscle Girl Project - NV] by '''zomb_killer and Tigersan'''.</del> (No longer available. See "Female bodybuilder race and companion" by '''Bernt ''' instead.) | ||
| + | :::* [http://www.nexusmods.com/newvegas/mods/47277 SKINNY 6 Body BNB] by '''tattooedillusions via Humannature66''' | ||
| + | :::* [http://www.nexusmods.com/newvegas/mods/67079 Wasteland Gals - Body Textures and Playable Races Type 3 4 6] is a retexture of type 3, 4 and 6 female bodies and faces that makes raiders, ghouls and old people playable. | ||
| + | ::: NPC overhauls: | ||
| + | :::* [http://www.nexusmods.com/newvegas/mods/64014 Simple Vanilla Nude Body Replacers] by '''Jokerine'''. | ||
| + | ::::* [http://jokerineborealis.tumblr.com/tagged/fnv Jokerine's Website with additional resources including apparel mod patches for vanilla bodies] such as "Spice of Life - Variety Armor and Clothing" for Vanilla/Default Body. | ||
| + | :::* [http://www.nexusmods.com/newvegas/mods/39325 NVCE - New Vegas Character Expansions] by '''Machienzo'''. | ||
| + | :::* [http://www.nexusmods.com/newvegas/mods/54460 Fallout Character Overhaul] by '''Drumber'''. | ||
| + | :::* [http://www.nexusmods.com/newvegas/mods/39218 Fallout New Vegas Redesigned 2] by '''Dracomies'''. | ||
| + | :::* [http://www.nexusmods.com/newvegas/mods/56312 Fallout New Vegas Redesigned 3] by '''Dracomies and Weijiesen'''. | ||
| + | |||
| + | :: Q: What is the difference between Body Type 3 and Body Type 6M, etc?<br> | ||
| + | :: A: It's a matter of personal preference in "shape": breast, hip and/or butt size. All are potentially weighted differently ("bounce" effect). Type 6 has an "apple bottom", Type 3 are thinner "waifs". Apparently T3 originated in Fallout 3 along with Type V; Type 6 (another variant of Type 3) by '''Necroscope''' came along when NV came out, but has since been hidden by the author. Type 6M (by '''Izumiko''') is a "rounder" modification of the basic Type 6 model. Why do they have numbers? Your guess is as good as any. Any that have T3 in the name are derivatives of the original Dimonized Type 3 set from Fallout 3 (variants: Alice, Berry, Cali = A Cup, B Cup, C Cup). | ||
| + | :::* HD versions have more polygons, which place a heavier demand on the video memory. | ||
| + | :::* Hentai versions have puffy nipples and are based on T3F. | ||
| + | :::* It's best to use clothing and armor specific to the particular body type or they won't render properly. And it's not simple to "fix". | ||
| + | |||
| + | :: Q: Can Body Type6M (or T6, Type V/T5, T3BG, or T3M) can be used with textures for Body Type3?<br> | ||
| + | :: A: Yes, if they have the same '''UVmapping''' (part of the texture "*.dds" file). However, the dimensions of the armor will not change from the Type3 to the others. The armor contains it's own body mesh. (See the next question.) The mod [http://www.nexusmods.com/newvegas/mods/67079 Wasteland Gals - Body Textures and Playable Races Type 3 4 6] is a retexture of type 3, 4 and 6 female bodies and faces that makes raiders, ghouls and old people playable. (Note the caveats near the bottom of the description carefully.) | ||
| + | |||
| + | :: Q: What about clothing and armor compatibility between body types?<br> | ||
| + | :: A: Compatibility is a problematic term to use in this case. Generally, the only thing that is needed for the body types and associated armors to work together is for them to share the same '''UVmap'''. Any mesh that shares a '''UVmap''' can also share textures. And generally the ones that are variations on Type3 do. There are more choices for Type3 bodies than any others. Remember: the "garment" completely replaces the body supposedly underneath it. You are seeing the shape of the garment mesh, not that of the naked body. | ||
| + | ::: "BnB" is a little more complicated. Basically, in order to use BnB you have to have the skeleton. So you can't just take an individual BnB outfit and have it work unless you've downloaded the skeleton from the main file. The reason is because the outfit will have two reference bones (left breast and right breast) that aren't in the normal skeleton, and that causes glitches or crashes. But you can have the BnB stuff installed and still use other non-bounce outfits, because those outfits don't need the extra bones. | ||
| + | ::: Now, if your idea of compatibility is for your character's body to stay the same size no matter the outfits, then you're generally out of luck. For the time you're wearing an outfit, your body will be that size, for most things. This is because virtually all major outfits include their own body meshes as part of the outfit. The exception are accessory-type items like individual shirts or shorts or whatever. Those are usually fitted to a particular body that is NOT included in the mesh file, and in this case if you're not using the right body then the clothing will clip badly. As always, read the documentation carefully. | ||
| + | ::: However, with that said, there was a tool called [http://kgtools.wordpress.com/clothing-converter/ KGTools Clothing Converter]. This would automatically convert Armor, Clothing, or Equipment from one body style to another! Unfortunately the KGTools web site containing the downloads is no longer accessible. Use the links [http://www.loverslab.com/topic/27557-new-clothing-body-style-converter-beta-v089f-10-26-2014/ on this site (adults 18+ only)] instead. The documentation is still available on the first link provided. | ||
| + | |||
| + | :: Q: Can I use a different body type for my companions (and NPCs) than for my character?<br> | ||
| + | :: A: Yes, as long as they have their own ''male/femaleupperbody.nif'' file. | ||
| + | |||
| + | : In summary, you can expect to need "Body Type", "Body Texture", "Clothing and Armor", and possibly "Head", "Hair", and "Eyes" mods that are all compatible to work together. | ||
| + | |||
| + | <span id="Issue: Body Replacer - Custom Hair, Eyes, Heads, and/or Races"></span> | ||
| + | |||
| + | === Issue - Body Replacer - Custom Hair-Eyes-Heads and-or Races === | ||
| + | Problems getting custom heads or head elements (e.g. Hair and Eyes) to work correctly with a specific body replacement mod. | ||
| + | |||
| + | * Cause-1: As pointed out in [[#Issue:_Body_Replacer_-_Custom_Body_Types|Issue: Body Replacer - Custom Body Types]] you can't just assume every mod affecting the head will work with every other, or even with the body mod you have chosen. They are not "mix-n-match" and you can only use one such mod at a time for each race. For example, if it says it's for "Head03", then it won't work with the vanilla game heads. The popular mod [http://www.nexusmods.com/newvegas/mods/44312/? Mojave Delight for Type3] by '''Glosshouse''' is for '''Type3''' bodies only, while [http://www.nexusmods.com/newvegas/mods/35878/? Beauty Pack PLUS -Project Mikoto- Hair - Eyes - Presets] by '''Matteius''' is not intended to work with any [[custom race]] body mods like '''Type3'''. Read the description and installation instructions carefully to determine what the mod is designed to work with. Most known issues are noted either on the description page or under the "comments" page. Note that some require MANUAL installation. | ||
| + | |||
| + | : The following is taken from the description on the "Mojave Delight for Type3" download page: | ||
| + | <blockquote> | ||
| + | <div name="Note Box" class="boilerplate metadata" id="Notice Box" | ||
| + | style="margin:0px 10px 10px 0px;border:1px dashed #DAA520;color: lightgray; | ||
| + | background-color:#333333;padding:3px; | ||
| + | word-wrap: break-word; /* Internet Explorer 5.5+ */ | ||
| + | "> | ||
| + | There is a long standing issue with custom races, hair and eye incompatibility causing CTD. Be forewarned that you WILL experience CTD when using the Character Generator IF you do this:<br> | ||
| + | 1) Put on a Custom Hair (that means ANY of the Cool Hairs included in the mod)<br> | ||
| + | 2) Then Put on a Custom Eye Color (THAT means ANY of the custom eyes included in this mod)<br> | ||
| + | <br> | ||
| + | YOUR GAME WILL CRASH - THERE IS NO SOLUTION FOR THIS AT THIS TIME THAT WE ARE AWARE OF.<br> | ||
| + | <br> | ||
| + | Therefore, in order to change eye colors without CTD you MUST:<br> | ||
| + | 1) PUT ON A VANILLA HAIR STYLE FIRST then<br> | ||
| + | 2) change eye color.<br> | ||
| + | <br> | ||
| + | As long as you do this in this order your game will NOT crash.</div> | ||
| + | </blockquote> | ||
| + | : Once you have successfully changed eye color, then you can safely change to your custom hair style. But any time later that you wish to change any of these features you must repeat the process: vanilla hair, custom eyes, custom hair. | ||
| + | :* Solution-1: Hair and Eyes are "slots" on the head. This mean such mods are either replacement textures for the head model (either vanilla or some custom head), or have to edit the mesh and texture files to point to the mod's elements using the GECK. The solution depends upon the mod. | ||
| + | ::* [http://www.nexusmods.com/newvegas/mods/62744 Megaton Hairs - Vegas Edition] by '''zzjay''' is for the vanilla game races only, but includes a tutorial on how to add it MANUALLY to your custom race. | ||
| + | ::* [http://www.nexusmods.com/newvegas/mods/35878/? Beauty Pack PLUS -Project Mikoto- Hair - Eyes - Presets] by '''Matteius''' | ||
| + | ::* [http://forums.nexusmods.com/index.php?/topic/5184015-guide-replacing-vanilla-hair-with-modded-hair/ GUIDE: Replacing Vanilla Hair with Modded Hair] Forum Thread outlines the basic procedure using the GECK. | ||
| + | ::* [http://www.nexusmods.com/newvegas/mods/61538/? Hairs - Eyes - Races Auto - Patcher] mod by '''Fallout 2AM''' attempts to automate this "patching" process for custom races. | ||
| + | ::* [http://www.nexusmods.com/newvegas/mods/68016/? Hair Patcher Two] mod by '''Fallout 2AM''' adds a few differences to '''Hairs - Eyes - Races Auto - Patcher''' (by the same author). | ||
| + | ::* [http://www.moddb.com/mods/lings-coiffure-nv/downloads/lings-coiffure-nv-v42 Lings Coiffure NV] by '''earache42'''. | ||
| + | ::* [http://www.nexusmods.com/newvegas/mods/44312/? Mojave Delight for Type3] by '''Glosshouse''' | ||
| + | |||
| + | * Cause-2: Unsuccessfully trying to switch between race or hair mods. The character becoming invisible, getting stuck in the ground and unable to even use the console to toggle the "clipping" command (''TCL''), or unable to access the Pip-boy, usually happens if you uninstall/disable the race that your character is set to. Trying to use the console command "''ShowRaceMenu''" here will probably crash the game. | ||
| + | :* Solution-2: Instead reinstall and enable whatever mod contains the race you were playing, then use the console ''ShowRaceMenu'' command to switch to something else vanilla before removing it again. Then perform a "Clean Save" as laid out in the 'Clean Saves' section of the wiki "FNV General Mod Use Advice" article before attempting to install a replacement. | ||
| + | * A guide on custom race creation that covers adding hairs to races is: [http://www.nexusmods.com/newvegas/images/102834 How to Create a Custom Race] by '''jim_uk''' in the "Images" section of the Nexus. There is also a [http://www.nexusmods.com/newvegas/mods/62261/? How to Create a Custom Race PDF] version in the Mods section. | ||
| + | |||
| + | <span id="Issue: Body Replacer - Custom Race skin mismatch"></span> | ||
| + | |||
| + | === Issue - Body Replacer - Custom Race skin mismatch === | ||
| + | This is most commonly seen as a difference between the skin color of the head and the body. This is a "texture" problem. Adjusting the tone sliders in the racemenu does not change anything. | ||
| + | * Cause: This generally occurs when the plugin is an ESP rather than an ESM file. | ||
| + | :* Solution: Note that the Player and NPCs are distinct and what is a problem for one may not be for the other. | ||
| + | :: A custom race defined in an ESP will work properly for the player, even though the head and body will be mismatched for NPCs. | ||
| + | :: Defining the NPC in an ESM is the only solution that works for everyone. | ||
| + | :: If you are using this on an NPC, make sure the NPC is defined in an ESM and not in an ESP. There are some tweaks to your INI files that can kinda fix it for ESP files, but they don't work for everyone. | ||
| + | ::* In both the "Fallout.INI" and "FalloutPrefs.INI" files in the "C:\Users\<AccountName>\Documents\My Games\FalloutNV" folder, and the "Fallout_default.INI" in the game root folder, set: | ||
| + | <div name="Simulated code box" class="boilerplate metadata" id="Warning Notice" | ||
| + | style="margin:0px 10px 10px 70px; border:1px dashed #DAA520; color: lightgray; background-color:#424242; padding:3px; | ||
| + | /* Remove the next four 'white-space' lines to restore default white-space processing. */ | ||
| + | white-space: pre-wrap; /* css-3 */ | ||
| + | white-space: -moz-pre-wrap; /* Mozilla, since 1999 */ | ||
| + | white-space: -pre-wrap; /* Opera 4-6 */ | ||
| + | white-space: -o-pre-wrap; /* Opera 7+ */ | ||
| + | word-wrap: break-word; /* Internet Explorer 5.5+ */ | ||
| + | ">bLoadFaceGenHeadEGTFiles=1</div> | ||
| + | ::* Toggling "ArchiveInvalidation" sometimes works, as does repeatedly reloading the save game again and toggling it until the head and body match skin tones. | ||
| + | |||
| + | :: It is also possible that the shader type and shader flags are set wrong in the race's body mesh. Skin parts need the shader type to be ''SHADER_SKIN'', and the ''SF_Specular'', ''SF_Skinned'', ''SF_FaceGen'', ''SF_Remappable_Textures'', and ''SF_ZBuffer_Test'' flags need to be set. You can check and modify these using '''NifSkope'''. If these are not set properly, then the custom race body and skin won't work properly for both NPCs and for the player, if the player uses that race. | ||
| + | |||
| + | :: Another thing to check is that the skin textures are all there and are all named properly. If the body texture for the race is named '''UpperBody.dds''', then the normal map needs to be named '''UpperBody_n.dds''' and the skin needs to be '''UpperBody_sk.dds''', and all of those files need to be in the same folder. You only define the base texture ('''UpperBody.dds''') for the race in the '''GECK''''. The '''GECK''' just assumes that the other files will be in the same place and will have the same name. | ||
| + | |||
| + | :: And finally, keep in mind that whatever '''clothes''' or '''armor''' you use will have body parts defined, and those skin textures will show instead of whatever body you have defined in the '''GECK'''. In other words, if your character is wearing overalls and bare arms are visible, those bare arms are part of the overalls mesh and are not the bare arms from the race's body mesh. If the clothing wasn't created especially for your custom race, the bare skin parts of the outfits might not match the rest of your custom body type. | ||
| + | |||
| + | :: See also the following in the wiki [[Getting_started_creating_mods_using_GECK|Getting started creating mods using GECK]] article: | ||
| + | ::* [[#Tip-ESMOnly|TIP: When can you use an ESM only mod?]] This contains the "rules" of making an ESM. | ||
| + | ::* [[#Tip-CustomRaceFaces | TIP: Custom Race & Faces.]] | ||
| + | ::* [[#Tip-CustomSkinTextures | TIP: Custom Race & Skin Textures.]] | ||
| + | |||
| + | <span id="Issue: Body Replacer - Default/Vanilla"></span> | ||
| + | === Issue - Body Replacer - Default ''aka Vanilla'' === | ||
| + | No matter your opinion of the matter, one of the most common reasons for installing a "body replacer" is to enable a "nude body" when clothing and armor are removed. (Since these are classified as "Adult" mods, you may need to change your Nexus Profile "Content Blocking" setting to access them.) Some would prefer to not have to get into the complexities of resorting to "custom races" to get this feature. | ||
| + | |||
| + | * Cause: The provided default (vanilla) bodies in the game have "underwear" as an integral part of the body texture. This cannot be "removed" along with other clothing or armor. There are some mods which provide alternative "underwear", but these are also integrated into the texture. | ||
| + | |||
| + | :* Solution: The mod "[https://www.nexusmods.com/newvegas/mods/64014 Simple Vanilla Nude Body Replacers] by '''Ghostwalker71''' and '''Jokerine''' is a simple mesh and texture replacer that gives the default bodies anatomically correct appendages. They are the same resolution (1024x1024) as the vanilla "race" files they replace. | ||
| + | |||
| + | :* Related: | ||
| + | ::* [http://www.nexusmods.com/newvegas/mods/40724/? DIMONIZED presets for Vanilla races for FNV] by '''dimon99'''. Female FaceGen presets only. | ||
| + | ::* [http://www.nexusmods.com/newvegas/mods/55174 zzjay's body and face textures workshop - Type 3 and 6] by '''zzjay'''. Includes optional "face texture" files for vanilla "race" heads as well as Type 3 and Type 6 races. | ||
| + | ::* [https://www.nexusmods.com/newvegas/mods/70160 Improved Vanilla Male Body - Seamless - 4k] by '''zzjay''' and '''7thNighthawk'''. '''High poly''', improved and SEAMLESS version of the male body. Compatible with VANILLA outfits and comes with actual feet instead of blocks, thanks to Robert's. Underwear, nude and "erect" versions. | ||
| + | |||
| + | <span id="Issue: Body Replacer - FCO ("Fallout Character Overhaul") not working or conflicting"></span> | ||
| + | |||
| + | === Issue - Body Replacer - Fallout Character Overhaul ''aka FCO'' not working or conflicting === | ||
| + | * Cause-1: Usually the problem is not understanding or following the installation instructions. | ||
| + | : Note that FCO is a "high resolution" texture replacement of characters and NPCs. These will place additional demands upon your video system. Not all older systems will be able to handle the challenge. | ||
| + | : The extensive [http://forums.nexusmods.com/index.php?showtopic=1257503 FCO "comments" forum thread] on the subject has the answers to pretty much every conceivable question not answered here. Use the forum search function. | ||
| + | :* Solution-1: Make sure you have complied with the following requirements: | ||
| + | ::* Install the latest version of [http://nvse.silverlock.org/ NVSE] (original version from the Silverlock site has been at 5.1b4 for many years. The current version known as "xNVSE" from [https://github.com/xNVSE/NVSE GitHub] is in version 6.x). | ||
| + | ::* Install [http://www.nexusmods.com/newvegas/mods/57174/? User Interface Organizer] (UIO). | ||
| + | ::* Have the official "Old World Blues (OWB)" DLC installed and active. | ||
| + | ::* Use one of the mod managers recommended by the author, or understand enough to be able to manually install it yourself. If you can't or have to make a choice then use of [http://www.nexusmods.com/newvegas/mods/54991/ Fallout Mod Manager - Forked (FOMM-Forked)] is recommended as FCO has an install wizard written for it. | ||
| + | ::* Only install optional components of FCO you actually need. When in doubt, don't. You can add them later. | ||
| + | ::* Toggle your "ArchiveInvalidation" off-and-on again after installing FCO, as it is replacing texture files. | ||
| + | ::* Start a new game either upon installing or uninstalling FCO. The changes it makes to characters are such the effects upon a game in progress are not supported. | ||
| + | |||
| + | * Cause-2: "Fallout Character Overhaul" (FCO) v3.01 has some bugs that can make it unplayable if you don't understand how to correct them yourself. | ||
| + | :* Solution-2a: The author recommends the authorized patch [http://www.nexusmods.com/newvegas/mods/61357/? FCO Bugfixes] by Lunarion Silver to correct these issues. | ||
| + | :* Solution-2b: [http://www.nexusmods.com/newvegas/mods/64012/? Fallout Character Overhaul - Pink Hands Fix] by Vainlash. | ||
| + | :* Solution-2c: Other mods may also have their own patches for FCO. Be sure to check the download pages for any mods already installed for "compatibility patches" for FCO. Be careful as to which version of FCO each patch is designed to work with. | ||
| + | |||
| + | <span id="Issue: Body Replacer - FCO or FNV Redesigned3 Characters have pink faces or clean bodies with dirty faces"></span> | ||
| + | |||
| + | === Issue - Body Replacer - FCO or FNV Redesigned3 Characters have pink faces or clean bodies with dirty faces === | ||
| + | * Cause: While FCO and FNV Redesigned3 (FNVR3) can work together, there are often difficulties such as pink/magenta faces or fiends/raiders who normally are "dirty" looking suddenly having "clean" bodies with dirty faces depending upon the options chosen for each mod. | ||
| + | :* Solution: While the FNVR3 recommendation is to install it after FCO, the proper solution is a "compatibility patch file" between the two mods. Finally there is one specifically to address this issue. Make sure you have all patch files provided by either mod installed first. Then install the mod [http://www.nexusmods.com/newvegas/mods/63230/? Fallout Character Overhaul Pink Faces fix] by '''Fheese'''. See the comments for additional information. | ||
| + | |||
| + | <span id="Issue: Body Replacer - FCO or FNV Redesigned3 Eyes rolled to the side"></span> | ||
| + | === Issue - Body Replacer - FCO or FNV Redesigned3 Eyes rolled to the side === | ||
| + | Commonly seen with [http://www.nexusmods.com/newvegas/mods/54460/?tab=2&navtag=http%3A%2F%2Fwww.nexusmods.com%2Fnewvegas%2Fajax%2Fmodfiles%2F%3Fid%3D54460&pUp=1 Fallout Character Overhaul (FCO)] (designed to remodel NPC faces) in combination with various other character mods and mods that affect appearance, especially eyes. This often is related to attempts to use both FCO and "Fallout New Vegas Redesigned" (FNVR; similar goal) in combination. | ||
| + | |||
| + | * Cause-1: Mod conflict with FCO. Note the older version (v2.3.1) is available on the same download page under "Old Versions". | ||
| + | :* Solution-1: The current version of FCO is v3.01, which has new eye textures. | ||
| + | |||
| + | * Cause-2: According to the author of all FNVR versions, with FNVR3 the correct approach in conjunction with FCO3 is to use one or the other. 'Although FCO will "technically" work with New Vegas Redesigned 3, it's best not to. It's best to use one or the other. But not both. This makes it so that you will get New Vegas Redesigned 3's faces instead of the ones in FCO and it leaves the characters I left alone (ie. Lt. Monroe), etc. alone.' A more detailed expanaition can be found in [https://forums.nexusmods.com/index.php?/topic/1876875-new-vegas-redesigned-3/page-96#entry16892164 the FNVR3 forum thread]. | ||
| + | : Note there are separate mod download pages for [http://www.nexusmods.com/newvegas/mods/39218/? FNV Redesigned 2 (FNVR2)] and [http://www.nexusmods.com/newvegas/mods/56312/? FNV Redesigned 3 (FNVR3)]. | ||
| + | |||
| + | :* Solutions-2: As FCO3 does not work well with "Fallout New Vegas Redesigned" (FNVR), despite the author's advice people have had some success (with the same caveats as listed in the post above) using FCO2 instead of FCO3 in combination with FNVR2. Any one of the following may also be required to resolve the "eye roll" problem. | ||
| + | ::* [http://www.nexusmods.com/newvegas/mods/37537/? Hi-Res Eyes Replacer by Zenl] for FCO2. | ||
| + | ::* Try reinstalling and not using the "child eye fix". | ||
| + | ::* Do you use a Bashed Patch and tag "FCOMaster.esm" with "Eyes"? | ||
| + | ::* Possible conflict with another mod that affects eyes, such as "Beauty Pack PLUS -Project Mikoto- Hair - Eyes - Presets by Matteius" or various "Project Mikoto for <specific companion>" mods. | ||
| + | |||
| + | <span id="Issue: Body Replacer - FNV Redesigned 3 (FNVR3) and Qwinn's Refined FNV Redesigned 3 (QRNVR3)"></span> | ||
| + | === Issue - Body Replacer - FNV Redesigned 3 ''aka FNVR3'' and Qwinns Refined FNV Redesigned 3 ''aka QRNVR3'' === | ||
| + | '''Dracomie''''s "Fallout New Vegas Redesigned 3 (FNVR3)" mod is often combined with '''Drumber''''s "Fallout Character Overhaul (FCO)" mod. This can be done successfully, but requires close adherence to the '''FNVR3''' install instructions. Even so, many people have had problems with crashes and performance in heavily modded games. | ||
| + | |||
| + | * Cause: The mod has been in production since '''FNV''' was released in 2010, and it's never had a thorough cleaning. Over the near-decade that '''Dracomies''' has spent working on it, the '''GECK''' added tons of wild edits (it does that), and there were even some obsolete values from before the '''Fallout Official Patches''' were applied back in 2010/2011 still lurking in the plugins. | ||
| + | : In addition, '''FNVR3''' relied on both an ESM and an ESP plugin. The main reason for the ESP is that when "NPC Actor" records are stored only in an ESM, you can get visual glitches such as what some call "whiteface", generally intense bright discoloration. '''FNVR3''' also suggests setting ''bLoadFaceGenHeadEGTFiles=1'' in the various INI files to further help with this problem, but that setting is an intense resource hog (it generates textures for every character on the fly while in game), which is a lot to ask of your modded setup on what is already a fairly unstable engine. There is a better way to resolve this though, using the "Export Face Textures" feature in the '''GECK''', eliminating the need for an ESP file. | ||
| + | |||
| + | :* Solution: The mod [http://www.nexusmods.com/newvegas/mods/65865 Qwinn's Refined FNV Redesigned 3 (QRNVR3)] by '''Qwinn''' is an authorized overhaul of FNVR3 to cleanup all the old issues. The mod is currently a "beta test" of the cleanup which, if successful, will be rolled into the official '''FNVR3''' release. It is applied as a "patch" to an existing '''FCO+FNVR3''' installation, and takes care of the question about disabling the '''FCO''' ESM file by replacing it with an empty "dummy" version. | ||
| + | :: Qwinn has authored two articles to supplement QRNVR3: | ||
| + | ::* [http://www.nexusmods.com/newvegas/articles/55232 Complete NVR3 Installation Instructions] This should help every NVSR3 user, even if they don't use Qwinn's mod. | ||
| + | ::* [http://www.nexusmods.com/newvegas/articles/55233 How to Export NPC Face Textures for ESMs] | ||
| + | |||
| + | <span id="Issue: Body Replacer - In-game doesn't look quite like the author's images"></span> | ||
| + | === Issue - Body Replacer - In-game does not look quite like the authors images === | ||
| + | * Cause: Mod authors usually choose 3rd Person "poses" available from other mods to show off their results. Those poses accentuate the figure in a way that the normal in-game animation does not. Also, the game has a horrible "fisheye lens" effect with the default of 75 or higher "Field of View" (FoV). The problem lies with the way the game is displaying the image. For screenshots modders and imageshare users tend to greatly reduce the FoV to correct the problem, sometimes going as low as 30 or even 20. The game is unplayable with the FoV this low; but it makes for better character screenshots. | ||
| + | :* Solution: Ignore it, or play around with the FoV using a mod such as [http://www.nexusmods.com/newvegas/mods/55085 FOV Slider]. However, note there are several different FoV settings and they have some impact upon each other. The mod [http://www.nexusmods.com/newvegas/mods/36773 Further 3rd Person Camera] for normal game play may also help. | ||
| + | |||
| + | <span id="Issue: Body Replacer - Installing "Beware of Girl" (BoG) FOMOD with "Mod Organizer" (MO)"></span> | ||
| + | |||
| + | === Issue - Body Replacer - Installing '''Beware of Girl''' ''aka BoG'' FOMOD with '''Mod Organizer''' ''aka MO'' === | ||
| + | Many people have had problems getting this to install. The following needs to be understood. | ||
| + | |||
| + | * There is more than just the body to consider when replacing appearance. Please see the [[#Issue:_Body_Replacer_-_Custom_Body_Types|Issue: Body Replacer - Custom Body Types]] section of this article. | ||
| + | * BoG is a high resolution ''texture'' FOR Type3 bodies, not vanilla bodies. | ||
| + | * BoG is not itself a "body replacer" mesh. | ||
| + | * BoG is designed for Type3 bodies, NOT vanilla bodies. (Yes, this is almost the same thing as the first point, but it bears repeating.) | ||
| + | * If you only install this BoG ''texture'' replacer on vanilla bodies, there will be ugly underwear seams on a naked body. Like two textures/meshes are conflicting. | ||
| + | |||
| + | * To use this body mod (BoG), you should install a Type 3 Body & Armor ''mesh'' Replacer. An example would be [http://www.nexusmods.com/newvegas/mods/34825/? Type3 Body and Armor replacer] by '''Exeter'''. It is not the only one. | ||
| + | |||
| + | # Download & Install your chosen "Type3 body and armor replacer" main file and their respective updates/patches. | ||
| + | #: Remember to '''Merge''' instead of "replace" them when installing. | ||
| + | # Download & Install "Type 3 Armors" for the DLC's and their respective updates/patches in this order if applicable. Examples by '''Exeter''': | ||
| + | ## [http://www.nexusmods.com/newvegas/mods/40595/? Dead Money Type3 Outfits] | ||
| + | ## [http://www.nexusmods.com/newvegas/mods/41884/? Honest Hearts Type3 Tribal Armors] | ||
| + | ## [http://www.nexusmods.com/newvegas/mods/41884/? Old World Blues Armors for Type3] | ||
| + | ## [http://www.nexusmods.com/newvegas/mods/44034/? Lonesome Road Armors for Type3] | ||
| + | #: Remember to '''Merge''' updates/patches, not "replace". | ||
| + | # Download the [http://www.nexusmods.com/newvegas/mods/34702/? "Beware of Girl Type 3 HiRez HiDetailed Replacer] (BoG) FOMOD. | ||
| + | # Double click the "BOG Body Replacer FOMOD" from your downloads. Click Next. | ||
| + | # Check "I have installed Invalidation myself and it works perfectly." | ||
| + | # Click through the FOMOD installation and choose your options. Click Install. | ||
| + | # After install, it will give you errors like these: | ||
| + | #:: Unable to install default meshes. | ||
| + | #:: Unable to install (Selected) Body Mesh. | ||
| + | #:: Unable to install default textures. | ||
| + | #:: Unable to install textures for (Selected private parts). | ||
| + | #:: Unable to install (Selected Raider) textures. | ||
| + | #:: Unable to install Sleepwear meshes. | ||
| + | #:: Unable to install default textures for Sleepwear. | ||
| + | #:: Unable to install (Selected) texture for Sleepwear. | ||
| + | #: Just click "OK", ignoring them. | ||
| + | # Activate the plugin (check marking it). | ||
| + | # Post install: | ||
| + | ## Go to profiles -- > click "Profile Name" -- > uncheck 'Automatic archive invalidation' . | ||
| + | ## Close and reopen profiles. | ||
| + | ## Now go back to "Profile Name" -----> recheck 'Automatic archive invalidation'. Close. | ||
| + | # Verify the Install Order (on the left MO pane): | ||
| + | ## Type3 Body and Armor replacer | ||
| + | ## Dead Money Type3 Outfits | ||
| + | ## Type 3 Honest Heaart Tribal Armors | ||
| + | ## Old world Blues Armors for Type 3 | ||
| + | ## Lonesome Road Armors for Type 3 | ||
| + | ## BEWARE OF GIRL Type 3 HiRez HiDetailed replacer | ||
| + | #: Notice how BoG is last, so it overwrites Type3 Body and Armor replacer. | ||
| + | : You should now see the BoG textures when you launch the game. | ||
| + | |||
| + | <span id="Issue: Body Replacer - Type 6M?"></span> | ||
| + | |||
| + | === Issue - Body Replacer - Type 6M === | ||
| + | Problems getting this body replacer to work correctly. | ||
| + | |||
| + | * Cause: You need, in addition to a Type 6 body replacer, the correct body ''texture'' and "clothing and armor" mods. Such mods usually need to be installed MANUALLY. Read their documentation carefully. | ||
| + | :* Solution: Type 6 bodies are based upon Type 3 bodies. This makes many Type 3 based mods compatible with Type 6. (An "M" suffix just means it is slightly modified from the base Type body in some dimension. This is usually not enough to make it sufficiently different to cause problems.) Keep in mind the ''meshes'' are separate from the ''textures'', but the ''meshes'' contain the path to the ''texture'' files they use. Common choices that work are: | ||
| + | ::* [http://www.nexusmods.com/newvegas/mods/34702/? BEWARE OF GIRL Type 3 HiRez HiDetailed Replacer] by '''BlackBlossom'''. Note that SOME FO3 body textures MAY generally work as well but must MANUALLY install only the texture files. | ||
| + | ::* [http://www.nexusmods.com/newvegas/mods/54438/? DIMONIZED TYPE3 female body] by '''dimon99'''. Straight copy from FO3 (not ported). Use textures only; as a "lower" resolution alternative to other body texture replacements. | ||
| + | ::* [http://www.nexusmods.com/newvegas/mods/45505/? T6M Equipment Replacer NV] by '''Izumiko'''. Type 6M Clothing and Armor. | ||
| + | :: Don't forget to toggle "ArchiveInvalidation" off-and-then-on again after installing new textures. | ||
| + | |||
| + | <span id="Issue: BrokenHitIndicator"></span> | ||
| + | === Issue - Broken Square/Hit Indicator === | ||
| + | Basically every time you get shot or hit, a very broken square pops up in the direct middle of the screen with no idea what exactly is causing it. | ||
| + | |||
| + | * Cause: According to the author "Just Mods: The Hit Indicator" textures from [http://www.nexusmods.com/newvegas/mods/66666 Just Mods Assorted] (2.6d) only support high texture size. | ||
| + | :* Solution: Go to "settings" [SIC] and change your texture size to "High". | ||
| + | :: NOTE: The comments page indicates that some individual "Just" mod components work fine when installed separately; but not when installed as part of the umbrella "Just Assorted" package. YMMV. | ||
| + | |||
| + | <span id="Issue: Character is suddenly invisible in both 1st and 3rd person views"></span> | ||
| + | |||
| + | ===Issue - Character is suddenly invisible in both 1st and 3rd person views=== | ||
| + | Upon opening a save, the player character is suddenly invisible except for their shadow. NPCs act like the character is present. Loading an earlier save doesn't have the problem. | ||
| + | |||
| + | * Cause: Unknown, but might be related to use of the game "Auto-Save" feature. | ||
| + | |||
| + | :* Solution: In the game console (default toggle key "~") enter the following commands (where "14" is the [http://fallout.wikia.com/wiki/Fallout:_New_Vegas_characters RefID of the player]): | ||
| + | ::<pre> | ||
| + | ::: prid 14 | ||
| + | ::: enable | ||
| + | </pre> | ||
| + | :: and close the console. | ||
| + | |||
| + | <span id="Issue-WonkyTextures"></span> | ||
| + | === Issue - Chinese Assault Rifle Textures are '''''wonky''''' === | ||
| + | : Thanks to '''XP47JSuperbolt''' of the Nexus Fallout "Mod Troubleshooting" forum for the basis of the following: | ||
| + | * Cause: "Project Nevada" appears to cause a texture problem with the "Chinese Assault Rifle". | ||
| + | :* Solution: Strangely, installing one of the [http://www.nexusmods.com/newvegas/mods/64339?tab=files Asurah Reanimation Pack] "Iron Sight Fix" files resolves the conflict. | ||
| + | |||
| + | <span id="Issue: Disable Map Markers?"></span> | ||
| + | |||
| + | ===Issue - Disable Map Markers=== | ||
| + | Desire to remove visible map markers in a mod that appear before the site has actually been visited. | ||
| + | * Cause: The map marker in '''GECK''' (an "M" in a box with a large circle around an area in the Render window) has been flagged as "visible". | ||
| + | :* Solution-1: This is much easier with [http://www.nexusmods.com/newvegas/mods/34703/? FNVedit] if you apply a filter to only show "map markers". | ||
| + | ::* Start '''FNVEdit''' and load your current load order (selected by default). | ||
| + | ::* When it's done loading, right-click somewhere in the left panel and select "Apply Filter". | ||
| + | ::* In the "Filter" dialog, check the option titled "Base Record EditorID contains" and in the field below it type "MapMarker". | ||
| + | ::* Confirm by pressing "Filter" and wait for a minute or two while the program is working. | ||
| + | ::* Find the map marker you want to disable. | ||
| + | ::* Find the "Record Flags" sub-record (in the right panel, almost at the top). Right-click the sub-record and select "Edit". | ||
| + | ::* At this point you may be introduced to a warning. Accept it. | ||
| + | ::* When the "Edit Value" dialog pops up, check the "Initially disabled" option and press "OK". | ||
| + | ::: The sub-record is now shown with a bold font, indicating that it has been modified. | ||
| + | :: If the map marker is in "FalloutNV.esm" or one of the official DLC, you need to save your change as an "override" in a '''new plugin'''. It may also be prudent to avoid modifying mod plugin files directly unless you fully grasp the consequences of the changes you're making. Saving your change to a '''new plugin''' makes it easy to revert. | ||
| + | ::* Right-click the record and select "Copy as override into...". | ||
| + | ::* In the dialog that opens, select "<new file>" and enter a name for your new plugin. | ||
| + | ::: Selecting the record will now also list the override from your new plugin in the right panel. | ||
| + | ::* Proceed from step 6 (Find the "Record Flags" sub-record ...) in the previous set of instructions, but apply them to the record in your new plugin. | ||
| + | ::* When you're all done, close the '''FNVEdit''' program. You will see a list of all the plugins that has been modified in your current session. If a plugin is listed that you did not intentionally modify, deselect it. Press OK to save your changes and close '''FNVEdit'''. | ||
| + | |||
| + | :* Solution-2: Click on the marker in '''GECK''' to bring up it's "reference" interface window (see [http://geck.bethsoft.com/index.php?title=Reference GECK: Reference] page), and then check it as "initially disabled" so the marker will only appear when you actually discover the location. Then click the "OK" button, and save the file. | ||
| + | |||
| + | :* Solution-3: If you wish to unset the "visible" flag (in the "Marker Data" section of the [http://geck.bethsoft.com/index.php?title=Reference GECK: Reference] window) instead of disabling the marker, that can be done in "FNAM - Flags" (near where the name and location type is also defined.) If the visible flag is set, it'll be listed below and you can right-click the entry and select "remove" to unset it. | ||
| + | |||
| + | <span id="Issue: Distant terrain/LOD flickers rapidly"></span> | ||
| + | |||
| + | === Issue - Distant terrain or LOD flickers rapidly === | ||
This problem seems to occur more frequently with high-end systems, but across all sorts of platforms and video cards. | This problem seems to occur more frequently with high-end systems, but across all sorts of platforms and video cards. | ||
* Cause: Known as "Z-fighting" or "stitching", this is a complex problem in 3D rendering where two or more "primatives" such as "layers" have similar or identical values in the "z-buffer", so they essentially occupy the same space. The result is the pixels from each layer "fight" to be the one displayed on screen, especially when the point of view changes. This causes a flickering, noisy display of first one then another color pixel. See the "[https://en.wikipedia.org/wiki/Z-fighting Z-fighting]" article from Wikipedia for the full technical description. | * Cause: Known as "Z-fighting" or "stitching", this is a complex problem in 3D rendering where two or more "primatives" such as "layers" have similar or identical values in the "z-buffer", so they essentially occupy the same space. The result is the pixels from each layer "fight" to be the one displayed on screen, especially when the point of view changes. This causes a flickering, noisy display of first one then another color pixel. See the "[https://en.wikipedia.org/wiki/Z-fighting Z-fighting]" article from Wikipedia for the full technical description. | ||
| − | * Solution: There is no single solution that applies to every system, and some of these effects cannot be resolved by the player. See the S.T.E.P. Project Guide [http://wiki.step-project.com/Guide:Z-Fighting Z-Fighting] for examples of the issue and some INI tweaks that may help. An FNV user tried some similar suggested | + | * Solution: There is no single solution that applies to every system, and some of these effects cannot be resolved by the player. See the S.T.E.P. Project Guide [http://wiki.step-project.com/Guide:Z-Fighting Z-Fighting] for examples of the issue and some INI tweaks that may help. An FNV user tried some similar suggested in [https://www.youtube.com/watch?v=XjHt-4Z6PwI Gopher's "Mountain Flicker and Z-Fighting" video] and had the most success with adjusting the "fNearDistance=" value under [Display] in the "FalloutPrefs.INI" file. He reports that anything above "10" results in clipping with arms and weapons in first person mode, but a balance can be reached with some testing. |
| + | : Tweaks to create "Fog" in the distance to mask Z-Fighting: The following are derived from the [http://www.tweakguides.com/Fallout3_7.html TweakGuides for Fallout]. Page numbers refer to that document. | ||
| + | :* [GRAPHICS] (Page 9) | ||
| + | ::* "BlockLoadDistanceLow=" (default: 50000; corresponds to [Distant LOD] "Object LOD Fade" in INI /In-Game settings (page 7), but more extreme.) | ||
| + | ::* "fTreeLoadDistance=" (default: 40000; corresponds to [Distant LOD] "Tree LOD Fade" in INI /In-Game settings (page 7), but more extreme.) | ||
| + | ::* See also "fSplitDistanceMult=" in this section, though this is less likely to be effective if you are trying to increase the "fog" effect. | ||
| + | |||
| + | <span id="Issue: Entering an Interior spawns the player in a huge ball of items and NPCs (junkado)"></span> | ||
| + | === Issue - Entering an Interior spawns the player in a huge ball of items and NPCs ''aka '''junkado''''' or '''''junknado''''' === | ||
| + | Also sometimes referred to as a "vortex on junk" or "compacting of cell contents". | ||
| + | |||
| + | * Cause-1: This has been traced to a corrupt ESM plugin from the mod [http://www.nexusmods.com/newvegas/mods/50817/? CAM - Chems Alcohol and Meds] by '''SenterPat'''. | ||
| + | :* Solution-1: The problem has been fixed in version 9 of the mod. Apparently it was resolved by removing the internal file header "ESM" flag from the ESP file. | ||
| + | * Cause-2: File "FINAL Searchlight Airport NCR.esm" in mod [http://www.nexusmods.com/newvegas/mods/40324 Searchlight Airport NCR or Legion]. To put it simply, this mod makes a few minor adjustments in the "Camp Forlorn Hope Messhall" cell, which wouldn't be an issue except it moves one of the decals to something like (-3000) under the cell. No idea why the game responds this way, but the result is that the decal inexplicably pulls everything not nailed down along with it. Its like a powerful electromagnet dragging everything along the ground. | ||
| + | :* Solution-2a: Thanks for '''Merik2013''' for diagnosing the source and solution to the problem. He simply reset that decal back to its default settings and everything went back to normal. You probably could also just delete it from that ESM as well. As always, make backups of the mods before editing. | ||
| + | ::* The cell is '''CampForlornHope01''' and the decal is ''NVNCRDecalCLeg''. You'll want to right click the decal and click the "edit" option. | ||
| + | ::* Its the Z Position that needs to be changed. He changed it to its default value, which is 671.1060. Also disabled (unchecked) all the miscellaneous changes made to it just to be sure it took, but that might not be necessary. The changes the mod made were enabling the "Persistent Reference" and "Initially Disabled" options as well as the "Flags: Set Enable State to Opposite of Parent " option under the "Enable Parent" tab. (The last has also been suggested as a possible general fix to the problem on it's own.) | ||
| + | |||
| + | :* Solution-2b: Thanks to '''Roy Batty''' for the following: | ||
| + | ::* Go into [http://www.nexusmods.com/newvegas/mods/34703/? FNVedit] and change the cleaning setting "set z -<some high number>" (ex: -3000) and TURN IT OFF. | ||
| + | ::* Reclean your mod. | ||
| + | ::: (Note this solution predates v4.x of '''FNVEdit''' which has replaced such settings with the "AutoClean" function. Presumably this is implemented in that function but we lack reports on how effective it is for this purpose, which is why it is not the primary solution.) | ||
| + | |||
| + | :* Solution-2c: Thanks to '''user826''' for experiments based upon the above "Solutions" leading to the following theory for mod creators: | ||
| + | :: Placing (either deliberately or accidentally) "objects" (to include '''GECK''' things with "collision": like "trigger box activators") outside the "havok range boundary" of a cell seems to cause the "junknado". (While this seems to occur in the "z-axis" most commonly, there is nothing to suggest so far this cannot occur when exceeding that boundary along any axis.) The following warning about "accidental placement" is found in the [http://geckwiki.com/index.php?title=Bethsoft_Tutorial_Optimization Bethsoft Tutorial Optimization] article on '''GECKWiki''': | ||
| + | <blockquote> | ||
| + | WARNING: Havok physics and the [http://geckwiki.com/index.php?title=Markers room markers] do not play well together. Avoid placing Havokable objects [to include [http://geckwiki.com/index.php?title=Movable_Static movable statics]] near [http://geckwiki.com/index.php?title=Room_Bounds_and_Portal_Basics portals] that they might be knocked through. [If an object is in, say, room A, then drawing of that object is restricted to people who are in room A, or who can see the object through a '''portal''' to room A. If the Havok engine causes the object to move (because the player picked it up with the Z key, or an explosion threw it) then the object will continue to be drawn so long as the object is in the motion under the control of the Havok system. However, once the object comes to rest, it is passed back to the normal renderer, and is once again drawn only for people in room A... even if it is now in room B. If you are in room B, with the object, it will be invisible to you.] | ||
| + | </blockquote> | ||
| + | |||
| + | * Cause-3: Some Weather mods cause this problem as a conflict in the interior cells of some mods. | ||
| + | :* Solution-3: If applying the "Solution-2a/2b" fixes above to either or both of the mod plugins in question fails to resolve the issue, try switching to a different Weather mod. | ||
| + | |||
| + | <span id="Issue: Female Character strafing left modelling glitch"></span> | ||
| + | |||
| + | === Issue - Female Character strafing left modelling glitch === | ||
| + | The left arm appears totally mangled. Only seems to affect female models, and persists even if the entire FNV game and "Users\<acct>\documents\My Games\FalloutNV" folders are deleted and re-installed with only vanilla files (no mods). | ||
| + | |||
| + | * Cause: Why the problem persists through a re-install is unknown. However, the cause appears to be related to the "left movement" animations used. | ||
| + | :* Solution: For at least one user this was "mitigated" (though not actually resolved) by downloading a "BnB" (Bouncing Natural Breasts) skeleton and copying the "left movement" animations located in that mod's "meshes\characters\_male\female" folder to that of the "Data" folder tree. | ||
| + | |||
| + | <span id="Issue: FPVCameraBug"></span> | ||
| + | === Issue - First Person camera bug wearing Riot Armor family of gear === | ||
| + | There can be a problem with the mod [https://www.nexusmods.com/newvegas/mods/55334 New Vegas - Enhanced Camera] by '''LogicDragon''' when drawing a weapon (even bare hands) in "First Person View" while wearing Power Armor or Elite Riot Armor in which half of the view is blocked by the left shoulder pauldron. | ||
| + | |||
| + | * Cause: This is due to a bug in the mod [http://www.nexusmods.com/newvegas/mods/51664 Yukichigai Unofficial Patch - YUP] that makes it so the Riot Armor family has its left shoulder appear in first person. The source of the problem seems to be from YUP version 11.3 onwards (and possibly earlier versions.) The YUP team is aware of the problem, but it has not been fixed as of version 11.7. The same problem has also been referenced in the "Enhanced Camera" comments without attributing it to YUP. | ||
| + | |||
| + | :* Solution: Remove YUP from the load order. As YUP provides many, many other bug fixes this is less than ideal and not recommended, but does resolve this particular problem. | ||
| + | |||
| + | :* Partial Workaround: The mod [http://www.nexusmods.com/newvegas/mods/65496 Elite Desert Combat Gear] offers a Desert Ranger Combat armor and helmet with the same stats as Elite Riot gear. The helmet is however still light armor to reflect the changes made by YUP. | ||
| + | |||
| + | <span id="Issue: Fisheye"></span> | ||
| + | |||
| + | === Issue - Fisheye lens effect in 3rd Person === | ||
| + | Both FO3 and FNV have a horrible "fisheye lens" effect with the default of 75 or higher in 3rd Person "Field of View" (FoV). This affects what can be seen in the HUD, especially distorting items at the edges. | ||
| + | |||
| + | * Cause: The problem lies with the way the game is displaying the image. For screenshots modders and imageshare users tend to greatly reduce the FoV to correct the problem, sometimes going as low as 30 or even 20. The game is unplayable with the FoV this low; but it makes for better character screenshots. | ||
| + | :* Solution: Use the "mouse wheel" to zoom the "chase camera" in or out as needed, or play around with the FoV using a mod such as [http://www.nexusmods.com/newvegas/mods/55085 FOV Slider]. However, note there are several different FoV settings and they have some impact upon each other. The mods [http://www.nexusmods.com/newvegas/mods/36773 Further 3rd Person Camera] or [http://www.nexusmods.com/newvegas/mods/65521 Definitive Camera Hotkeys - a PHW Module] for normal game play may also help. | ||
| + | |||
| + | <span id="Issue: Flickering Shadows on grass"></span> | ||
| + | |||
| + | === Issue - Flickering Shadows on grass === | ||
| + | * Cause: Video settings issue. | ||
| + | :* Solution: Any one or combination of the following may work: | ||
| + | :# Switch between "HDR", "Bloom", and "No Lighting Effect" (NLE) settings in the game video panel. HDR is the default and increase the "glow" of the lighting accents, at some (varying) cost in FPS. Some feel Bloom makes the sky seem overly bright but doesn't have the FPS hit. NLE really tones down the glare and is more subdued. | ||
| + | :# Set ''Ambient Occlusion'' to "Quality" in the video adapter card control panel. | ||
| + | :# Set ''Negative LOD Bias'' to "Clamp" in the video adapter card control panel. | ||
| + | :# Disable ''Anti Aliasing '' in the video adapter card control panel. | ||
| + | :# In all three INI files, try setting "bShadowsOnGrass=0" under "[Display]" section. However, reportedly this only affects the shadows of Actors. | ||
| + | :# Use the [http://www.lagom.nl/lcd-test/ Lagom LCD Monitor Test Site] to check if you need to adjust the color controls (e.g. "brightness or contrast") on your physical display monitor. | ||
| + | |||
| + | <span id="Issue: Floating objects"></span> | ||
| + | ===Issue - Floating objects=== | ||
| + | Some objects in a cell "float" above ground level. | ||
| + | * Cause: More than one plugin is changing the same thing, causing a record level conflict. | ||
| + | * Solution-1: Use a "compatibility patch" file to resolve the record conflict. See the [http://tesalliance.org/forums/index.php?/tutorials/article/28-oblivion-creating-compatibility-patches/ Oblivion: Creating Compatibility Patches - Worldbuilding - TES Alliance] article for basic guidance on creating one. | ||
| + | * Solution-2: Edit each floating object in the "console window" (typically toggled with the "~" key), and then save the game. The result would persist from that save game point onwards. However it will re-appear if an earlier save were loaded, or a new game started, or a new mod added which also conflicts: so it is only a temporary solution to that specific conflict. The edit would consist of: | ||
| + | :* Click on the floating object. | ||
| + | ::* Use the "getpos [x|y|z]" commands, where "x"= is the '''horizontal''', "y" is the '''vertical''', and "z" is 'the '''height''' above the water table (AKA "ground level")' axis location in the cell. Each axis must be retrieved individually, i.e. "getpos x", "getpos y", and "getpos z". Record each result. | ||
| + | ::* Use the "getangle [x|y|z]" commands in the same manner. Record each result. | ||
| + | ::* Use the "setpos z 0.00" command to reset the height of the object to "ground level". Note the floating decimal number value. | ||
| + | :: The record of "getpos" and "getangle" entries will enable you to restore things with the appropriate "setpos" or "setangle" commands if anything goes wrong. | ||
| + | :* Repeat the above steps for each floating object as needed. | ||
| + | :* Make a "full save" to a new "save game" slot. | ||
| + | |||
| + | <span id="Issue: Fog effect around the Vegas Strip"></span> | ||
| + | === Issue - Fog effect around the Vegas Strip === | ||
| + | * Cause: The area around New Vegas (outside the strip itself) uses the "NVWastelandHazy" weather type which includes the same effect that the distance fog does, but it's set as if the distance is nothing (-10) causing it to be present right where you are. Apparently it's there to give everything a sort of dirty/dusty appearance, as if lots of sand and dirt has been kicked up by the amount of human activity around Vegas. The weather that does that nasty looking fog is "NVUrbanClear [WTHR:00173564]". | ||
| + | :* Solution: Forcing the weather from "NVUrbanClear [WTHR:00173564]" to "NVWastelandHazy [WTHR:00100A4E]" will remove the fog. "NVWastelandClear [WTHR:000FFC88]" doesn't "fog". | ||
| + | :: Looking at NVUrbanClear, it has '''FNAM - Fog Distance''' Day & Night "- Near fog" set to "-10". ("NVWastelandClear" does as well), although during the night time it doesn't fog your eyes. | ||
| + | :: So essentially to get rid of the fog using '''xEdit/'''[http://www.nexusmods.com/newvegas/mods/34703/? FNVedit], you would expand the "Weather" '''Object''' category, select "NVUrbanClear", and then scroll down to "FNAM - Fog Distance" and change "Night - Near" from "-10" to "2000"; and also for "NVWastelandClear" change both "Night - Near" and "Day - Near" from "-10" to "2000". Any Fog setting that is "-10" should be set to "2000" if "Near", and "200000" if "Far", to get rid of the foggy effect. | ||
| + | |||
| + | <span id="Issue: Head clipping through hair"></span> | ||
| + | |||
| + | === Issue - Head clipping through hair === | ||
| + | * Cause: FNV requires the vanilla hair meshes to be located in BSA archives to display properly. If you need to edit one of them, unpack it somewhere other than your Data directory. If the problem is with custom hair styles, it is most likely that they were not made properly. | ||
| + | :* Solution: If you have "Data\Meshes\Characters\Hair" and "Head" folders, delete them and toggle "ArchiveInvalidation" so the game uses the files in the "Fallout - Meshes.BSA". | ||
| + | |||
| + | <span id="Issue: Interior cell portions not visible"></span> | ||
| + | === Issue - Interior cell portions not visible === | ||
| + | You may find some things invisible, not rendered, or apparently "transparent walls" in some interior cells; without ENB or other "post processor" installed or active. | ||
| + | |||
| + | *Cause: Mod conflict with more than one attempting to modify the same interior cell. Often this is done by an author "copying" the interior cell and making changes without taking proper precautions regarding optimizations. See the '''GECK''' [[#TIP: Enable "MultiBounds"|TIP: Enable "MultiBounds"]] for details. | ||
| + | :* Solution-1: You may want to experiment with changes to the "interior buffer size" setting. Start small, as the memory has to come from that used elsewhere. Please see the "[http://www.tweakguides.com/Fallout3_10.html Memory, Loading & Multi-threading]" entry in the TweakGuides.com "Fallout 3 Tweak Guide". | ||
| + | |||
| + | :* Solution-2: The problem in the offending plugin has to be resolved by the author. In the meantime, you have to identify the offending plugin(s) and remove from your "load order". Please see the '[http://wiki.nexusmods.com/index.php/FNV_General_Mod_Use_Advice#Clean_Saves Clean Saves]' section of the wiki "[http://wiki.nexusmods.com/index.php/FNV_General_Mod_Use_Advice FNV General Mod Use Advice]" article. | ||
| + | |||
| + | :: See also [[#Issue_-_Followers_not_moving_or_Navmesh_Problems|Issue - Followers not moving or Navmesh Problems]] entry under the "Miscellaneous Solutions" section. | ||
| + | |||
| + | <span id="Issue: Invisible Companion"></span> | ||
| + | |||
| + | === Issue - Invisible Companion === | ||
| + | A companion has suddenly gone "invisible" in the game, and nothing seems to make them visible again. Their marker appears on the Pipboy map, but they do not seem to physically be there upon traveling to that location. | ||
| + | |||
| + | * Cause: Unknown, but the situation has been reported to occur before. | ||
| + | :* Solution-1a: Load an earlier save from before they disappeared to obtain the companion's "Ref-ID". | ||
| + | ::* Travel to the companion's location so your character is near them. | ||
| + | ::* Open the in-game console (default is the < ~ > key). | ||
| + | :::* < Click > on the companion. This is all that is needed. Note this will display an 8 character "Ref-ID" above them, which you will need to remember. | ||
| + | ::* Enter the console command: "prid <Ref-ID>" and < Enter >, but without the quotes (where "Ref-ID" is what you noted for the companion in the previous step). | ||
| + | ::* Now enter: "disable" and < Enter >. | ||
| + | ::* Follow with "enable" and < Enter >. | ||
| + | :: This sequence should make the companion visible again. | ||
| + | |||
| + | :* Solution-1b: Revert to using the earlier save from prior to their disappearance. | ||
| + | |||
| + | :* Solution-1c: If "Solution-1a" doesn't work and "Solution-1b" is not really feasible and you prefer to live with the consequences, try "resurrecting" the companion. They may end up without their current inventory: losing everything you gave them to carry and reverting to their starting equipment. It might also interfere with some of their quests as well, which is why it's the least preferred solution. Follow the same basic process with the commands: | ||
| + | ::* "prid <Ref-ID>" | ||
| + | ::* "kill" | ||
| + | ::* "resurrect" | ||
| + | ::* "disable" | ||
| + | ::* "enable" | ||
| + | :: This may require you to "re-hire" the companion and reset it's "companion command options". | ||
| + | |||
| + | <span id="Issue: InvisibleCorpses"></span> | ||
| + | === Issue - Invisible Corpses === | ||
| + | Symptoms: Any type of preplaced corpses in game (regardless if it's from primary ESMs for the game, edited ones, or even entirely new preplaced corpses from mods) turn entirely invisible and have no physical form to interact with, but can still be opened/searched as a container. | ||
| + | |||
| + | * Cause: The mod [https://www.nexusmods.com/newvegas/mods/66514?tab=description Slow Death] (file "(Animation)_Slow_Death.esp") has been confirmed to be at least one cause. | ||
| + | :* Solution: Remove the mod. (It has been suggested the likely culprit for this issue is the 'SlowDeathBEScript' script, but not confirmed.) This mod is based upon another ([http://www.nexusmods.com/newvegas/mods/60201 Near Death]) which might serve as an alternative. | ||
| + | |||
| + | <span id="Issue: LightingExteriors"></span> | ||
| + | |||
| + | === Issue - Lighting - Exteriors at night === | ||
| + | Symptoms: Walls and ground textures seem to strangely disappear and re-appear from close view at night. This might appear to be due to a missing or fading texture. | ||
| + | |||
| + | * Cause: FNV has a known "lighting problem " due to the game engine being limited to a maximum of 4 lights per exterior cell. This causes lights suddenly disappearing, terrain not lighting properly, random polygons going unlit, etc.. | ||
| + | :* Solution: The mod [https://www.nexusmods.com/newvegas/mods/69833 Improved Lighting Shaders] fixes the shading code to work with up to 13 light slots, and also includes 28 re-assembled shaders that make full use of them.<br> | ||
| + | :: In other words this pretty much gets rid of the lighting bug, and your Pip-Light can shine brightly without interfering with other lights!<br> | ||
| + | :: Lights besides the Pip-Light are also improved: no more lights disappearing/reappearing depending on your camera position, or lines appearing when a light crosses cells - lights will now almost always remain lit if they're active!<br> | ||
| + | :: ENB Users: Please note the "sticky" at the top of the comments page. | ||
| + | |||
| + | <span id="Issue: LightingGlow"></span> | ||
| + | === Issue - Lighting - Faces and surfaces glow === | ||
| + | Symptoms: After installing mods, actors' ''faces'' and some surfaces have an excessively bright glow or shine in both interiors and exteriors. | ||
| + | |||
| + | * Cause: This has been noted for some users of the mod "[https://www.nexusmods.com/newvegas/mods/35998 Nevada Skies - Weather Effects]". | ||
| + | :* Solution: Simply disabling the plugin is not sufficient. The report indicated it was necessary to run the "quick auto cleanup" function of [https://www.nexusmods.com/newvegas/mods/34703 FNVEdit] to completely remove the effects and restore things to "vanilla". | ||
| + | |||
| + | === Issue - Lighting - Mod makes the Sun too bright off surfaces === | ||
| + | [Formerly "Issue - Mod makes the Sun too bright off surfaces".] | ||
| + | |||
| + | Symptom: Note this is not "sun glare", which is when you look directly at the sun in game. | ||
| + | Be aware that there is a "light dome effect" around the New Vegas strip which is quite visible from a distance at night. Daylight surfaces within this dome area are blindingly bright from some angles on default settings. This appears to be by design. | ||
| + | |||
| + | * Cause-1: Lighting mods make adjustments to various lighting values, resulting in uncomfortably bright reflections off some surfaces. Sometime these are by way of tweaks to the INI file, and sometimes controlled "in-game". | ||
| + | |||
| + | :* Solution-1a: Only use one lighting mod for exteriors, and one for interiors. Read their documentation carefully for recommendations on where to position them in your load order. | ||
| + | :: Some mods intend you to use hats and sunglasses to mitigate the effect. Changing the facing direction may also have an effect. | ||
| + | :: INI tweaks depend upon which surfaces and where they are located. See the [https://web.archive.org/web/20161025065631/http://www.tweakguides.com/Fallout3_1.html Tweakguide's General Fallout game guide] (specifically for FO3 and FNV) for the effects of particular settings. | ||
| − | + | :* Solution-1b: The mod [http://www.nexusmods.com/newvegas/mods/51577/? Dynavision 3] incorporates (saving a plugin slot) [http://www.nexusmods.com/newvegas/mods/39619/? The Imaginator] which "allows you to separately control visual elements like Brightness, Contrast, Saturation, Light Output, Depth-of-Field, Focus, Motion Blur and Tint all from within an easy-to-navigate PIP-BOY menu". Dynavision 3 now works with UIO instead of requiring it's own installer. | |
| − | + | :: This is a recommended alternative to ENB and other "post-processors". However, Dynavision has a persistent and annoying bug which frequently causes NPCs to go invisible. Some people recommend using the older "Dynavision 2" + "Imaginator" instead, but the same "invisible NPCs" bug was reported with it. A patch file to fix this issue in "Dynavision 3" was posted in mid 2016, but there are no comments regarding how effective it is. | |
| − | * Solution: | + | :* Solution-1c: INI Lighting tweaks. The following is derived from the [https://web.archive.org/web/20161025065631/http://www.tweakguides.com/Fallout3_7.html TweakGuides for Fallout]. Page numbers refer to that document. |
| + | ::* [View Distance] (Page 7) | ||
| + | ::: Specularity Fade: This slider controls how shiny reflective surfaces appear to be. In practice the only obvious impact of changing this setting is that some metallic objects will lose their shine. However you can also manually adjust the value of this setting by editing the INI "fSpecularLODStartFade" variable, and if you want to disable specularity altogether, either to further boost performance, or if you believe the game world is too shiny, then see the "bDoSpecularPass" variable covered on page 9. | ||
| + | ::* [Display] (Page 7) | ||
| + | ::: Brightness: This gamma slider controls how bright or dark the overall screen image will be. Adjust it so that at night the image is visible but not washed out. It has no impact on performance, so set to suit your taste. If you need to increase gamma to be much brighter than the maximum on the slider allows (e.g. on very old monitors), see the "fGamma"-related variables on page 9. | ||
| − | + | :* Solution-1d: Sometimes "post-processors" like the ENB Series can compensate, though remember that these often impose a penalty upon your "frames per second" (FPS). The first resort in these cases is often choosing a different "preset", but if you want to adjust settings yourself, see the S.T.E.P. Project [http://wiki.step-project.com/Guide:ENBseries_INI ENBSeries INI Guide] page which "is intended as THE comprehensive reference to the functionality of all parameters found within enbseries.ini as it evolves." Suggest you start with the "[BLOOM]" and "[REFLECTION]" sections. | |
| − | * | + | :: The [http://www.overclock.net/t/1386086/guides-to-creating-and-customizing-your-enbs Guides to Creating and Customizing Your ENB's] thread is another ENB settings resource. |
| − | * | + | * Cause-2: Your monitor brightness/gamma is too high. |
| − | |||
| − | |||
| − | |||
| − | |||
| − | * Solution-2: | + | :* Solution-2: Use the [http://www.lagom.nl/lcd-test/ LCD monitor test images] web site as reference to adjust your monitor calibration to what you desire. |
| − | + | <span id="Issue: Main or DLC missing elements"></span> | |
| − | + | === Issue - Main/DLC - missing elements === | |
| − | + | Symptoms: A "vanilla" (from the publisher) component of the game (Main or any DLC) is missing or has "messed up" components such as missing the buildings or objects in the distance, meshes, textures, etc.. | |
| − | |||
| − | === Issue: Scope zoom distortion problems === | + | * Cause: Cleaning the ESM file. |
| + | :* Solution: Despite what any "generalized" tool (such as LOOT) or elsewhere for any other Bethesda games may advise as a general practice, DO NOT clean any of the publisher's game files. If you have done so, use the "verify local files" procedure or your backed up copies to restore the vanilla files. You may possibly need to rebuild any "merged patch" and FNVLODGen files if simply restoring the ESMs is not enough. | ||
| + | |||
| + | :: Even with mods, such cleaning should be performed by the mod author: who is the only one who really knows if an ITM is needed in their mod. FNV came along after the usual problems that required cleaning were well known, and most authors have taken on that responsibility. Inform them of any such problems you encounter. | ||
| + | |||
| + | <span id="Issue: Missing textures/walls"></span> | ||
| + | |||
| + | === Issue - Missing textures or walls === | ||
| + | Entering some locations (e.g. "Hidden valley bunker", "Kings school", and "Camp Golf") the walls appear to be transparent or missing, allowing a view of some elements of the adjacent interior rooms. Collision still seems to be functioning (the character doesn't fall through the "gray areas" if they are entered). | ||
| + | |||
| + | * Cause: Mod conflict | ||
| + | :* Solution: The plugin "PrnOut.esp" (apparently a component of the "Sexout" mod) seems to be at least one culprit. Deactivating it has been reported to correct the issue. | ||
| + | |||
| + | <span id="Issue: Mod makes the Sun too bright off surfaces"></span> | ||
| + | |||
| + | <span id="Issue: Naked NPCs (missing armor or inventory)"></span> | ||
| + | |||
| + | === Issue: Naked NPCs ''aka missing armor or inventory'' === | ||
| + | * Cause: Vanilla Bug - Some NPCS are naked/have a weird inventory: An engine bug will sometimes not correctly refresh named and unnamed NPCs. The problem seems most often when they are supposed to be wearing leather armor. (This appears to be a problem with "leveled lists".) | ||
| + | :* Solution-1: As always with any texture bug, try toggling "ArchiveInvalidation" off-and-on again. | ||
| + | |||
| + | :* Solution-2: Use/rebuild your "merged patch" file. Please see the 'Third Rule: The Rule of One' and 'Merge Patch File' sections of the wiki [http://wiki.nexusmods.com/index.php/FNV_General_Mod_Use_Advice FNV General Mod Use Advice] article. Note that mods adding armor/clothing that is not appearing in-game may need to have the "bash tags" "Delev" and "Relev" added. | ||
| + | |||
| + | :* Solution-3: Just open the console (default "<~>" key), click on the NPC and note it's displayed "Base-ID". Then type "resurrect <Base-ID>" (replacing "<Base-ID>" with the value noted when you clicked on the NPC). The NPC will be correctly refreshed with its gear. If that doesn't work, try "resetinventory <Base-ID>". | ||
| + | |||
| + | <span id="Issue: NPCs making annoying SHHHH sound and hand gesture"></span> | ||
| + | === Issue - NPCs making annoying SHHHH sound and hand gesture === | ||
| + | Some NPCs in the game, such as General Oliver & the Holograms & Dean Domino (when you meet him in the theater in Dead Money DLC), make that annoying SHHHH sound & hand gesture. | ||
| + | |||
| + | * Cause: This has been traced to the mod [http://www.nexusmods.com/newvegas/mods/43386 Axepriests Face Aches for FNV] by '''SariDecember''', which is a port of the FO3 mod [http://www.nexusmods.com/fallout3/mods/6709 FAFF - Face Aches For Fallout] by '''Axepriest''' (who hasn't been active on Nexus since Feb 2016). This adds facial expressions to idle animations ("*.kf" files). | ||
| + | :* Solution: The mod is designed only to work with vanilla head meshes and textures, adding "morphs" which reference the data built into the FaceGen TRI files. (See the "[[Getting_started_creating_mods_using_GECK#FaceGen:_Heads.2C_Faces.2C_Hairs.2C_and_Helmets|FaceGen: Heads, Faces, Hairs, and Helmets]]" section of the wiki "[[Getting_started_creating_mods_using_GECK|Getting started creating mods using GECK]]" article.) Either remove the mod, or refer to the FNV and FO3 mod descriptions to attempt to change the morphs associated with the idle animation in question. | ||
| + | |||
| + | <span id="Issue: PermanentLimp"></span> | ||
| + | === Issue - Permanent Limp === | ||
| + | Symptoms: the Player displays a limp even after having been healed of damage.<br> | ||
| + | If it's an animation, then it's a 'feature' of the game (or some mod); not a bug. It indicates the Actor has broken a limb. If it "heals" without the proper treatment, it becomes "permanent". | ||
| + | |||
| + | * Cause: With the legs, it's typically from a fall from a height or critical hit to the leg. | ||
| + | |||
| + | :* Solution: You need to heal the limb with a "doctor's bag" (which contains a "splint") or by an actual doctor before saving. (Just healing damage with Stimpacks, etc. won't "set the break".) Once it has gotten in your "save game" files, it has (for some people) been fixable by reloading the save file during the same "game session" (i.e. not exiting to the desktop). Others found it necessary to go back to a save prior to the injury. | ||
| + | |||
| + | <span id="Issue: Pink teeth/tongue/mouth"></span> | ||
| + | |||
| + | === Issue - Pink teeth or tongue or mouth === | ||
| + | * Cause: This is another "missing texture file" problem, usually because of failing to allow overwrite of a file during installation of the mod in question; sometimes by not actually making a choice of options. | ||
| + | :* Solution: Uninstall the mod entirely from your mod manager (or the "Data" folder), close the manager and re-open, and re-install the mod. This time always make a choice to "overwrite" when offered unless you have very good reason to not do so (knowing it may cause problems with the mod). | ||
| + | |||
| + | <span id="Issue: Player hands are either stubs, too large, or the fingers are missing"></span> | ||
| + | === Issue - Player hands are either stubs or too large or the fingers are missing ''AKA Fingers glitch'' === | ||
| + | * Cause: Fallout 3 and New Vegas have a bug when using ''iFPSClamp'' (in the game INI file), causing the hands of NPCs and the player to either become massive, or collapse into themselves. | ||
| + | : This problem seems to also be linked to the "64Hz bug" fix for "microstutter" included in "New Vegas Stutter Remover" (NVSR) and "New Vegas Tick Fix" (NVTF). The reason why the "64Hz bug" occurs is because the renderer uses ''GetTickCount'' which returns a variable frequency that jumps between 13-16ms, whereas ''TimeGetTime'' will consistently return a frequency of 1ms. This is an "Unreal Engine" bug which persisted into 2015 (at least). | ||
| + | : As both NVSR and NVTF use the same code for the "64Hz bug", the end result is that you can choose between having a microstutter and no "fingers glitch" or having no microstutter and fingers glitching out. | ||
| + | : There is no one reliable solution to the problem. The following "mitigations" have helped people to different extents. | ||
| + | |||
| + | :* Mitigation-1: See also the related [[#Issue_-_Vsync_aka_V-Sync_ON_or_OFF|Issue - Vsync aka V-Sync ON or OFF]] regarding "frame rate synchronization", "screen-tearing", and "lag". | ||
| + | ::* The various "Borderless Window" or "Fake Fullscreen Window" mods (such as "[http://www.nexusmods.com/newvegas/mods/59266/? OneTweak for NVSE]" by virusek) may prevent Vsync issues if you don't have a triple buffered video card. | ||
| + | :* Mitigation-2: Setting "bManageFPS=0" in NVSR.INI, the "finger glitch" problem is gone, but then stuttering is back. | ||
| + | :* Mitigation-3: Limit your FPS to 60. If that doesn't help, try using a setting just below that (ie. 57-59). | ||
| + | :* Mitigation-4: Manage your FPS setting in only one location (e.g. NVSR or the INI file, but not both). If you do have to manage it in more than one location, then ensure you have the same cap in all setting locations. (There are suggestions about this in the "Causes" under the [[#Issue_-_Game_in_slow_motion|Issue - Game in slow motion]] entry.) | ||
| + | :: Note there may be different settings for "maximum" and "minimum" FPS. Setting a "minimum" below 30 causes the render engine into a "slow display mode". | ||
| + | :* Mitigation-5: Others have reported that "drawing a two-handed weapon" or exiting to the desktop and re-loading the game save file have temporarily resolved the "fingers glitch" problem. | ||
| + | :* Mitigation-6: Try a different video driver. | ||
| + | ::* Or, an alternative solution to a driver update: Grab [http://www.entechtaiwan.com/ps.htm Powerstrip] and follow simple instructions in [http://gfycat.com/MinorSilentArgusfish this GFY]. | ||
| + | |||
| + | <span id="Issue: Pip-boy and Terminal screens are all white/blank"></span> | ||
| + | |||
| + | === Issue - Pip-boy and Terminal screens are all white or blank === | ||
| + | * Cause-1: This is a known game bug. | ||
| + | :* Solution-1: Try toggling the Pip-boy light on and off a few times (hold down the < Tab > key for a few seconds) to see if it resolves the problem. | ||
| + | |||
| + | * Cause-2: A mod for the Pip-boy 3000 or attempts to optimize texture files have installed texture files causing the problem. | ||
| + | :* Solution-2: Check the "Data\Textures" folder for a "Pip-boy 3000" sub-folder and if it exists, delete the sub-folder. The game will then use the default files in the BSA. | ||
| + | |||
| + | <span id="Issue: Playing at greater than 1920x1080 resolution"></span> | ||
| + | === Issue - Playing at greater than 1920x1080 resolution === | ||
| + | * Cause: By default the game hardware setup options only permit a maximum of 1920x1080 resolution. This is a factor due to it's age. It simply didn't know what later advances in screen sizes would establish as standards. | ||
| + | :* Solution-1: In the "FalloutPrefs.ini" file under the "[Display]" section (near the bottom) are two entries where you should specify your desired game screen size to match your default/native monitor resolution: | ||
| + | <div name="Simulated code box" class="boilerplate metadata" id="Warning Notice" | ||
| + | style="margin:0px 10px 10px 50px; border:1px dashed #DAA520; color: lightgray; background-color:#424242; padding:3px; | ||
| + | /* Remove the next four 'white-space' lines to restore default white-space processing. */ | ||
| + | white-space: pre-wrap; /* css-3 */ | ||
| + | white-space: -moz-pre-wrap; /* Mozilla, since 1999 */ | ||
| + | white-space: -pre-wrap; /* Opera 4-6 */ | ||
| + | white-space: -o-pre-wrap; /* Opera 7+ */ | ||
| + | word-wrap: break-word; /* Internet Explorer 5.5+ */ | ||
| + | "> | ||
| + | iSize W=<width in pixels> (i.e. 2560) | ||
| + | iSize H=<height in pixels> (i.e. 1440) | ||
| + | </div> | ||
| + | :: However, these only work if you have the "bFullScreen=1" setting enabled so the game starts in "full screen" mode. In "windowed mode", the game will revert back the maximum of 1920x1080 that it knows about. | ||
| + | |||
| + | :* Solution-2: If you prefer to run the game in "fake fullscreen windowed mode" so you can get to other programs or screens, then you need to use a setting of "bFullScreen=0" (windowed mode), along with the above "iSize" settings, AND a '''NVSE''' mod which handles the "fake fullscreen" effect while recognizing the larger screen resolutions. NVSE knows and can read the INI setting and override the game. These are reported to do so: | ||
| + | ::* [http://www.nexusmods.com/skyrim/mods/40706/? OneTweak] by '''virusek''' (from the Nexus Skyrim Catelog, but works with FNV.) | ||
| + | ::* [http://www.nexusmods.com/newvegas/mods/57843/? FullScreenWindowedMode] by '''TimThompson89'''. | ||
| + | |||
| + | :* Solution-3: If you are using a "post processor" such as ENB, make sure it is not adding some feature like "cinematic bars" to create an effect similar to "letter-boxing" of your display. | ||
| + | |||
| + | :* You will probably want to see the [[#Issue: Scope zoom distortion problems|Issue: Scope zoom distortion problems]] entry as well. | ||
| + | |||
| + | <span id="Issue: Scope zoom distortion problems"></span> | ||
| + | |||
| + | === Issue - Scope zoom distortion problems === | ||
Playing with widescreen (16:9) and high resolution (1920x1080 or higher) and have a problem with scope zooms (white square edges or just edges in the reticle and the scopes have an outstretched circle). | Playing with widescreen (16:9) and high resolution (1920x1080 or higher) and have a problem with scope zooms (white square edges or just edges in the reticle and the scopes have an outstretched circle). | ||
* Cause: Game masking that is automatically applied to scopes. | * Cause: Game masking that is automatically applied to scopes. | ||
| Line 268: | Line 2,966: | ||
* Solution: add the line "fScopeScissorAmount=0", in the "[Display]" section of all 3 INIs. | * Solution: add the line "fScopeScissorAmount=0", in the "[Display]" section of all 3 INIs. | ||
*: Make backups of the INIs before changing them. | *: Make backups of the INIs before changing them. | ||
| + | :: When you make any changes to the game INI file, remember to change it in all three files: the "Fallout_default.ini" in the game root folder (which only gets used to recreate the other two when they are not found), and the two in "C:\Users\<YourAccountName>\Documents\My Games\FalloutNV" folder ("FALLOUT.ini" and "FalloutPrefs.ini"). Otherwise you tend to lose track of which you actually changed if you have to "verify files", and they may not appear to "take".<br> | ||
| − | === Issue | + | <span id="Issue: Screen brightness gets darker as the game progresses"></span> |
| + | === Issue - Screen brightness gets darker as the game progresses === | ||
* Cause-1: Conflict between ENB and SweetFX settings. | * Cause-1: Conflict between ENB and SweetFX settings. | ||
| − | * Solution-1: Identify the conflicting settings in the INI files and choose one. | + | :* Solution-1: Identify the conflicting settings in the INI files and choose one. |
| − | + | :: Make backups of the INIs before changing them. | |
<blockquote> | <blockquote> | ||
From [http://www.tweakguides.com/Fallout3_9.html TweakGuides]:<br> | From [http://www.tweakguides.com/Fallout3_9.html TweakGuides]:<br> | ||
| Line 285: | Line 2,985: | ||
* Cause-2: Don't ignore your monitor's role. Monitors are like TVs: they react to the ambient light levels in the room. Do not play in a completely dark room. | * Cause-2: Don't ignore your monitor's role. Monitors are like TVs: they react to the ambient light levels in the room. Do not play in a completely dark room. | ||
| − | * Solution-2: You need a source of steady light level (a non-flourescent lamp) to prevent your monitor reacting to changing game light levels. | + | :* Solution-2: You need a source of steady light level (a non-flourescent lamp) to prevent your monitor reacting to changing game light levels. |
| + | |||
| + | :* Amelioration: A mod that gives you more control over lighting in-game: [http://www.nexusmods.com/newvegas/mods/39619/? The IMAGINATOR]. This might be useful to confirm some mod is the culprit, by loading it near the end/bottom of the LO. | ||
| + | |||
| + | <span id="Issue: Somehow, without changing anything, my character is "glitched" oddly"></span> | ||
| + | === Issue - Somehow ''without changing anything'' my character is ''glitched'' oddly === | ||
| + | * Cause: Unknown. | ||
| + | :* Workaround: Something that's always worth trying is blowing yourself up or otherwise get killed: i.e. throw a grenade against a wall so it bounces back and kills you. Then let the game reload. Sometimes that can clear oddities. However, it doesn't address any underlying cause, so it's only useful as a temporary solution. Try to see if you can reproduce a reliable set of circumstances to re-create the problem. | ||
| + | |||
| + | <span id="Issue: Textures randomly change only on particular items"></span> | ||
| + | === Issue - Textures randomly change only on particular items === | ||
| + | * Cause: There is more than one BSA containing the named texture file, but they have different content. The game does not have any mechanism to deal with this situation, so it randomly grabs the texture from one or the other BSA file. | ||
| + | :* Solution-1: Try the simple solution of toggling "ArchiveInvalidation" off-and-then-on again. This should cause any loose file to be used instead of one in a BSA. | ||
| + | |||
| + | :* Solution-2: Determine which mods have the different textures. See [[#Issue:_Find_the_source_mod-index_of_an_object_in-game|Issue: Find the source mod-index of an object in-game]]. Once you have identified the one with your preferred texture, either remove the other offending plugin or extract the preferred texture from the BSA as a "loose file", and toggle "ArchiveInvalidation". | ||
| + | |||
| + | <span id="Issue - TTW Centaur Face distortion"></span> | ||
| + | === Issue - TTW Centaur Face distortion === | ||
| + | When playing "Tale of Two Wastelands" (TTW) the Centaur face may appear to stretch off into the distance. | ||
| + | |||
| + | Note: this is very similar to the problem with "B-n-B" bodies discussed under the [[#Issue_-_Body_Replacer_-_Custom_Body_Types|Issue - Body Replacer - Custom Body Types]] entry: having the same issue of differences in "bone attachment points" and "bone weighting". | ||
| + | |||
| + | * Cause: The TTW version 4.1 of the [http://www.nexusmods.com/newvegas/mods/59147? Ragdolls] mod version of the '''Evolved Centaur''' is missing modifications to the skeleton (armature) and mesh needed to fix dismemberments. The author is aware of the problem, which will be fixed in releases after 4.1. In the meantime he suggests the following "workaround". | ||
| + | |||
| + | :* Workaround "fix" for v4.1 (TTW): Install or unpack the Ragdolls TTW mod as usual, goto under the "meshes | creatures | centaur" folder, and delete "skeletonevolved.nif" file. (You may want to repackage the "Ragdolls TTW" archive so that file is not later re-installed by accident.) Then toggle "ArchiveInvaliation" off-and-then-on again. | ||
| − | + | <span id="Issue: StuckIMOD"></span> | |
| + | === Issue - Visual special effect (IMOD) stuck === | ||
| + | Some visual effect (such as "Cateye", "HUD Shudder", or "chem" induced blur) won't wear off or go away. | ||
| − | === Issue: | + | * Cause: An "[http://geckwiki.com/index.php?title=ImageSpace_Modifier imagespace modifier]" (IMOD) remains in effect. |
| − | + | :* Solution: The console command "[http://geckwiki.com/index.php?title=RemoveImageSpaceModifier rimod <imodID>]" will remove the specified IMOD. The mod "[http://www.nexusmods.com/newvegas/mods/69096 Clear Imagespace Modifiers BAT file]" is a console "bat" file containing that command for all of the vanilla IMOD effects to clear them all at once. | |
| − | * | + | |
| + | <span id="Issue: Weapons/Fists are displayed off-center in 1st Person"></span> | ||
| + | |||
| + | ===Issue - Weapons or Fists are displayed off-center in 1st Person=== | ||
| + | 3rd Person view displays correctly. | ||
| + | * Cause: This is the result of a bug with the mod "A Familiar Friend", or with "Readius PipBoy" mods. | ||
| + | |||
| + | * Solution: Uninstall and start a new game. It's hard to get the bug out of an existing game. If you still wish to attempt this, be sure to follow the specific mod's uninstall instructions carefully. | ||
| + | |||
| + | <span id="Issue: Win10 Blurry/small text/icons"></span> | ||
| + | === Issue - Win10 Blurry or small text or icons === | ||
| + | The problem may be particularly apparent with "install programs". | ||
| + | * Cause: This problem occurs on high-PPI resolution monitors and TVs (such as "Full HD" 1920x1080 and 4K-UHD 3840x2160 or higher resolutions). Windows 10 introduced a solution called "High DPI Scaling", but earlier versions of the OS do not have the same capability because such displays were not in common use at the time. | ||
| + | : (The terms "DPI" and "PPI" are often used interchangeably but actually have different technical meanings: DPI (Dots Per Inch) is correctly used for "scan" output in "dots" such as printers and analog displays, while PPI (Pixels Per Inch) is used for output in very small fixed sized "picture elements" ''aka "[http://en.wikipedia.org/wiki/Pixel_density pixels]"''.) | ||
| + | |||
| + | :* Solution-1a: See the [http://www.digitaltrends.com/computing/how-to-adjust-high-dpi-scaling-in-windows-10/ How to adjust high-DPI scaling in Windows 10] article for the explanation of how Windows 10 deals with this issue for both modern and older programs. You may need to temporarily turn off the "Settings | System | Display | Advanced scaling settings | Fix scaling for apps | Let Windows try to fix apps so they're not blurry" setting and use a "Custom scaling" of "100%" when running "install programs". | ||
| + | |||
| + | :* Solution-1b: If you have a multiple monitor setup, then you want to use "individual display scaling". Also see the [http://www.pcworld.com/article/2953978/displays/use-windows-10s-individual-display-scaling-to-perfect-your-multi-monitor-setup.html Use Windows 10's individual display scaling to perfect your multi-monitor setup] article in that instance. | ||
| + | |||
| + | :* Solution-1c: There are other built-in Win10 tools you can use to "fine tune" your display. See the [http://www.cnet.com/how-to/6-display-settings-you-should-be-using-in-windows-10/ 6 display settings you should be using in Windows 10] article if the above is not sufficient to your needs or you want the best possible results. | ||
| + | |||
| + | <span id="Issue: Win10 Screen tearing in "Borderless Windowed Mode""></span> | ||
| + | |||
| + | ===Issue - Win10 Screen tearing in ''Borderless Windowed Mode''=== | ||
| + | Based upon this [http://www.reddit.com/r/pcgaming/comments/6ukc1z/tip_disable_full_screen_optimizations/ Reddit thread] | ||
| + | * Cause: Apparently, Win10 "Full Screen Optimizations" setting is enabled by default in Win10 since the Anniversary Update. It basically forces a game to run in "borderless fullscreen mode" (even if you selected "fullscreen mode" in the game's options) making the game stutter more, frametimes more variable, and there may be some performance loss. | ||
| + | : It is not putting games into standard "Fullscreen Windowed/Borderless Mode". It's a new presentation mode that is intended to combine the best of both "Windowed" and "Fullscreen Exclusive Mode". Before the Windows 10 Creator's Update, it was exclusive to DX12 UWP apps. Now there are 80+ non-UWP, non-DX12 games which support it. | ||
| + | : "Standard Fullscreen Windowed Mode" passes everything through the ''desktop compositor'' which forces "triple-buffered V-Sync" to be used, and adds a frame of latency. This new presentation mode can bypass the ''compositor'', reducing latency and allowing you to disable "V-Sync". At the same time, it enables fast <Alt+Tab>ing if there's no display mode switching. | ||
| + | : "Fullscreen Windowed Mode" games are also handled slightly differently with this enabled. So long as there are no other windows overlaying the game, they can also bypass the ''compositor'' and disable "V-Sync". | ||
| + | : It's supposed to perform as well as "Fullscreen Exclusive Mode", and in one demo, it outperformed FSE Mode by a small amount. | ||
| + | :* Solution-1: Disable Win10 "Full Screen Optimizations". | ||
| + | :: Here's how to disable it by default: '''Windows Settings | Gaming | Game Bar'''. The settings: "show game bar when I play full screen games Microsoft has verified" and "record clips, screenshots..." should both be OFF. | ||
| + | :: Either that or you can do it individually in each game's properties. | ||
| + | :* Related commentary: | ||
| + | :: It also resets the "International Colour Consortium" (ICC) profile of the monitor(s) to default every time you start a ''fullscreen'' game or <Alt+Tab> to one or switch to "fullscreen mode". You would think that in trying to apply the advantages of ''borderless'' to ''fullscreen'' that they'd also make ICC profiles work in ''fullscreen''. But no, they make it even worse in that aspect. | ||
| + | :: This setting, along with 4k, causes all kinds of scaling issues. Only 1/4 the game on screen, or green tint across the screen with wrong refresh rate. | ||
| + | |||
| + | <span id="Issue: Wounds don't appear on Actors"></span> | ||
| + | === Issue - Wounds do not appear on Actors === | ||
| + | After installing a Body, Armor, or Skin replacement mod, wound decals no longer appear on most enemies. When they do appear, it's only on the legs. This happens with non-humanoid NPCs like Bighorners as well. The wound decals are supposed to come from mods like [http://www.nexusmods.com/newvegas/mods/57113/ IMPACT] and [http://www.nexusmods.com/newvegas/mods/34917/ Enhanced Blood Textures]. | ||
| + | |||
| + | * Cause: The problem lies within NIF files for armors/outfits and creatures. Each NIF has to be modified so that the main armor/creature ''NiTriStrips'' (or shapes) appear above all other ''NiTriStrips'' (like ''gore caps'' ) in the tree. Only then will decals appear correctly. | ||
| − | + | : It's a HUGE amount of work because of the number of faulty armors (just vanilla; not including modded ones like "Type3" and "Roberts"), because sometimes you'll need to join meshes via a texture editor such as '''Blender''' in order to reduce the number of ''NiTri''s as only the FIRST 2-3 mesh shapes are used for decal placement. By default, ''gore cap'' meshes are placed above main outfit meshes and are cut into multiple parts. Consequently wounds are not appearing. | |
| − | + | :* Solution-1a: [http://forums.nexusmods.com/index.php?/topic/6044613-wounds-not-appearing-on-npcs/#entry54108463 Example] of corrected NIF files, explained by '''KiCHo666''': | |
| − | * | ||
<blockquote> | <blockquote> | ||
| − | + | I joined all gore caps into one mesh (1 for torso caps, 1 for limb caps), joined all possible armor parts into one via Blender ('''Outfit1''' and '''Outfit2''' were separated because they use different texture paths.) and then reordered them via [http://niftools.sourceforge.net/wiki/NifSkope Nifskope]. | |
| − | : | + | "Arms" mesh need to be separated for arms to appear in first person view. |
| + | PipboyOn/Off are replacement meshes used when NPC has Pipboy equipped.<br> | ||
| + | |||
| + | After all that, wounds appear correctly in the game.<br> | ||
| + | |||
| + | However, for any addon body part, like heads, arms, other armor parts ... wounds won't appear no matter what.<br> | ||
| + | |||
| + | A friend here on '''Nexus''', '''VWgolfR1''', told me about that. So give kudos to him!</blockquote> | ||
| + | |||
| + | :* Solution-1b: ''No gore'' was a problem that was reported in the [http://www.nexusmods.com/newvegas/mods/35047/ Bouncing Natural Breasts] mod comments. One solution is to use a "gore compatible" texture replacer like [http://www.nexusmods.com/newvegas/mods/34702/? Beware of Girl Type 3 HiRez HiDetailed Replacer]. | ||
| + | |||
| + | <span id="Solutions to Mesh (Red "!" icon) or Texture (solid color) problems"></span> | ||
| + | ==Solutions to Mesh -Red Kite- icon or Texture -solid or off color- problems== | ||
| + | |||
| + | <span id="Issue: What are these ''Red "!" kite '' icons in the game?"></span> | ||
| + | === Issue - What are these -Red Kite- icons in the game === | ||
| + | This Red irregular "kite shaped" hexagon with a white "!" icon is the "missing mesh" indicator. | ||
| + | |||
| + | * Cause-1: You added meshes as "loose files" that replace the vanilla versions in the BSA files, but the game engine doesn't realize it needs to use them instead. | ||
| + | :* Solution-1: Toggle "ArchiveInvalidation" off-and-on again in your mod manager. This is discussed in detail in the[[#ArchiveInvalidation (by Manager)|ArchiveInvalidation (by Manager)]] sub-topic. | ||
| + | |||
| + | * Cause-2: Your load order is not sorted correctly. | ||
| + | :* Solution-2a: Check that you have the vanilla game and Official DLC ESM files in the correct sequence. Please see the "Vanilla "Load Order" section of the [[FNV_General_Mod_Use_Advice|FNV General Mod Use Advice]] article. | ||
| + | |||
| + | :* Solution-2b: Use [http://loot.github.io/ LOOT] to sort your "load order". Like most automated tools, LOOT is not 100% accurate; yet it is infinitely better at determining a correct load order for a large number of mods than anything other than manually examining each mod in an editor like [http://www.nexusmods.com/newvegas/mods/34703/? FNVedit] (a generic tool called 'xEdit' which is renamed for working with specific games) and building such an order by hand (each time you add or remove a mod). (There is a FNVEdit Training Manual specific to both FO3 and FNV.) LOOT works by examining the file header of each plugin and working out all the records each modifies, and determines the relationships between those mods. For the beginning mod user, it is essential to resolve most fatal mod conflict problems. LOOT does provide the "metadata" mechanism that allows you to customize it's sorting to preserve such adjustments as you determine necessary. Read it's documentation to exploit all of it's capabilities. | ||
| + | {{xEdit Exclusivity}} | ||
| + | |||
| + | * Cause-3: Different texture/mesh replacement mods can conflict with each other. The "install order" can be the cause of the "missing mesh" indicator suddenly appearing, especially where things had been fine before adding the new mod. | ||
| + | :* Solution-3a: Be sure you are using compatible meshes and textures. See "Body Replacement Basics" in the wiki [http://wiki.nexusmods.com/index.php/FNV_General_Mod_Use_Advice FNV General Mod Use Advice] article. | ||
| + | |||
| + | :* Solution-3b: As a general rule, install replacement mods that predominately affect the "background" on the horizon or mountains first, then those that affect the mid-ground (like billboards and trees/flora), with those affecting things you normally don't see well until in the mid- to foreground (like creatures) last. Some experimentation with the "install order" may be necessary. | ||
| + | :: Remember that "view while distant" (VWD) ''objects'' require "_far.nif" files and rebuilding of the ".lod" quadrants for ''landscapes'' with [http://www.nexusmods.com/newvegas/mods/58562/? FNVLODGen] after updating the "load order". See the [http://web.archive.org/web/20170713081056/http://www.darkcreations.org/testg/wiki/Category:VWD-OB "TESTG: VWD/LOD Overview"] page to understand the issues and for details on resolving them. | ||
| + | |||
| + | * Cause-4: The path to the mesh and/or texture file must be in "relative" format to the "Data" folder (i.e. "textures\<SpecificSubFolderPath>" rather than "absolute" format (i.e. "C:\<PathToGameFolder>\Data\textures\<SpecificSubFolderPath>"). | ||
| + | :* Solution-4: See the wiki article [[How_to_fix_hard-coded_texture_paths_in_NIF_files|How to fix hard-coded texture paths in NIF files]]. | ||
| + | |||
| + | <span id="Issue: What's with these ''Solid Green'' billboard signs in the distance (LOD)?"></span> | ||
| + | |||
| + | === Issue - What is with these ''Solid Green'' billboard signs in the distance ''aka LOD'' === | ||
| + | * Cause: The underlying problem is how the game handles distant 2D objects generally called "trees" or "billboards".<br> | ||
| + | <div name="Note Box" class="boilerplate metadata" id="Notice Box" | ||
| + | style="margin:0px 10px 10px 30px;border:1px dashed #DAA520;color: lightgray; | ||
| + | background-color:#333333;padding:3px; | ||
| + | word-wrap: break-word; /* Internet Explorer 5.5+ */ | ||
| + | ">LOD in general is what you see in the distance, beyond the '''uGridsToLoad''' setting value. Bethesda uses static LOD which means that LOD information is prebuilt and doesn't change when mods modify objects in game. Some mods include updated LOD files to address this issue, but they are rare and usually incompatible with each other and require compatibility patches of their own. Those LOD files are generated with GECK which is quite complex procedure unaccessible by majority of users. [http://www.nexusmods.com/skyrim/mods/62698/? TES5LODGen/xLODGen] (the latest version just needs to be renamed to what your game is expecting) tries to address this issue by providing a simple one-click automated LOD files generation for the current load order of user, taking in account all mods that have content visible from distance.<br>-(Source: xLODGen description.)</div> | ||
| + | |||
| + | :: The game engine treats distant 2D "vegetation trees" and "sign billboards" identically beyond the immediate foreground as "level of detail"(LOD) distant "tree" objects. The resulting "images" collectively make up "billboards" which are combined into an "atlas". '''xLODGen''' can combine billboards from different mods into new atlases when you select the "Trees LOD" option. When you run '''xLODGen''' after updating the "load order", it will replace any missing "billboard" LOD textures to this "solid green" color during LOD generation. It also lists these "missing" textures in the xLODGen log file. | ||
| + | |||
| + | <div name="Note Box" class="boilerplate metadata" id="Notice Box" | ||
| + | style="margin:0px 10px 10px 30px;border:1px dashed #DAA520;color: lightgray; | ||
| + | background-color:#333333;padding:3px; | ||
| + | word-wrap: break-word; /* Internet Explorer 5.5+ */ | ||
| + | ">"Atlas" means that there are several separate images located inside a single image. Trees in the distance are just flat images of trees displayed from atlas texture. The usage of single texture in [game] for all trees is performance friendly, but unfortunately very problematic for mods that change tree models or add new ones. To update LOD images, even if it is only a single tree, the mod must include the whole atlas texture along with images for all other trees even if they are unchanged. The other problem of trees LOD is that a single atlas texture is used for all worldspaces [in the Gamebryo engine].<br>-(Source: xLODGen description, edited from game specific for more generic purposes. See the game specific version download pages of '''xLODGen''' as to specific differences.)</div> | ||
| + | |||
| + | :: (For more details about this, please see the article [http://www.reddit.com/r/skyrimmods/comments/466vss/the_difference_between_lods_and_billboards/ The difference between LODs and Billboards explained] on Reddit's Skyrim forum. Note there are some technical differences in how this works between Skyrim (Creation) and Oblivion/Fallout (Gamebryo) as they use different game engines.<br> | ||
| + | :: See this [http://afkmods.iguanadons.net/index.php?/topic/4051-wipz-tes5lodgen-for-trees-lod/ TES5LODGen for Trees LOD] thread for information on how billboards work in TES5LODGen.) | ||
| + | |||
| + | :* Solution-1a: The mods with LOD additions (such as [http://www.nexusmods.com/newvegas/mods/61206/? LOD additions and improvements] by '''tomzik''') are highly recommended to be installed before LOD generation as they provide extra distance models missing in the vanilla game. | ||
| + | |||
| + | :* Solution-1b: Re-run '''xLODGen''', enabling the "Trees LOD" option. You may also find that adjusting the game INI files '''uGridsToLoad''' setting value to a larger "odd number" (e.g. 7, 9, 11) may help with the issue of "pop-in" (where objects such as "sign billboards" appear "green" until you are much closer to them). However, note that you may want to also increase the '''uExterior Cell Buffer''' value to accommodate the greater cell data and prevent crashes and stuttering. <span style="margin:0px 10px 10px 0px;border:1px solid #00C600;color: green; | ||
| + | background-color:#fff5f5;padding:3px; | ||
| + | word-wrap: break-word; /* Internet Explorer 5.5+ */ | ||
| + | ">Larger values have an impact upon performance. And once you save the game with a higher setting, you cannot lower it again except by starting a new game.</span> (See the related entries in the [http://www.tweakguides.com/Fallout3_9.html Fallout TweakGuides] for details.) | ||
| + | |||
| + | :* Solution-1c: The tool [http://www.nexusmods.com/skyrim/mods/60733/? Tree LOD billboard creator for xLODGen] by '''zilav''' can be used to "grab an image of a tree directly from preview/render window of official editor (Creation Kit, GECK and Construction Set) or NifScope, calculate alpha mask, scale, adjust brightness and contrast, generate mipmaps and save ready to use DDS billboard image in a single click." Please read the "usage guide" on the download page carefully. | ||
| + | |||
| + | <span id="Issue: Find the source mod-index of an object in-game"></span> | ||
| + | |||
| + | === Issue - Find the source mod-index of an object in-game === | ||
| + | This is often desired to determine the source of a missing texture (solid color) or mesh (the White "!" on a Red background symbol in game), or when the file for one has been overwritten producing the "wrong texture". | ||
| + | * Cause: The only way to identify a "Reference Object" (one that has been placed into the game world and begins with the "mod-index" of "FF") is to use the console to identify an object in-game. "Usable objects" that can be picked up must have the object in a container's inventory ("the Player" {your character}, another Actor such as a NPC or creature, or a container such as a cabinet or chest) in order to obtain their "Base-ID". "Static objects" like signs or billboards that are not movable can be targeted directly to obtain their "Ref-ID", which you will need to turn into a "Base-ID". | ||
| + | : For more on the distinctions between the various terms associated with "Reference Objects" and "Form-IDs", please see the 'GECK Form-ID, Base-ID, Ref-ID, and Editor-ID' section in the wiki [http://wiki.nexusmods.com/index.php/Getting_started_creating_mods_using_GECK Getting started creating mods using GECK] article. These distinctions are VERY important to understand. | ||
| + | |||
| + | :* Solution: | ||
| + | :# Open the in-game console (default is the <~> key). | ||
| + | :#* For "static objects", < Click > on the target. This is all that is needed. Note this will be a "Ref-ID". | ||
| + | :#* For "usable objects", < Click > on the PC, NPC, or container and enter "showinventory" in the game console. Note this will be a "Base-ID". | ||
| + | :# The Form-ID (e.g. "001735E4") will be displayed at the top of the screen. See this article [http://fallout.wikia.com/wiki/Help:Form_IDs Help:Form IDs] for an explanation of how to interpret the Form-ID. In short, the first two characters are the "load order index" (aka ''mod index'') (in [http://en.wikipedia.org/wiki/Hexadecimal hexadecimal], starting with "00"). The ''mod index'' tells you the source mod's position within the "load order". | ||
| + | :#* If you have '''NVSE''' installed and the '''plugin file name''', then you can use the console command ''GetModIndex "<pluginname>.ES<M|P>"'' (double quotes required) to get the "load order" ''mod index'' while in-game (i.e. ''GetModIndex "DeadMoney.esm"'' should return "01"). | ||
| + | :#* The '''NVSE''' console command "''GBO''" (GetBaseObject) after selecting the item will return the "base object id" (Base-ID). The Form-IDs listed in the Object window of GECK are "Base-IDs". A "Base-ID" is only associated with an object template ''in the editor'', never with an instanced object in-game. Note: Will return the ''leveled'' character/creature form if called on references spawned by a "leveled list". Use "''GBF''" (GetBaseForm) to return the NPC/creature "Base-ID" instead. Source: [http://geck.bethsoft.com/index.php?title=Glossary GECK Wiki]. | ||
| + | :#* If you have the '''"Lutana"''' or '''"JIP LN" NVSE Plugin''' installed, you can use it's console command `'''''search "<item name>"'''''' (double quotes required), which will show you a list of matching items with Form-IDs. | ||
| + | :#* Note that a "00" ''mod index'' means it's from the game master file (i.e. FalloutNV.ESM). | ||
| + | :#* DLC masters follow the game master, and should be in order of release. (See [[FNV_General_Mod_Use_Advice#Vanilla_.22Load_Order.22|Vanilla Load Order]].) | ||
| + | :#* The ''mod index'' for other plugins may change as their position on the "load order" changes due to the addition or removal of others. | ||
| + | :#* The "FF" index means it is a "spawned" character or item, which happens when you place or drop the item to the ground in the game-world. This ''mod index'' is never that of the "source mod". It's a "Ref-ID". (These get included in the save game file.) You will need to use the NVSE "GBO" or "GBF" command to get it's "Base-ID" which should contain the "mod-index" of the "source mod". | ||
| + | :# To determine the source of conflicts: | ||
| + | :#:* Once you have the Base-ID, load your entire "load order" into [http://www.nexusmods.com/newvegas/mods/34703/? FNVedit], enter the Base-ID you found (e.g. "001735E4") in that field (upper left corner of FNVEdit), press < Enter >, and in the right-hand pane select the "View" tab. (Note that a "Ref-ID" beginning with "FF" will not work for searching purposes. You need to determine the "Base-ID" using NVSE "GBO" or "GBF" first.) | ||
| + | :#:* This will now show you ALL the plugins which touch that record, in the order in which they do so. The last (right-most) is the one that "wins" the conflicts (red backgrounds) for that record. All you really need is to see which plugin (column) is the winner. | ||
| + | :#:* Note that you cannot use a "Ref-ID" with the "player.additem" console command. It requires a "Base-ID". | ||
| + | :#:* "Ref-IDs" will be located in the left-hand pane under the "World" category, and once found their record information in the right-hand pane will tell you the "Base-ID" they are a reference back to. | ||
| + | {{Lutana NVSE Plugin Status}} | ||
| + | |||
| + | <span id="Issue: Fix a "missing/solid color" texture problem"></span> | ||
| + | |||
| + | === Issue - Fix a ''missing or solid color'' texture problem === | ||
| + | * Cause-1: the texture (DDS) file is missing, incorrect, can't be located, or corrupt. | ||
| + | :* Solution-1a: This is a multi-part procedure presented in increasing level of difficulty. Details in other articles or sections of this guide cover those aspects in more depth, so read everything first before attempting. | ||
| + | |||
| + | :# Identify the load order "mod index" of the plugin the object in question belongs to using the procedure laid out in [[#Issue:_Find_the_source_mod-index_of_an_object_in-game|Issue: Find the source mod-index of an object in-game]] entry in this guide. | ||
| + | :# Make sure you have installed all the "art assets" of that plugin (that is: any ESM and BSA files required). Check the mod "requirements" carefully. Sometimes these are a separate "mod" or file download. | ||
| + | :# Toggle "ArchiveInvalidation" off-and-on again. | ||
| − | : | + | :* Solution-1b: You have a mod conflict that is overwriting that object's record, which requires a change in the "load order" sequence or a "merge/bash patch file" to correct; though this is much less likely for a "missing texture only" problem. (Please see the [[FNV_General_Mod_Use_Advice#Third Rule: The Rule of One|Third Rule: The Rule of One]] and [[FNV_General_Mod_Use_Advice#Merge_Patch_File|Merge Patch File]] sections of the wiki [[FNV_General_Mod_Use_Advice|FNV General Mod Use Advice]] article.) |
| − | |||
| − | * Solution: | + | :* Solution-1c: If neither of those solutions is enough to fix the problem, then you have to determine if the texture (DDS) file is missing or corrupt. |
| − | + | :# Examine the mod archive package to check if the folder where it got placed is somewhere the engine isn't looking for it. You can manually drag the folders to the correct locations, or repackage the archive to avoid that problem against the next time you need to install it. | |
| − | + | :#; For example: In the case of "Weapon Retexture Project" (WRP) v1.95, the package has a "non-standard" folder structure. (Not an uncommon mistake by mod authors, so learn from this.) The game (to include most mod managers like NMM, MO, and FOMM) is expecting the top level folder of an archive package to be standardized; with folder names such as "Textures" or "Meshes" (etc.), or ESM/ESP/BSA files. It assumes they are being placed under the game "Data" folder. This example package starts with a "RLS" folder, which the game does not recognize, and so it places that as the "top level" under "Data". (Sometimes this is the author's name or initials, other times it's the mod name and version, but anything unexpected is treated the same way: as a new folder or file. Sometimes it's "Data" so you end up with "Data\Data" which is also unexpected.) Most likely when the files are "installed" but aren't found correctly, something similar to this is your problem. Unpack the mod archive (WRP in this instance) to some other location and then either rebuild the archive so the top level folders are "Textures" and "Meshes" (in other words, without the "RLS" folder from WRP at all), and then install with your mod manager, or manually drag those folders into the game "Data" folder.<br> | |
| − | : | + | :#: BTW: The text file under the WRP "RLS" folder is a documentation file. If you want to keep similar in the package, just place it in the top level along with the "Meshes" and "Textures" folders. Recommend renaming such to "<mod_name>_ReadMe.txt" so you know which package they came from, and place them all in a "Docs" folder for easy access, but it's not a requirement. (Many authors act as if their mod's text file is the only one that might possibly exist in the same location or use the same common name (i.e. "Readme.txt"), so consequently only the last installed exists.) |
| − | : | + | :# Examine the plugin in [http://www.nexusmods.com/newvegas/mods/34703/? FNVEdit]. (Note that the "mod index" will be different because you probably won't be loading all of the plugins from your "load order".) |
| − | : | + | :# Locate the object, using the "Form-ID" that was returned when you identified the object in ''Solution-1a''. |
| − | : | + | :# Find the "model" (MODL/NIF) filename and path of the object in question. (The "texture file" name and path is located within the model/mesh "NIF" file.) |
| − | : | + | :# Use [http://niftools.sourceforge.net/wiki/NifSkope NifSkope] to open that NIF file. |
| − | + | :# See the wiki article [http://wiki.nexusmods.com/index.php/How_to_fix_hard-coded_texture_paths_in_NIF_files How to fix hard-coded texture paths in NIF files] for the procedure to locate the texture file entry within '''NifSkope'''. (The path needs to be "relative" instead of "absolute"/"hard-coded" in order to be found, which is what that article covers.) But in short form the procedure is: | |
| + | :#* Open the NIF file in '''NifSkope'''. | ||
| + | :#* Click on the part you want the texture for; it will highlight it in the ''Block'' list. | ||
| + | :#* Expand it and highlight ''BSShaderPPLightingProperty''. Expand that. | ||
| + | :#* Highlight ''BSShaderTextureSet''. | ||
| + | :#* In ''Block Details'' you will see textures (DDS files). Expand it. | ||
| + | :#* There you will see the paths to the textures used by that mesh. | ||
| + | :# Once you have identified the texture (DDS) file in question, first ensure it is present. If it is, then you want to replace it as it might be corrupt. Either way, install or replace by extracting that file from the plugin archive (or extract the DDS file from the appropriate BSA with [http://www.nexusmods.com/newvegas/mods/54991/ FOMM]) and overwrite the file (if any) in that location. | ||
| + | :# Toggle "ArchiveInvalidation" off-and-on again. | ||
| + | :# Test the result. | ||
| − | + | :: If nothing changes, then you most likely identified the wrong object and need to start over. | |
| − | |||
| − | * | + | * Cause-2: Sometimes installing a mod can replace a vanilla "normal map" (aka "bump map") or fail to include one, which in turn causes some strange effects such as "transparency" and problems with texture Alpha channels (brightness). |
| + | :* Solution-2: Removing the mod should restore things, but you have to toggle "ArchiveInvalidation" off-and-on-again once it is uninstalled. If a loose file was actually overwritten, you will need to "verify local files" or re-install the other mod to restore it. | ||
| − | * Cause- | + | * Cause-3: Failure of the mod to include a "mipmap" (which includes the same image at various resolution sizes) so it's default size fails to match that of your game settings. |
| + | :* Solution-3a: Try changing the "Texture Size" to "LARGE" in the main game "Settings | Display" menu and "exit to the desktop" to restart the game session. If that doesn't resolve the problem, try gradually lowering the "Texture Size" settings. While this will eventually match the size of the mod image allowing to appear correctly, it is likely to causes problems with other mods which don't have mipmaps either and use a different default size. It's best to bring the matter to the attention of the mod author. | ||
| + | :* Solution-3b: Mipmap generation is a "properties setting" in the "Mesh Editor" (e.g. '''Blender''') when creating the NIF file. You can try to rebuild the NIF file to also produce a "mipmap" file, but that process is beyond the scope of this article. | ||
| − | + | <span id="Issue: Pink Screen or textures (VRAM limitation)"></span> | |
| − | === Issue | + | === Issue - Pink Screen or textures ''aka VRAM limitation'' === |
* Cause-1: Usually this means you are running out of graphics VRAM (the physical memory on your video card); typically from too many High Resolution Texture replacement packs. These pink textures can show on faces, hands, and hairs, but also can happen with entire loading screens. When you start seeing this "pink stuff", a CTD is just around the corner. | * Cause-1: Usually this means you are running out of graphics VRAM (the physical memory on your video card); typically from too many High Resolution Texture replacement packs. These pink textures can show on faces, hands, and hairs, but also can happen with entire loading screens. When you start seeing this "pink stuff", a CTD is just around the corner. | ||
| − | * Cause-2: If you are on Windows | + | * Cause-2: If you are on any version later than Windows 7, the game can handle less "High Quality" / "High Definition" textures due to how the Direct3D API reports available VRAM. ''"The API in question simply reports to the app an estimation of how much memory remains available to allocate. On Windows 7, when more than 4GB are available, this API will not report accurate information. For example, if 4.1GB of memory are available, the app will see 0.1GB available. […] On Windows 8 and newer, this API will only report 4GB. Up until the change in this Fall Creator’s [sic] Update, once the counter reports 0 you can expect future memory allocation requests to fail."'' - '''Jesse Natalie''', Senior Software Engineer in the Direct3D team at Microsoft as reported to [http://www.neowin.net/news/windows-10-fall-creators-update-fixes-the-directx-9-memory-allocation-bug Neowin.net]. So in short, if your game ran fine in Win7, it will and cannot handle as many textures as it could before upgrading to later versions of Windows or video cards with more than 4GB of VRAM. This can cause your symptoms of pink textures or worse a CTD if you had more than 4GB total of video memory use loaded under Win7.<span style="margin:0px 10px 10px 10px;border:1px solid #00C600;color: green; |
| + | background-color:#fff5f5;padding:3px; | ||
| + | word-wrap: break-word; /* Internet Explorer 5.5+ */ | ||
| + | ">Note this VRAM limitation is fixed in Windows 10 Version 1709 (aka the Win10 "Fall Creator's Update") which started it's release rollout on 17 Oct 2017.</span> | ||
| + | |||
| + | :* Diagnostic: You can see if reducing the in-game "texture quality" setting from "High" to "Low", or if reducing your screen resolution down to 800x600, or both, makes any difference to confirm the above are the cause. | ||
| + | |||
| + | :* Solution 1-2: There are several things you can try, individually or in combination, in order of effectiveness: | ||
| + | ::* Implement "ENBoost" (which is NOT the "ENB Series" graphics post-processor with it's attendant FPS hit) if you have more than 4GB of system RAM. See the [http://wiki.step-project.com/Guide:ENB#ENBoost S.T.E.P. ENB Guide] and [http://wiki.step-project.com/ENBoost#Recommendations S.T.E.P. ENBoost QuickStart] pages. | ||
| + | ::* Uninstall some HD texture replacement packs. | ||
| + | ::* Run the game at a lower screen resolution. | ||
| + | ::* Reduce the texture resolution down by half each time (i.e. from 4096x4096 to 2048x2048, 1024x1024, or 512x512). See the Utilities "DDSOpt" and "Optimizer Textures" on the [http://web.archive.org/web/20170713081056/http://www.darkcreations.org/testg/wiki/Utilities TESTG Utilities] page. | ||
| + | ::* Upgrade your video card. However, note the limitation in Windows 10 in "Cause-2" above. | ||
| + | |||
| + | ::* For advanced users: If you have a Windows 10 Education, Professional, or Enterprise edition you can use the included Win10 Hyper-V system and try running the game in a Win7 "virtual machine". See [https://msdn.microsoft.com/virtualization/hyperv_on_windows/quick_start/walkthrough_compatibility HyperV on Windows compatibility] for the hardware requirements and a walk-through of the installation process. Note this requires you to have or obtain an ".iso" file of the desired OS install media. (If none of this option makes sense, you probably don't want to mess with it. Otherwise, educate yourself as it is beyond the scope of this wiki.) | ||
| + | |||
| + | * Cause-3: When this occurs with faces, you may need to adjust profile settings in ''Fallout.INI'', ''FalloutPrefs.INI'', and ''Fallout_default.INI''. Note some Character overhaul mods change the mesh for faces as well and may require additional setting adjustments. Read their documentation carefully. | ||
| + | :* Solution-3: Set | ||
| + | <pre> [General] | ||
| + | bLoadFaceGenHeadEGTFiles=1</pre> | ||
| + | |||
| + | <span id="Issue: "ShowRaceMenu" / Changing Character / Uninstalling a "custom race" problems"></span> | ||
| + | |||
| + | === Issue - '''ShowRaceMenu''' or Changing Character or Uninstalling a ''custom race'' problems === | ||
| + | Example: Uninstalled "Fallout Character Overhaul" (FCO) in mid game, but forgot to switch to a vanilla race first and got stuck in the ground and constantly have to use the "tcl" console command to rise up vertically. Tried re-installing FCO and using the "ShowRaceMenu" console command but it CTDs upon loading. | ||
| + | |||
| + | * Cause-1: Failure to provide a "replacement" for fundamental features the game is expecting (such as switching to a vanilla "race" prior to removing a "custom race" mod) will cause a CTD, similar to a "missing master" problem. | ||
| + | |||
| + | :* Solution-1a: Basic troubleshooting on the "CTD upon loading" symptom in the example case identified that the re-installed plugin was not enabled as an active plugin. (This permitted the use of the "ShowRaceMenu" command.) | ||
| + | ::* In general, uninstalling any mod from an active game is going to cause problems. Many will not be fully resolveable by simply re-installing the mod. Anything that has a "FormID" with the plugin index of the removed mod will be purged when the save game is loaded (the "missing content" message), but some elements such as scripts might not. Understand what you are getting into before attempting. Safest is to go back to a "save game" file from before the mod was installed. | ||
| + | |||
| + | :* Solution-1b: It's been reported using the "ShowRaceMenu" console command can have harmful side effects, especially after "level 5". You can safely change "face proportions" and "hair". Changing the character's race will "deactivate" your stat related Perks, Traits, and Implants. They will still be listed in your Pip-boy, but the effects supposedly won't be active any more. There are safer, more specialized alternatives to "ShowRaceMenu": such as "SexChange", "ShowPlasticSurgeonMenu", and "ShowBarberMenu". | ||
| + | ::* There is a mod [http://www.nexusmods.com/newvegas/mods/45717/? Safe ShowRaceMenu] that let's you "Revise your character no matter what level you are, without resetting your stats, skills, traits and perks simply by activating a mirror". However, read the comments for some known issues before plunging ahead. | ||
| + | ::* The mod [http://www.nexusmods.com/newvegas/mods/49152/? Fallout NV Cheat Terminal Redux] that allows, among other things, the removal and addition of Perks, Traits, and Implants. This can be used to "fix" those deactivated by changing race. | ||
| + | |||
| + | * Cause-2: Switching custom races causes a CTD in the "RaceMenu". | ||
| + | |||
| + | :* Solution-2: It is also reported you can avoid the crash in the "RaceMenu" when switching between "custom" races by first switching from the old custom race to a vanilla one, and then switching to the new custom race. No need to save; just switching to vanilla first and then to the new race is enough for the menu to avoid the problem. | ||
| + | |||
| + | <span id="Issue: Skin tone mismatch between head and body"></span> | ||
| + | === Issue - Skin tone mismatch between head and body === | ||
| + | This commonly occurs when using a body replacement like "Type 3 Body" or facial overhaul like "Fallout Character Overhaul" (FCO) or "Fallout New Vegas Redesigned 3" (NVR3). The most obvious symptom is a Caucasian head on an other racial body. | ||
| + | |||
| + | * Cause: The vanilla game by default assumes only vanilla races for matching skin tones. Various forms of replacement to either the head or body fall into the general category of "custom races". | ||
| + | :* Soution-1: The "bLoadFaceGenHeadEGTFiles=" setting needs to set to "1". This line may be missing from the three INI files, in which case it should be added to the "[General]" section just before the "[Display]" section. | ||
| + | <div name="Note Box" class="boilerplate metadata" id="Notice Box" | ||
| + | style="margin:0px 10px 10px 50px;border:1px solid #00C600;color: green; | ||
| + | background-color:#fff5f5;padding:3px; | ||
| + | word-wrap: break-word; /* Internet Explorer 5.5+ */ | ||
| + | "> | ||
| + | Note that if you are currently or have used "Mod Organizer", MO uses its own copies of "Fallout.ini" and "FalloutPrefs.ini" (from when the MO profile was created), located in "\Steam\steamapps\common\Fallout New Vegas\Mod Organizer\profiles\<Your Profile Name>". These files need to be changed as well.</div> | ||
| + | :* Solution-2: Make sure if you have more than one such mod installed that they are compatible. Check to documentation carefully for version numbers and install instructions. | ||
| + | :* Other, less likely suggested solutions if the first two are not sufficient: | ||
| + | ::* Toggle "Archive Invalidation" on and off several times. | ||
| + | ::* Ensure FCO is installed before NVSR3 and the FCO plugins are disabled (per instructions, you only require the FCO assets). | ||
| + | ::* If you haven't already, create a "merged/bashed patch" to resolve any potential record level conflicts. If you have one, rebuild it. | ||
| + | ::* Use the "showracemenu" console command to switch to a vanilla race on a test character, and then to your custom race, and save. Then reload your the test save file several times until the character head and body skin tones match. Once they do, try loading your normal game save file and see if the skin tone matching carries over. This "work-around" may only last for that game session and need to be repeated the next time your play. | ||
| + | |||
| + | == Solutions to Miscellaneous problems == | ||
| + | Issues that don't fit well into other subject categories. | ||
| + | |||
| + | <span id="Issue: (Main)PsychEval"></span> | ||
| + | === Issue - MAIN - Doc's Psych Eval gives wrong tag skill === | ||
| + | : Thanks to '''Shadyfan4500''' of the Nexus "Fallout New Vegas Discussion" forum for identifying and researching the problem. | ||
| + | |||
| + | Symptoms: Despite carefully tailoring the '''Vigor Testor''' "psych eval" answers to get specific "tag" skills, there is always one unanticipated skill "tagged", such as ''Lockpick'' even though there are only three answers that should "tag" it. | ||
| + | |||
| + | * Cause: In the ''VCG01Test'' quest (the in-game code related to the psych eval) is the script that controls what happens as a result of the dialogue. The script has three skill pools, and guarantees a player gets at least 1 tagged "combat" pool skill and 1 tagged "gate-opener" pool skill. Among the "gate-opener" skills are ''Science, Lockpicking, Speech,'' and ''Barter''. Regardless of the other answer options you chose, you will get one of the skills from each of those two pools tagged if none were chosen. | ||
| + | :* Solution: Functioning as intended by the developers. Use a "cheat" tool (such as "[https://www.nexusmods.com/newvegas/mods/49152 Fallout NV Cheat Terminal Redux]") to change the result to what you want instead. | ||
| + | |||
| + | <span id="Issue: (Main)JoeCobbExplosion"></span> | ||
| + | |||
| + | === Issue - MAIN - Goodsprings quest ''Ghost Town Gunfight'' - Joe Cobb explodes === | ||
| + | : Thanks to '''TheCrimsonCommando''' of the Nexus "Fallout New Vegas Mod Troubleshooting" forum for identifying and researching the problem. | ||
| + | |||
| + | Killing Joe Cobb in the last bit of the GoodSprings quest ''Ghost Town Gunfight'' causes an explosion. The explosion does the following: | ||
| + | ** Forces the player into a constant stagger and camera shake. Entering and exiting VATS doesn't fix this. | ||
| + | ** Blinds the player and forces the camera to go white. HUD is unaffected. Opening and exiting the ''Pause'' menu causes the camera to go black, then returns to white after a second or two. | ||
| + | ** An explosion sound effect plays, then seems to loop/stretch/compress with increasing intensity and volume. Opening and exiting the ''Pause'' menu only restarts the sound effect and makes it worse. | ||
| + | *: No damage is done to any NPCs or the player, and the player can still move around. | ||
| + | |||
| + | * Cause: This is a scripted effect from the mod "Sinitar's Gameplay Overhaul for Fallout New Vegas (SGO)" that requires the "[http://www.nexusmods.com/newvegas/mods/66927 JohnnyGuitar NVSE]" plugin. (The SGO mod is hosted off-site of the Nexus. Search the web on "sinitargaming".) | ||
| + | :* Solution: The required "[http://www.nexusmods.com/newvegas/mods/66927 JohnnyGuitar NVSE]" plugin is missing or not the correct version or it's required NVSE files are not present/compatible. | ||
| + | |||
| + | <span id="Issue: NiptonNPCs"></span> | ||
| + | === Issue - MAIN - Nipton - Neither Vulpes Inculta nor Oliver Swanick appear === | ||
| + | Symptoms: Upon first arriving at Nipton neither Swanick nor Vulpes appear (although they can be spawned through the commands). However the Legionanaires that should accompany Vulpes do appear. | ||
| + | |||
| + | * Cause: Mod conflict. | ||
| + | :* Solution-1: The mod "[https://www.nexusmods.com/newvegas/mods/65082 Simply Uncut]" has been identified as one culprit, though others have the problem without that specific mod. Note that the author of "Simply Uncut" suggests (in the comments thread): "I'm pretty sure you have to approach from the road at the Nipton Road Pit Stop for Oliver to spawn, then walk down that road that curves off into the Crucifixion road for Vulpes to spawn." [Oliver appears on the West side of Nipton as you approach the edge of town.] Anyone having this problem should try this first. | ||
| + | |||
| + | :* Solution-2: Please see the [[#Mod_Conflict_Isolation|Mod Conflict Isolation]] section. | ||
| + | |||
| + | <span id="Issue: DamageBug"></span> | ||
| + | |||
| + | === Issue - MAIN - Weapon Damage displayed for other weapons is unexpected === | ||
| + | : Thanks to '''holyshitijustwantanaccount''' of the Nexus Fallout "New Vegas Mod Troubleshooting" forum for discovering the basis of the following: | ||
| + | |||
| + | Symptoms: When equipping a weapon (specifically noticed with a "shotgun"), the damage for all other Player weapons changes wildly until it is "unequipped". This occurs even without any mods installed. | ||
| + | |||
| + | * Cause: (Thanks to '''miguick''' for investigating and providing this information.) This is vanilla game behavior. The game displays the damage of all weapons adjusted by the ammo effects of your currently loaded ammo, even if those weapons don't use it. Since the default ammo for shotguns has something like a x1.2 damage multiplier, you'll see all other weapons adjusted by that much. | ||
| + | |||
| + | : So other than that annoyance when viewing weapons in the Pipboy and containers, it isn't much of a problem? Well, it is, because it can also change the damage and effects of things like mines you've laid that go off while you have that ammo loaded. Which means that if you have "bean bags" loaded, a mine you laid will deal 5% damage and will cause '''fatigue''' like a "bean bag" impact. And with HP ammo loaded: a mine will deal 175% damage, but then faces a x3 DT increase in whatever it harms in the blast, etc. It's affected by any current ammo you have. Most of the time it's "cosmetic" but the game treats all damage you cause as affected by your current ammo's effects behind the scenes, which under normal circumstances would only come into play when mines are involved, but the problem is still real. | ||
| + | |||
| + | :* Solution: Vanilla behavior. Not a mod conflict. Not previously identified or "corrected" by any mod. (People didn't notice it over the last decade, so why worry about it now just because "you know"? The good news is that an experienced modder has become motivated to look into fixing it.) | ||
| + | |||
| + | <span id="Issue: (DLCs) Can companions travel to DLC worldspaces?"></span> | ||
| + | |||
| + | === Issue - DLCs - Can companions travel to DLC worldspaces === | ||
| + | All the official DLC (except the "Pre-Order Packs") require you to "part ways" from your companions before starting the DLC quest. However, sometimes only the first companion in the list is sent away, and the others come along as part of your party. | ||
| + | * Cause: The game is designed to only allow one humanoid and one "non-human" (robot, dog, etc.) companion each. Consequently, the DLC only check for and release the first one of each if you have more than one. This is circumvented by mods like [http://www.nexusmods.com/newvegas/mods/34870/ Unlimited Companions]. Unpredictable design consequences (such as a lack of navmeshing or appropriate AI packages) may cause problems if they do accompany you. | ||
| + | :* Solution: Manually "dismiss/part ways" with each companion prior to beginning the DLC; such that they must be "re-hired" to regain their services/perks. Merely sending a companion to "wait" somewhere is not sufficient for any of the eight [http://fallout.gamepedia.com/Fallout:_New_Vegas_companions permanent vanilla companions], as that still leaves them as a member of your group but in a different cell ... "out of range" of orders. The game engine is not fooled by this; only "part ways" counts. This situation may or may not apply to companions added by mods but the consequences of bringing them along will have similar risks. | ||
| + | |||
| + | <span id="Issue: (Dead Money) - Cannot kill or dismember ''Ghost People''"></span> | ||
| + | |||
| + | === Issue - DLC Dead Money - Cannot kill or dismember ''Ghost People'' === | ||
| + | The problem occurs if using a mod (such as "[http://www.nexusmods.com/newvegas/mods/40567 Return To Sierra Madre]", "[http://www.nexusmods.com/newvegas/mods/40567 Sierra Madre EXIT Door]", or "[http://www.nexusmods.com/newvegas/mods/48896 Return To The Sierra Madre Casino]") which enable you to return to the Sierra Madre after completing and leaving the original DLC. Upon returning, Ghost People are nearly "invincible" as reported in each of the mentioned mods comments. | ||
| + | |||
| + | * Cause: the DLc was only intended and designed to be played through once without leaving. | ||
| + | :* Suggested Solution: It has been suggested that the "[http://fallout.fandom.com/wiki/Ghost_Hunter Ghost Hunter]" ''special perk'' needs to be enabled upon returning to the DLC (possibly via a tool such as "[http://www.nexusmods.com/newvegas/mods/49152 Fallout NV Cheat Terminal Redux]"). (None of the mentioned mods do so.) The perk "[http://fallout.fandom.com/wiki/Bloody_Mess Bloody Mess]" (which grants a +5% damage bonus) does not seem to be sufficient against Ghost People to make a material difference in their fatality rate. | ||
| + | :: NOTE: There have not been any reports as to whether this strategy is successful. | ||
| + | |||
| + | <span id="Issue: (Honest Hearts) Can't kill Salt-Upon-Wounds"></span> | ||
| + | |||
| + | === Issue - DLC Honest Hearts - Cannot kill Salt-Upon-Wounds === | ||
| + | Near the end of the "Crush the White Legs" or the opposing "Flight from Zion" quest, there will be a scene where Joshua Graham will kill some White-Legs and confront Salt-Upon-Wounds. There are a couple of potential bugs here. See the bug reports at the bottom of the Nukepedia [http://fallout.fandom.com/wiki/Crush_the_White_Legs Crush the White Legs] or the Vault [http://fallout.gamepedia.com/Flight_from_Zion Flight from Zion] quest pages. | ||
| + | |||
| + | * Cause-1: Certain "trigger" events have to occur. | ||
| + | :* Solution-1a: For "Flight from Zion", you can not kill Salt-Upon-Wounds until after initiating conversation. | ||
| + | :* Solution-1b: For "Crush the White Legs", after reaching the Three Marys' caverns, the White Legs detonate mines from above a rock formation, blocking the direct way to the camp's center (this obstruction will not be cleared, even after the ending). This explosion needs to happen to trigger the event. The Courier must then go through Three Marys' caverns to reach the other side of the blockade, reaching the innermost parts of the camp. After reaching the destination, a cut-scene initiates with Joshua Graham executing two White Legs. | ||
| + | :* Solution-1c: See also [[#Issue:_(Honest_Hearts)_Quest_"Crush_the_While_Legs"_bug|Issue - DLC Honest Hearts - Quest ''Crush the While Legs'' bug]] '''Solution-1c'''. | ||
| + | |||
| + | <span id="Issue: (Honest Hearts) Can't leave Zion"></span> | ||
| + | === Issue - DLC Honest Hearts - Cannot leave Zion === | ||
| + | Even though you have completed "Honest Hearts", gotten everything from the rewards locker and have the "Map of Zion" from the Sorrows Camp, upon activating the cave door to the Southern Passage you get the message that without a guide or a map you have no hope of finding your way back to the Mojave. | ||
| + | |||
| + | * Cause-1: You are using "Mission Mojave - Ultimate Edition" (MMUE), which has changed the original "misc item" into a "note" the game engine doesn't recognize as the required map. | ||
| + | :* Solution-1: Disable the MMUE plugin from your "load order" and perform a "[[FNV_General_Mod_Use_Advice#Clean_Saves|Clean Save]]" to flush out the MMUE "note" quest item. Then add the original '''NVDLC02ZionMap''' quest item with the console (toggle "~") command: | ||
| + | <div style="margin:0px 10px 10px 50px; border:1px dashed #DAA520; color: lightgray; background-color:#424242; padding:3px;" | ||
| + | >"player.additem xx00AE9F 1" | ||
| + | </div> | ||
| + | :: (Replace "xx" with Honest Hearts's 'mod index', which is usually "02"). You should now be able to actually activate the cave door to leave Zion. | ||
| + | |||
| + | <span id="Issue: (Honest Hearts) Can't return to Zion"></span> | ||
| + | === Issue - DLC Honest Hearts - Cannot return to Zion === | ||
| + | Even though you have completed the "Honest Hearts" DLC, you are unable to return without joining the (now deceased) "Happy Trail Caravan company". | ||
| + | |||
| + | * Cause: The footlocker with the DLC item rewards appeared before you left Zion, and you should have gotten the quest "Departing Paradise" and the objective "Return to the Mojave via the Southern Passage". The script that enables the footlocker also gives you the "Zion Canyon Map" after the DLC ending slides. Without it, you can't find your way back on your own. | ||
| + | :* Solution-1a: You need the Zion Canyon Map in order to return. | ||
| + | :: You can give yourself a new copy of the map with this console command: | ||
| + | <div style="margin:0px 10px 10px 50px; border:1px dashed #DAA520; color: lightgray; background-color:#424242; padding:3px;" | ||
| + | >"player.additem xx00ae9f 1" | ||
| + | </div> | ||
| + | :: (Replace "xx" with Honest Hearts's 'mod index', which is usually "02"). Just save and quit after entering the command. You won't lose any progress and by exiting the game you will be able to resume pursuing achievements that was disabled by using the console. | ||
| + | :: OR | ||
| + | :: you can use the mod [http://www.nexusmods.com/newvegas/mods/59133/? Using the console doesn't disable achievements] | ||
| + | :: Alternatively installing the [http://www.nexusmods.com/newvegas/mods/58277/? JIP LN NVSE Plugin] also has the same feature to avoid disabling achivements, and doesn't use up an "active plugin" slot. | ||
| + | |||
| + | :* Solution-1b: Primarily of use to someone who has already completed the DLC, the mod [http://www.nexusmods.com/newvegas/mods/41874/? Zion Exit Cave] provides an alternate entry & exit point to Zion. However, do know that leaving ANY DLC not using the proper route will remove the Mojave's radios, as they do this as a immersion since the signal can't reach you in those areas, but *intend* to return them to you on the trigger event that you leave through the preordained exit. Leaving through a new exit will result in these radios being lost until you go back through the proper exit or use a solution under "Cause-2" of [[#Issue: Radio station music doesn't play|Issue: Radio station music doesn't play]]. | ||
| + | |||
| + | <span id="Issue: DLC Honest Hearts - Joshua Graham Narrows Dialogue not triggering"></span> | ||
| + | === Issue - DLC Honest Hearts - Joshua Graham Narrows Dialogue not triggering === | ||
| + | Just after completing the "Deliverer of Sorrows" quest: '''Joshua Graham''' will approach when you leave ''the Narrows'' and speak to you with a quote from the bible. However, with this bug he leans in to talk but then pans back out. You can't go into third person until you speak to him: but the dialogue doesn't trigger. (This is an old bug reported at least as far back as May 2013.) | ||
| + | |||
| + | * Cause-1: This glitch is caused by having '''Walking Cloud''' as a companion. It causes '''Joshua''''s "NVDLC02JoshuaNarrowsForceGreetTrigger" script to glitch. | ||
| + | :* Solution-1: Reload a save and reject '''Walking Cloud''''s offer, in which case the conversation will trigger as normal. Then you can go back and recruit '''Walking Cloud'''. | ||
| + | |||
| + | * Cause-2: The mod [http://www.nexusmods.com/newvegas/mods/43773 Humping the Mojave v003] (last updated Nov 2011) causes this issue even when you don't recruit '''Walking Cloud'''. | ||
| + | :* Solution-2: Disable that plugin, don't recruit '''Walking Cloud''', and talk to '''Joshua'''. Then you can re-enable the plugin afterwards. | ||
| + | |||
| + | <span id="Issue: (Honest Hearts) Quest "Crush the While Legs" bug"></span> | ||
| + | |||
| + | === Issue - DLC Honest Hearts - Quest ''Crush the While Legs'' bug === | ||
| + | Can't get past the final "Crush the White Legs" dialog with Joshua Graham. | ||
| + | |||
| + | * Cause: Script glitches. | ||
| + | :* Solution-1a: If you are using the mod "Mission Mojave - Ultimate edition", see "Cause-1" under [[#Issue: (Honest Hearts) Can't leave Zion|Issue: (Honest Hearts) Can't leave Zion]]. | ||
| + | |||
| + | :* Solution-1b: Use the console command: | ||
| + | <div style="margin:0px 10px 10px 50px; border:1px dashed #DAA520; color: lightgray; background-color:#424242; padding:3px;" | ||
| + | >"setstage xx008a36 100" | ||
| + | </div> | ||
| + | :: (Replace "xx" with Honest Hearts's 'mod index', which is usually "02"). The quest should complete successfully, the "Crush the White Legs" challenge completed, all relevant xp awarded, Joshua Graham's final dialogue started, the ending slideshow played, and the "Departing Paradise" quest started. | ||
| + | :: Just save and quit after entering the command. You won't lose any progress and by exiting the game you will be able to resume pursuing achievments that was disabled by using the console. | ||
| + | :: OR | ||
| + | :: you can use the mod [http://www.nexusmods.com/newvegas/mods/59133/? Using the console doesn't disable achievements] | ||
| + | :: Alternatively installing the [http://www.nexusmods.com/newvegas/mods/58277/? JIP LN NVSE Plugin] also has the same feature to avoid disabling achivements. | ||
| + | |||
| + | :* Solution-1c: Sometimes after the Three Marys' canyon detonation when Joshua moves on ahead of you, he leaves his entire inventory (including his Companion Ammo, Magical) with you. When this happens, at the end of the trail there will be a cut-scene where Joshua will kill some White-Legs and confront Salt-Upon-Wounds, but he won't actually do anything because he has no ammo. In order to continue this scene, you need to use the console and after selecting him: | ||
| + | <div style="margin:0px 10px 10px 50px; border:1px dashed #DAA520; color: lightgray; background-color:#424242; padding:3px;" | ||
| + | >"additem 00176e54 1". | ||
| + | </div> | ||
| + | |||
| + | <span id="Issue: (Honest Hearts) Year bug on entry/exit of Zion"></span> | ||
| + | === Issue - DLC Honest Hearts - Year bug on entry or exit of Zion === | ||
| + | The year will advance +1 if you enter/exit Zion on February 28th; and the date will be reset to January 1st. | ||
| + | * Cause: Game does not account for February 29th in a bissextile (leap) year. | ||
| + | :* Solution: The mod [http://www.nexusmods.com/newvegas/mods/65001?tab=description Door to Zion Advance Year Fix] by '''CivisRomanus''' (who tracked down and fixed the bug). | ||
| + | |||
| + | <span id="Issue-HoarderTrait"></span> | ||
| + | === Issue - DLC Old World Blues - Hoarder Trait with PN Sprint is broken === | ||
| + | : Thanks to '''IntenseMute''' of the Nexus Fallout "New Vegas Mod Troubleshooting" forum for the basis of the following: | ||
| + | <div name="Note Box" class="boilerplate metadata" id="Notice Box" | ||
| + | style="margin:0px 10px 10px 10px;border:1px dashed #DAA520;color: lightgray; | ||
| + | background-color:#333333;padding:3px; | ||
| + | word-wrap: break-word; /* Internet Explorer 5.5+ */ | ||
| + | ">The [http://fallout.gamepedia.com/Hoarder Hoarder] trait is provided with the DLC "Old World Blues". Basically it adds "+25 lbs" to your total '''Carry Weight''' limit with some penalties which are easily overcome. The problem is the "Project Nevada (PN)" '''Sprint''' command doesn't work correctly with it. You are unable to '''sprint''' when over the "old" carry weight (without the trait), but still under the "new" trait added carry weight limit. | ||
| + | |||
| + | *Cause: '''Player.GetAV CarryWeight''' for some reason doesn't get updated by the hoarder trait. | ||
| + | :* Solution-a: The mod [http://www.nexusmods.com/newvegas/mods/66487 Project Nevada - Better Sprinting] by '''IntenseMute''' (as of 22 Jul 2019) has fixed this bug as described in "Solution-b". | ||
| + | |||
| + | :* Solution-b: Edit the trait directly with the following code. | ||
| + | <div name="Simulated code box" class="boilerplate metadata" id="Warning Notice" | ||
| + | style="margin:0px 10px 10px 30px; border:1px dashed #DAA520; color: lightgray; background-color:#424242; padding:3px;" | ||
| + | /* Remove the next four 'white-space' lines to restore default white-space processing. */ | ||
| + | white-space: pre-wrap; /* css-3 */ | ||
| + | white-space: -moz-pre-wrap; /* Mozilla, since 1999 */ | ||
| + | white-space: -pre-wrap; /* Opera 4-6 */ | ||
| + | white-space: -o-pre-wrap; /* Opera 7+ */ | ||
| + | word-wrap: break-word; /* Internet Explorer 5.5+ */ | ||
| + | "> | ||
| + | If Player.HasPerk NVDLC03TraitHoarder == 1 | ||
| + | : Set ActualCarryWeight To Player.GetAV CarryWeight + 25 | ||
| + | Else | ||
| + | : Set ActualCarryWeight To Player.GetAV CarryWeight | ||
| + | EndIf</div> | ||
| + | </div> | ||
| + | |||
| + | <span id="Issue: (Old World Blues) Quest "Get your brain back!" bug"></span> | ||
| + | |||
| + | === Issue - DLC Old World Blues - Quest ''Get your brain back'' bug === | ||
| + | This can be caused by either a "vanilla game" or mod capability issue. | ||
| + | |||
| + | * Cause-1: Dialog with the Courier's brain in the OWB "Brain Tank" fails to initiate if (somehow) you already have the "Big Brained" Perk. (This is normally a possible "reward" for this quest.) | ||
| + | :* Solution-1: Use a "cheat terminal" mod such as [http://www.nexusmods.com/newvegas/mods/49152 Fallout NV Cheat Terminal Redux] to remove the "Big Brained" Perk before attempting to speak with the Courier's Brain in the tank. | ||
| + | |||
| + | * Cause-2: "Dialog loop" when the player eventually gets to and select certain dialog options with the Courier's "Brain Tank" (specifically observed with: "So, what, you'd rather just stay here? Never leaving that tank of... whatever that stuff is?"). | ||
| + | :* Solutions-2: Use the in-game console (default key "<~>") and enter the command "player.cam" (Close All Menus) to exit the dialog with the "Brain Tank". This enables the player to walk away or enter dialog again. Note the loop can occur again, so choose differently. | ||
| + | |||
| + | <span id="Issue - HCSleepDeprived275Bug"></span> | ||
| + | === Issue - DLC Old World Blues / Lonesome Road - SleepDeprevation forced to 275 === | ||
| + | : Thanks to '''GamerRick''' of the Nexus Fallout "New Vegas GECK and Modders" forum for the basis of the following: | ||
| + | <div name="Note Box" class="boilerplate metadata" id="Notice Box" | ||
| + | style="margin:0px 10px 10px 10px;border:1px dashed #DAA520;color: lightgray; | ||
| + | background-color:#333333;padding:3px; | ||
| + | word-wrap: break-word; /* Internet Explorer 5.5+ */ | ||
| + | ">Upon entering "Lonesome Road" through the door in the "Canyon Wreckage" site, or after the "Ending Slide" of "Old World Blues", when in "Hard Core" mode the player's SleepDeprevation stat is set to 275 as the new "floor" or base value instead of 0. | ||
| + | |||
| + | * Cause: "Mission Mojave Ultimate Edition (MMUE)" sets this ''ActorValue'' in DM's dialog topic "NVDLC01IntroSlide14", LR's "NVDLC04WreckageDoorSCRIPT" and OWB's dialog topic "NVDLC03EndingSlideFinale" to 275. "Honest Hearts" is the only "new worldspace" DLC that doesn't have it. | ||
| + | :* Solution-a: Don't use MMUE instead of YUP. (It's known to make other, similarly arbitrary "questionable fixes".) YUP has all but one fix (related to a "Companion Perk") of MMUE. Instead make sure your "HC needs" are fully met before either entering or exiting any DLC as they frequently have hidden "elapsed time". | ||
| + | |||
| + | :* Solution-b: Edit the respective scripts as follows. | ||
| + | <div name="Simulated code box" class="boilerplate metadata" id="Warning Notice" | ||
| + | style="margin:0px 10px 10px 30px; border:1px dashed #DAA520; color: lightgray; background-color:#424242; padding:3px; | ||
| + | /* Remove the next four 'white-space' lines to restore default white-space processing. */ | ||
| + | white-space: pre-wrap; /* css-3 */ | ||
| + | white-space: -moz-pre-wrap; /* Mozilla, since 1999 */ | ||
| + | white-space: -pre-wrap; /* Opera 4-6 */ | ||
| + | white-space: -o-pre-wrap; /* Opera 7+ */ | ||
| + | word-wrap: break-word; /* Internet Explorer 5.5+ */ | ||
| + | ">If IsHardcore == 1 | ||
| + | : Player.SetAv SleepDeprevation 0; | ||
| + | : Player.CIOS NVDLC01AdrenalineShot; | ||
| + | EndIf</div> | ||
| + | :: The misspelling of the "Deprivation" trait is "seen in context" (SIC), so don't try to "correct" it. | ||
| + | </div> | ||
| + | |||
| + | <span id="Issue: (Lonesome Road, or other) DLC hangs after cutscene"></span> | ||
| + | |||
| + | === Issue - DLC Lonesome Road ''or other'' - DLC hangs after cutscene === | ||
| + | As in blowing up the silo and running back to the elevator, get stuck unable to move after the cutscene is done playing. (Consider "Lonesome Road" as an example of similar problems with any DLC. The issues can appear both before and after a cutscene plays.) | ||
| + | |||
| + | * Cause-1: Mod conflict. Nevada Skies has been identified as at least one culprit, because it likes to kick off a storm after a cutscene ends. | ||
| + | :* Solution-1a: Enter the console (toggle "<~>" key) command: "EnablePlayerControls". (Using the console prevents achievements in the current game session only. Save your game and exit to desktop, then continue playing and you will get achievements) | ||
| + | |||
| + | :* Solution-1b: Disable "Nevada Skies" (or other Weather Mods) before you enter the final part of Ulysses's temple. You can re-enable it once you are completely done with the DLC. | ||
| + | |||
| + | * Cause-2: In "Hardcore Mode", if you are low on sleep or other "needs", cutscenes can cause problems. | ||
| + | :* Solution-2: See [[#Issue: Can Timescale adjustments break certain quests, etc.?|Issue: Can Timescale adjustments break certain quests, etc.?]]. | ||
| + | |||
| + | * Cause-3: It seems like the invisible trigger box that you get teleported into leaving "Lonesome Road" sometimes doesn't get enabled. | ||
| + | :* Solution-3: Once you get stuck, use these console commands: | ||
| + | <div name="Simulated code box" class="boilerplate metadata" id="Warning Notice" | ||
| + | style="margin:0px 10px 10px 50px; border:1px dashed #DAA520; color: lightgray; background-color:#424242; padding:3px; | ||
| + | /* Remove the next four 'white-space' lines to restore default white-space processing. */ | ||
| + | white-space: pre-wrap; /* css-3 */ | ||
| + | white-space: -moz-pre-wrap; /* Mozilla, since 1999 */ | ||
| + | white-space: -pre-wrap; /* Opera 4-6 */ | ||
| + | white-space: -o-pre-wrap; /* Opera 7+ */ | ||
| + | word-wrap: break-word; /* Internet Explorer 5.5+ */ | ||
| + | ">prid xx00c47b (xx is usually 04 for "Lonesome Road.ESM", and "xx00c47b" is the RefID of 'NVDLC04CompletionTriggerREF' under "Worldspaces".) | ||
| + | enable</div> | ||
| + | |||
| + | <span id="Issue-LRCollapsedOverpassTunnelFreeze"></span> | ||
| + | === Issue - DLC Lonesome Road - Freeze in Collapsed Overpass Tunnel === | ||
| + | The freeze is always immediately preceded by the growl of a tunneler. For some, when they come close to the exit point of the Tunnel, their also FPS drops massively. | ||
| + | |||
| + | * Cause: Unknown. | ||
| + | :* Solution-a: Try editing the "Users" INI files under the "[Audio]" section, and change the following settings as indicated: | ||
| + | <div name="Simulated code box" class="boilerplate metadata" id="Sim Code Box" | ||
| + | style="margin:0px 10px 10px 50px; border:1px dashed #DAA520; color: lightgray; background-color:#424242; padding:3px;"> | ||
| + | iAudioCacheSize=2048 to "=8192"<br> | ||
| + | iMaxSizeForCachedSound=256 to "=1024"<br> | ||
| + | bMultiThreadAudio=0 to "=1" | ||
| + | </div> | ||
| + | |||
| + | :* Solution-b: The mod [http://www.nexusmods.com/newvegas/mods/67359/?tab=description Lonesome Road - Tunneler freezes fix] by ''' Francksteel''' replaces the "use of" / "call to" the "playidle '''''emerge'''''" animation with the "playidle '''''emergereveal'''''" animation instead in the following scripts: | ||
| + | ::* NVDLC04TunnelCodeHolderSCRIPT | ||
| + | ::* NVDLC04TunnelCodeSupportSCRIPT | ||
| + | ::* NVDLC04TunnelerAmbusherSCRIPT | ||
| + | ::* NVDLC04TunnelerAmbusherTESTSCRIPT | ||
| + | ::* NVDLC04TunnelerSCRIPT | ||
| + | ::* NVDLC04TunnelerTESTSCRIPT | ||
| + | ::* NVDLC04VenomousTunnelerAmbusherSCRIPT | ||
| + | :: This simple "playidle" animation replacement is a candidate to resolve all instances of similar freezing in other situations as well. The problem appears to reside in that particular animation implementation. | ||
| + | |||
| + | <span id="Issue: (Mod - ATTT), WRP, and WMIM combatibility"></span> | ||
| + | |||
| + | === Issue - MOD '''ATTT''' - and '''WRP''' and '''WMIM''' combatibility === | ||
| + | The mod [http://www.nexusmods.com/newvegas/mods/64147 Armed to the Teeth (ATTT)] "allows you to dynamically holster up to three weapons on your character at once." It requires (among other plugins such as '''NVSE''' and '''JIP LN NVSE''') the mod [http://www.nexusmods.com/newvegas/mods/38285 Weapon Retexture Project (WRP)] to work correctly. The latest version 2.x of '''WRP''' also requires the mod [http://www.nexusmods.com/newvegas/mods/65052 Weapon Mesh Improvement Mod (WMIM)] which fixes accuracy (and other) issues with vanilla weapons. Even with all the required mods, there can be problems getting things to work correctly. | ||
| + | |||
| + | * Cause: When developed, there was only one version of WRP available (v1.95 from 2012), which ATTT was designed to work with. '''WRP''', while primarily a "texture replacement" mod, does include some modified "meshes" in order to get things aligned correctly. That version used the same folder structure as vanilla. Now however there is a "version 2" release which uses it's own unique folder structure. '''WMIM''' fixes only vanilla weapons, which means it (along with ATTT as well) uses the vanilla folder paths. | ||
| + | :* Solution: Use the older v1.95 version of '''WRP''' with ATTT. | ||
| + | |||
| + | : Be aware that by installing '''WMIM''' before '''WRP''', you are going to lose the accuracy fixes to meshes from '''WMIM''' that do not have those fixes incorporated into the older '''WRP'''. If you install '''WRP''' first, then you will lose the "texture fit" changes to the overwritten meshes when '''WMIM''' is installed. | ||
| + | |||
| + | <span id="Issue: (IMPACT) FPS drop/stutter on semi-auto hits"></span>> | ||
| + | === Issue - MOD IMPACT - FPS drop or stutter on semi-auto hits === | ||
| + | Whenever shooting repetitively from a semi-auto weapon or in that firing mode, the game stutters more and more until it eventually freezes for 0.5-1 sec every shot that hits. Upon switching to shooting "full auto" or after not shooting completely for a second or two before resuming again, the stutter is gone and everything is just fine again. | ||
| + | |||
| + | * Cause: This is a consequence of the "ricochet" custom particle VFX effect from hits on metal and stone materials in the mod [http://www.nexusmods.com/newvegas/mods/57113 IMPACT]. | ||
| + | :* Solution: Use the [http://www.nexusmods.com/newvegas/mods/57113?tab=files Option - No Refract Hits] file under the "Optional" section OR use one of the less demanding ("The Gaming Rig" or "The Basement Dweller") versions of the base mod. | ||
| + | |||
| + | <span id="Issue: (MOD - NVInteriors) Drunken Gnomes Quest can't be completed"></span> | ||
| − | + | === Issue - MOD '''NVInteriors''' - ''Drunken Gnomes Quest'' cannot be completed === | |
| + | This is a joke "easter egg quest" to obtain 30 specifically named "drunken gnome" statues, included as part of the "[http://www.nexusmods.com/newvegas/mods/43534/? NVInteriors Project]" mod by '''ChuckSteel'''.<br> | ||
| + | Hint: The author located them almost the same distance apart from one to the next with only a couple exceptions. | ||
| − | * | + | * Cause-1: Some mods can make the location of a given gnome unreachable as they cause a "conflict". Some gnomes are placed in the "exterior worldspace" as well as "interior" cells modified by '''Chucksteel''''s "NVInteriors Project" mods. |
| − | + | :* Solution-1a: The mod "'''Freeside Open'''" for one, is known to cause such a conflict as it moves "Freeside" locations from an interior cell into the exterior worldspace. If you are using '''TTWInteriors''', gnome "P.B.R." was moved to the part of Freeside with the King school; and was supposed to be moved for '''NVInteriors''' as well (acknowledged by the author in 2014) but no update has been published since 2013. | |
| − | + | :* Solution-1b: The mod '''Vurt''''s "'''Wasteland Flora Overhaul'''" (Dead Version, at least) is known to place a rock on top of "Willy the Wino". | |
| − | |||
| − | * | ||
| − | * | + | * Cause-2: Your quest fails to update after you are forced to use a console command (such as "TCL" to toggle "clipping") to retrieve one. |
| + | :* Solution-2: Try dropping that gnome in question to the ground, save, exit to the desktop, and then reload the game. When you reload the game, pick him up and the quest should advance (with a travel marker to your prize at the end. Check your Pipboy map). | ||
| − | === | + | * SPOILER ALERT: Here are the locations of the 30 Gnomes, in Alphabetical order. |
| − | * | + | <div name="Note Box" class="boilerplate metadata" id="Notice Box" |
| + | style="margin:0px 10px 10px 10px;border:1px dashed #DAA520;color: lightgray; | ||
| + | background-color:#333333;padding:3px; | ||
| + | word-wrap: break-word; /* Internet Explorer 5.5+ */ | ||
| + | "> | ||
| + | 01. Billy the Boomer - At the top of the tower at Nellis. Must go through the new building in Nellis from the interiors mod to reach it. | ||
| − | + | 02. Bozo the Clown - in the South Vegas Ruins, in the Neon Sign yard, next to the B&K Cleaners Sign. | |
| − | + | 03. Colonel Klink- on a cliff to the left of the Remnant Bunker. Follow the cliff edge to the left as you face the bunker entrance. Go to the top of the hill and look in the first depression by the cliff top. | |
| − | |||
| − | |||
| − | |||
| − | |||
| − | |||
| − | |||
| − | |||
| − | |||
| − | |||
| − | |||
| − | |||
| − | + | 04. (Take) Corporal Punishment - in the lower half of the Graveyard at Camp Forlorn Hope. He is next to the cliff against the edge of the hill. Easiest to find in the daylight. | |
| − | + | 05. Festus - In the back of one of the Sunset Sarsaparilla trucks out by the Sunset Sarsaparilla factory. | |
| − | + | 06. Fire Marshall Bill - Searchlight, at the rear of the Fire Station, behind the small broken walls. | |
| − | + | 07. Floyd - NCR Sharcropper Farm, in greenhouse under planting box near Camp McCarren fence. | |
| − | + | 08. Genghis - Red Rock Drug Lab, in 2nd small trailer on right as you enter the camp | |
| + | |||
| + | 09. Gomer - On the right side of the El Dorado Gas station, between the building and the large gas tank. | ||
| + | |||
| + | 10. Happy Hour - Behind the Gas station on the hill in Goodsprings. | ||
| + | |||
| + | 11. Joe Twelve Pack - above the entrance to Searchlight North Gold Mine. Located on top of the hill above the mine entrance. Almost in line with the Coyote Mine Shack and the Searchlight Water Tower. | ||
| + | |||
| + | 12. Johnie Reb - Near Horowitz Farmstead, in downed silo. | ||
| + | |||
| + | 13. Last Call - Blue Paradise Vacation Rentals, on the small rock ridge behind the two graves. | ||
| + | |||
| + | 14. Larry the Lush - Quarry Junction, inside the large shovel bucket on the left side of the quarry floor. | ||
| + | |||
| + | 15. Major Tom - at the Old Nuclear Test Site, at the top of the small hill next to the sand bag observation area; to the right of the sand bags as you face the truck. | ||
| + | |||
| + | 16. Minor League - NCR Correction Facility, in tower shack by Admin bldg (on the left tower as you face admin). | ||
| + | |||
| + | 17. Mr Robinson - Camp Golf, in the Guard Tower overlooking Lake Las Vegas where the water pipeline starts. | ||
| + | |||
| + | 18. Officer Friendly - out front of the Nevada highway patrol station, in a bush. | ||
| + | |||
| + | 19. Otis- in Gypsum Train Yard behind a dumpster beside the main building. (Beware the Deathclaws.) | ||
| + | |||
| + | 20. Party Time- in the Repconn Test Site in the rubble on right far side of the building. The rubble pile is past the rocket and though the arch. | ||
| + | |||
| + | 21. P.B.R - Originally in freeside, by the north gate. Go through the North Gate into Freeside. Take the first left between the building and the Mormon Fort. There is a building behind Genaro, the meat salesmen. Go left again behind the building and left again at the back towards the open dumpster. There will be some stuff in front of it - you may have to jump in to spot it. Should be in the back left corner. (There should be meat or a body in front of it, if you have NVB I installed.) [NOTE: the "Freeside Open" mod makes the original location unreachable. He was moved for TTWInteriors to the part of Freeside with the King school, and was supposed to be for NVInteriors as well (in 2014) but no update has been published since 2013.] | ||
| + | |||
| + | 22. Private Ryan - this is in Boulder City. it is outside on the right hand side of the bakery where you meet the the Great Khans who shot you. | ||
| + | |||
| + | 23. Ranger Rick - In Ranger Station Charlie, over near Novac. This gnome is behind one of mobile homes, between it and the wall, in a bush opposite the radio tower on the south side of the ranger station. | ||
| + | |||
| + | 24. Ralph - inside a railcar on broken bridge at the edge of Crescent Canyon. | ||
| + | |||
| + | 25. Sgt Schlitz - Samson Rock Crushing Plant, 2nd Floor outside on the roof balcony. | ||
| − | + | 26. Tanto - On the second story of the burnt and gutted out farm over top of the ant mound. | |
| − | + | 27. The Lone Ranger - is In Bonny Springs, in the corner of a destroyed house on the left side as you enter the main street. Should be the one next to the intact building about mid block. | |
| − | + | 28. Uncle Fester - Black Mountain, left side at edge in the Radar Dish Shelter. | |
| − | |||
| − | + | 29. Whisky Dick - In Primm, on the highest point on the roller coaster. (Used TCL to get to it.) | |
| − | + | 30. Willy the Wino - at the Crashed Airliner Site, in front of the large bolder just behind the honey mesquite tree. There is a downhill slope, so the base of the rock is much lower than the plane. If there have been any explosions in the vicinity, he might have been tossed further into the desert. [NOTE: Vurt's "Wasteland Flora Overhaul" (Dead Version, at least, not sure about the other ones) spawns a rock right on top of the gnome, along with a dead tree instead of a honey mesquite tree.] | |
| − | + | </div> | |
| − | |||
| − | + | <span id="Issue: 52 Card Pickup"></span> | |
| + | === Issue - MOD '''NVInteriors''' - ''52 Card Pickup'' cannot be completed === | ||
| + | This is a separate mini-quest in '''NVInteriors''' which is a bit harder to get started but much easier to finish if your looking. Successful completion gets an apartment overlooking the North Gate of the Strip. To the right as you face the Strip Gate, there is a locked set of double doors at the end of the multi-story building. Based off the description in the ReadMe file, that should be the location of the prize for finding the cards. | ||
| − | === | + | <div name="Note Box" class="boilerplate metadata" id="Notice Box" |
| − | + | style="margin:0px 10px 10px 10px;border:1px dashed #DAA520;color: lightgray; | |
| + | background-color:#333333;padding:3px; | ||
| + | word-wrap: break-word; /* Internet Explorer 5.5+ */ | ||
| + | ">To start the quest you have to find one of two vintage Vargas Pin-up jokers! Once you find one you get a mini-Quest "Freeside Shuffle" which leads you to the Player home you will get if you find them all. Once there, the "52 Card Pickup" quest starts and you have to get a full deck. (Well not really a full deck: only 50 cards) | ||
| + | |||
| + | Hint 1: the cards are small so they are only placed in '''Checksteel''''s "NV Interiors" cells; not all over the world but they don't show up until the quest starts so you may have to retrace your steps. | ||
| + | |||
| + | Hint 2: the Jokers are at opposite ends of the map. | ||
| + | |||
| + | The first Joker (to start the quest) is located at Cottonwood Cove, in the Recreation Center. Look carefully at the poker game on the table and locate the card. All the cards will have "Vargas" in their title. Back to suite overlooking the North Gate of the Strip and you are on your way. | ||
| − | + | The second joker is somewhere in Nellis AFB but you only need to find one to start the quest so don't bother looking for the second joker, as it gets disabled when you find the first one. | |
| − | + | There is a forum thread ([http://forums.nexusmods.com/index.php?/topic/2123009-nv-interiors-52-card-pickup-quest/page-3 NV Interiors 52 Card Pickup Quest]) where people have reported the locations of all the cards if you need help. | |
| − | |||
| − | |||
| − | + | <span style="color: green; background-color:#fff5f5;">NOTE: If you use explosions in the vicinity of a card, it may be displaced from the stated location and may even have fallen through other objects/below ground.</span> | |
| − | + | </div> | |
| − | |||
| − | |||
| − | |||
| − | |||
| − | |||
| − | |||
| − | |||
| − | = | + | <span id="Issue: Adjust or eliminate limb dismemberment and body explosions chance"></span> |
| − | |||
| − | + | === Issue - Adjust or eliminate limb dismemberment and body explosions chance === | |
| − | + | Is it possible to reduce or eliminate the "gore" factor? | |
| − | |||
| − | |||
| − | |||
| − | |||
| − | |||
| − | |||
| − | |||
| − | |||
| − | |||
| − | |||
| − | |||
| − | |||
| − | |||
| − | |||
| − | |||
| − | |||
| − | |||
| − | |||
| − | |||
| − | |||
| − | |||
| − | |||
| − | |||
| − | |||
| − | + | * Cause: The basic formulae is: | |
| + | :* Large edged weapons dismember. | ||
| + | :* Powerful laser weapons dismember. | ||
| + | :* Blunt weapons explode. | ||
| + | :* High powered rifles and pistols explode. | ||
| + | :* Powerful plasma weapons explodes. | ||
| + | :* Explosives explode. (Strangely not allowed in vanilla) | ||
| + | : By this it seems nothing can change the fact a lead pipe can cause an arm to explode. | ||
| + | : Many effects are scripted to occur, so simple settings will not affect them. Some gore is the result of combat, while some is placed in the game world for atmosphere. | ||
| + | :* Solution-1: Changing the setting "bDisableAllGore=" to "1" in the three INI files reduces limb dismemberment, but not completely. | ||
<div name="Note Box" class="boilerplate metadata" id="Notice Box" | <div name="Note Box" class="boilerplate metadata" id="Notice Box" | ||
| − | style="margin:0px 10px 10px | + | style="margin:0px 10px 10px 50px;border:1px solid #00C600;color: green; |
background-color:#fff5f5;padding:3px; | background-color:#fff5f5;padding:3px; | ||
word-wrap: break-word; /* Internet Explorer 5.5+ */ | word-wrap: break-word; /* Internet Explorer 5.5+ */ | ||
"> | "> | ||
| − | Note that | + | Note that if you are currently or have used "Mod Organizer", MO uses its own copies of "Fallout.ini" and "FalloutPrefs.ini" (from when the MO profile was created), located in "\Steam\steamapps\common\Fallout New Vegas\Mod Organizer\profiles\<Your Profile Name>". These files need to be changed as well.</div> |
| + | |||
| + | :* Solution-2: : While there are several mods on Nexus for tweaking Gore for various weapons, most seem unable to eliminate it completely. | ||
| + | ::* [http://www.nexusmods.com/newvegas/mods/49021/? No Combat Gore No Environmental Gore] "is dedicated to eliminating all gore from the game. The gore from fighting, the extra gore added from the Bloody Mess perk, environmental gore that is piled in areas and even scripted gore such as your head exploding due to Dead Money's many radios setting off your collar." | ||
| + | ::* [http://www.nexusmods.com/newvegas/mods/40040/? Project Nevada - Rebalance] lets you adjust the chances of bodies to dismember and explode. | ||
| + | |||
| + | :* Solution-3: You can try to make changes in the GECK for yourself. | ||
| + | ::* In the GECK, the "defaultbodypart" setting (and other bodypart settings) are all found in "Actor | Data/Body | Part | Data". Just double click on the region you wish to disable gore on and uncheck the boxes for "Severable" and/or "Explodable". This applies to Actors instead of the weapons, and prevents scripts from dismembering/exploding them. | ||
| + | ::* There are two settings in the GECK for each weapon that control the Gore chance: | ||
| + | :::* iCombatDismemberPartChance (default = 50%) | ||
| + | :::* iCombatExplodePartChance (default = 75%) | ||
| + | ::: You can try to edit these settings for each weapon more to your liking. | ||
| + | |||
| + | <span id="Issue: DialogOverride"></span> | ||
| + | === Issue - All NPCs have over-ridden dialogue === | ||
| + | All NPCs give the same response, as for example: "See you later" when saying "Goodbye". | ||
| + | |||
| + | * Cause: All NPCs are supposed to have at least three dialog "topics": a "GREETING" (for the first response when the Player initiates dialog); a "Hello" which is all actors' way to start conversations (but usually only between NPCs); and a "GOODBYE" which is essential to be able to terminate a conversation. These dialog topics are supposed to have "qualifying conditions" to control which actor they belong to and when they are triggered, but the first dialog response which has all of it's conditions "true" is used. If one is poorly constructed so it's conditions can always be "true" and it is tested earlier, it will prevent the correct response from being used. | ||
| + | |||
| + | :* Solution-1: At least one report has determined that the "[http://www.nexusmods.com/newvegas/mods/56270 Vanessa]" companion mod by '''GePalladium''' can cause her "GOODBYE" response to override all others. Removing the mod resolved the problem. | ||
| + | |||
| + | <span id="Issue: AllScriptsRecompiled"></span> | ||
| + | === Issue - All Scripts Recompiled Warning === | ||
| + | : Thanks to '''wfandrews''' and '''LStewieAL''' of the Nexus "New Vegas Technical Support Forum" for identifying and investigating this issue. | ||
| + | : Symptoms: A "Command Prompt" Window appears to flash briefly with the message:<br> | ||
| + | <p style="margin:0px 10px 10px 30px; color: red; background-color:#fff5f5;">"Warning!<br> | ||
| + | < some plugin name > has recompiled all scripts. This is dangerous to your save game. Quit and remove the mod from your load order or clean it of ITMs using [http://www.nexusmods.com/newvegas/mods/34703/? FNVedit]."</p> | ||
| + | : This message may also appear in a NVSE logfile. | ||
| + | |||
| + | * Cause: The warning has been confirmed to be from "[https://www.nexusmods.com/newvegas/mods/66347 lStewieAl's Tweaks]" versions 5.20 and later. It is based upon detecting the named plugin is overwriting two unused vanilla scripts no mod should be touching, which are used to determine this is the likely condition. | ||
| + | |||
| + | : When someone uses the GECK Script Editor command to "recompile all scripts", it causes EVERY script currently loaded into the GECK (all from vanilla and DLC and any mods) to be recompiled and included in the modified plugin which is currently "active". While that might initially seem to not be a "bad thing", it means that every other identical preceding loaded script file (including those of the vanilla game) gets overridden by that plugin and will cause problems as those scripts will now have the ''mod index'' of the modified plugin instead of the originals, which will cause errors for everything referencing them. The problem won't be within that mod, but in everything else: breaking them all. NO MOD AUTHOR SHOULD USE THIS COMMAND but many are not aware of why. There is no internal GECK warning associated with the command. | ||
| + | |||
| + | :: Known instances: | ||
| + | ::* [https://www.nexusmods.com/newvegas/mods/37530 Extended Repair Kits] v1.02 by '''vivanto'''. | ||
| + | |||
| + | :* Solution-1a: Inform the mod author and do not use the mod until it is resolved. | ||
| + | :* Solution-1b: If you want to ignore the error and are willing to risk later save file corruption, you can add to "nvse_stewie_tweaks.ini" file: | ||
| + | <div style="margin:0px 10px 10px 30px; border:1px dashed #DAA520; color: lightgray; background-color:#424242; padding:3px;"> | ||
| + | [INI]<br> | ||
| + | bShowRecompiledAllScriptsWarning = 0 | ||
</div> | </div> | ||
| − | |||
| − | |||
| − | |||
| − | + | <span id="Issue: Can Timescale adjustments break certain quests, etc.?"></span> | |
| − | * | + | |
| − | ** | + | === Issue - Can Timescale adjustments break certain quests === |
| − | + | The default Timescale is a "30:1" = "Game Time":"Real time" ratio. "Units of measurement" are the same on both sides of the equation: "seconds:seconds", "minutes:minutes", etc., i.e. default is 30 game minutes = 1 real minute. So "Timescale: 6" equals "6:1" ("6 game minutes:1 real minute" or "60 game minutes for every 10 real minutes"). | |
| − | ** | + | |
| − | ** | + | * Cause: Setting too high or low a ratio can break AI packages; and anything other than the default "30:1" can cause crashes in some quests which jump the time forward or during the "sleep/wait" command. "Hardcore mode" can be especially problematic, and certain main quests in both TTW/FO3 and FNV can consistently break if any timescale other than "30:1" is used. This appears to be a vanilla bug. Results vary with some users reporting no issues over multiple replays with adjusted timescales in "normal mode" despite others able to reliably reproduce the issue on multiple play-thru and save-game reloads. |
| − | ** | + | :: FYI: FNV Game start date = 19 Oct 2281. |
| − | + | ::* "Hardcore needs" decrease their current state at a rate based upon "game time", while their recovery is based upon "real time". See [http://fallout.gamepedia.com/Hardcore_mode Hardcore mode "Status Effects"] on The Vault Fallout wiki. | |
| − | * | + | |
| − | + | :: Reported quest problems if timescale is other than "30:1". | |
| + | :: In FNV: | ||
| + | ::* Cutscenes. | ||
| + | ::* "Dealing with Contreras" (stuck in "I'm not ready yet, come back tomorrow"). | ||
| + | ::* "Young Hearts" (Janet never makes it to Nellis Base). | ||
| + | ::: (Personally had both of these quests succeed using a timescale of "6:1", but they did take some hours of gameplay to complete. Some "stuck" issues may simply be a lack of patience/forgotten need for the increased time required.) | ||
| + | |||
| + | :: In FO3/TTW: | ||
| + | ::* "Finding the Garden of Eden". | ||
| + | ::* "Take It Back". | ||
| + | ::* "Death from Above". | ||
| + | ::* "Head of State". | ||
| + | ::* "Temple of the Union" (slaves never make it to The Mall). | ||
| + | |||
| + | :: See also the possible related consequence: [[#Issue:_Stuck_effects_or_stats|Issue: Stuck effects or stats]]. | ||
| + | |||
| + | :* Solution: There is a long standing game engine bug affecting the accuracy with how time is tracked. See the entry [[#Issue:_GLOB_variable_'GameDaysPassed'_doesn't_advance_or_suddenly_jumps|Issue: GLOB variable 'GameDaysPassed' doesn't advance or suddenly jumps]] for the problem and solutions. | ||
| + | |||
| + | :* Adjustment mechanisms: (Not solutions; use with care.) | ||
| + | ::* The "Bashed Patch" (BP) global "Timescale setting" gets baked into saves, but each BP rebuild gets reset. | ||
| + | ::* "Project Nevada" has a global "Timescale" setting. | ||
| + | |||
| + | ::* Timescale adjustment mods: | ||
| + | :::* [http://www.nexusmods.com/newvegas/mods/34718/? Imps TimeScale Adjuster] by '''Imp of the Perverse'''. Basic adjustments by circumstance, to include reset to default for conversations to avoid quest crashes. | ||
| + | :::* [http://www.nexusmods.com/newvegas/mods/37254/? IMCNNV - Imps More Complex Needs] by '''Imp of the Perverse'''. More complex "hardcore mode" settings than "Imps TimeScale Adjuster", including integration with the [http://www.nexusmods.com/newvegas/mods/34814/? Ambient Temperature] by '''Imp of the Perverse''' mod. Can be used in combination with "Project Nevada" timescale adjustment to modify the rate at which "needs" go up. | ||
| + | |||
| + | <span id="Issue - MainMenuImage"></span> | ||
| + | === Issue - Change the Main Menu background image === | ||
| + | When you want to change the FNV Main Menu background image, it's actually very simple. | ||
| + | |||
| + | * The image used in the main menu is called "main_background.DDS" and resides in "Fallout - Textures2.BSA" under "Textures\interface\main". If you just want to replace it completely with a different image, you can use a ".JPG" (JPEG) formated image. You don't even need to convert it to a "DDS" file; just rename it. | ||
| + | |||
| + | * On the other hand, if you intend to edit the default image somehow, you will first need to extract it to a separate file from the BSA file using a tool such as [http://www.nexusmods.com/newvegas/mods/64745 BSArch] or the "BSA Browser" in [http://www.nexusmods.com/newvegas/mods/36901/? Fallout Mod Manager (FOMM)] or similar. Load the image into your paint type program (such as [http://www.getpaint.net/ Paint.Net]), edit as desired, and save as a ".DDS" file. | ||
| + | |||
| + | * Either way, name the new file "main_background.dds" and copy it into "Data\Textures\interface\main". Then toggle "ArchiveInvalidation" off-and-on-again and you should be seeing it in the main menu. | ||
| − | + | <span id="Issue: Children can't use that"></span> | |
| − | + | === Issue - Children cannot use that === | |
| + | Unable to perform actions like harvesting plants or use a campfire because the game thinks you are a "child". | ||
| − | + | * Cause: Occasionally the game gets your character's size wrong, and that makes it think you are a "child". | |
| − | * | + | :* Solution: Use the console (toggle key "~") and command: "player.setscale 1" to reset your size to default. If that doesn't work, you can also try "player.IsChild 0" to tell it you are not a young person without adult supervision. |
| − | + | <span id="Issue: Console "player.additem" command fails"></span> | |
| + | === Issue - Console ''player additem'' command fails === | ||
| + | The proper console (default is < ~ > key) command syntax is: "player.additem [item code] [count] < Enter >" (without the quotation or [bracket] marks). | ||
| − | * Cause | + | * Cause: Either the command failed to include the "[count]" parameter (which is required), or the "[item code]" parameter is a "RefID" instead of a "BaseID". (Please see [[Getting_started_creating_mods_using_GECK#GECK Form-ID, Base-ID, Ref-ID, and Editor-ID|GECK Form-ID, Base-ID, Ref-ID, and Editor-ID]] for the distinction.) In the console, clicking on the target item displays it's "Reference ID" (RefID). "Usable items" that can be picked up must have the item in an Actor's (the PC {your character}, an NPC, or a container) inventory; or if "persistent" or "spawned, while lying on the ground. |
| + | :* Solution: With NVSE installed, after clicking on the target use the command "''gbo''" (GetBaseObject), which will return the "BaseID" of the target item. | ||
| + | :: See also [[#Issue: Find the source mod-index of an object in-game|Issue: Find the source mod-index of an object in-game]]. | ||
| − | + | <span id="Issue: Corpse in 'T' (crucifix) pose"></span> | |
| + | === Issue - Corpse in -T- ''crucifix'' pose === | ||
| + | The corpse unexpectedly remains upright until 'bumped' by the player. This 'havok' collision will cause the corpse to drop to the ground and sprawl out. | ||
| − | * Cause-3: | + | * Cause: The actor's ACHR (Actor Reference) record did not have the "Starts Dead" flag enabled when it was placed in the "world" (Render window). This flag has the "uint32" data field value of "0x00000200" when set. See also the sub-topic [[#Issue: Floating objects|Issue: Floating objects]] which points out that more than one mod affecting a cell may also cause this. |
| + | :* Solution-1: The [https://www.nexusmods.com/newvegas/mods/58277 JIP LN NVSE Plugin] mod (as of version 55.40) provides an engine level bug fix to this problem. | ||
| + | :* Solution-2: The [http://www.nexusmods.com/newvegas/mods/51664/? YUP] mod fixes this for some vanilla game actors. | ||
| + | :* Solution-3: The mod [http://www.nexusmods.com/newvegas/mods/59147/ Ragdolls], which fixes havok collision for most skeletons, may help. It now includes a small script called "Havok Bounce" designed to automatically "poke" every corpse every time you change cells. | ||
| + | :* Solution-4: Inform the mod author of the problem. | ||
| − | + | <span id="Issue -HangingCorpse"></span> | |
| − | + | === Issue - Corpse hanging or floating === | |
| + | : Thanks to '''KiCHo666''' of the Fallout New Vegas "Mod Talk" forum for the basis of the following. | ||
| + | Some Actors appear to hang by a limb in the air after they are dead. (As in: they appear to dangle from their wrist or ankle or crumbled over an invisible fence.) While similar, this is not the same as the [[#Issue_-_Corpse_in_-T-_crucifix_pose|Issue - Corpse in -T- crucifix pose]] problem. | ||
| − | * | + | * Cause-1: The issue is caused by one animation file in the mod [http://www.nexusmods.com/newvegas/mods/65052 Weapon Mesh Improvement Mod]. According to the author (as of v1.3): |
| − | + | <div style="margin:0px 10px 10px 20px; border:1px dashed #DAA520; color: lightgray; background-color:#424242; padding:3px;">It's caused by a fix I made to the pistol drawing animation. We've been waiting for proper animation import/export tools which haven't been completed yet in order to fix it correctly. I decided to leave it because I find that less annoying than the double drawing bug with quick draw and high agility. If it annoys you a lot you can delete the 1hpequip animations. </div> | |
| − | + | :* Solution-1: Remove the single "mod added" file (''Data\meshes\characters\_male\'''''1hpequip.kf'''). (Not the entire WMIM mod.) Toggle "ArchiveInvalidation" afterwards. | |
| − | |||
| − | |||
| − | |||
| − | |||
| − | |||
| − | |||
| − | |||
| − | |||
| − | |||
| − | |||
| − | < | ||
| − | |||
| − | |||
| − | |||
| − | |||
| − | |||
| − | :: | ||
| − | |||
| − | * | ||
| − | |||
| − | |||
| − | + | * Cause-2: There is an engine level bug where dead bodies of actors that were killed while being ragdolled would assume a T-pose when loading a game. | |
| − | + | :* Solution-2: The [https://www.nexusmods.com/newvegas/mods/58277 JIP LN NVSE Plugin] mod (as of version 55.40) provides an engine level bug fix to this problem. | |
| − | * | ||
| − | + | <span id="Issue: Corpses disappear too quickly"></span> | |
| − | === Issue | + | === Issue - Corpses disappear too quickly === |
This is not a bug, or something that can be "fixed". It takes some understanding of how this necessary game "garbage collection" works. | This is not a bug, or something that can be "fixed". It takes some understanding of how this necessary game "garbage collection" works. | ||
* Cause: Corpses count against the number of actors in a cell. All actors (dead or alive) have scripts running against them which affects your processor load. Too many can crash your game, so the game runs "garbage collection" routines to remove them. | * Cause: Corpses count against the number of actors in a cell. All actors (dead or alive) have scripts running against them which affects your processor load. Too many can crash your game, so the game runs "garbage collection" routines to remove them. | ||
| Line 515: | Line 3,799: | ||
** You can't "carry" (<grab> key) a body through a door or fast travel with it. | ** You can't "carry" (<grab> key) a body through a door or fast travel with it. | ||
** Adding an item (even one that was originally in it's inventory but removed) to a corpse turns it into a "container", causing the corpse to persist through a cell respawn. | ** Adding an item (even one that was originally in it's inventory but removed) to a corpse turns it into a "container", causing the corpse to persist through a cell respawn. | ||
| + | |||
| + | <span id="Issue: CTD after a fairly constant amount of time (e.g. 20 minutes)"></span> | ||
| + | === Issue - CTD after a fairly constant amount of time ''such as 20 minutes'' === | ||
| + | * Cause: Usually this is a symptom that you have an "overheating" hardware problem. While possible it is due to "memory exhaustion" from a "memory leak", such seldom are as consistent in their timing. | ||
| + | |||
| + | : The "chassis cover" for a computer's case is an integral part of it's cooling system. Generally (there are variations) it is designed to cause air flow in a reverse "S" pattern through the case: cool air from the outside coming in through the front bottom, through the open internal spaces (over the memory and CPU), and out the top back of the case. There are usually fans in the lower front, and in the enclosed "power supply" at the top back. Often there are additional fans to assist. The removable "slot covers" in the back where additional "addon" component cards can be added to the motherboard need to be in place over unused slots to ensure this flow remains as designed. Some people think removing the cover will improve air flow, but they are mistaken. The cover is needed to cause the flow to be directed as intended. It's the difference between using a sprayer or stream of water to rinse a bowl, and simply pushing it down under the surface of the water. The former pushes residue out the other side, while the latter tends to trap it in the center because the water is pouring in from all sides. | ||
| + | |||
| + | : Dust collects on electronics from the "static electricity" effect. This build up reduces the efficiency of the heat dissipation, causing the component to "run hotter". Normal circulating air flow will not help with this dust buildup as it will not be able to overcome the "static" effect. The use of compressed air on an unplugged system will be needed, but be sure to block the movement of any fans as that will generate unregulated currents in the system which can damage components. | ||
| + | |||
| + | : Modern CPUs run at relatively hotter temperatures than the rest of the system, so they usually have either "heat dissipation fins" for passively drawing heat away and into the air flow or CPU "coolers" to actively do so. The more rapidly it heats up, the more active the necessary measures. But the monitoring threshold issue gets complicated when you have "multi-core" CPUs. There are recommended temperatures for individual cores and for the entire "CPU" package. Please see the [http://www.tomshardware.com/forum/id-1800828/intel-temperature-guide.html Intel Temperature guide] or it's equivalent for your brand of processor chip to determine what the suitable temperature ranges are for your device. | ||
| + | |||
| + | :* Solution-1: You need to ensure there is adequate air flow around your box (at least "one inch"/"2.5 cm" around the back and sides), and that all the fans in your case are actually running. This will be easier to determine when you temporarily have the case more accessible and visible. Still, you can't see the cooler on the CPU, so a temperature monitor set to alert you when you are nearing the CPU's thresholds is the most reliable way to detect overheating. One from your motherboard manufacturer is preferable, or you can try one of the Intel tools: [http://downloadcenter.intel.com/download/24075 Intel® Extreme Tuning Utility] or [http://software.intel.com/en-us/articles/intel-power-gadget-20 Intel® Power Gadget] or others [http://www.intel.com/content/www/us/en/support/boards-and-kits/desktop-boards/000005607.html Diagnostic and Performance Tools for Intel Desktop Boards]. There are more generic "third party" tools like [http://www.almico.com/speedfan.php Speedfan] (freeware) as well. Check when you first start playing the game and then again about 5 minutes before you anticipate a CTD. | ||
| + | |||
| + | :* Solution-2: A temporary solution is to run a fan directed to improve air flow around the computer box. If this prolongs the time before the crash, you have fairly conclusively proven an overheating problem. | ||
| + | |||
| + | <span id="Issue: CTD traveling from Cottonwood Cove to Fortification Hill (Render Unto Caesar quest)"></span> | ||
| + | === Issue - CTD traveling from Cottonwood Cove to Fortification Hill ''aka '''Render Unto Caesar''' quest'' === | ||
| + | The game attempts to autosave or "load screen" and crashes before arriving at Fort Hill. | ||
| + | |||
| + | * Cause-1: You are using the built-in game "Autosave" feature. This is not recommended at all. See [[#Issue: CTD on interior/exterior/"fast travel" cell change|Issue: CTD on interior/exterior/"fast travel" cell change]] for more on this. | ||
| + | :* Solution-1: Disable "auto-save" and use either of the [http://www.nexusmods.com/newvegas/mods/36730/? CASM] or [http://www.nexusmods.com/newvegas/mods/45652/? CASM with MCM] mods instead. "Timed saves" are not recommended because they can't detect if something critical (like a script processing) is going on in the background. "CASM with MCM" allows you to fine tune when it saves. | ||
| + | |||
| + | * Cause-2: You failed to trigger all prior stages of the quest. | ||
| + | :* Solution-2: Be sure to speak with the guard who halts you when you enter Cottonwood Cove after starting this quest. Do not bypass him. | ||
| + | |||
| + | <span id="Issue: 'Difficulty' setting causes Player and NPC damage to be 'unbalanced'"></span> | ||
| + | === Issue - ''Difficulty'' setting causes Player and NPC damage to be ''unbalanced'' === | ||
| + | Desiring a damage mechanism to work the same for both. | ||
| + | |||
| + | * Cause: According to this [http://www.supercheats.com/guides/fallout-new-vegas/game-difficulty-hardcore-mode Game Difficulty and Hardcore Mode] article the "difficulty" setting causes the damage inflicted to be inversely proportional between the Player and NPCs. "Hardcore" mode has no effect on damage calculations. | ||
| + | |||
| + | {| class="wikitable" style="text-align: center; color: green; background-color:#ffffcc;" cellpadding="10" | ||
| + | |+ '''DIFFICULTY affect on DAMAGE inflicted''' | ||
| + | ! Difficulty !! iDifficulty= !! by Player !! by Opponent | ||
| + | |- | ||
| + | | Very Easy || 0 || 200% || 50% | ||
| + | |- | ||
| + | | Easy || 1 || 150% || 75% | ||
| + | |- | ||
| + | | Normal || 2 || 100% || 100% | ||
| + | |- | ||
| + | | Hard || 3 || 75% || 150% | ||
| + | |- | ||
| + | | Very Hard || 4 || 50% || 200% | ||
| + | |} | ||
| + | "iDifficulty=" setting is found in the "FalloutPrefs.ini" file in the "C:\Users\<YourAccountName>\Documents\My Games\FalloutNV" folder. | ||
| + | |||
| + | :* Solution: Adjust "Difficulty" to "Normal" for the same damage calculations to apply to both sides. | ||
| + | :: Note you can change difficulty "on the fly" in game, so you should be able to easily test what works best for you with any combination of mods. | ||
| + | |||
| + | <span id="Issue: Disable the "death scene" splash of blood across the screen?"></span> | ||
| + | === Issue - Disable the ''death scene'' splash of blood across the screen === | ||
| + | "When I die, I like to see what happens to my body. But this is usually hindered by all the [omitted] blood on the screen and I can barely see what's going on." | ||
| + | |||
| + | * Cause: Default game setting. | ||
| + | :* Solution: Edit all three of your Fallout INI files by setting the following (at the bottom) from "=1" to "=0". | ||
| + | ::<pre> | ||
| + | ::: [ScreenSplatter] | ||
| + | ::: bScreenSplatterEnabled=0</pre> | ||
| + | |||
| + | <span id="Issue: DyingRedTMP"></span> | ||
| + | === Issue - Dying with red TMP displayed === | ||
| + | Symptoms: The letters "TMP" have appeared in red on the right hand of the HUD screen. Every time this occurs, character loses 5 or 6 HP. Also, keeps getting sleep deprivation even though "Hardcore mode" is not on. | ||
| + | |||
| + | * Cause: The mod "[https://www.nexusmods.com/newvegas/mods/35998 Nevada Skies - Weather Effects]" prior to version "Final" (04 Oct 2020) had a feature called "Frostfall" that could be enabled in the "Mod Configuration Menu (MCM)". The "Frostfall" setting adds a 'heat stroke'/hypothermia function to the game; switching on "Hardcore Mode" in the process (even if it says it's off in the settings menu). | ||
| + | :: "TMP" = Temperature | ||
| + | : The "Frostfall" feature was cut because it was never finished and the author has stopped working on the mod. | ||
| + | |||
| + | :* Solution: Shut off the "Frostfall" setting in the MCM, or upgrade to the "Final" version which removes the feature. | ||
| + | |||
| + | <span id="Issue: FACTION - Still attacks even after reputation is "Idolized""></span> | ||
| + | |||
| + | === Issue - FACTION - Still attacks even after reputation is ''Idolized'' === | ||
| + | This applies when any large number of NPCs (who are probably in the same Faction) are suddenly not acting as expected.<br> | ||
| + | Example: Even with the "Mark of Caesar" and while wearing Legion faction armor, legionnaires attack. | ||
| + | |||
| + | * Cause: Various faction members belong to their own faction groups (e.g. "CaesarsLegionNelsonFaction", "VCaesarsLegionCCoveExplorerFaction", "VCaesarsLegionCCoveFaction". etc). If you have been detected committing a crime against their faction, it may be tracked specific to that faction. | ||
| + | :* Solution: Identify the faction. (See the GECK [http://geck.foesmm.org/index.php/Factions Category:Factions] under "Actor Data", or find the NPC and their "Factions" tab in the "NPC" category under the "Actors" tab; both in the "Object Window".) Then see the [http://geck.foesmm.org/index.php/Category:Faction_Functions Category:Faction Functions] page for other commands you can use in the console to determine your status with each. Use "player.addtofaction <FactionID> <rank>", where setting your rank to "0" which will clear your "crime" record, but leaves/makes you a member of that faction. Setting the "rank" to "-1" will remove the player from the faction. | ||
| + | :: Avoid changing the relationships of the various existing factions (even "PlayerFaction") to each other, as they can have wide ranging unintended effects on scripts and quests. Stick to changing the player's personal status within the faction in question. If you feel it essential to change faction interrelationships, create your own new faction, and set up the relationships desired with other factions and include "Player" as a member in that new faction, or make the "PlayerFaction" "friendly" or "allied". | ||
| + | |||
| + | <span id="Issue: FACTION - Strip Securitrons unexpectedly become hostile"></span> | ||
| + | === Issue - FACTION - Strip Securitrons unexpectedly become hostile === | ||
| + | Apparently people have had this issue intermittently over the years. | ||
| + | * Cause: The following causes have been suggested but not all are confirmed. | ||
| + | :* <div name="Note Box" class="boilerplate metadata" id="Notice Box" | ||
| + | style="margin:0px 10px 10px 00px;border:1px dashed #DAA520;color: lightgray; | ||
| + | background-color:#333333;padding:3px; | ||
| + | word-wrap: break-word; /* Internet Explorer 5.5+ */ | ||
| + | ">You let "House Always Wins" expire . You have to see him soon after you get on the strip. It's a must if you want him to stay non-hostle for a while untill you want to kill him.</div> | ||
| + | :* <div name="Note Box" class="boilerplate metadata" id="Notice Box" | ||
| + | style="margin:0px 10px 10px 00px;border:1px dashed #DAA520;color: lightgray; | ||
| + | background-color:#333333;padding:3px; | ||
| + | word-wrap: break-word; /* Internet Explorer 5.5+ */ | ||
| + | ">Another suggestion was to leave your companions behind when entering the strip until you have resolved the Mr. House quest line.</div> | ||
| + | :* Under "notes" on the wiki entry for [http://fallout.wikia.com/wiki/Securitron Securitron] is: | ||
| + | <div name="Note Box" class="boilerplate metadata" id="Notice Box" | ||
| + | style="margin:0px 10px 10px 30px;border:1px dashed #DAA520;color: lightgray; | ||
| + | background-color:#333333;padding:3px; | ||
| + | word-wrap: break-word; /* Internet Explorer 5.5+ */ | ||
| + | ">If there is an NCR Ranger or trooper following the Courier, the Securitrons by the Strip will shoot them.<br> | ||
| + | and<br> | ||
| + | Killing the Securitrons at the Strip's gate will cause all Securitrons to become hostile.</div> | ||
| + | :: It appears that all the Securitrons in the Mojave belong to Mr House, except those in the Big MT. So likely that last bit about killing a Securitron applies to all of them outside of a vault. However, it was also suggested that this occurs if you go to new Vegas AFTER exploring "Vault 11", so that advice may apply to killing any Securitrons in the Mojave. (Faction interrelationships are "foggy" at best.) | ||
| + | :* <div name="Note Box" class="boilerplate metadata" id="Notice Box" | ||
| + | style="margin:0px 10px 10px 00px;border:1px dashed #DAA520;color: lightgray; | ||
| + | background-color:#333333;padding:3px; | ||
| + | word-wrap: break-word; /* Internet Explorer 5.5+ */ | ||
| + | ">It was also suggested that was because Victor (in Goodsprings or the Strip; because that "personality" could switch bodies) had been killed by someone else. Other suggested reasons were you killed or stole from someone "good" on the strip.</div> | ||
| + | :* Under "bugs" are a couple of similar instances: | ||
| + | <div name="Note Box" class="boilerplate metadata" id="Notice Box" | ||
| + | style="margin:0px 10px 10px 30px;border:1px dashed #DAA520;color: lightgray; | ||
| + | background-color:#333333;padding:3px; | ||
| + | word-wrap: break-word; /* Internet Explorer 5.5+ */ | ||
| + | ">When passing the Science check with the Securitron gatekeeper, and talking to it again saying goodbye, the Securitrons might turn hostile while attempting to enter the Strip. [verified]<br> | ||
| + | It is possible that opening Mr. House's Antechamber may only cause a couple of his Securitrons in his penthouse to become hostile, even after destroying some of them. [verified]</div> | ||
| + | :* Solutions: None confirmed. Please see the [[#Issue:_FACTION_-_Still_attacks_even_after_reputation_is_"Idolized"|Issue: FACTION - Still attacks even after reputation is "Idolized"]] entry for how to try to determine the actual faction relationships between the Player and the various Securitrons. The Securitrons (under GECK "Creatures") in the Luck38 (including Victor) belong to the factions: | ||
| + | :::* Lucky38Faction | ||
| + | :::* VVictorFaction. | ||
| + | :: Those outside the Lucky38 belong to: | ||
| + | :::* VStreetSecuritronFaction | ||
| + | :::* VNCRStreetFaction (which includes all the NPCs on The Strip). | ||
| + | ::* There is a mod ([http://www.nexusmods.com/newvegas/mods/49080/? Securitron attack fix] by DonkeyMonkey) on Nexus that gets around the problem by adding the Securitrons to the PlayerFaction. However, this would be considered a "cheat" as they normally wouldn't be allied until after you had completed the "platinum chip" OS upgrade, and it's subsequent effect on other quests and scripts is unknown. | ||
| + | |||
| + | <span id="Issue: 'File exists' error attempting to install mod"></span> | ||
| + | === Issue - ''File exists'' error attempting to install mod === | ||
| + | While most commonly seen when using FOMM as the mod manager, the problem can occur when attempting to install the mod by switching between different mod managers. | ||
| + | |||
| + | * Cause: The underlying problem is the use of the default "Windows' temporary folder" (of which there are a couple of possible choices) by the install process to unpack a mod package's component files. If the files present were not "Owned" (created) by the process currently executing, or are "locked" as being "in use" by another process, this error message is displayed. The possible "temp file" locations are "C:\Users\<your_user_accountname>\AppData\Local\Temp", "C:\Windows\Temp" (both setup automatically by the system), or any other path the system installer may have set the [http://en.wikipedia.org/wiki/Environment_variable environmental variable] "temp" (when referenced in a script or code it will appear between two percent signs <%>) to point towards. | ||
| + | |||
| + | :* Solution-1a: There are several tools and ways to [http://www.howtogeek.com/128680/how-to-delete-move-or-rename-locked-files-in-windows/ Delete, Move, or Rename a "locked file"]. In general, if the file wasn't locked by the Windows system upon starting up, "rebooting" the computer (this may require "power off", with "hibernation" disabled) will free it. | ||
| + | |||
| + | :* Solution-1b: Delete any files currently in the "temp" folder. As the Windows system creates some of these when it starts, the best way to ensure you can delete the most files is to [http://www.howtogeek.com/393698/how-to-perform-a-clean-boot-in-windows/ Clean Boot] or boot into "Safe Mode" first. Any files you can't delete in that situation will be required by Windows and must be left alone. | ||
| + | |||
| + | <span id="Issue: Flash Bang Bug (Combat skills reduced to zero)"></span> | ||
| + | |||
| + | === Issue - Flash Bang ''aka '''Combat skills reduced to zero''''' Bug === | ||
| + | Some effects such as "flash bangs" or electronic "zaps" may suddenly reduce all your "combat skills" to zero. | ||
| + | |||
| + | * Cause-1: While these are supposed to be "temporary", they don't always reset to normal as intended. | ||
| + | :* Solution-1: "Temporary damage" effects should be restored to normal with the console command: | ||
| + | <div name="Note Box" class="boilerplate metadata" id="Notice Box" | ||
| + | style="margin:0px 10px 10px 50px;border:1px dashed #DAA520;color: lightgray; | ||
| + | background-color:#333333;padding:3px; | ||
| + | word-wrap: break-word; /* Internet Explorer 5.5+ */ | ||
| + | ">These actor values are derived based on other statistics, and that derivation becomes the base value. Some can also be entered in to the GECK for an individual NPC or creature. In these cases, the value entered into the GECK is added to a derived value to determine the base value. Remember that calling '''SetActorValue''' on an actor value that does not have an entry field in the GECK will have no effect. | ||
| + | <pre>player.RestoreAV <ActorValue> <value:Int>"</pre> | ||
| + | where ''<ActorValue>'' is one of the skills: | ||
| + | * Barter | ||
| + | * BigGuns (Fallout 3 - unused in Fallout: New Vegas however the code is still active in the engine) | ||
| + | * EnergyWeapons | ||
| + | * Explosives | ||
| + | * Guns (Fallout: New Vegas - equivalent to SmallGuns in Fallout 3) | ||
| + | * Lockpick | ||
| + | * Medicine | ||
| + | * MeleeWeapons | ||
| + | * Repair | ||
| + | * Science | ||
| + | * SmallGuns (Fallout 3 - equivalent to Guns in Fallout: New Vegas) | ||
| + | * Sneak | ||
| + | * Speech | ||
| + | * Survival (Fallout: New Vegas - repurposed from Throwing in Fallout 3) | ||
| + | * Throwing (Fallout 3, unused - repurposed for Survival in Fallout: New Vegas) | ||
| + | * Unarmed | ||
| + | and ''<value:Int>'' is "0" (for no damage) or a negative number as a damage modifier. The value of "0" should remove any damage applied to the ''<ActorValue>'' skill, restoring to it's previous ''<value>''. Positive values are not permitted. | ||
| + | |||
| + | You can use the: | ||
| + | <pre>player.GetAVInfo <ActorValue></pre> command to determine the value before and after the "RestoreAV" command to return the current & computed base values. In addition, you'll see the values that make up the base value, including the amount from the actor base (i.e. the amount autocalced or entered into the GECK), the result of the derivation function if any, the value as overridden by calling '''SetAV''' if any, whether or not the derived value is added to the base, and finally the three modifiers. | ||
| + | |||
| + | * Cause-2: If "RestoreAV" fails to work, it likely means the effect was not applied as "damage" to the skill but rather as a permanent reduction, probably by using the "ForceAV" or "ModAV" commands which make "permanent" changes. (If you believe this was caused by a "mod", consider replacing it with an alternative as it is bad design implementation for a "temporary effect".) The problem with making "permanent" changes is that they ignore bonuses (from situational perks, equipped items, drugs, etc.). Perks (e.g. "Tag!") and items (e.g. "skill books") that add permanent skill increases are included when you use the command <pre>player.GetPermAV <StatName></pre> to return the base value of the stat without any Trait or Perk bonuses. However, these commands will only return the current values of those stats. You may need to use a previous "save game" to determine what those skill values were prior to the "damaging event". | ||
| + | :* Solution-2a: Use a "''<value:Int>''" (which is used as a 3-digit percentage for ''skills'') with the command: | ||
| + | <div name="Note Box" class="boilerplate metadata" id="Notice Box" | ||
| + | style="margin:0px 10px 10px 50px;border:1px dashed #DAA520;color: lightgray; | ||
| + | background-color:#333333;padding:3px; | ||
| + | word-wrap: break-word; /* Internet Explorer 5.5+ */ | ||
| + | "> | ||
| + | * player.ModAV ''<StatName>'' +/-''<value:Int>'': Permanently alters the actor value, without affecting the base value of the stat. The modifier may be positive or negative. The main uses for '''ModActorValue''' are curses or blessings that can't be dispelled and spells or magic items that can modify a skill/attribute beyond 100. | ||
| + | * player.SetAV ''<StatName>'' ''<value:Int>'': sets the stat's BASE value to the new value. Note: For the player, this will not modify base health. Base health is determined by (Endurance * fPCBaseHealthMult). For example, a level 2 player with 40 Endurance will have 80 base health (40 * 2 = 80) and 4 more health (from the Endurance level bonus). If you use player.SetAv Health 100 the player will have 180 total health - 80 from base health, and 100 for the rest. | ||
| + | |||
| + | DO NOT use: | ||
| + | * ForceAV ''<StatName>'' +/-''<value:Int>: Permanently modifies the current stat to the specified value (not to be confused with '''SetActorValue''', which changes the BASE value of the stat). Because this includes the '''GetActorValue''' function which returns the current state, including all effects, damage, and other '''ModActorValue''' numbers, '''ForceActorValue''' will produce different '''ModActorValue''' results at different times. <span style="color: red; background-color:#fff5f5;">Should never be used on the player, as it will seriously screw up that actor value when combined with other mods or scripts that adjust it or depend on it.</span> | ||
| + | </div> | ||
| + | :* Solution-2b: Use a mod like "[http://www.nexusmods.com/newvegas/mods/49152 Fallout NV Cheat Terminal Redux]" by '''gir489''' to check and reset your skills. | ||
| + | |||
| + | <span id="Issue: FixNavmeshInfo"></span> | ||
| + | === Issue - Followers not moving or Navmesh Problems === | ||
| + | : Thanks to '''MysteryMachineX''' and '''randonwigwam''' of the Nexus Fallout forums for the basis of the following: | ||
| + | <div name="Note Box" class="boilerplate metadata" id="Notice Box" | ||
| + | style="margin:0px 10px 10px 10px;border:1px dashed #DAA520;color: lightgray; | ||
| + | background-color:#333333;padding:3px; | ||
| + | word-wrap: break-word; /* Internet Explorer 5.5+ */ | ||
| + | ">When you have problems with Actors from the base game and DLCs (ones known to normally not have "follow" issues) suddenly not moving or stop following the Player, consider the possibility that an added mod has disrupted the "navmeshing" in that area. This can also be an underlying cause of missing walls or doors which do not load in interior cells. (See also [[#Issue_-_Interior_cell_portions_not_visible| Issue - Interior cell portions not visible]] entry.) Particular suspects would be anything specifically making "fixes" or "improvements" to areas that might include "navmesh" replacements in the problem cells. The problem may persist even after the offending plugin has been uninstalled. | ||
| + | |||
| + | * Cause: The "Navmesh" (NAVM) records have been altered and the "Navmesh Map Info" still contains the "bad" record information. | ||
| + | :* Solution: Make a backup of the plugin you are going to attempt to fix, then open it in '''xEdit/'''[http://www.nexusmods.com/newvegas/mods/34703/? FNVedit], navigate down to the "Cell" Records group and expand it (Lclick on the "+" sign just to the left of the group). This will expand to show "Block sub-groups" under that group; and when you expand each "Block" you will see "Sub-Blocks" which will also need to be expanded before you see any actual records. (You can "<Alt-Lclick> on the first "+" in front of a group to expand ALL of the subordinate groups at once.) Any "groups" or records immediately under a "group" that '''''do not have''''' a "+" in front of them are likely "wild/dirty edits" which are not deliberate and can cause problems. Examine each such "plusless" entry to see if you can determine what they are changing (they are not or do not have any "Temporary" or "Persistent" records under them). If nothing, then they are not doing anything and can be "Removed", which safely disables them. Select\highlight the entry | <Rclick> | select "Remove" from the pop-up menu. This only removes those records from THIS plugin. They still remain (unchanged) in the master file they originated from. | ||
| + | |||
| + | :: Even removing such records from a plugin is not be sufficient. Changes will have been made to the "navmesh map info" record group. You will need to navigate down to the "Navigation Mesh Info Map" Records group and select it (highlight). Right-click on that record group and select to "Remove" the entire group; and then save the changed plugin. Open that saved plugin in the '''GECK''', select the "Navmesh" tool and "Finalize Navmesh", then immediately re-save. That will rebuild the missing "navmesh map info" record correctly. | ||
| + | </div> | ||
| + | |||
| + | <span id="Issue: FOMM can not install mods anymore"></span> | ||
| + | |||
| + | === Issue - FOMM can not install mods anymore === | ||
| + | Symptom-1: When attempting to install a ".FOMOD" file, there is almost always a problem preventing it. | ||
| + | * Cause-1: The FOMOD package has to be unpacked. This problem usually is then due to insufficient free disk space in the "temporary folder" used for this purpose. This location varies by version of Windows, but there is always one at "C:\Windows\Temp" (used by the OS), and in later versions: the default is at "C:\Users\<username>\AppData\Local\Temp" (used by processes initiated by the user). | ||
| + | :* Solution-1: [http://en.wikipedia.org/wiki/Disk_Cleanup Disk Cleanup] the drive containing the temporary folders. This can also be manually done, but some of those files are currently "in use" by open programs, so to be safe you might want to do a [http://www.thewindowsclub.com/what-is-clean-boot-state-in-windows Clean Boot] (or even boot into [http://neosmart.net/wiki/safe-mode/ Safe Mode]), delete the files, then reboot again. | ||
| + | |||
| + | Symptom-2: Installing FOMODS initially went fine, but now a crashdump is indicating "System.UnauthorizedAccessException: Access to the path [...] is denied". | ||
| + | * Cause-2: Something prevented FOMM from releasing it's "file lock". | ||
| + | :* Solution-2: Use a tool like [http://lockhunter.com/ LockHunter] to identify the process holding the lock and then unlock, delete, copy, or rename a locked file. | ||
| + | |||
| + | <span id="Issue: FOMM crash trying to login to Nexus using Package Manager"></span> | ||
| + | === Issue - FOMM crash trying to login to Nexus using Package Manager === | ||
| + | * Cause: This feature has not worked in years, but just hasn't been disabled in the most recent updates. It is well documented in the comments section of the download page. | ||
| + | :* Solution: Open FOMM, go to "Settings" and disable (uncheck) the box for "Check for new FOMod Version". This will prevent the login screen in FOMM from showing. If that alone is not sufficient, uncheck ALL the settings boxes and test re-enabling them one by one. | ||
| + | |||
| + | <span id="Issue: FOMM/FOMOD 'Invalid Field' error"></span> | ||
| + | === Issue - FOMM or FOMOD ''Invalid Field'' error === | ||
| + | Using NMM to download mod files and FOMM to install them, the latter reports an invalid field in the file "InstallLog.xml" and then exits to the desktop without installing. | ||
| + | * Cause: NMM is inserting some fields into your mod archive's "fomod.xml" file upon installing them. | ||
| + | :* Solution-1: Re-download the mod(s) "manually" and install with the last version (0.14.11.12) of [http://www.nexusmods.com/newvegas/mods/54991/ FOMM-Forked]. | ||
| + | :* Solution-2: Use the [http://www.loverslab.com/topic/17895-fomm-custom-build-0141113/ "Custom" version 0.14.11.13 of FOMM]. This version provides support to undo NMM changes, along with bug fixes. (Note: The download site is "adults only 18+" and requires registration to download, but the linked page has no "adult content". FOMM is licensed under [http://www.gnu.org/licenses/gpl.html GPLv3].) | ||
| + | |||
| + | <span id="Issue: "Foul Smell" debuff to Charisma"></span> | ||
| + | === Issue - ''Foul Smell'' debuff to Charisma === | ||
| + | When acquired this debuff reduces Charisma by -3. | ||
| + | * Cause: From cleaning the men's bathroom in the Adult quest mod [http://www.nexusmods.com/newvegas/mods/56156 Coito Ergo Sum] by '''Belthan'''. This is by design, and not a bug or conflict. | ||
| + | :* Solution: Use the shower on the third floor to get rid of the "Foul Smell" debuff. | ||
| + | |||
| + | <span id="Issue: GLOB variable 'GameDaysPassed' doesn't advance or suddenly jumps"></span> | ||
| + | === Issue - GLOB variable ''GameDaysPassed'' does not advance or suddenly jumps === | ||
| + | ''GameDaysPassed'' is a GECK "base type" [http://geck.foesmm.org/index.php/List_of_Global_Variables Global Variable] used to return the number of days that have passed "in-game". However, it has been found to become inaccurate over time (more quickly if the timescale is adjusted to anything other than the default of 30) and eventually to fail to advance at all. This causes problems with many vanilla and mod scripts; particularly in "Hardcore Mode" where the sudden advance can cause instant, unexpected death. | ||
| + | * Cause: "The nature of [the problem] seems to be that single-precision floating point math is only accurate up to so many digits, 7 to 8, depending. Sleep, wait and fast travel update the var by sufficiently high values to never go unnoticed. But during gamemode ''GameDaysPassed'' [(GDP)] is updated by tiny fractions, every frame. That means that every frame, it should be updated by something close to TimeScale / (FPS * 86400). At 30 timescale and 30 FPS, that's 0.0000157407407407 (etc.); 0.000005787037037 (etc.) at FPS 60. | ||
| + | |||
| + | : "If you add it to the existing GDP value, then even at day 1 in the game (day 6, isn't it?), the result of this addition, stored in the GDP var, will only be reliably accurate until 6 digits after the decimal point. The var itself could store more precise data, but it's the calculation that is inaccurate and the result of that is what's being stored. So it may only accurately apply an increase of 0.000005 at 60 FPS or 0.000015 at 30. The following digits of the GDP value will be very much random, and each time the increase is added, it just results in new randomness beyond those digits, possibly rolling over to a higher digit and affecting its accuracy too. | ||
| + | |||
| + | : "Then, when GDP hits 10, or 100, the whole problem becomes much larger because from then on only 5, or 4, digits behind the decimal point are theoretically reliable, and because of earlier inaccuracies that happened over time, it's hard to trust them either. | ||
| + | |||
| + | : "The sad part is that all numeric variables in FNV are actually stored as double-precision, but math involving any var is single-precision." | ||
| + | |||
| + | :* Solution-1: The [http://www.nexusmods.com/newvegas/mods/58277/? JIP LN NVSE Plugin] v51.60+ now include a "game fix" to this problem. Once installed, the issue is automatically corrected. There is a "jip_nvse.ini" configuration file under the "NVSE\Plugins" folder where this behavior is enabled by default. | ||
| + | |||
| + | :* Solution-2: The mod [http://www.nexusmods.com/newvegas/mods/63880/? Timescale Pacemaker] by '''Asterra''' was developed specifically to address this issue. The information provided here comes from that mod and comments on it by '''DoctaSax'''. Thanks to both for exposing a long standing "mysterious bug". It actually predated the JIP NVSE fix, but the author has left it available for those who decide not to use that plugin for whatever reason. | ||
| + | |||
| + | <span id="Issue: How to eliminate the 'bullet sponge' effect?"></span> | ||
| + | === Issue - How to eliminate the ''bullet sponge'' effect === | ||
| + | As in: a critical hit to the head should generally kill a human. A few (1-3) bullets to the torso should knock a human out of the fight. Can't shoot through openings in railings, bridges, vehicles, etc. | ||
| + | |||
| + | * Cause-1: See sub-topic [[#Issue: 'Difficulty' setting causes Player and NPC damage to be 'unbalanced'|Issue: 'Difficulty' setting causes Player and NPC damage to be 'unbalanced']]. | ||
| + | |||
| + | :* Solution-1: Adjust "Difficulty" to "Normal" for the same damage calculations to apply to both sides. | ||
| + | |||
| + | * Cause-2: The designers appear to have chosen the rather simple approach of using 'difficulty' to determine how much health ('hit points' or HP) each opponent has, but in a non-linear manner. This, combined with the inverse calculations of the "difficulty damage calculations", tends to create "bullet sponges" ... opponents that soak up multiple hits before appearing to be effected. | ||
| + | |||
| + | :* Solution-2: There are mods designed to 'correct' the balance between the player and other opponents in the game. These tend to proclaim themselves as "more realistic". | ||
| + | :: Some popular ones (but not all available) include: | ||
| + | ::* [http://www.nexusmods.com/newvegas/mods/35335/ Realistic Weapons Damage - New Vegas (RWD)] - modifies Body Parts Data to make fights more tactical. (Your enemies won't be able to take 5 shots in the head and stand still, same thing for you...) Fights are deadlier. | ||
| + | ::* [http://www.nexusmods.com/newvegas/mods/35037/ Realistic Headshots (RHS)] - A shot to the head for most opponents is almost always an "instant kill". | ||
| + | ::* [http://www.nexusmods.com/newvegas/mods/61141/? Bleed] - designed to change the way that ballistics, energy, explosives, poison, fire, electricity, plasma and shrapnel inflict damage and other effects in a challenging and more deadly way. BLEED provides enhancement to all forms of damage, and also provides more realistic knock down mechanics. | ||
| + | ::: According to one of the authors does essentially the same thing as RWD (and possibly RHS), but without the CTDs of RWD due to weird edits, and the two mods (Bleed and RWD) will conflict with each other. Use either RWD or '''Bleed''', but not both. | ||
| + | ::* [http://www.nexusmods.com/newvegas/mods/47285/ Project Nevada - Extra Options (PNO)] - enables you to turn the level multiplier down for endurance and level. Set them to 0 so they don't get the game default of exponential HP scaling. You must have the PN "Rebalance" and "Rebalance Complete" modules for this. This will also affect how the "enemy artificial intelligence" acts. Turn on the helmet DT requirement, too. | ||
| + | |||
| + | * Cause-3: Objects and terrain in the game world have "collision boxes" around them so "actors" don't walk through them. Often these boxes are larger than the player might desire and cause the blocking of projectiles from passing through apparent "openings". | ||
| + | |||
| + | :* Solution-3: [http://www.nexusmods.com/newvegas/mods/59149/ Collision Meshes] fixes some of the worst collision meshes in the game! It allows shooting through the obvious gaps in and between vehicles and bridge struts for example. | ||
| + | |||
| + | <span id="Issue: Is my game the latest version?"></span> | ||
| + | === Issue - Is my game the latest version === | ||
| + | Wondering if the problem might be because it doesn't have the latest patch? | ||
| + | |||
| + | * Cause: I bought the game before more recent versions like "Ultimate", which I know have the latest patch. | ||
| + | |||
| + | :* Solution: Steam will automatically patch the game, but if you want to check for yourself: | ||
| + | ::* Navigate to your "FalloutNV.exe" file in the game root folder using Windows Explorer, | ||
| + | ::* right-clicking on the file to bring up the context-menu, and | ||
| + | ::* click on "Properties". | ||
| + | ::* Look under the "Details" tab for the game "Product Version". | ||
| + | :: The last patched version is 1.4.0.525; dated 27 Nov 2015. | ||
| + | |||
| + | <span id="Issue: Missing Pipboy after uninstalling the Readius mod"></span> | ||
| + | === Issue - Missing Pipboy after uninstalling the Readius mod === | ||
| + | * Cause: The "Readius" is an handheld piece of "equipment" replacement for the "Pipboy" glove ("apparel") automatically provided by Doc Mitchell. The glove is "unequipped" but should remain in your inventory when the "Readius" is installed. Upon uninstalling the "Readius", the glove is not automatically re-equipped. | ||
| + | :* Solution: If you can't select it under the "Apparel" tab, use the console command to equip the "Pipboy glove" from your inventory: | ||
| + | ::<pre> player.equipitem 15038</pre> | ||
| + | :: If the glove is missing from your inventory, first add it with: | ||
| + | ::<pre> player.additem 15038 1</pre> | ||
| + | |||
| + | <span id="Issue: My Steam Achievements have stopped working"></span> | ||
| + | === Issue - My ''Steam Achievements'' have stopped working === | ||
| + | * Cause: Most likely you used a console command (like "tcl") during a play session. This will automatically stop "Steam Achievements" as an "anti-cheat" measure. | ||
| + | |||
| + | :* Solution: Save and exit the game to the desktop. Upon reloading, Achievements will resume automatically. You won't lose any progress. | ||
| + | :: OR | ||
| + | :: Install the mod [http://www.nexusmods.com/newvegas/mods/59133/? Using the console doesn't disable achievements] | ||
| + | :: Alternatively installing the [http://www.nexusmods.com/newvegas/mods/58277/? JIP LN NVSE Plugin] also has the same feature to avoid disabling achievements, and does not use up an "active plugin" slot. | ||
| + | |||
| + | <span id="Issue: Mysterious building"></span> | ||
| + | === Issue - Mysterious building === | ||
| + | There is a building added by the mod [http://www.nexusmods.com/newvegas/mods/37908 ELECTRO-CITY - Relighting the Wasteland] by '''MyGoodEye''' that can be seen in the distance near the '''El Dorado Gas & Service''' station, but disappears when you get close to it. | ||
| + | * Cause: The building was scrapped in one of the updates and now exists only as a "mirage". | ||
| + | :* Solution: Ignore it. OR you can use console commands to attempt to enter it as the interior cell technically still exists in the mod. Just remember there is usually a reason behind the author scrapping all their work and doing so is "unsupported". | ||
| + | |||
| + | <span id="Issue: No karma or XP for lowest tier level enemies"></span> | ||
| + | |||
| + | === Issue - No karma or XP for lowest tier level enemies === | ||
| + | People have notice when combining the plugins for: | ||
| + | * [http://www.nexusmods.com/newvegas/mods/61592 JSawyer Ultimate Edition] | ||
| + | * [http://www.nexusmods.com/newvegas/mods/47285 Project Nevada - Extra Options] "Rebalance" | ||
| + | * [http://www.nexusmods.com/newvegas/mods/62933 JSawyer Ultimate Edition Patches] "JSawyer Ultimate Edition - Project Nevada Patch" compatibility patch | ||
| + | you don't get any karma or XP for killing lowest tier enemies like "Powder Gangers". Using either of the main plugins alone has no apparent problem. | ||
| + | |||
| + | * Cause: According to the author of the '''JSawyer Ultimate Edition''' mod" | ||
| + | <blockquote>"Some low-level NPCs don't award XP when killed. This is also vanilla; however, you may notice it for more NPCs due to my corrections to enemy level tiers, meaning that more weak NPCs are now considered low-level. Powder Gangers, for instance, are easily killable with a BB Gun, hence they should belong in the lowest tier, and so forth."</blockquote> | ||
| + | : So, this is working by design. | ||
| + | :* Workaround: It seems there's a script named '''NVJSawyerFnMCMConfig''' and inside the script source there's a line '''SetNumericGameSetting "iXPRewardKillNPCVeryEasy" 0'''. If this is set to some non-zero value such as "1", it now awards that amount of XP for the kills. This requires the use of the '''GECK'''. The following is a basic outline of the procedure. It is not a tutorial on using the '''GECK'''. | ||
| + | ::* If you haven't already, you will need to download and install the '''GECK'''. Please see [[#Solutions to "Garden of Eden Construction Kit" (G.E.C.K.) problems|Solutions to "Garden of Eden Construction Kit" (G.E.C.K.) problems]] section in the wiki "Fallout NV Mod Conflict Troubleshooting" guide. Pay particular attention to the fact you will have to run the '''GECK''' as an "Administrator", which means everything will be under that "Users" account. | ||
| + | ::* Plan for the possibility of error. Backup the '''JSawyer''' file you will be editing. | ||
| + | ::* Suggest you open [http://www.nexusmods.com/newvegas/mods/34703/? FNVedit] and select the '''JSawyer''' plugin. Then '''FNVEdit''' will automatically load all the "master files" needed for that plugin. Once it has finished loading, scroll down to the '''JSawyer''' plugin and "<Left-Click>" on the "+" to the left of that plugin. This will expand the list of records categories so you can then select the "File Header" record. Make note of the "master files" listed there. You are going to need to tell the '''GECK''' to load those "master files" next. Once you have your list, just close '''FNVEdit'''. (You shouldn't have changed anything and don't need to save anything.) | ||
| + | ::* Open the '''GECK''', and select for loading the '''JSawyer''' plugin and all of it's "master files". Set the '''JSawyer''' plugin as the "Active File". (This is very important.) | ||
| + | ::* Once the loading is completed, look on the toolbar for the "Scripts" button. (See the [http://geckwiki.com/index.php/Toolbar Toolbar - GECK] page for the icons and their descriptions.) | ||
| + | ::* When you "<Left-Click>" on the "Scripts" icon, it will open to an empty page. You need to "<Left-Click>" on the "Open Folder" icon (or select "File | Open") and scroll down through the list of scripts until you find and select "NVJSawyerFnMCMConfig". | ||
| + | ::* Once the script has loaded, find the line [SetNumericGameSetting "iXPRewardKillNPCVeryEasy" 0]. Change the reward amount (0) to what you want, and save. | ||
| + | ::* If the script refuses to save, you messed up the syntax of the command. ('''DO NOT EVER use the "Compile All" button.''' This will not do anything you want.) Note the use of "[square brackets]" (which should be ignored/skipped) so you can more clearly see where quotes are used. The quotes are required. | ||
| + | ::* Once the script has been saved, exit the '''GECK''' and it will save the "active file" (i.e. "NVJSawyerFnMCMConfig"). | ||
| + | :: The modified '''JSawyer''' plugin will now be used when you load the game. You might want to back it up somewhere also, but keep straight which is the original and which is your customized version. | ||
| + | |||
| + | <span id="Issue -A**holeCompanion"></span> | ||
| + | |||
| + | === Issue - Obnoxious Companion ''Asshole'' === | ||
| + | : Thanks to user '''automanic''' for tracking down and reporting the following: | ||
| + | <div name="Note Box" class="boilerplate metadata" id="Notice Box" | ||
| + | style="margin:0px 10px 10px 10px;border:1px dashed #DAA520;color: lightgray; | ||
| + | background-color:#333333;padding:3px; | ||
| + | word-wrap: break-word; /* Internet Explorer 5.5+ */ | ||
| + | ">Upon starting a new game and leaving Doc Mitchell's house, a "companion" named "Asshole" (sic) is waiting who immediately "joins" your character unasked and proceeds to live up to his name. He has no interactions with you (his dialog is non-existent: the "Talk" command does nothing so you can't tell him to "part ways"), frequently gets in your way, reacts to enemies much faster than you and prevents you from gaining any XP. He is impossible to get rid of, aggro, or kill. Shooting him does nothing at all. He is invincible. | ||
| + | |||
| + | This was an experiment by the author in making a companion, which was never completed and accidentally left in version 1.0 of the mod when it was published. | ||
| + | |||
| + | * Cause: Undocumented addition by [http://www.nexusmods.com/newvegas/mods/67553 BummerBoi's Mega Pack] mod. | ||
| + | :* Solution-1: Enter console mode (default key is "~") and click on the companion (important to ensure the next command operates on the correct "Actor"). Then type in the command "disable" and save the game. He should be gone (until the next "new game"). | ||
| + | |||
| + | :* Solution-2: Disable the mod. | ||
| + | </div> | ||
| + | |||
| + | <span id="Issue: PluginLimit"></span> | ||
| + | === Issue - Plugin Limit Warning despite Limit Fix mod === | ||
| + | Symptoms: There is a message displayed in the upper left-hand corner of the HUD about exceeding 140 plugins even though the mod [https://www.nexusmods.com/newvegas/mods/68714 FNV Limit Fix] is installed. | ||
| + | |||
| + | * Cause: The warning message is included in the mod [https://www.nexusmods.com/newvegas/mods/50468 JIP Companions Command and Control (JIP CC&C)] and is based upon the smaller "plugin cap" of the original game. It predates the release of the mod "FNV Limit Fix" and has not been updated since. | ||
| + | :* Solution-1: This message is now removed by using underlying required plugin [https://www.nexusmods.com/newvegas/mods/58277 JIP LN NVSE] "Version 55.65" or later. | ||
| + | |||
| + | <span id="Issue: Project Nevada "Sprint" suddenly not working"></span> | ||
| + | |||
| + | === Issue - Project Nevada ''Sprint'' suddenly not working === | ||
| + | * Cause-1: Sometimes the sprint scripts crash. | ||
| + | :* Solution-1: Turn the feature off (in "Mod Configuration Manager", aka MCM), save and exit the game, then reload and restart it. This clears all instances out of memory, and then restarts the managing quest, usually fixing the problem. (Don't use the version of MCM that comes with PN. Install the latest "stand alone" version, after PN, instead. See the wiki [[HUD-UI-Menu_issues|HUD-UI-Menu issues]] article.) | ||
| + | |||
| + | * Cause-2: Sometimes the script or another remaps or even completely unbinds the walk/run key. | ||
| + | :* Solution-2a: Check in your control settings to make sure that walk/run is bound to whatever key you had it set to. It's a rare bug, but does happen. If you're wondering why in the world it unbinds it, it's due to the way the sprint feature works, otherwise you'd actually wind up just walking. | ||
| + | |||
| + | :* Solution-2b: Sometimes another, later installing mod overrides PN's keybinding. This is usually an "install order" rather than a "load order" problem. Please see the wiki [[HUD-UI-Menu_issues|HUD-UI-Menu issues]] article which discusses this in depth. | ||
| + | |||
| + | <span id="Issue: Quest is hung and won't advance"></span> | ||
| + | === Issue - QUEST - is hung and will not advance === | ||
| + | This is a general situation and solutions need to be tailored to the specific quest in question. | ||
| + | |||
| + | * Cause-1: varies. The first suspects are either "too many plugins" or a "mod conflict". | ||
| + | :* Solution-1a: Move any "inactive" plugins out of the game "Data" folder. They count against the "plugin cap" of roughly 128-140 because they get loaded by the game engine if found, and can cause "Missing Master" problems. Please see the wiki [[Missing_Masters|Missing Masters]] article if you get that error message. | ||
| + | |||
| + | :* Solution-1b: Please see the [[#Mod_Conflict_Isolation|Mod Conflict Isolation]] entry of this document. | ||
| + | ::* Especially look into potential conflicts between various "bug fix" mods like YUP and MMUE. (Please see the [[FNV_General_Mod_Use_Advice#Towards_Game_Stability|Towards Game Stability]] article.) Older "fix" mods that have not been continuously updated are more likely to have conflicts with later versions of mods they are designed to "patch", which are in turn more likely to already include those corrections. Check and compare the "last updated" entries on each mod's download page. | ||
| + | ::* The mod [http://www.nexusmods.com/newvegas/mods/43055?tab=files Perk per Level - Level Cap at 100] (file: "Level100PerkPerLevel.esp") was in at least one instance found to cause a conflict with the ending of the Gomorrah Casino quest "How little we know". | ||
| + | |||
| + | * Cause-2: Sometimes your choices can cause a quest to get into an unanticipated situation and it can't progress as intended. Resolving this usually requires using "console commands" (toggle <~> key in-game). | ||
| + | :* Solution-2a: What follows are a series of steps you will need to undertake to identify where you are in the quest and how to reset it so you can take a different set of actions to enable proceeding. | ||
| + | ::* Look up your main game quest name (as presented in the Pipboy list of active quests under the "Data" tab) on the [http://fallout.wikia.com/wiki/Portal:Fallout:_New_Vegas_quests Nukapedia] wiki site. | ||
| + | ::* Make note of the "Base-ID" of the quest. You will be using this information in later console commands. (Leave the web page(s) up for later reference, or copy the "Quest Stages" information.) | ||
| + | ::* Back in the game, toggle on the "console" command line by tapping the "<~>" key. | ||
| + | ::: This will display an "underscore" ("_") character in the lower left corner of the screen. | ||
| + | ::* Enter the command ''[http://geckwiki.com/index.php/GetStage GetStage] <quest Base-ID>'' (without quotes or the <angle braces> on the console command line, followed by "<Enter>". From various examples it appears you can also use the quest "Editor-ID" name. | ||
| + | ::: This will return the current active "quest stage" number. This is the highest stage completed so far, most likely after which you have gotten hung up. Note that some quest stages can be completed "out of sequence", so it is possible an earlier stage has not been completed. | ||
| + | ::* Look up that quest stage in the "Quest Stages" information identified earlier, either on the web page or from your notes. It is possible for your Pipboy (Data tab) to list more than one stage in your "Active Quest" list, while the console command returned only one stage. Depending upon the quest, this might be the source of the problem: incompatible quest stages active and the game can't decide how to proceed. | ||
| + | |||
| + | :* Solution-2b: You can use the ''[http://geckwiki.com/index.php/SetStage SetStage] <questID> <StageIndex>'' command to tell the quest it has completed through that given stage (including the end). Pay attention to the "Notes" of that command description. See also the '''JIP NVSE''' command [http://geckwiki.com/index.php/SetStageAlt SetStageAlt] as a way to set a lower stage as the currently "highest completed" value returned by "GetStage". | ||
| + | |||
| + | :* Solution-2c: Quest stages get set as "results" of actions or dialog: conversations with NPCs or by picking up specific objects or activating specific markers (locations). It's dialog choices that will usually get you into an impasse. You need to figure out the most likely source of triggering a quest stage, and "reset" things "back to zero" on that Actor using the ''[http://geckwiki.com/index.php/ResetDialogueFlags reset dialog flags (rdf)]'' command. (Be careful with this command as it can mess with other quests if you didn't first use the "GetStage" command and don't select the correct Actor whose dialog you want to reset.) | ||
| + | :::* Select (<Left-Click> on) the "quest trigger" in console mode, and enter the command: "rdf <quest Base-ID>". | ||
| + | :: Here is an example to illustrate this process: | ||
| + | <div name="Grouping Box" class="boilerplate metadata" id="Grouping Box" | ||
| + | style="margin:0px 10px 10px 50px;border:1px dashed #DAA520;color: lightgray; | ||
| + | background-color:#333333;padding:3px; | ||
| + | word-wrap: break-word; /* Internet Explorer 5.5+ */ | ||
| + | ">Suppose you have gotten hung in the "Boulder City Showdown" quest (Base-ID: 0010e908) after talking to the Great Khan Jessup and got the hostages freed, but then couldn't talk to him about negotiating with the NCR; and Lt. Monroe would acknowledge that the Khans freed the hostages but wouldn't advance the quest either. Stages completed were both "Meet with Jessup, leader of the Great Khans in Boulder City" (stage 10) and "Help the Great Khans kill all the NCR troops in the Boulder City ruins" (stage 40). The latter (stage 40) is preventing Lt. Monroe from proceeding peacefully. | ||
| + | |||
| + | To resolve this: | ||
| + | * "getstage 0010e908" tells you the last stage set is "10". So your conversation with Jessup did not advance to another stage. | ||
| + | * Select Lt. Monroe in the console, and enter "rdf". (You don't want him to have set any stages as yet.) | ||
| + | * Tell Lt. Monroe you want to talk things out with the Khans. Don't say anything about sneaking or killing to avoid accidentally opening the same bug. (This should get you to "stage 15".) | ||
| + | * Return to Jessup. | ||
| + | * Ask Jessup about shooting his way out, then about working something out with the NCR, then use your "Speech Check" to release the hostages. (This is a sequence of dialog that is necessary to avoid the deadlock condition.) | ||
| + | * Return to Lt. Monroe and resolve the quest the way you want, either for NCR or both factions. | ||
| + | </div> | ||
| + | <br> | ||
| + | :: Thanks to '''olistr644''' of the '''New Vegas Mod Troubleshooting''' forum for researching the basis of the following. | ||
| + | :* Solution-2d: The following procedure utilizing [http://www.nexusmods.com/newvegas/mods/34703/? FNVedit] can produce the IDs of any Quests, including '''Mods''', that are recorded in the game Pipboy "Quests log" under the "Data" tab. | ||
| + | ::* In the game, note the quest you want to know about. | ||
| + | :::* That is "Track it" under the "Data" tab of your Pip-Boy on the "Quests" page. Select the quest in question. | ||
| + | :::* Then open the console (<~> key) and type "sqt" (show all of the current quest targets). | ||
| + | ::::: You should then get "Active quest: <The Editor-ID of the quest name>" displayed. | ||
| + | ::* Open '''FNVedit'''. | ||
| + | :::* Load your entire "load order". (This ensures you get the correct "mod index" in the Quest-ID.) | ||
| + | :::* Choose the "Quest" folder in the left-hand pane list of categories. | ||
| + | :::* Up top of that left-hand pane you will see an "Editor ID" box. Type your Quest Editor-ID (obtained from the console) into there. (Assume capitalization matters.) | ||
| + | ::::: Alternatively, if you don't have a Quest Editor-ID to search for, you have to expand (click on the "+" sign to the left of) each of the plugins listed in the left-hand pane and then scroll down to and expand the "Quests" category of each to look through the "Editor-ID" of each quest to find a likely candidate to select (<left-click>). | ||
| + | :::* Hit <Enter> and the editor will load for a short while until your quest should then be highlighted (if found), in the left-hand pane. (If not found, you entered an invalid Quest-ID in the search field.) | ||
| + | :::* Make sure that Quest-ID is "selected" (highlighted) by <left-clicking> on it. | ||
| + | ::::: If it is "selected", a whole lot of different variables will appear under the "Information" tab in the right-hand pane. | ||
| + | :::* If you scroll down the variables in the right-hand pane under the "Record Header" you should find a "FormID" field with "<EditorID>[QUST:<XXnnnnnn>]" for a value. That "XXnnnnnn" value is your actual Quest Ref-ID (where "XX" is the mod index and "nnnnnn" is a six-character hexadecimal value). Make note of it as you will need it later in the "setstage" command. | ||
| + | :::* If you scroll down further in the right-hand pane you should (for a Quest) find one or more "INDX - Stage Index" entries. In the column to right of each such entry is the "stage number" (e.g. "0", represented in "<ii>" form). Those are the different phases in the quest, i.e. "stages". | ||
| + | :::* Scroll down until you find the one relevant to you by examining the "SCTX" and "SCRO" entries under the "Embedded Script" category of each. These are your clues as to the purpose of each stage. (If the script names are not descriptive enough, all you can do is open the scripts in the '''GECK''' "script editor" and examine the contents in more detail.) | ||
| + | ::::: Note the quest "stage index" ("ii") to the right of the "INDX - Stage Index" of the particular line of interest for use in the "setstage" command. | ||
| + | ::* Then you type the just acquired information into the console: e.g. "[https://geckwiki.com/index.php?title=SetStage setstage] <XXnnnnnn> <ii>", where <XXnnnnnn> is the Quest Ref-ID, and <ii> is the "StageIndex" number. | ||
| + | ::* If all you need is to have completed that quest stage, you should now be able able to proceed. | ||
| + | |||
| + | :* Solution-2e: Sometimes using the "Kill" and "Resurrect" commands on an Actor are necessary to cause them to become "unstuck". | ||
| + | ::* First you have to identify the "Reference-ID" of the Actor in question. See the [[#Issue_-_Find_the_source_mod-index_of_an_object_in-game|Issue - Find the source mod-index of an object in-game]] entry under the "Solutions to Mesh -Red Kite- icon or Texture -solid or off color- problems" section. | ||
| + | ::* Once you have the Actor's "Reference-ID" you can use it in the ''prid <Reference-ID>'' and (if desired, subsequent) command to designate whom the following console commands are applied to (i.e. becomes the "calling ref"). <span style="color: green;background-color:#fff5f5;">Note that according the GECKWiki "Help" entry beside the "Syntax" field, function ''arguments in italics'' are '''optional'''.</span> | ||
| + | ::: For example: | ||
| + | <div name="Note Box" class="boilerplate metadata" id="Notice Box" | ||
| + | style="margin:0px 10px 10px 50px;border:1px dashed #DAA520;color: lightgray; | ||
| + | background-color:#333333;padding:3px; | ||
| + | word-wrap: break-word; /* Internet Explorer 5.5+ */ | ||
| + | ">[http://geckwiki.com/index.php/PickRefByID prid] <Reference-ID><br> | ||
| + | [http://geckwiki.com/index.php/Kill KillActor]<br> | ||
| + | [http://geckwiki.com/index.php/Resurrect ResurrectActor] | ||
| + | </div> | ||
| + | |||
| + | :* Solution-2e: Try ''[http://geckwiki.com/index.php/Enable Enable]/[http://geckwiki.com/index.php/Disable Disable]'' on the Actor, using the same "prid <Reference-ID>" technique as with the "kill/resurrect" sequence above. | ||
| + | |||
| + | :* Solution-2f: Add the Actor to the Player faction (0001b2a4), diable, enable, and finally remove from the faction with: | ||
| + | <div name="Note Box" class="boilerplate metadata" id="Notice Box" | ||
| + | style="margin:0px 10px 10px 50px;border:1px dashed #DAA520;color: lightgray; | ||
| + | background-color:#333333;padding:3px; | ||
| + | word-wrap: break-word; /* Internet Explorer 5.5+ */ | ||
| + | ">[http://geckwiki.com/index.php/PickRefByID prid] <Reference-ID><br> | ||
| + | [http://geckwiki.com/index.php/AddToFaction AddToFaction] 01b2a4 1<br> | ||
| + | [http://geckwiki.com/index.php/Disable Disable]<br> | ||
| + | [http://geckwiki.com/index.php/Enable Enable]<br> | ||
| + | <Reference-ID>.[http://geckwiki.com/index.php/RemoveFromFaction RemoveFromFaction] 01b2a4 | ||
| + | </div> | ||
| + | |||
| + | : These sets of example solutions is designed to achieve the particular desired outcome. With any quest the choice of dialog or actions depends upon that desired solution so adapt as needed. | ||
| + | |||
| + | : People often are worried about the effect of using "console commands" upon their progress towards particular game "achievements". The use of the console suspends activities counting towards "achievements" only for the game session once the console command was given. Simply exit the game to the desktop once your situation is resolved, and when you next load the game you will resume working towards your "achievement" as if nothing had happened. OR you can install the NVSE Plugin [http://www.nexusmods.com/newvegas/mods/59133 Using the console doesn't disable achievements]. | ||
| + | |||
| + | <span id="Issue: Recommended "Project Nevada" master file load order?"></span> | ||
| + | |||
| + | === Issue - Recommended '''Project Nevada''' master file load order === | ||
| + | While only a few of the many "Project Nevada" (PN) plugins require more than the "PN-Core.esm" as a master, the order in which the master files are listed '''''in a given plugin''''' can cause some "master file" conflicts ("orange boxes" in Wrye Flash). The usual resolution is to get such plugin "masters" sorted to conform to the overall "game load order", using '''xEdit'''. However, the difference in how '''xEdit''' loads files from the game's sorted "load order" (i.e. by '''LOOT''') can make this more difficult than expected, because PN has two ESP "master" files that are "false ESM flagged" in their "File Header" record. | ||
| + | |||
| + | * Cause: According to Zilav 27 Apr 2017 06:19 in "TES5Edit Support Forum": | ||
| + | <div name="Note Box" class="boilerplate metadata" id="Notice Box" | ||
| + | style="margin:0px 10px 10px 20px; border:1px dashed #DAA520; color: lightgray; background-color:#424242; padding:3px; | ||
| + | word-wrap: break-word; /* Internet Explorer 5.5+ */ | ||
| + | "> | ||
| + | "All plugins from the Data folder are sorted into 2 groups by extension (and extension only, ESM flag in plugin's header doesn't matter): *.ESM and *.ESP, then each group is sorted by plugin's file timestamp. Then xEdit loads all ESM, then all ESPs. The order of masters in plugins doesn't affect anything."</div> | ||
| + | : The file's "Modified Date" is used for sorting. For some unknown reason, the "PN-Extra Options.esm" file always gets loaded in '''xEdit''' immediately after the "PN-Core.esm", regardless of the date/time stamps even if "PN-Equipment.esm" is placed before "PN-EO". | ||
| + | :* Solution: Even though the PN download page doesn't recommend a specific load order, placing the PN "master" files in the following sequence seems to have eliminated conflicts when using '''xEdit''' to "sort masters" of PN-related ESP plugin masters to conform to it. They do not need to be "contiguous" or immediately next to one another. You can then "sort" each plugin's "master files" in '''xEdit''' so they will ALL thereafter match up with the game load order as well. | ||
| + | ::* PN-Core.esm | ||
| + | ::* PN-Extra Options.esm | ||
| + | ::* PN-Equipment.esm | ||
| + | ::* PN-Cyberware.esp (ESM flag) | ||
| + | ::* PN-Rebalance.esp (ESM flag) | ||
| + | ::* Other PN ESP files simply must load after any "master files" in their '''xEdit''' "File Header". | ||
| + | |||
| + | <span id="Issue: xEdit_Record_conflicts"></span> | ||
| + | === Issue - Record conflicts in '''xEdit''' ''aka '''FNVEdit''''' === | ||
| + | The documentation for '''xEdit/'''[http://www.nexusmods.com/newvegas/mods/34703/? FNVedit] is the [http://tes5edit.github.io/docs/index.html Tome of xEdit]. It is an indispensable tool for tracking down record conflicts between plugins, so it is worth the time to learn how to use it. Because you can change (and therefor "break" things), don't try to use it without a basic understanding of how it works. This is the merest outline of how it can be used for a specific purpose. | ||
| + | |||
| + | You are looking for the "record-ID", "Editor-ID" or "Base-ID" in "hexadecimal" number format for each record (row) in the plugin in question. The "record number" consists of a "mod index" and it's sequential position within the plugin. (Please see the short article [http://fallout.wikia.com/wiki/Help:Form_IDs Help:Form IDs] on how to interpret the "mod index".) The "Editor-ID" is the "human readable" name for that record, while the "Base-ID" is that of the "template Form-ID" each specific "Reference-ID" copy placed in the "game world" is based upon. The "vanilla" ones provided by the base game and DLCs can be found on the [http://fallout.gamepedia.com/Fallout_Wiki The Vault] and [http://fallout.fandom.com/wiki/Portal:Fallout:_New_Vegas Nukapedia] wikis in the page describing each. Please see the [http://wiki.nexusmods.com/index.php/Getting_started_creating_mods_using_GECK#GECK_Form-ID.2C_Base-ID.2C_Ref-ID.2C_and_Editor-ID GECK Form-ID, Base-ID, Ref-ID, and Editor-ID] section of the wiki [http://wiki.nexusmods.com/index.php/Getting_started_creating_mods_using_GECK Getting started creating mods using GECK] article for a more complete explanation of these terms. The differences between them are important to understand. | ||
| + | |||
| + | If a mod has added it's own new record (for example: a new "Perk" or "Trait"), then you have to find the information in that mod's documentation, description, or comments page. Failing that, then you have to use '''FNVEdit''' (base name is '''xEdit'''. '''FNVEdit''' is '''xEdit''' renamed to work specifically with FNV format records) to load the plugin (in the "Module Selection" popup window): | ||
| + | * First <RClick> in a blank area of the "Module Selection" window. | ||
| + | * When the context menu window pops up, choose the "Select none" option. (This will "uncheck" all the plugins.) | ||
| + | * Now <LClick> on the checkbox of ''only'' the ESP plugin(s) you want to examine. | ||
| + | * <LClick> the "OK" button. | ||
| + | Any required "master" plugins will automatically be selected for you. Then wait for the plugins to all be loaded (see the "messages" tab in the right-hand pane for the "done loading" message. | ||
| + | |||
| + | Now look down the list of plugins in the left hand pane for your chosen plugin to examine (it should be the last): | ||
| + | * Expand it (<LClick> on the "+" symbol to the left of the plugin name). | ||
| + | * Scroll down the list of "record types" to select (and expand) the (in this example: "Perks") group, and then find a specific record (row). | ||
| + | :* (The "traits" are "spells" affecting SPECIAL stats and are listed under "Actor Effect". The game ones are listed here.) | ||
| + | * The first column is the "record-ID". If you select the record (row) of a specific "Perk" then in the right-hand pane you will see all the plugins (as columns) which affect that record. | ||
| + | Unfortunately it only provides the first couple of words of the description of the "Perk" in question, which often is not enough to tell you what it affects. But it will often give you enough information to know if you need to look it up further in the documentation for the parent plugin (which will be the first column in the right-hand pane), or if you need to open the plugin in the '''GECK''' and examine the record there where you can see more detail. | ||
| + | |||
| + | Typically you will see the first mention of a record in the "FalloutNV" ESM or EXE plugin. Other plugins on that row will be modifying values in that record. But a brand new record introduced by a plugin will not have any other plugin in a column to the left of the one introducing that "new" record. Any to the right of that plugin will be modifying it's original record. Any plugins to the right of any given column are "potential conflicts". | ||
| + | |||
| + | See the [http://tes5edit.github.io/docs/index.html Tome of xEdit] for how you can choose which values from which plugin will actually be used. | ||
| + | |||
| + | <span id="Issue: Regional (non English) version has different FormIDs"></span> | ||
| + | |||
| + | === Issue - Regional - non-English version has different FormIDs === | ||
| + | This is informational to explain the underlying cause. There is no "fix" to implement. | ||
| + | (Thanks to '''JustChill''' of the "Fallout New Vegas Mod Troubleshooting" forum for identifying and investigating the issue, as well as '''sandbox6''' of the "Yukichigai Unofficial Patch" (YUP) mod and '''RoyBatterian''' of the "Tales of Two Wastelands" team for confirmation and details.) | ||
| + | |||
| + | Unfortunately, each regional language version of the '''Fallout New Vegas''' game other than English has completely different FormIDs for all records from '''0017b75a''' and above, which also affects all references to those records in all records below that as well. (Please see the 'GECK Form-ID, Base-ID, Ref-ID, and Editor-ID' section of the wiki "[http://wiki.nexusmods.com/index.php/Getting_started_creating_mods_using_GECK Getting started creating mods using GECK]" article if you need help understanding the term "FormID".) | ||
| + | |||
| + | '''RoyBatterian''' wrote: | ||
| + | <div name="Note Box" class="boilerplate metadata" id="Notice Box" | ||
| + | style="margin:0px 10px 10px 10px;border:1px dashed #DAA520;color: lightgray; | ||
| + | background-color:#333333;padding:3px; | ||
| + | word-wrap: break-word; /* Internet Explorer 5.5+ */ | ||
| + | ">Different ESMs have different FormIDs because Obsidian screwed up when patch v1.3 came out, it actually broke a ton of mods at the time. German version in particular (the no gore version) is quite different from all others, and generally isn't supported by many mods or things like '''JIP_LN''' [NVSE] either because the exe is also different internally. These things just make it a real pain to maintain any mods, and if there is support at all count yourself lucky that someone took the time to do so.</div> | ||
| + | |||
| + | While this has obvious implications for translators, it also means mods developed for a different language version of the game won't work "out of the box" in another language. The FormIDs won't match. Conversion would require determining what the FormID in one language version is in the other language version. | ||
| + | |||
| + | Luckily, loading up mods in '''xEdit/'''[http://www.nexusmods.com/newvegas/mods/34703/? FNVedit] with the language-specific "FalloutNV.esm" and the mods which are desired to be translated, will often result in errors (displayed in the "Messages" box of FNVEdit) similar to the following with which you can recognize the issue: | ||
| + | <div name="Note Box" class="boilerplate metadata" id="Notice Box" | ||
| + | style="margin:0px 10px 10px 10px;border:1px dashed #DAA520;color: lightgray; | ||
| + | background-color:#333333;padding:3px; | ||
| + | word-wrap: break-word; /* Internet Explorer 5.5+ */ | ||
| + | ">[00:01] Background Loader: Warning: Record [GMST:0017B7BB] in file FalloutNV.esm is being overridden by record [LVLI:0017B7BB] in file Project Nevada - Equipment-ENG.esm. | ||
| + | [00:01] Background Loader: Warning: Record [GMST:0017B7DA] in file FalloutNV.esm is being overridden by record [LVLI:0017B7DA] in file Project Nevada - Equipment-ENG.esm. | ||
| + | </div> | ||
| + | What's important is not the "record type" part (e.g. "GMST:"), but rather that the record number in both files is supposed to be the same. But in a "Regional" language version of the game, the record number from "FalloutNV.esm" would be different (i.e. "0017BCB1" in the German version). Changing the FormID in the mod (e.g. "Project Nevada - Equipment-ENG.esm") to the one in the regional language-specific master file (e.g. the German "FalloutNV.esm") resolves the problem. | ||
| + | |||
| + | The following images show how such FormID conflicts can be identified in '''FNVEdit/xEdit'''. | ||
| + | <span id="Figs1-3"></span> | ||
| + | <gallery> | ||
| + | File:RegionalFormIDs_ApplyFilter.jpeg|Fig 1 | ||
| + | File:RegionalFormIDs_EditorIDContains.jpeg|Fig 2 | ||
| + | File:RegionalFormIDs_FilterResults.jpeg|Fig 3 | ||
| + | </gallery> | ||
| + | : (See Figs. 1-3. {{Thumbnail_enlargement_message}}) | ||
| + | |||
| + | You can't just change the name of a "language specific" plugin to keep compatibility with other later-loading "English language" mods. It might sound like a good idea at first, but it would run the very real risk of less knowledgeable people attempting to run incompatible mods without even knowing it until something goes wrong, and then having no way to work out what is causing their issue and not knowing which mod is at fault. | ||
| + | |||
| + | <span id="Issue: Remove active effects"></span> | ||
| + | |||
| + | === Issue - Remove active effects === | ||
| + | Sometimes an active effect that is supposed to have a duration fails to expire. "Ingestibles" (food item, drug, or chemical), "Actor Effects" (spells), and "Object Effects" (enchantments) produce "[http://geckwiki.com/index.php/Base_Effect Base Effects]" which are treated as fundamental "magic effects" in the GECK. Mods can create their own "Base Effects" as well as delete existing effects. Unless an "Actor Effect" has a "condition" it is permanent. | ||
| + | * Cause: Varies. Check the "Pipboy | S.P.E.C.I.A.L." tab display "Eff(ects)" section for the list of "active effects". Also check for "Perks" and "Traits". Look for "+" or "-" signs in the Pipboy display, indicating "effects" in play. Try "player.getavinfo <ActorValueName>" on each stat you believe is "affected". (See the GECKWiki [http://geckwiki.com/index.php/Stats_List Stats List] for a list of "Actor Values". IF you try to modify an ActorValue directly, ONLY use the "Get/Mod/RestoreActorValue" functions. "Set/Force" alter the baseActorValue" and will cause problems.) | ||
| + | :* Solution-1a: Use the console comand "player.DispellAllSpells". Note this will cancel out any beneficial effects as well. | ||
| + | :* Solution-1b: Try a "cheat" mod such as "[http://www.nexusmods.com/newvegas/mods/49152 Fallout NV Cheat Terminal Redux]". | ||
| + | :* Solution-1c: For other effects such as "specific Spell-IDs", "Magic Shader Effects", "Magic Effect Visuals" see the "[http://forums.nexusmods.com/index.php?/topic/872861-tutorial-removing-unwanted-magic-effects-from-the-player TUTORIAL: REMOVING UNWANTED MAGIC EFFECTS FROM THE PLAYER]" thread. While specific to Skyrim (most of the thread is identifying specific effects), it's basic commands apply (with minor modifications) to other Bethesda games. You may find once you identify the effect, you need to first "player.addspell <Spell-ID>" and immediately follow it with "player.removespell <Spell-ID>" to get rid of it. | ||
| + | |||
| + | <span id="Issue: Restore vanilla animations"></span> | ||
| + | |||
| + | === Issue - Restore vanilla animations === | ||
| + | You tried some animation replacement file(s) and want to go back to the vanilla version. | ||
| + | * Cause: Animations, like most "replacers", either place loose ".kf" files in the appropriate folders, or overwrite any that are already there. The vanilla version of the animation files are in the "Fallout - Meshes.bsa" file under the path "("Data\Meshes\Characters\_male\Locomotion", so any "loose files" found under that path are "replacements". | ||
| + | |||
| + | :* Solution: First see if uninstalling the mod cleans up the issue. | ||
| + | ::* Otherwise, examine the archive package of the "replacer" mod you are removing to determine the folder structure where the mod places it's files. These should be under "Data\Meshes\Characters\_male" and "Data\Meshes\Characters\_1stperson", but may or may not be placed in deeper sub-folders. | ||
| + | ::* If this was the only set of "animation replacement" files installed, then simply delete the "Locomotion" sub-folder if it exists. (The game will use the vanilla animations from the BSA file.) | ||
| + | ::* Some mods place their files directly in the "Data\Meshes\Characters\_male" and "Data\Meshes\Characters\_1stperson" instead of a "Locomotion" sub-folder under them. Those folders are used by many mods, so rather than deleting the folder, you should delete "*.kf" files only. | ||
| + | ::* If you wish to try to preserve other replacements, then examine the archive package of the "replacer" mod you are removing, and delete any matching file names from the corresponding "Data\Meshes\Characters\_male" and "Data\Meshes\Characters\_1stperson" paths and sub-folders. However, if any other replacement files were overwritten, then you will need to re-install the other replacers as well. | ||
| + | |||
| + | <span id="Issue: Background Noise bug?"></span> | ||
| + | === Issue - SOUND - Background Noise bug === | ||
| + | Occasionally hearing a rapid "thumping" or "slow buzzing" sound, like something is vibrating or falling off shelves. | ||
| + | * Cause-1: Companions are clipping into the ground or NPCs are clipping into the chair they are sitting in, or similar. This often happens when explosives were used in combat. NPCs/Companions stay in semi-ragdoll mode (even if they weren't knocked down) that freak out when you're not looking at them. If you have a "custom race" with a tail or some additional appendage, that might also be causing the sound. Sometimes "actors" like "creatures with wings" become trapped in the scenery and similarly clip. | ||
| + | :* Solution-1a: A mod like [http://www.nexusmods.com/newvegas/mods/62876/? Human Collision Sounds Removed] might be the solution or at least confirm if this is the cause. There is a version for Robots as well. | ||
| + | |||
| + | :* Solution-1b: The command "'''resurrect'''" after selecting the Actor in the console may correct the situation as well. | ||
| + | |||
| + | * Cause-2: If you are finding items that appear to have fallen from shelves, tables, or the walls, then you have a "havok (aka "ragdoll") physics" problem where objects placed on shelves or walls but not properly "grounded" with collision get triggered and fall when you enter into range. | ||
| + | :* Solution-2: This has to be corrected by editing the placement of the objects or adding collision, and should be reported to the mod author. | ||
| + | |||
| + | * Cause-3: With "uncapped FPS", the higher your "frames per second" (FPS) gets the more likely the "havok physics" will go crazy and clip through the geometry of other artwork in the cell. This is not to say you can't play with higher FPS, just that the game engine was simply not designed for more than 60 FPS. If you have problems, try scaling the cap back. | ||
| + | :* Solution-3: Set the "FPS" setting to a maximum of "=60". | ||
| + | ::: Make backups of the INI files before changing them. | ||
| + | ::* The Fallout INI files have an "iFPSClamp=" setting under the "[General]" section. Do not set this to other than "=0" if you have NVSR "bManageFPS = 1". | ||
| + | ::* New Vegas Stutter Remover (NVSR) "Data\nvse\plugins\NV_Stutter_Remover.ini" has to have "bManageFPS = 1" under the "Master = {" section before the setting "MaximumFPS = 60" under the "FPS_Management = {" section will take effect. Check that the "MinimumFPS" setting is not higher than the maximum; something like "= 20" is noticeable while still playable. If NVSR is managing FPS, do not leave the three Fallout INI files with a setting other than "iFPSClamp=0". | ||
| + | |||
| + | <span id="Issue: FreeMusic"></span> | ||
| + | === Issue - SOUND - Music Licenses and Sources === | ||
| + | Symptoms: Questions regarding the ability to include "music" or "songs" in any form in a mod. | ||
| + | |||
| + | * Cause: Published music (instrumentals, digital, and vocals) is usually by default "copyright protected", which means you need to have purchased a ''license'' to include it in your mods or online videos published for use by others. This includes music (in whatever form or manner of production) included in other media (such as games, videos, and films) as well as downloaded from various websites. | ||
| + | : The following terms are taken from the [https://buffer.com/library/background-music-video/ Buffer.com Background Music Video] page: | ||
| + | ::* Royalty Free | ||
| + | ::: Royalty free music gives users the right to use copyrighted music without having to pay “royalties” for recurring use of the content. In other words, royalty free music allows the buyer to ''pay the music license only once'' and use the music for as long as they want. | ||
| + | ::: Royalty free often gets mistaken for “free” music, which is not the case in many situations. The author or artist who has composed the music decides what kind of license it will have, and therefore, the costs associated. | ||
| + | |||
| + | ::* Public Domain | ||
| + | ::: Public domain refers to all works that are not protected by copyright and can be used without permission or without having to pay the original author/artist. Public domain essentially gives free use of the music in whatever manner a user sees fit. | ||
| + | ::: Essentially, that means that content within the public domain can be copied, distributed, interpreted, and displayed in public for free as if it belongs to everyone. | ||
| + | |||
| + | ::* Creative Commons | ||
| + | ::: [https://creativecommons.org/licenses/ Creative Commons] is one of several public copyright licenses that enable the ''free distribution'' of an otherwise ''copyrighted'' work. At the core of the Creative Commons license is the idea that every CC license ensures copyright holders retain control and get the credit for their work they deserve. It’s a standardized way to grant copyright permissions to their creative work. | ||
| + | |||
| + | :* Solution: Obtain music which is in the "public domain" either by explicit placement there in it's licensing terms, or expired copyright (dates vary by jurisdiction and number of authors); or which is explicitly published as "licensed royalty free" but probably still requires an initial purchase. This can get complicated as "music" consists of separate components such as "instruments", "performance" by particular artists, and "lyrics". "Licenses" usually must be purchased (otherwise how would the author/artists get any form of compensation for their work). See [https://incompetech.com/wordpress/2020/10/composerish-perils-of-buying-instruments-from-instagram-meditation-music-royalty-free-vs-commercial-music/ Composerish: Perils of buying instruments from Instagram, Meditation Music, Royalty Free vs Commercial Music] for a discussion. | ||
| + | <br> | ||
| + | Download sources (representative, not all inclusive): | ||
| + | * Public domain & Creative Commons. Free to download. | ||
| + | :* [http://freemusicarchive.org/ Free Music Archive] | ||
| + | :* [https://www.youtube.com/channel/UCht8qITGkBvXKsR1Byln-wA YouTube Audio Library - Music] | ||
| + | :* [https://soundcloud.com/search/sounds/?filter.license=to_share SoundCloud] | ||
| + | :* [http://ccmixter.org/ ccMixter] Free (with attribution). | ||
| + | :* [http://freeplaymusic.com/index.aspx FreePlay Music] Free (personal use only on YouTube) or $0.99 and up (business use) | ||
| + | <br> | ||
| + | * Royalty or Copyright Free but must purchase License or Download | ||
| + | :* [https://incompetech.com/music/royalty-free/licenses/ IncompeTech] Free (with attribution) or starting at $20 per piece (no attribution). | ||
| + | :* [https://www.bensound.com/ Bensound] Free (with attribution) or 1-year unlimited downloads for $129. | ||
| + | :* [https://www.amazon.com/Royalty-Free-Music/e/B01IP5RZ9A Amazon Music] Free only for your personal, non-commercial purposes or premium tracks start at $0.99. | ||
| + | :* [https://www.premiumbeat.com/royalty-free/audio-music-library Premium Beat Copyright Free Music] Licensing $49 each or $13/month | ||
| + | :* [http://www.epidemicsound.com/ Epidemic Sound Royalty Free Music] Licensing starting at $0.99 and Subscriptions starting at $12/month. | ||
| + | :* [https://audiojungle.net/ AudioJungle] Tracks starting at $1. | ||
| + | :* [https://www.jamendo.com/ Jamendo] Standard licensing starting at $49. | ||
| + | :* [https://www.audioblocks.com/ AudioBlocks] Unlimited downloads start at $99/year. | ||
| + | :* [http://www.beatpick.com/player/index BeatPick] Price varies depending on track. | ||
| + | :* [https://www.storyblocks.com/pricing?site=audio Storyblocks] Monthly or Annual subscription licensing starting at $10/month. | ||
| + | |||
| + | <span id="Issue: Stuck effects or stats"></span> | ||
| + | |||
| + | === Issue - Stuck effects or stats === | ||
| + | Sometimes you find a chem or other temporary effect has caused a stat to become "stuck" in a "buff" (bonus) or "debuff" (penalty) state. | ||
| + | * Cause: Usually (but not always) this is the result of a script change that has not been reverted for some unknown reason. See also the related possible cause [[#Issue:_Can_Timescale_adjustments_break_certain_quests,_etc.?|Issue: Can Timescale adjustments break certain quests, etc.?]]. | ||
| + | :* Solution: The mod [http://staticdelivery.nexusmods.com/mods/130/images/thumbnails/49152-1-1361396517.jpg Fallout NV Cheat Terminal Redux] allows adjustment of many (but not all) stats. Required: ALL FNV DLC. | ||
| + | |||
| + | <span id="Issue: Uninstall Fallout New California (FNC/FONC)"></span> | ||
| + | === Issue - Uninstall Fallout New California ''FNC'' aka ''FONC'' === | ||
| + | Cannot seem to find an option to uninstall. | ||
| + | * Cause: "Fallout New California", though a mod for FNV, uses it's own installer program. Consequently uninstalling it, regardless of which mod manager you use, requires you to use it's provided "uninstaller" to restore things to normal. | ||
| + | :* Solution: In the game root folder (where "FalloutNV.exe" is found), you should also find the file "FONCuninstall.exe". Run that like any other executable within your mod manager. | ||
| + | :: If that doesn't work correctly, best place to ask would be their [http://discord.gg/Cr39CP8 discord Help channel]. | ||
| + | |||
| + | <span id="Issue: Weapon quick key binding fails unexpectedly"></span> | ||
| + | |||
| + | === Issue - Weapon quick key binding fails unexpectedly === | ||
| + | While previously working, suddenly the quick key binding for weapons no longer functions, and cannot be rebound. | ||
| + | * Cause: Unknown. Circumstances are uncertain, but at least one report was after exiting the "Dead Money" DLC, while another had not played any DLC as yet. | ||
| + | |||
| + | :* Workarounds: The following have worked for some, but not others. | ||
| + | :** Load a recent save game from prior to the point of failure to bind. Now rebind the keys to the weapons, and see if playing forward doesn't retain the key bindings. In a DLC that removes your equipment (i.e. "Dead Money"), this should be after you have had your original equipment returned, but before you have actually exited the DLC setting to the Mojave. | ||
| + | :** Travel to some point where the weapons are removed from your possession (like a casino); and immediately upon exiting the location and the weapons are restored to your character see if binding the keys works again. | ||
| + | |||
| + | <span id="Solutions to Post-Processor (ENB/SweetFX et. al.) problems"></span> | ||
| + | |||
| + | == Solutions to Post-Processor '''''ENB or SweetFX''' et al'' problems == | ||
| + | |||
| + | <span id="Issue: ENB & NVR-NVGE conflict"></span> | ||
| + | === Issue - '''ENB''' and '''NVR-NVGE''' conflict === | ||
| + | [http://www.nexusmods.com/newvegas/mods/65525 New Vegas Reloaded - NVGE] is a "post-processor" designed specifically to work with the older Bethesda "Gamebryo" engine for Oblivion, Skyrim, and now (22 Aug 2018) "Fallout New Vegas". | ||
| + | |||
| + | * Cause: NVR-NVGE is an alternative to other "post processors" such as ENB (including ENBoost) and SweetFX. They are not designed to work together, so you have to choose one. | ||
| + | |||
| + | :* Solution: Please see the [http://www.tesreloaded.com/board/24/technical-support Technical Support] forum on the [http://www.tesreloaded.com/ TES Reloaded] site for any issues with it. | ||
| + | |||
| + | <span id="Issue: ENB Blur"></span> | ||
| + | === Issue - '''ENB''' Blur === | ||
| + | Symptom: Screen becomes immensely blurry when using ENB, like it is perpetually "out of focus". | ||
| + | |||
| + | * Cause-1: ENB settings. | ||
| + | :* Solution-1a: Disable "remove blur" (depth of field) setting under the "[FIX]" section in "ENBlocal.INI". | ||
| + | |||
| + | :* Solution-1b: Disable "EnableDepthOfField" by setting to "false" under the "[EFFECT]" section in "ENBSeries.INI". | ||
| + | |||
| + | :* Solution-1c: Tweak settings in the "enbeffectprepass.fx" file. (These are usually set in a "pre-set" mod.) For a discussion of "depth of field" effects (with example pictures) from these settings, see this [http://forums.nexusmods.com/index.php?/topic/831400-skyrim-enb-depth-of-field-settings-confusion/ Nexus Skyrim forum thread]. | ||
| + | |||
| + | :* Solution-2: Make sure you have disabled any overlays such as "Steam" or "Overwolf". | ||
| + | |||
| + | :* Solution-3: Some mods might cause or aggravate the problem. Use the in-game console (default key "<~>") and enter the command "sisme 0". | ||
| + | |||
| + | :* Solution-4: Try the mod [http://www.nexusmods.com/newvegas/mods/41790/? Blur Killer] by '''sortitus'''. It removes "all blur effects in Imagespace Modifiers (but not depth of field effects, because it's simple to disable that without a mod)". | ||
| + | |||
| + | Symptom: Textures are pixelated and blocky at a NEAR distance but clear up when getting closer. | ||
| + | * Cause-2: This is the result of having ''Anistropic filtering'' set really low for ENB. | ||
| + | :* Solution-2: Apparently (according to a single report) if you change the ''Anistropic filtering'' in the game "FalloutNVLauncher | Options | Graphics Settings" to zero, but are adjusting it in the graphics/video card driver control panel to a value that clears up the problem, it does not affect the ENB negatively at all, and thus you can play the game without this problem. NOTE: this runs counter to normal ENB configuration instructions which call for ALL ''Anistropic filtering'' in both the game settings and video drivers to be zeroed out. | ||
| + | |||
| + | <span id="Issue: ENBIntWindows"></span> | ||
| + | === Issue - ENB Interior windows are off-color === | ||
| + | Symptoms: Interior windows are some off-color such as "blue". | ||
| + | |||
| + | * Cause-1: "Post processors" such as '''ENB''' or '''SweetFX/Reshade''' have interior darkness setting. The brighter the interior light level the brighter the "blue" RGB component. | ||
| + | :* Solution-1: Adjust the interior darkness level setting of the "post processor" INI file. | ||
| + | * Cause-2: The imagespace adapters (IMODs) used for night weathers have a heavy dark blue tint added to them. Some interior lighting mods are affected by "weather" mods as well. | ||
| + | :* Solution-2: Adjust the exterior darkness level setting of the "post processor" INI file. | ||
| + | |||
| + | <span id="Issue: ENB is not working"></span> | ||
| + | |||
| + | === Issue - '''ENB''' is not working === | ||
| + | or only partially. | ||
| + | |||
| + | * Cause-1: Almost always this is due to faulty installation. | ||
| + | :* Solution-1a: ENB expects the vanilla 2.0 shader files. If you are using any custom ones (to include switching to the vanilla 3.0 shader, aka "[http://www.tweakguides.com/Fallout3_9.html switching ''shaderpackage013'']"), or have included any from other post-processors, you can expect problems. This may manifest as an inability to correctly detect an interior cell or adjusting light levels. First, try disabling them and using just the vanilla shaders to see if that resolves the issue. Questions regarding how to use other specific shaders with ENB are best addressed to the [http://enbdev.com/enbseries/forum/viewforum.php?f=19&sid=85dc9ae81dbe1b437e0d94f033efe84f ENB Series Support Forum]. | ||
| + | :* Solution-1b: General instructions for installing the ENB series (read '''everything''' first). In the event of conflicting instructions, go with those provided by ENB for the specific game. | ||
| + | :# Download the latest [http://enbdev.com/download.htm ENB series Graphic Modifications] version file for the game in question (i.e. FNV will be used as an example), along with any "Patch" file that may exist. This is explained in the description on that "Downloads" page, so please take the time to read it to avoid confusion. The files are in separate sub-sections lower down on the same page. | ||
| + | :#: <p style="text-align: left; color: red; background-color:#fff5f5;">Note the "Installing" section contains important instructions regarding the placement of certain files, including specific versions of DirectX files. See "Cause-1" of [[#Issue: Vanilla game Hangs on startup|Issue: Vanilla game Hangs on startup]] and the ENB download page for details. Copy these files if necessary. Failure to heed this is the second most common cause of failure.</p> | ||
| + | :#* Scroll down to and select the game (i.e. "Fallout 3/New Vegas") under the "Graphic Modifications" section. This will take you to the game version page, where you should select the latest version. (At the time of this writing it's v0.322 for FalloutNV. There was an update without changing the version number, so re-download it to ensure you have the latest version.) If you intend to use a specific ENB preset, check that it does not ''require'' an older version first. If it is merely ''suggested'', then try the latest version anyway. | ||
| + | :#* Clicking on a version number will take you to another page that provides a one-line summary of the changes for each version EXCEPT for the version you selected. (This is how you know you are on the correct page.) Scroll down to the bottom of the page and "click" on the "<down arrow> download" button's icon to start the download process of the version you selected on the previous page. | ||
| + | :#* If there was a patch file for your game listed, return to the "[http://enbdev.com/download.htm ENB Series Download]" page, scroll down to the "Patches" section, and click on the Patch file (i.e. "Fallout 3/ New Vegas"). | ||
| + | :#* This will take you to another page with the patch file. Select the "description" of the patch underneath the word "Download" on this page to start the download process. (The patches have their own numbering system independent of the "Graphic Modifications" file series.) | ||
| + | :#: The other "Tools" and "Converters" files are not needed for the Fallout games; though the "VRamSizeTest" tool can be useful when looking into the VRam requirements for various games which do not have ENB installed. (ENB will report the same VRam size information when properly installed.) | ||
| + | :# Once you have downloaded the ENB Series files, follow the instructions you noted earlier from the "Installing" section on the "Downloads" page. Inside the "Graphic Modifications" version archive file, you will find two sub-folders: "'''wrapper'''" and "'''injector'''". Choose between either the "'''wrapper'''" or the "'''injector'''" method of installation. It is suggested you try the "'''wrapper'''" method first. If that fails, uninstall ENB and install the "'''injector'''" method instead. Failure to uninstall the "'''wrapper'''" method files first will result in confusion about the correct method files to place and edit. If you have installed ENB correctly you should see on the loading screens (in the upper left corner) something similar to: [[File:ENB_Load_Screen.JPG|border|300px|ENB Load Screen]] | ||
| + | :#: I recommend you unpack the ENB version file archive to a folder outside of the game. Then copy the CONTENTS of the "wrapper" folder to the game root folder (i.e. "<Steam install path>\common\Fallout New Vegas"). (Do not drag the "wrapper" folder itself, only the files and folders inside of it.) This way you will be able to refer back to tell exactly which were copied over if you have to uninstall them. <p style="text-align: left; color: green; background-color:#fff5f5;">If you do uninstall, be sure to remove the provided D3D9.DLL file. However, do note that it is required to use the ''ENBoost'' feature, which is separate from the post-processor effects.</p> | ||
| + | :#: (Those needing to use the "'''injector'''" version may be interested in the mod [http://www.nexusmods.com/newvegas/mods/60812/? ENBAuto] for automatically opening and closing the '''injector''' with any game.) | ||
| + | :#: <br> | ||
| + | :#: <p style="text-align: left; color: green; background-color:#fff5f5;">Users of the older version of FNV4GB.exe called [http://www.nexusmods.com/newvegas/mods/62552/? 4GB Fallout New Vegas Updated] and similar should note that the "D3D9.DLL" file from ENB "'''wrapper'''" method needs to be placed in the "Fallout New Vegas\exes" folder, along with the "FalloutNV.EXE" file they moved there when installing that executable. This does not apply to the "'''injector'''" method, which requires the "D3D9.DLL" file to remain in the game root folder. The suggested "''"<steampath>\Fallout New Vegas\FNV4GB.exe" -laaexe .\FalloutNV4GB.exe''" shortcut forces the "FNV4GB.exe" file to be called "FalloutNV4GB.exe" instead when it loads into memory, and does '''*not*''' create a directory called "exes". This is suggested so that any files added to the game root folder (like ENB or Sweetfx) will work properly without any further work on the users part. The executable filename following the "-laaexe" switch can actually be anything to which the "LAA" flag has been applied. The parameter is optional and can be skipped if you do not need the filename changed upon loading.<br>Note that none of this is required with the newer "[http://www.nexusmods.com/newvegas/mods/62552/? FNV 4GB Patcher]" version.</p> | ||
| + | :# Choose and download an ENB "Preset" configuration from the Nexus or other download site. For examples: the author of [http://www.nexusmods.com/newvegas/mods/49882/? ENHANCED SHADERS - ENB] by '''tapioks''' is focused on achieving a Balanced and Playable preset, while the author of [http://www.nexusmods.com/newvegas/mods/62366/? Bone Fide ENB (Great Performance ENB)] by '''Charmareian''' wanted a preset being "true to vanilla, had realism, and wasn't so crazy that the game becomes a screenshot simulator rather than an RPG!" Others are often focused on creating particular "atmospheres", but read their descriptions carefully. Expect that you may need to try several before finding the one best suited to your preferences and system performance. Again, unpacking the preset outside of the game and copying it's contents over will provide a means of determining what needs to be uninstalled if necessary, OR see the sub-topic [[#Issue: Managing Post-Processor (ENB, SweetFX, FXAA) configurations|Issue: Managing Post-Processor (ENB, SweetFX, FXAA) configurations]] on tools to manage multiple presets. | ||
| + | :#: Follow the installation instructions of that preset, which usually consist of placing it's contents in the game root directory (i.e. "<Steam install path>\common\Fallout New Vegas"), or wherever the game's original executable resides. | ||
| + | :#:<p style="text-align: left; color: red; background-color:#fff5f5;">''Such presets (along with ENB itself) generally cannot be installed successfully using a mod manager, because mod managers assume they belong in the game's "Data" folder.'' This is THE most common error. YOU HAVE BEEN WARNED!</p> | ||
| + | :#:<p style="text-align: left; color: green; background-color:#fff5f5;"> Note that some presets make use of files that appear in the game "load order". Such files go after any "bashed/merged patch file" unless the author specifies otherwise.</p> | ||
| + | :# Now you need to make certain adjustments to the game "Graphics Settings". (Note: this part is specific to FNV. Other games may require other means to access these setting or the specific settings to be altered.) Use the original game launcher (not FNV4GB.exe or "NVSE_Launcher.exe" if you have them installed), and select "Options" to get to the "Graphics Adapter and Resolution" window. | ||
| + | :#* Turn off "Antialiasing". | ||
| + | :#* Turn off "Anistropic filtering". | ||
| + | :#* Enable "Screen Effects: HDR" instead of "Bloom". Failure to set this to "HDR" can cause a "black screen" upon startup. | ||
| + | :#* Click on the "Advanced" button and select the "Water" tab. | ||
| + | :#** Disable (uncheck) the "Water Displacement" check box. | ||
| + | :#** "Close" the "Advanced" window. | ||
| + | :#* Click on the "OK" button to close the "Options" window. | ||
| + | :#* Select "Play" to proceed to the Main Menu so the game will save the changes to your settings. | ||
| + | :#* Now "Exit" the game without proceeding any further. | ||
| + | :# Now check the video card controller to ensure you have also disabled any of those same settings for the video card. | ||
| + | :#: <p style="text-align: left; color: green; background-color:#fff5f5;">Make backup copies of any INI file before editing or overwriting.</p> | ||
| + | :# Usually an ENB preset will have already made specific edits to the default ENB INI files, which it will overwrite. However, this is not considered "best practice" because only about a third of the ENBLocal file is related to the preset and the remainder is specific to your system. Instead you should use their file as a guide to edit the ENB settings in your own files. You can choose to edit those settings either "in-game" (using the "<Shift+Enter>" key combination to enter and exit ENB "edit" mode), or by directly editing the ENBLocal.INI (or ENBInjector.INI) file, or other files as directed. See the [http://wiki.step-project.com/Guide:ENB#Warning_About_Enblocal.ini Warning about ENBLocal.INI] entry of the S.T.E.P. Project [http://wiki.step-project.com/Guide:ENB ENBseries Guide] for specifics. | ||
| + | :# Most of the ENB configuration settings you need to adjust for your particular game setup are found in the "ENBLocal.INI". See the S.T.E.P. Project [http://wiki.step-project.com/Guide:ENBlocal_INI ENBLocal INI Guide] for their descriptions. | ||
| + | :# If you want to adjust the "ENBSeries.INI" file settings yourself instead of using the ones provided by a "pre-set", see the S.T.E.P. Project [http://wiki.step-project.com/Guide:ENBseries_INI ENBSeries INI Guide] page, which "is intended as THE comprehensive reference to the functionality of all parameters found within '''enbseries.ini''' as it evolves." There is also the [http://mcmoddingenbseries.wikia.com/wiki/ENBseries_0.248_enbseries.ini_documentation ENB Series] Wiki page. | ||
| + | :# See the sub-topic [[#Issue: CTD without warning, "Out of Memory error", or stops responding|Issue: CTD without warning, "Out of Memory error", or stops responding]] for other settings that ENB users need to include. | ||
| + | |||
| + | * Cause-2: Unexpected CTDs (such as when attempting to use the < Shift+Enter > key combination to enter the ENB Editor) can be due to programs running in the background, such as "anti-virus", "anti-malware", Video Card configuration control programs, overlays like the Steam Overlay, etc.. Many of these use the same techniques to "hook" the key presses to determine if their functions are being called. | ||
| + | :* Solution-2: Try turning off any unnecessary background processes, such as "anti-virus" or "anti-malware" programs (unneeded if you are running your game in "offline" mode), multiplayer "overlays" like "OverWolf" (this is single-player after all), the Steam overlay, etc., at least on a temporary basis to see if they are interfering. | ||
| + | |||
| + | <span id="Issue: ENB Nights are too dark, even with "nightvision""></span> | ||
| + | === Issue - '''ENB''' Nights are too dark even with ''nightvision'' === | ||
| + | Specifically with combination of "darker nights" from [http://www.nexusmods.com/newvegas/mods/35998/? Nevada Skies], preset [http://www.nexusmods.com/newvegas/mods/49882/? ENHANCED SHADERS - ENB by tapioks] and nightvision from [http://www.nexusmods.com/newvegas/mods/40040/? Project Nevada], but possibly other mod combinations. | ||
| + | * Cause: Preset is not designed with non-vanilla lighting in mind. | ||
| + | :* Solution-1: Check for a version of the "pre-set" in question specifically designed for the lighting mod. | ||
| + | :* Solution-2: The preset [http://www.nexusmods.com/newvegas/mods/49882/? ENHANCED SHADERS - ENB by tapioks] has a version specifically for darker nights of the "Night Skies" mod. Use a program like the free [https://notepad-plus-plus.org/ Notepad++], [http://winmerge.org/?lang=en WinMerge], or [http://www.prestosoft.com/edp_examdiff.asp ExamDiff] to compare that preset with yours for the differences in "lighting" settings to your tastes. | ||
| + | |||
| + | <span id="Issue: ENB Performance (FPS) drops"></span> | ||
| + | === Issue - '''ENB''' Performance ''aka FPS drops'' === | ||
| + | The foundation of game performance is to first optimize your system for gaming. See the sub-topic [[#Issue: Game in slow motion|Issue: Game in slow motion]]. | ||
| + | |||
| + | ENB will cause a drop in "framerate per second" of around 30-50 FPS in it's default configuration. How much will vary depending upon hardware, mod texture resolutions (game normal is 512x512), and ENB INI settings. In order to increase performance (i.e. FPS), you HAVE to give up some graphic effects: either by reducing texture size or disabling some ENB settings. Which trade-offs matter to you the most is a very personal thing. What is presented here are merely a collection of setting others have recommended, primarily from the [http://enbdev.com/enbseries/forum/viewforum.php?f=20&sid=2ee4aed91d395987501630f1c2faccf2 ENBDEV Performance Forum] site. | ||
| + | |||
| + | Performance is reduced by two factors: 1) number of textures created in video memory; 2) total size of textures created in video memory. When there is not enough video memory, ENBoost begins deleting resources by their usage priority; it also removes unused after 5 seconds. Make sure the game video settings (i.e. "Low"=512x512, "Medium"=1024x1024, "High"=2048x2048, "Ultra"=4096x4096) match the highest texture resolution you are using so it deals with them efficiently. All your texture replacements should be of the same resolution. There are tools that will let you adjust them to other resolutions if needed. See the "Optimizer Textures" tool description under "Utilities" section of the [http://web.archive.org/web/20170713081056/http://www.darkcreations.org/testg/wiki/Utilities TES Texture Guide] (TESTG) site. | ||
| + | |||
| + | Do not try to use ENB without a [https://en.wikipedia.org/wiki/PCI_Express PCI-Express] ("PCIe") video card. This means no "integrated video on the motherboard". According to the author, ENB requires high bandwidth for a certain amount of VRam, which depends upon the screen resolution. When this amount goes above the internal on-GPU fast memory much slower system Ram is used which in turns drops the FPS. <p style="text-align: center; color: red; background-color:#fff5f5;">(Note this generally means "no laptops" not specifically designed for games.)</p> | ||
| + | |||
| + | The following are other peoples suggestions that have helped them. | ||
| + | |||
| + | For extremely low FPS (~10 or less), try setting the following in "enblocal.ini": | ||
| + | * ExpandSystemMemoryX64=false | ||
| + | * ReduceSystemMemoryUsage=false | ||
| + | * DisableDriverMemoryManager=false (configure the "[MEMORY] parameters as well.) | ||
| + | If that doesn't help, check if a lower resolution affects performance. If it does, then it's the GPU as described above. Make sure these parameters are also set: | ||
| + | * WaitBusyRenderer=false | ||
| + | * EnableFPSLimit=false | ||
| + | |||
| + | ENB performance under Windows 10 is acknowledged to just be bad. The ENB author hasn't switched to it and can't really help with whatever is causing the issues. It is known, for instance, that the Win10 DirectX 9.0 drivers can't handle video memory greater than 4GB regardless of how much is on the card, whereas it wasn't a problem under Win7. These were design decisions by Microsoft and not much can be done until they address them.<span style="margin:0px 10px 10px 10px;border:1px solid #00C600;color: green; | ||
| + | background-color:#fff5f5;padding:3px; | ||
| + | word-wrap: break-word; /* Internet Explorer 5.5+ */ | ||
| + | ">Note this VRAM limitation is reportedly fixed in the Win10 "Fall Creator's Update" scheduled for release 17 Oct 2017.</span> | ||
| + | |||
| + | * For advanced users: If you have a Windows 10 Education, Professional, or Enterprise edition you can use the included Win10 Hyper-V system and try running the game in a Win7 "virtual machine". See [https://msdn.microsoft.com/virtualization/hyperv_on_windows/quick_start/walkthrough_compatibility HyperV on Windows compatibility] for the hardware requirements and a walk-through of the installation process. Note this requires you to have or obtain an ".iso" file of the desired OS install media (i.e. Win7). (If none of this option makes sense, you probably don't want to mess with it. Otherwise, educate yourself as it is beyond the scope of this wiki.) | ||
| + | |||
| + | Please refer to the S.T.E.P. Project [http://wiki.step-project.com/Guide:ENB ENBseries Guide] pages for each ENB INI file for information regarding the purpose of each setting before electing to make such changes. It is easy to forget the changes to all files when testing various presets. There are separate S.T.E.P. guides for each of the ENB INI files as well as Troubleshooting tips. Each game version of the ENB Series "Graphic Modifictions" file also documents settings in it's "readme" file. | ||
| + | |||
| + | <div name="Note Box" class="boilerplate metadata" id="Notice Box" | ||
| + | style="margin:0px 10px 10px 10px;border:1px solid #00C600;color: red; | ||
| + | background-color:#fff5f5;padding:3px; | ||
| + | word-wrap: break-word; /* Internet Explorer 5.5+ */ | ||
| + | "> | ||
| + | Note that tweaked ENB settings for one game will not necessarily produce the same result in another game. The game engine used for the Fallout series (FO3 and New Vegas) is Gamebryo, which is the same one used for Oblivion ''but not for Skyrim. That used the Creation Engine, which is based upon the Gamebryo engine but Bethesda enhanced.'' Use caution when applying ENB settings from one game to another. Test one at a time to see the impact of each. Understand what you are doing. It's your system and your responsibility. | ||
| + | </div> | ||
| + | |||
| + | If you are using the ENB Memory Manager (DisableDriverMemoryManager=false), be sure to configure it's "[MEMORY]" section properly or it will frequently fill all available VRam (which is bad). Use the "VRamSize" value displayed when ENB initializes in the game; or from the VRamSizeTest tool. | ||
| + | |||
| + | Changing other settings will have an impact upon the final visual result. Expect one tweak to lead to others. For this reason it is advisable for novices to search out other presets emphasizing performance and try them first. | ||
| + | |||
| + | ENB settings under "[EFFECT]" that most affect performance for all games: | ||
| + | * Ambient Occlusion (aka SSAO). "EnableOcclusion=0" to disable; or adjust "[SSAO]" section for tweaks. | ||
| + | * Shadows. "EnableShadow=0" to disable; or adjust "[SHADOW]" section for tweaks. | ||
| + | * Depth of Field shaders: | ||
| + | ** UseWaterDeep=0 (under "[WATER]"). | ||
| + | ** UseIndirectLighting=0 (under "[SSAO]"). | ||
| + | ** ShadowQuality=2 (under "[SHADOW]"). | ||
| + | |||
| + | Other tweaks: | ||
| + | * LimitFPS to a lower value. Too much over 60 FPS can cause rendering issues. Remember that TV and Movies are shown at a fixed 30 FPS which is all the eye needs to see a smooth transition from one frame to another. | ||
| + | * If "DisableDriverMemoryManager=false", be sure to configure the "[MEMORY]" parameters in "enblocal.ini". | ||
| + | * Try reducing these two settings to the following, in "enbseries.ini": | ||
| + | ** SizeScale=0.5 | ||
| + | ** SourceTexturesScale=0.5 | ||
| + | |||
| + | If you play in "windowed" or "borderless windowed" mode: | ||
| + | * EnableUnsafeMemoryHacks=true (may help, but only for those modes). | ||
| + | |||
| + | <span id="Issue: ENB Support for Windows versions later than Win7"></span> | ||
| + | |||
| + | === Issue - '''ENB''' Support for '''Windows''' versions later than '''Win7''' === | ||
| + | * Cause: As of June 2017, the author of the ENB Series tools did not have, and had announced "no intention of paying for that crap", support for Windows 8 or 10. His official signature indicates support only for WinXP/Win7. | ||
| + | :* Solution: There are some "workarounds" for some situations (see elsewhere in this section) that involve improved "Win7 compatibility" on Win10. However, if you can't find a "fix" here, then the author offers the following generic suggestions: | ||
| + | ::* Install DirectX Runtime from MS web site. | ||
| + | ::* Disable Steam overlay. | ||
| + | ::* Do not use Afterburner, EVGA, GeForce Experience. | ||
| + | ::* Do not use screen capturing tools, Razer and Logitek utils, etc. (which he calls "crapware"). | ||
| + | ::* Do not use Avast; some other antiviruses also fail to work properly. | ||
| + | ::* Do not use later video drivers than recommended unless absolutely forced to. (Once they no longer test for older games, bugs can creep in.) | ||
| + | :: The only other shot you have at a solution is from other users on the [http://enbdev.com/enbseries/forum/viewforum.php?f=19&sid=ac65392b42f0f35ed81c9fac348a9d71 ENB Support Forum] or elsewhere on the Internet. If you can't reproduce the problem under Win7, appeals to the author will fall on deaf ears. (While one may sympathize with his opinion, that position may change as his equipment ages.) | ||
| + | |||
| + | <span id="Issue: ENB Texture disappears or turns shiny/black"></span> | ||
| + | === Issue - '''ENB''' Texture disappears or turns shiny or black === | ||
| + | Occurs after passing rapidly between interior/exterior cells several times, such as through a doorway repeated times. | ||
| + | *Cause: A few ENB "pre-sets" have disabled the "EnableCompression" flag. | ||
| + | :* Solution: Make the "enblocal.ini" file "[Memory]" setting "EnableCompression" flag to "true". | ||
| + | |||
| + | <span id="Issue: ENB Transparency/Translucency problem"></span> | ||
| + | === Issue - '''ENB''' Transparency or Translucency problem === | ||
| + | See through some weapons, walls, or the ground in some locations with ENB enabled. | ||
| + | * Cause-1: Conflicting settings. ENB has better support for nVidia than AMD, as that is what the developer uses so bear that in mind. AMD users may need to use "work-arounds". | ||
| + | :* Solution-1: Check the settings in both the GPU (video card) control panel AND the game options/INI. The following are separate solutions that have reported success, in order of popularity. | ||
| + | ::* The "anti-aliasing" option should be turned off in both. | ||
| + | ::* The "anistropic filtering" option should be turned off in both. | ||
| + | ::* "Water displacement" in the game options should be "off", and "HDR" should be "on". | ||
| + | ::* Set "iMultiSample=0" in your INI. | ||
| + | ::* Don't use the "Steam Overlay". Launch the game from a desktop shortcut after running the Steam Client, or go to Steam Options (in-game) and uncheck "Steam Overlay". Other DX overlays may also have a similar effect. | ||
| + | ::* Adjust ENB settings (in-game use "Shift-Enter" from the game's Main/Pause Menu to access the ENB menu; or edit the ENBLocal.INI file directly): | ||
| + | :::* Disable "Ambient Occlusion". | ||
| + | :::* Disable "Detailed Shadows". | ||
| + | :::* Save the changed settings, (and if in-game use "Shift-Enter" to return to the game and check the result). | ||
| + | |||
| + | * Cause-2: ENB incorporates a "Fix for Transparency bugs. From some people, this "fix" causes the problem instead. | ||
| + | |||
| + | :* Solution-2: Use the in-game editor (or in the ENBLocal.INI file); locate the "[FIX]" section (at the bottom of the INI file) and change the "FixTransparencyBugs=true" line to "=false". Save. | ||
| + | |||
| + | <span id="Issue: ENB Weather effects near water are 'off color'"></span> | ||
| + | === Issue - '''ENB''' Weather effects near water are ''off color'' === | ||
| + | Specifically, whenever entering a cell near the Colorado River, a strong purple hue affects the lighting and scenery. | ||
| + | * Cause: ENB preset is amplifying some weather effect color. | ||
| + | :* Solution: Adjust the ENB settings values for: | ||
| + | ::* NVHooverDamWeather | ||
| + | ::* NVWastelandClearEast | ||
| + | :: to exactly mention the regular wasteland weather. Include ambient light, fog, sky, etc, for all times of day. | ||
| + | :: This will take trial and error experimentation. See [[#Issue: Managing Post-Processor (ENB, SweetFX, FXAA) configurations|Issue: Managing Post-Processor (ENB, SweetFX, FXAA) configurations]] for preset managers that can incorporate your changes into your preferred preset. | ||
| + | |||
| + | <span id="Issue: Get ENB to work while in GECK"></span> | ||
| + | === Issue - Get '''ENB''' to work while in '''GECK''' === | ||
| + | * Cause: By default the ENBSeries is configured to not load when the GECK is started. | ||
| + | |||
| + | :* Solution: To get GECK to work with ENBSeries loaded so you can see ENB's effects while in the editor as well, try the following. | ||
| + | :: In the "enblocal.txt" file located in the game root folder (i.e. <SteamInstallPath>\steamapps\common\Fallout New Vegas"), set: | ||
| + | <code> | ||
| + | [FIX] | ||
| + | FixGameBugs=true | ||
| + | FixTransparencyBugs=true | ||
| + | IgnoreGECK=false ;<- set "false" from "true" | ||
| + | </code> | ||
| + | :: And get ready for GECK to take >20 seconds to load on startup. But it'll look pretty. | ||
| + | |||
| + | <span id="Issue: Image Modifications (IMODS, aka "fade to black", etc.) don't work"></span> | ||
| + | === Issue - Image Modifications ''aka '''IMODS''' aka fade to black'' etc do not work === | ||
| + | * Cause: Known problem with ENB, which prevents them from working as intended. | ||
| + | :* Solution-1: Try the mod [https://www.nexusmods.com/newvegas/mods/61891/? Imod emulator for ENB] by '''TommInfinite'''. Will pick up on any vanilla imod, but may not work for some quest mods that use their own imods. Safe to use with any save game as long as it's not in the middle of an imod effect. Requires [http://nvse.silverlock.org/ New Vegas Script Extender (NVSE)] and [http://www.nexusmods.com/newvegas/mods/57174/? User Interface Organizer (UIO)]. | ||
| + | :* Solution-2: Try to correct the problem with the console command: | ||
| + | :: <pre>SetImageSpaceModifiersEnable (aka "sisme"); "Set imagespace modifiers enable": 0-Off, 1-On.</pre> | ||
| + | |||
| + | <span id="Issue: Is ENBoost for everyone?"></span> | ||
| + | === Issue - Is '''ENBoost''' for everyone === | ||
| + | 4K textures put a massive strain on a game that never contemplated images greater than 2096x2096 pixels (generally considered "large" or "hi-rez" size images). Then you have to remember that [http://en.wikipedia.org/wiki/Graphics_display_resolution graphic display resolutions] are measured in "pixels per inch" ("ppi"), so a '''4K UHD''' (Ultra HD), also referred to as '''UHDTV-1''' or '''4K × 2K''', is a display resolution of 3840×2160 pixels (four times as many pixels as '''Full HD''' (FHD): 1920×1080 (aka '''1080p''', though more properly screens that use [http://en.wikipedia.org/wiki/Interlacing Interlacing] instead of ''Progressive scan'' are referred to as '''1080i'''), which was the usual design limit for later 32-bit games) in the same 16:9 [http://en.wikipedia.org/wiki/Display_aspect_ratio aspect ratio]. (Screens are measured diagonally, so it is not a simple "double each dimension" formula.) Then you have to account for "depth" as well as "color range" information as part of the memory requirement for each pixel. | ||
| + | |||
| + | [http://enbdev.com/download_patch_falloutnv.htm ENBoost] is considered virtually a requirement for 4K textures. Please see "Texture Size" on the TESTG site [http://web.archive.org/web/20170713081056/http://www.darkcreations.org/testg/wiki/Overview Overview] page regarding the visual effects of higher resolution image sizes and their display in games before choosing to use larger than default size image textures. | ||
| + | |||
| + | '''ENBoost''' is a memory management feature of the ENBSeries to address some of the limitations of 32-bit games. In the context of that very general statement it is similar to the 4GB LAA flag fix (i.e. [http://www.nexusmods.com/newvegas/mods/62552/? FNV 4GB Patcher]) that enables 32-bit games to use more than 2GB of RAM. However, it works differently by providing dynamic "intermediate speed" caching of video object geometry in system memory when the video adapter runs out of room, instead of CTD. This most commonly occurs when higher resolution texture mods are used. (For a more detailed explanation, see the [http://wiki.step-project.com/Guide:ENB#What_is_ENBoost.3F S.T.E.P. Project Guide:ENB] article.) | ||
| + | |||
| + | '''ENBoost''' is a stand-alone component called "enbhost.exe"; considered a memory and optimization "patch" to the ENB Series graphics effects process for the specific game with it's own version numbers. It is not involved with nor require the post-processing, so it does not impose the FPS loss that the ENBSeries is known for. Therefore, it is recommended for all users. See the S.T.E.P. Project [http://wiki.step-project.com/ENBoost#Recommendations ENBoost Quickstart Instructions] on how to install and configure for only this feature. If you have installed ENB correctly you should see on the loading screens (in the upper left corner) something similar to:<br> [[File:ENB_Load_Screen.JPG|border|300px|ENB Load Screen]].<br>Note the "available texture memory" line at the bottom. This should not be increased over the size reported before installing '''ENBoost''' by the [http://enbdev.com/download_vramsizetest.htm VRamSizeTest] tool available from the ENB download site. | ||
| + | |||
| + | <span id="Issue: Managing Post-Processor (ENB, SweetFX, FXAA) configurations"></span> | ||
| + | |||
| + | === Issue - Managing Post-Processor ''as in '''ENB''' or '''SweetFX''' or '''FXAA''''' configurations === | ||
| + | First you must recognize that any "post-processor" is going to have an adverse impact upon your game performance. They all add an "overhead", and often can cause some designed game and/or mod effects to no longer function. The choice is up to you, but remember that there are always trade-offs between "prettier" and "performance". | ||
| + | |||
| + | Some suggestions (thanks to s0cke of the Nexus FNV Forums) for those new to ENB and post-processors in general. | ||
| + | * Use an ENB Manager (below) if you plan to try out different "presets". | ||
| + | * In the "ENBSeries.INI" file, use the "[PROXY]" section with the following entries to add a DLL injector proxy library from another post-processor (like Reshade-SweetFX). See [[#Issue: SweetFX not working|Issue: SweetFX not working]] "Solution-4" for instructions. | ||
| + | * Check which version of ENB you are using. Some people find the "v01xx" series performs better than the later "v02xx" versions, even though they are less refined, do not have "ENB Boost", and have some transparency issues. | ||
| + | * When searching on the web, pay attention to which version the advice is directed towards. | ||
| + | * Some people find "ENB Boost" causes stuttering and performance issues when moving the camera around quickly. Experiment with it turned off ("DisableDriverMemoryManager=false"). | ||
| + | * If disabling Ambient Occlusion (SSAO), consider turning off "ubersampling" or decreasing the sampling range and quality instead. | ||
| + | * If disabling detailed shadows in the ENB config helps your performance, consider either making a choice between the two (SSAO and shadows) or looking into the variables for detailed shadow quality (set it to low, there is little to no difference on that one). | ||
| + | * Look at the "anti-aliasing" options: Turn off any temporal/accumulative/edge based AA here and use "Dynamic Super Resolution" (DSR: nVida)/Virtual Super Resolution (VSR: AMD/Radeon) to sample from a higher resolution instead. Also, turning down the ENB "enforced anisotropic filtering" a little, say to x12 can provide you with another 2 to 3 frames in some places. | ||
| + | |||
| + | The following management tools are intended primarily to allow you to keep track of and switch between different "preset" configurations, but may provide other capabilities. Most are for ENB, but one recognizes three different post-processors. Some provide the ability to include "in-game" changes in your own configuration files or back into the original preset. Read their download page descriptions carefully. Most are posted in the "Nexus Skyrim Mods" section, but are not specific to that game. Their ability to detect and work with other game folders is something to check. These are limited to Bethesda's Oblivion, FO3, FNV, and FO4 as well as Skyrim. | ||
| + | * [http://www.nexusmods.com/skyrim/mods/24402/? ENB Manager and Changer] by Legend Aeternus. Requires Java v7 (v8u45 jarfix seems to be the latest that will work according to comments). Last updated 15 Dec 2014. Supports FO3 according to comments, so likely others but not stated. | ||
| + | * [http://www.nexusmods.com/skyrim/mods/57620/? ENB Man] - An ENB Manager by Casmithy. Requires .NET Framework 4.5. Last updated 20 Jun 2016. Comments indicate support for FO3 and FNV, at least, so likely others but not stated. | ||
| + | * [http://www.nexusmods.com/skyrim/mods/67077/? ENB Organizer] by Breems. Requires .NET Framework 4.5. Last updated 24 Jul 2016. Multi-game support of at least Skyrim and FNV; others are likely but not stated. | ||
| + | * [http://www.nexusmods.com/skyrim/mods/7804/? ENB FXAA SweetFX Manager and Remover] by volvaga0. No requirements given. Last updated 09 Jun 2016. Supports all five games. | ||
| + | |||
| + | <span id="Issue: Problems using ENB/SweetFX - Long loading screen waits"></span> | ||
| + | === Issue - Problems using '''ENB''' or '''SweetFX''' - Long loading screen waits === | ||
| + | * Cause: Versions of Windows since Win7 have implemented various "caching improvements" intended to speed up games by "pre-fetching" anticipated video files from disk into VRAM. For some people, this seems to have the opposite effect. | ||
| + | :* Solution: Try disabling the [http://www.technipages.com/windows-enable-disable-superfetch Superfetch] feature to see if it improves the situation. (See [http://www.osnews.com/story/21471/SuperFetch_How_it_Works_Myths Superfetch: How it Works & Myths] for more detail.) | ||
| + | |||
| + | <span id="Issue: Problems using ENB/SweetFX alongside FNV4GB"></span> | ||
| + | === Issue - Problems using '''ENB''' or '''SweetFX''' - alongside '''FNV4GB''' === | ||
| + | The install instructions of "post-processors" generally don't anticipate the use of "indirect game launch" programs like FNV4GB.exe to enable the LAA Flag so the game will use more than 2GB of system memory. (See the wiki article [http://wiki.tesnexus.com/index.php/2-4GB_game_memory_limits_and_solutions 2-4GB game memory limits and solutions] for more details about the "LAA Flag" subject.) | ||
| + | |||
| + | * Cause: FNV4GB.exe is a "launcher" designed to work around issues with Steam checks for modified (i.e. "corrupted") EXE files by moving the original EXE file to another folder and internally launching it from there. It does a fine job of this, but if you are going to use "post-processors", their installation instructions have to be adjusted to accommodate it's changes. | ||
| + | |||
| + | :* Solution-1: The simplest solution is to switch to the newer [http://www.nexusmods.com/newvegas/mods/62552/? FNV 4GB Patcher] mod (by the same authors), which doesn't require moving the game EXE file to another folder, and thus let's you follow the originally provided install procedure for either ENB or SweetFX. | ||
| + | |||
| + | :* Solution-2: If for some reason you can't switch to the "FNV 4GB Patcher" and have to remain with FNV4GB.exe, then you need to put the ENB provided D3D9.DLL file in the "EXES" folder with the original "FalloutNV.exe" file. | ||
| + | |||
| + | Some suggestions (thanks to s0cke of the Nexus FNV Forums) for those new to ENB and post-processors in general. | ||
| + | * Use an ENB Manager (below) if you plan to try out different "presets". | ||
| + | * In the "ENBSeries.INI" file, use the "[PROXY]" section with the following entries to add a DLL injector proxy library from another post-processor (like Reshade-SweetFX). See [[#Issue: SweetFX not working|Issue: SweetFX not working]] "Solution-4" for instructions. | ||
| + | * Check which version of ENB you are using. Some people find the "v01xx" series performs better than the later "v02xx" versions, even though they are less refined, do not have "ENB Boost", and have some transparency issues. | ||
| + | * When searching on the web, pay attention to which version the advice is directed towards. | ||
| + | * Some people find "ENB Boost" causes stuttering and performance issues when moving the camera around quickly. Experiment with it turned off ("DisableDriverMemoryManager=false"). | ||
| + | * If disabling Ambient Occlusion (SSAO), consider turning off "ubersampling" or decreasing the sampling range and quality instead. | ||
| + | * If disabling detailed shadows in the ENB config helps your performance, consider either making a choice between the two (SSAO and shadows) or looking into the variables for detailed shadow quality (set it to low, there is little to no difference on that one). | ||
| + | * Look at the "anti-aliasing" options: Turn off any temporal/accumulative/edge based AA here and use "Dynamic Super Resolution" (DSR: nVida)/Virtual Super Resolution (VSR: AMD/Radeon) to sample from a higher resolution instead. Also, turning down the ENB "enforced anisotropic filtering" a little, say to x12 can provide you with another 2 to 3 frames in some places. | ||
| + | |||
| + | The following management tools are intended primarily to allow you to keep track of and switch between different "preset" configurations, but may provide other capabilities. Most are for ENB, but one recognizes three different post-processors. Some provide the ability to include "in-game" changes in your own configuration files or back into the original preset. Read their download page descriptions carefully. Most are posted in the "Nexus Skyrim Mods" section, but are not specific to that game. Their ability to detect and work with other game folders is something to check. These are limited to Bethesda's Oblivion, FO3, FNV, and FO4 as well as Skyrim. | ||
| + | |||
| + | * [http://www.nexusmods.com/skyrim/mods/24402/? ENB Manager and Changer] by Legend Aeternus. Requires Java v7 (v8u45 jarfix seems to be the latest that will work according to comments). Last updated 15 Dec 2014. Supports FO3 according to comments, so likely others but not stated. | ||
| + | * [http://www.nexusmods.com/skyrim/mods/57620/? ENB Man] - An ENB Manager by Casmithy. Requires .NET Framework 4.5. Last updated 20 Jun 2016. Comments indicate support for FO3 and FNV, at least, so likely others but not stated. | ||
| + | * [http://www.nexusmods.com/skyrim/mods/67077/? ENB Organizer] by Breems. Requires .NET Framework 4.5. Last updated 24 Jul 2016. Multi-game support of at least Skyrim and FNV; others are likely but not stated. | ||
| + | * [http://www.nexusmods.com/skyrim/mods/7804/? ENB FXAA SweetFX Manager and Remover] by volvaga0. No requirements given. Last updated 09 Jun 2016. Supports all five games. | ||
| + | |||
| + | <span id="Issue: Problems using ENB/SweetFx on Windows 10"></span> | ||
| + | === Issue - Problems using '''ENB''' or '''SweetFX''' - on '''Windows 10''' === | ||
| + | * Cause: Win10 has DirectX12 drivers, but the DX9 driver the game is expecting is not being found. | ||
| + | :* Solution: Please see 'Solution-1' under 'Cause-1' of [[#Issue:_Vanilla_game_Hangs_on_startup|Issue: Vanilla game Hangs on startup]]. Then, after installing ENB/SweetFX, copy and paste '''D3D11.dll''' and '''DXGI.dll''' from your ''System32'' folder into your game root folder (where the game "EXE" file resides). | ||
| + | |||
| + | <span id="Issue: Render Error using ENB/SweetFX"></span> | ||
| + | === Issue - Render Error using '''ENB''' or '''SweetFX''' === | ||
| + | * Cause: Both '''ENB''' and '''SweetFX''' install files to "help" with rendering their graphic effects. These usually take the form of "local folder copies" of system '''DirectX''' files. The problem is that different games may require compliant versions of these libraries for different versions of '''DirectX'''. AND the post processors use "effect search directories" (aka "search paths") to locate such files. If more than one version is found in those search paths, the conflict in libary versions can cause such errors. Some "pre-sets" or mods may unexpectedly include such files. Look for any log files used by the "pre-set" as well for other clues. These are usually found in the game "root" folder (where the game "EXE" file is found). | ||
| + | : Examples of such "helper files" include "dxgi.fx", "dxgi.dll", and "d3d9.dll". Look for any "*.dll" and "*.fx*" file extensions. Check the "Properties" for the "version" information. | ||
| + | :* Solution: Remove your previous, unused preset or "post processor" "helper" files. These may not have been cleaned out when uninstalling the mod or "pre-set". You could simply rename any you find and re-install the mod or pre-set if unsure which belong. | ||
| + | :: Check the "search paths" used by the "post-processor" to ensure other games' folders are not included. This may require setting up "batch/cmd" files to adjust such search paths for the respective games. These "search paths" are in "environmental variables" that can be displayed by entering just the single word "set" command in a command line prompt. | ||
| + | |||
| + | : See also [[#Issue: Problems using ENB/SweetFx on Windows 10|Issue: Problems using ENB/SweetFx on Windows 10]]. | ||
| + | |||
| + | <span id="Issue: SweetFX not working"></span> | ||
| + | === Issue - '''SweetFX''' is not working === | ||
| + | * Cause-1: Attempted to install with a mod manager. | ||
| + | |||
| + | :* Solution-1: Similar to ENB, SweetFX needs to place it's files in the game root folder, or wherever the original game executable resides. Do NOT attempt to install with a mod manager (they assume files need to go into the "Data" sub-folder). | ||
| + | |||
| + | * Cause-2: SweetFX uses much the same trick as overlays like FRAPS, Overwolf, and the Steam Overlay do; so they can conflict. It does have some allowance for working with the Steam Overlay, but this is not always successful. | ||
| + | |||
| + | :* Solution-2: Disable the other overlays. See the sub-topic "[[#Issue: How to disable the Steam Overlay|Issue: How to disable the Steam Overlay]]". | ||
| + | |||
| + | * Cause-3: Can't SweetFX be used with FNV4GB? | ||
| + | |||
| + | :* Solution-3a: Place the SweetFX DLL files in the "Fallout New Vegas\exes" folder, along with the original "FalloutNV.EXE" file moved there when installing the FNV4GB executable. | ||
| + | |||
| + | :* Solution-3b: Switch to the newer [http://www.nexusmods.com/newvegas/mods/62552/? FNV 4GB Patcher] (by the same authors), which doesn't require any alterations to the installation instructions (such as moving the original "FalloutNV.EXE" file). | ||
| + | |||
| + | * Cause-4: Can't find "CreateDXGIfactory". | ||
| + | :* Solution-4: "The entry point CreateDXGIFactory1 requires the support of DXGI 1.1 which is available on Windows 7, Windows Server 2008 R2, and as an update to Windows Vista (KB971644). If you are using Vista and only have DXGI 1.0, please install this [http://support.microsoft.com/kb/971644 Vista Platform DXGI v1.1 Update]." - [http://www.tomshardware.com/forum/251596-44-procedure-entry-point-createdxgifactory1-located tomshardware.com]. This is part of the DirectX drivers. See "Cause-1" under [[#Issue:_Vanilla_game_Hangs_on_startup|Issue: Vanilla game Hangs on startup]]. | ||
| + | |||
| + | * Cause-5: Can't SweetFX be used with ENB? | ||
| + | |||
| + | :* Solution-5: Note that both SweetFX and ENB have their own D3D9.DLL files. It is necessary to enable both to be used. Reshade/SweetFX doesn't provide a "ProxyLibrary" mechanism, but ENB does. The following procedure assumes both post-processors are installed separately and are not packaged as a single combination archive. | ||
| + | ::* Uninstall any previous installations of both SweetFX and ENB. | ||
| + | ::* Install SweetFX and it's preset first. | ||
| + | :::* Configure it according to it's documentation. | ||
| + | :::* Open the game. | ||
| + | ::::* Use the "<Scroll Lock> key" to toggle SweetFX on and off. | ||
| + | ::::* Enable the "monochrome" setting to confirm visually that SweetFX is working correctly. | ||
| + | :::* Close the game. | ||
| + | ::* Rename the Reshade DLL file to either "d3d9_something.dll" (for DirectX 8 or 9 games), or to "dxgi_something.dll" (for DirectX 10 or 11 games). This filename is what you put in the "ProxyLibrary" line of the "ENBSeries.INI" file. In this example we rename it to "d3d9_SWEETFX.dll". | ||
| + | ::* Now install the ENB files: both the main series "Graphic Modifications" and any applicable patch, and the chosen preset files. See sub-topic [[#Issue: ENB is not working|Issue: ENB is not working]] for general installation instructions. If planning to test more than one preset, consider an ENB Manager (see sub-topic [[#Issue: Managing Post-Processor (ENB, SweetFX, FXAA) configurations|Issue: Managing Post-Processor (ENB, SweetFX, FXAA) configurations]]). | ||
| + | ::* Configure ENB and check that it is working correctly. | ||
| + | ::* Exit the game. | ||
| + | ::* Now, edit the "ENBseries.INI" file (in the game root folder: i.e. "<Steam install path>\common\Fallout New Vegas") with the following: | ||
| + | <code> | ||
| + | [PROXY] | ||
| + | EnableProxyLibrary=true | ||
| + | InitProxyFunctions=true (some say this needs to be "false". If you have problems, try switching it.) | ||
| + | ProxyLibrary=d3d9_SWEETFX.dll (or whatever.) | ||
| + | </code> | ||
| + | ::: and save. | ||
| + | |||
| + | ::* When you start the game now you should be able to see effects from both post-processors. Look for the ENB message on the title screen, and use the "<Scroll Lock> key" to toggle SweetFX. You don't need to load a save to see the effects of both. If all appears well, then try loading a save game and check the results. | ||
| + | ::* If the game crashes, try temporarily disabling one or both of the effects. | ||
| + | :::* For ENB, use "<Shift+F12> key" to toggle entirely; or "<Shift+Enter>" to enter the editor mode and disable the "use effects" checkbox. | ||
| + | :::* For SweetFX, use the "<Scroll Lock> key" to toggle it's state. | ||
==References== | ==References== | ||
| − | * [http://nvse.silverlock.org/ New Vegas Script Extender] | + | (Generally in order of first appearance within the article.) |
| − | * [http://www.nexusmods.com/newvegas/mods/58277/? JIP NVSE Plugin] | + | |
| − | * [http://www.nexusmods.com/newvegas/mods/ | + | === Refs [[#Overview|Overview]] === |
| − | * [http:// | + | * [http://forums.nexusmods.com/index.php?/topic/5495032-fallout-nv-mod-conflict-troubleshooting-guide/ "Fallout NV Mod Conflict Troubleshooting" thread] |
| − | * [ | + | * [[How_to_ask_for_help|How to ask for help]] |
| − | * [http://www.nexusmods.com/newvegas/mods/55061/? | + | |
| + | === Refs [[#Checklist|Checklist]] === | ||
| + | * [http://www.howtogeek.com/howto/windows-vista/guide-to-using-check-disk-in-windows-vista/ chkdsk] | ||
| + | * [http://www.howtogeek.com/howto/windows-vista/using-windows-vista-system-restore/ restore point] | ||
| + | * [http://nvse.silverlock.org/ New Vegas Script Extender (NVSE)] | ||
| + | * [http://www.nexusmods.com/newvegas/mods/58277/? JIP LN NVSE Plugin] | ||
| + | * [http://www.loverslab.com/files/file/553-nvse-extender-aka-nx/ NX] | ||
| + | * [[How_to_read_most_Bethesda_game_error_logs|How to read most Bethesda game error logs]] | ||
| + | * [http://www.nexusmods.com/newvegas/mods/42507/? Mod Configuration Menu (MCM)] | ||
| + | * [http://www.nexusmods.com/newvegas/mods/44757/? One HUD (oHUD)] | ||
| + | * [http://www.nexusmods.com/newvegas/mods/57174/? User Interface Organizer (UIO)] | ||
| + | * [[HUD-UI-Menu_issues|HUD-UI-Menu issues]] | ||
| + | * [[2-4GB_game_memory_limits_and_solutions|2-4GB game memory limits and solutions]] | ||
| + | * [http://www.nexusmods.com/newvegas/mods/55061/? 4GB Fallout New Vegas Updated] | ||
| + | * [http://www.nexusmods.com/newvegas/mods/62552/? FNV 4GB Patcher] | ||
* [http://enbdev.com/index_en.html ENB] | * [http://enbdev.com/index_en.html ENB] | ||
* [http://reshade.me/sweetfx SweetFX] | * [http://reshade.me/sweetfx SweetFX] | ||
| − | * [ | + | * [http://loot.github.io/ LOOT] |
| − | * [http:// | + | * [http://loot.github.io/docs/ LOOT online manual] |
| − | * [http://www.nexusmods.com/newvegas/mods/ | + | * [[Load_order_and_you|Load order and you]] |
| − | * [http://www.nexusmods.com/newvegas/mods/ | + | * [http://github.com/Gruftikus/tes4ll TES4LL] |
| − | * [http://www.nexusmods.com/newvegas/mods/ | + | * [http://web.archive.org/web/20170713081056/http://www.darkcreations.org/testg/wiki/Main_Page TESTG] |
| + | * [http://www.nexusmods.com/newvegas/mods/58562/? FNVLODGen] | ||
| + | * [http://www.nexusmods.com/newvegas/mods/34703/? FNVEdit] | ||
| + | * [[Missing_Masters|Missing Masters]] | ||
| + | * [http://tes5edit.github.io/docs/index.html Tome of xEdit] Current online manual for all games | ||
| + | * [http://www.nexusmods.com/newvegas/mods/38413/? FNVEdit Training Manual] (PDF) | ||
* [http://www.nexusmods.com/newvegas/mods/35003/? Wrye Flash] | * [http://www.nexusmods.com/newvegas/mods/35003/? Wrye Flash] | ||
| − | * [http://www.darkcreations.org/testg/wiki/Troubleshooting TESTG Troubleshooting] | + | * [http://wiki.step-project.com/Guide:Merging_Plugins S.T.E.P. Merging Plugins Guide] |
| + | * [http://www.youtube.com/watch?v=yq-fqpL5LqE Making a Merge Patch by Roy Batty] | ||
| + | * [http://www.nexusmods.com/oblivion/mods/35230/? Wrye Bash Pictorial Guide] | ||
| + | * [http://forums.nexusmods.com/index.php?/topic/2247404-fallout-new-vegas-beginners-guide-to-modding/ Fallout New Vegas Beginners guide to modding] by gromulos | ||
| + | * [http://www.systemrequirementslab.com/cyri/requirements/fallout-new-vegas/11035 FalloutNV minimum System requirements] | ||
| + | * [[Installing_Games_on_Windows_Vista%2B|Installing Games on Windows Vista+]] | ||
| + | * [http://www.nexusmods.com/newvegas/mods/59266/? One Tweak for FNV] | ||
| + | * [http://www.almico.com/speedfan.php Speedfan] (freeware) | ||
| + | |||
| + | === Refs [[#ArchiveInvalidation (by Manager)|ArchiveInvalidation (by Manager)]] === | ||
| + | * [http://forums.nexusmods.com/index.php?/topic/3538840-should-i-really-need-to-update-my-invalidation-file-by-hand/#entry31870835 This post on manual invalidation] | ||
| + | * [http://www.nexusmods.com/newvegas/mods/42572/? Mod Organizer (MO)] | ||
| + | * [http://www.nexusmods.com/newvegas/mods/36901/? Fallout Mod Manager (FOMM)] | ||
| + | * [http://www.nexusmods.com/newvegas/mods/modmanager/ Nexus Mod Manager (NMM)] | ||
| + | * [http://www.nexusmods.com/newvegas/mods/54991/ Fallout Mod Manager - Forked (FOMM-Forked)] | ||
| + | * [[Archive_invalidation|Archive invalidation]] Wiki article | ||
| + | * [http://web.archive.org/web/20170713081056/http://www.darkcreations.org/testg/wiki/Troubleshooting TESTG Troubleshooting] | ||
| + | |||
| + | === Refs [[#Mod Conflict Isolation|Mod Conflict Isolation]] === | ||
| + | * [http://www.uesp.net/wiki/Tes4Mod:Clean_Save Tes4Mod:Clean-Save procedure] | ||
| + | |||
| + | === Refs [[#Towards_Game_Stability|Towards Game Stability]] === | ||
| + | * [http://www.youtube.com/watch?v=KkVWoccWoXY Performance & Stability Guide] YouTube video for "Tale of Two Wastelands (TTW)". | ||
| + | |||
| + | === Refs [[#Solutions to Starting the game problems|Solutions to Starting the game problems]] === | ||
| + | * [http://www.eassos.com/how-to/fix-error-code-0xc0000005.php How to fix error code 0xc0000005] | ||
| + | * [http://www.gog.com/galaxy GOG Galaxy] | ||
| + | * [http://www.gog.com/forum/fallout_series#1496664056 GOG forums for FNV] | ||
| + | * [http://support.microsoft.com/en-us/help/4058043/microsoft-store-reliability-improvements-for-windows-10-version-1709-d KB4058043, December 15, 2017] | ||
| + | * [http://www.redhat.com/en/blog/what-are-meltdown-and-spectre-here%E2%80%99s-what-you-need-know What are Meltdown and Spectre] | ||
| + | * [http://blogs.technet.microsoft.com/srd/2017/08/09/moving-beyond-emet-ii-windows-defender-exploit-guard/ Windows Defender Exploit Guard (WDEG)] | ||
| + | * [http://www.youtube.com/watch?v=ABuFjGBbyWA WDEG video] Video | ||
| + | * [http://www.ghacks.net/2017/10/25/configure-windows-defender-exploit-guard-in-windows-10/ Configure Windows Defender Exploit Guard (WDEG) in Windows 10] | ||
| + | * [http://support.microsoft.com/en-us/help/2458544/the-enhanced-mitigation-experience-toolkit Enhanced Mitigation Experience Toolkit (EMET) 5.52] | ||
| + | * [http://partner.steamgames.com/doc/store/localization Steam localization] | ||
| + | * [http://www.nexusmods.com/newvegas/mods/65508 Voice Actor BSA files] | ||
| + | * [http://www.nexusmods.com/newvegas/mods/53635/? New Vegas AntiCrash (NVAC)] | ||
| + | * [http://www.makeuseof.com/tag/take-back-control-driver-updates-windows-10/ Taking back control of Windows 10 driver updates] | ||
| + | * [http://www.microsoft.com/en-us/download/details.aspx?id=8109 DirectX End-User Runtimes (June 2010)] | ||
| + | * [http://answers.microsoft.com/en-us/windows/forum/games_windows_10/how-to-make-win10-run-directx-90/c7b61bc6-0b5e-4233-aefe-cfbe3c49d930 How to make Win10 run DirectX 9.0] | ||
| + | * [http://www.nexusmods.com/fallout3/mods/17209/? Intel HD graphics Bypass package] | ||
| + | * [http://www.dependencywalker.com/ Dependency Walker] | ||
| + | * [http://forums.nexusmods.com/index.php?/forum/350-new-vegas-technical-support/ New Vegas Technical Support Forum] | ||
| + | * [http://fallout.wikia.com/wiki/Fallout:_New_Vegas_bugs Wikia Fallout Portal: New Vegas Bugs] | ||
* [http://www.nexusmods.com/newvegas/mods/34832/? New Vegas Stutter Remover (NVSR)] | * [http://www.nexusmods.com/newvegas/mods/34832/? New Vegas Stutter Remover (NVSR)] | ||
| − | |||
* [http://www.nexusmods.com/newvegas/mods/51871/? Better Game Performance] | * [http://www.nexusmods.com/newvegas/mods/51871/? Better Game Performance] | ||
* [http://www.nexusmods.com/newvegas/mods/51664/? Yukichigai Unofficial Patch (YUP)] | * [http://www.nexusmods.com/newvegas/mods/51664/? Yukichigai Unofficial Patch (YUP)] | ||
* [http://www.nexusmods.com/newvegas/mods/45104/? Mission Mojave Ultimate Edition - FNV Community Patch (MMUE)] | * [http://www.nexusmods.com/newvegas/mods/45104/? Mission Mojave Ultimate Edition - FNV Community Patch (MMUE)] | ||
* [http://www.nexusmods.com/newvegas/mods/44204/? New Vegas Enhanced Content (NVEC)] | * [http://www.nexusmods.com/newvegas/mods/44204/? New Vegas Enhanced Content (NVEC)] | ||
| − | * [ | + | * [http://www.nexusmods.com/newvegas/mods/51871/? Better Game Performance] |
| − | * [http://www. | + | * [[Merged_Plugin_Guidelines_for_Personal_Use|Merged Plugin Guidelines for Personal Use]] |
| − | * [http://www.nexusmods.com/newvegas/mods/ | + | * [http://www.petges.lu/home/ Attribute Changer] |
| − | * [http://www.nexusmods.com/newvegas/mods/ | + | * [http://youtu.be/pabbSXENSlI How to FIX Steam Preparing to Launch Loop other Steam Problems] |
| − | * [http:// | + | |
| − | * [http:// | + | === Refs [[#Solutions to Performance problems|Solutions to Performance problems]] === |
| − | * [http://www. | + | * [http://www.youtube.com/watch?time_continue=488&v=plWow9dGI70 Modding Fallout NV 'Ultimate Edition' part 7 : Performance] 19:05 minute, 2012 Video by '''Gopher'''. |
| − | * [https://forums.nexusmods.com/index.php?/topic/ | + | * [http://www.nexusmods.com/newvegas/mods/61265 OGG Vorbis Libraries] by '''KaneWright'''. |
| − | * [http://www. | + | * [http://www.nexusmods.com/newvegas/mods/65854 FNV BSA Decompressor] by '''zilav'''. |
| − | * [http://www. | + | * [http://docs.microsoft.com/en-us/sysinternals/downloads/process-explorer Process Explorer] by '''SysInternals'''. |
| − | * [http://wiki. | + | * [http://rd.nexusmods.com/newvegas/mods/41381 Fake fullscreen] by '''BUDA20'''. |
| − | * [ | + | * [http://rd.nexusmods.com/newvegas/mods/42956 Game Companion - Fake FullScreen] by '''BUDA20'''. |
| + | * [http://github.com/Codeusa/Borderless-Gaming Borderless Gaming] by '''Codeusa'''. | ||
| + | * [https://web.archive.org/web/20161008023921/http://www.tweakguides.com/TGTC.html Complete System customization and optimization for Windows]. | ||
| + | * [https://web.archive.org/web/20161004212522/http://www.tweakguides.com/ATICAT_1.html Tweakguide's ATI Catalyst Guide] (driver optimizations for all games.) | ||
| + | * [https://web.archive.org/web/20160719081231/http://www.geforce.com/whats-new/guides/new-vegas-tweak-guide#1 Tweakguide's nVidia GeForce Guide] (driver optimizations for all games.) | ||
| + | * [https://web.archive.org/web/20161025065631/http://www.tweakguides.com/Fallout3_1.html Tweakguide's General Fallout game guide] (specifically for FO3 and FNV.) | ||
| + | * [http://forums.nexusmods.com/index.php?/topic/1197661-nvac-new-vegas-anti-crash/page-352#entry15646425 NVAC support thread] | ||
| + | * [http://www.nexusmods.com/newvegas/mods/40442/? New Vegas Configator] | ||
| + | * [http://msdn.microsoft.com/virtualization/hyperv_on_windows/quick_start/walkthrough_compatibility HyperV on Windows compatibility] | ||
| + | * [http://www.youtube.com/watch?v=sJOrDhghr60 Fallout New Vegas | FPS & Stability (definitive guide)] 12:11 minute, 2018 Video by '''GamerPoets'''. | ||
| + | * [http://taleoftwowastelands.com/viewtopic.php?t=6050 Tale of Two Wastelands (TTW) Performance Guide] | ||
| + | * [https://taleoftwowastelands.com/download/file.php?id=2998 NVSR INI for Newer Processors] Last updated 15 Dec 2017. Login to the TTW site is required for access. | ||
| + | * [https://taleoftwowastelands.com/download/file.php?id=2997 NVSR INI for Older Processors] Last updated 15 Dec 2017. Login to the TTW site is required for access. | ||
| + | * [http://taleoftwowastelands.com/viewtopic.php?p=55126#p55126 Configuring ENB Fallout New Vegas & TTW] by '''MajinCry'''. | ||
| + | * [http://download.orbmu2k.de/download.php?id=51 nVidia Inspector] | ||
| + | * [http://www.youtube.com/watch?v=syE55-jEzb8 Increase nVidia GTX performance with nVidia Inspector] | ||
| + | * [http://pcgamingwiki.com/wiki/NVIDIA_Profile_Inspector NVIDIA Profile Inspector] | ||
| + | * [http://www.amd.com/en-gb/innovations/software-technologies/catalyst AMD Catalyst Control Center] | ||
| + | * [http://www.radeonpro.info/2013/04/download-radeonpro-preview-1-1-1-0-13apr2013-with-improved-overdrive-and-sweetfx-1-4-support/ Radeon Pro] | ||
| + | * [http://www.radeonpro.info/2014/03/important-announcement-about-radeonpro/ AMD Gaming Evolved's Raptr] | ||
| + | * [http://www.auslogics.com/en/software/disk-defrag/ Disk Defrag] (freeware) | ||
| + | * [http://www.technipages.com/windows-enable-disable-superfetch Superfetch] | ||
| + | * [http://helpdeskgeek.com/windows-7/windows-7-file-search-indexing-options/ File Search Indexing] | ||
| + | * [http://hardforum.com/threads/how-vsync-works-and-why-people-loathe-it.928593/ How VSync works, and why people loathe it] | ||
| + | * [http://www.cccp-project.net/ CCCP codec pack] | ||
| + | * [http://ffdshow-tryout.sourceforge.net/ ffdshow tryouts] | ||
| + | * [http://www.codecguide.com/ K-Lite Codec Pack] | ||
| + | * [http://www.nexusmods.com/newvegas/mods/35868/? DirectShow Filter _Codec_ Reset] by '''Blade FireLight''' | ||
| + | * [http://www.howtogeek.com/howto/windows-vista/using-windows-vista-system-restore/ HEED THE WARNING ABOUT CREATING A 'SYSTEM RESTORE POINT' FIRST!] | ||
| + | * [http://www.youtube.com/watch?v=vpQShdafsFA Tutorial - Fallout New Vegas Radio Fix] video by '''KitsuneJimmy''' | ||
| + | * [http://mp3gain.sourceforge.net/ MP3Gain] | ||
| + | * [http://www.howtogeek.com/howto/windows-vista/using-windows-vista-system-restore/ Create a Windows System Restore Point] | ||
| + | * [http://www.microsoft.com/en-us/download/details.aspx?id=49975 Use Reset to restore your Windows 10 PC] | ||
| + | * [http://www.raymond.cc/blog/fix-video-playback-problems-by-removing-bad-codecs/ Removing bad codec Tools] | ||
| + | * [http://fallout.wikia.com/wiki/Portal:Fallout:_New_Vegas Wikia's Nukapedia] | ||
| + | * [http://fallout.gamepedia.com/Portal:Fallout:_New_Vegas Gamepedia's The Vault] | ||
| + | * [http://fallout.gamepedia.com/Gamebryo_and_Creation_console_commands_(all) Gamebryo and Creation console commands (all)] | ||
| + | :* [http://geckwiki.com/index.php/Radio_Stations Talking Activators] | ||
| + | :* [http://geckwiki.com/index.php/GetBroadcastState GetBroadcastState] | ||
| + | :* [http://geckwiki.com/index.php/GetDisabled GetDisabled] | ||
| + | :* [http://geckwiki.com/index.php/SetBroadcastState SetBroadcastState] | ||
| + | * [http://www.nexusmods.com/newvegas/mods/62555 Radio New Vegas Everywhere] by '''EPDGaffney''' | ||
| + | * [http://www.nexusmods.com/newvegas/mods/62551/? Music Pack for Radio NV - ver 1.3] by '''EPDGaffney''' | ||
| + | * [http://support.microsoft.com/en-us/help/322267/removing-client-for-microsoft-networks-removes-other-services Client for Microsoft Networks] | ||
| + | * [http://blogs.technet.microsoft.com/windows_vpc/2009/12/06/networking-in-windows-virtual-pc/ Virtual PC Network Filter Driver] | ||
| + | * [http://answers.microsoft.com/en-us/windows/forum/windows8_1-performance/qos-packet-scheduler-bug/5793456c-a5be-48de-abd8-839d9fcbf452 QoS Packet Scheduler] | ||
| + | * [http://support.microsoft.com/en-us/help/199346/disable-file-and-printer-sharing-for-additional-security File and Printer Sharing for Microsoft Networks] | ||
| + | * [http://en.wikipedia.org/wiki/Link_Layer_Topology_Discovery Link-Layer Topology Discovery] | ||
| + | * [http://hardforum.com/threads/how-vsync-works-and-why-people-loathe-it.928593/ How VSync works, and why people loathe it] | ||
| + | * [http://taleoftwowastelands.com/content/ttw-performance-guide Tale of Two Wastelands (TTW) Performance Guide] | ||
| + | |||
| + | === Refs [[#Solutions to "Crash To Desktop" (CTD) problems|Solutions to "Crash To Desktop" (CTD) problems]] === | ||
* [http://www.nexusmods.com/newvegas/mods/36730/? CASM] | * [http://www.nexusmods.com/newvegas/mods/36730/? CASM] | ||
* [http://www.nexusmods.com/newvegas/mods/45652/? CASM with MCM] | * [http://www.nexusmods.com/newvegas/mods/45652/? CASM with MCM] | ||
| + | * [http://www.nexusmods.com/newvegas/mods/62181/? Simple Saves] | ||
* [http://www.nexusmods.com/newvegas/mods/57465 Clean Quick Saves] | * [http://www.nexusmods.com/newvegas/mods/57465 Clean Quick Saves] | ||
| − | * [ | + | * [http://www.nexusmods.com/newvegas/mods/56651 Skippable DLC Cutscenes] |
| − | * [http:// | + | * [http://forums.windowssecrets.com/showthread.php/164357-Wndows-logo-key-equivalent-in-non-windows-keyboards Windows logo key equivalent in non-windows keyboards] |
| − | * [ | + | * [http://www.nexusmods.com/fallout3/mods/23188 Kill Fallout 3] by '''raz3rITA''' |
| + | |||
| + | === Refs [[#Solutions to Control problems|Solutions to Control problems]] === | ||
| + | * [http://www.nexusmods.com/newvegas/mods/63735/? Console Fix Glasses] by '''Random Unit''' | ||
| + | * [http://www.nexusmods.com/newvegas/mods/63747/? Console Key Rebinder] by '''Random Unit''' | ||
| + | * [http://github.com/Phaiax/PxKeystrokesForScreencasts PxKeystrokesForScreencasts] by '''Phaiax'''. | ||
| + | * [http://aalapshah.in/qipress/ QiPress] by '''aalapshah'''. Lite version is free; Pro version $30. | ||
| + | * [http://ui.darnified.net/wip/DUIFONV/v1/DUINVv04.7z DarNified UI] (DarnUI) | ||
| + | * [http://www.nexusmods.com/newvegas/mods/40471/? Alternative fonts for DarNified UI] | ||
| + | * [http://www.nexusmods.com/newvegas/mods/51066/? Alternative Fonts Pack for DarNifiedUI (with cyrillic support)] | ||
| + | * [http://www.nexusmods.com/newvegas/mods/60847/? HD More Alternate Fonts for DarNified UI] (in double resolution) | ||
| + | * [http://forums.bethsoft.com/topic/1143482-wipzbeta-darnified-ui-nv/ DarnUI support thread] | ||
| + | * [http://www.nexusmods.com/newvegas/mods/54611/? DarnifiedUI Configuration] | ||
| + | * [http://www.nexusmods.com/newvegas/mods/39651 Weapon Mods Expanded (WMX)] | ||
| + | * [http://www.nexusmods.com/newvegas/mods/44515 The Weapon Mod Menu (WMM)] | ||
* [http://www.xpadder.com/?lang=english Xpadder] ($9.99) | * [http://www.xpadder.com/?lang=english Xpadder] ($9.99) | ||
* [http://www.majorgeeks.com/files/details/xpadder_%28last_freeware_version%29.html Xpadder v5.3] (last freeware version: 13 Apr 2008) | * [http://www.majorgeeks.com/files/details/xpadder_%28last_freeware_version%29.html Xpadder v5.3] (last freeware version: 13 Apr 2008) | ||
| − | * [http://www. | + | * [http://dualmonitortool.sourceforge.net/ Dual Monitor Tools] (open source tool) |
| − | * [http://www.nexusmods.com/newvegas/mods/ | + | * [http://www.nexusmods.com/newvegas/mods/59266/? OneTweak] (NVSE plugin mod) |
| − | * [http://www.nexusmods.com/newvegas/mods/ | + | * [http://www.nexusmods.com/newvegas/mods/57843/? FullScreenWindowedMode] (NVSE plugin mod) |
| + | * [http://geck.bethsoft.com/index.php?title=DisableButton GECK: DisableButton] | ||
| + | * [http://fallout.wikia.com/wiki/Gamebryo_console_commands Gamebryo Console Commands] | ||
| + | * [http://en.wikipedia.org/wiki/Display_resolution Wikipedia on "Display resolution"] | ||
| + | |||
| + | === Refs [[#Solutions to "Garden of Eden Construction Kit" (G.E.C.K.) problems|Solutions to "Garden of Eden Construction Kit" (G.E.C.K.) problems]] === | ||
| + | * [http://geck.bethsoft.com/index.php?title=Main_Page GECK Wiki Download] | ||
| + | * [http://www.nexusmods.com/newvegas/mods/41642/? GECK 1.4 Powerup] | ||
| + | * [http://www.cipscis.com/fallout/utilities/validator.aspx CIPSCIS Script Validator] | ||
| + | * [http://support.microsoft.com/en-us/kb/3000850 Microsoft Knowledge Base article 3000850] | ||
| + | * [http://i.imgur.com/8qPH9h8.png Collapsed Text Field Figure] | ||
| + | |||
| + | === Refs: [[#Solutions to Graphics problems|Solutions to Graphics problems]] === | ||
| + | * [http://www.nexusmods.com/newvegas/mods/55709/? Gun Follows Crosshairs in First Person] by '''Grasscid''' | ||
| + | * [http://www.nexusmods.com/newvegas/mods/35781/? First Person Gun No Follow] by '''Azrael Dark''' | ||
* [http://www.tweakguides.com/Fallout3_8.html TweakGuides] | * [http://www.tweakguides.com/Fallout3_8.html TweakGuides] | ||
| − | * [http://www. | + | * [http://www.nexusmods.com/newvegas/mods/55085/? FOV Slider] by '''Roy Batty''' |
| − | * [ | + | * [http://www.nexusmods.com/newvegas/mods/65052 Weapon Mesh Improvement Mod] by '''Roy Batty''' |
| − | * [http:// | + | * [http://rd.nexusmods.com/newvegas/mods/59147 Ragdolls] by '''MadAce''' |
| − | * [http:// | + | * [http://www.nexusmods.com/newvegas/mods/64745 BSArch] |
| − | * [ | + | * [http://geck.bethsoft.com/index.php?title=Gun_Spread_Formula GECK: Gun Spread Formula] |
| − | * [http://www.nexusmods.com/newvegas/mods/ | + | * [http://www.nexusmods.com/newvegas/mods/34744/? Centered 3rd Person Camera] by '''Jahandar''' |
| + | * [http://www.nexusmods.com/newvegas/mods/57588/? Dynamic Third Person Camera] by '''claustromaniac''' | ||
| + | * [http://www.nexusmods.com/newvegas/mods/44207/? 3rd-Person-Camera-FIX] by '''humannature66''' | ||
| + | * [http://www.nexusmods.com/newvegas/mods/36773/? Further 3rd Person Camera] by '''Silverglade''' | ||
| + | * [http://www.nexusmods.com/newvegas/mods/34723/? No Auto Aim] by '''EddieV223''' | ||
| + | * [http://www.nexusmods.com/newvegas/mods/36057/? Advanced VATS and FIXED Autoaim with Improved Binoculars] by '''orgolove''' | ||
| + | * [http://www.nexusmods.com/fallout3/mods/15319/? Greatly improved 3rd person aiming] by '''Peste''' | ||
| + | * [http://www.nexusmods.com/newvegas/mods/48509/? Improved Automatic Ironsight animations] | ||
| + | * [http://www.nexusmods.com/newvegas/mods/212/? Enhanced Blood textures(EBT)] by '''dDefinder'''. | ||
| + | * [http://forum.step-project.com/topic/8963-fallout-new-vegas-default-values-for-all-valid-ini-settings/ Fallout New Vegas Default Values for All Valid INI Settings] | ||
| + | * [http://rd.nexusmods.com/newvegas/mods/59147 Ragdolls] by '''MadAce'''. | ||
| + | * Body Type Replacements | ||
| + | : Males: | ||
| + | :* [http://rd.nexusmods.com/newvegas/mods/35451 Breezes New Vegas Males] by '''sesom'''. | ||
| + | :* [http://rd.nexusmods.com/newvegas/mods/54731 Roberts Male Body FNV] by '''Nivea and Favoredsoul'''. | ||
| + | :* [http://rd.nexusmods.com/newvegas/mods/64001 Roberts and Brawler Body Complementary Resource for FNV and TTW] by '''Good0593''' and '''Nivea''' and '''Favoredsoul''' and '''RocketLombax'''. | ||
| + | : Females: | ||
| + | :* [http://rd.nexusmods.com/newvegas/mods/34702 BEWARE OF GIRL Type 3 HiRez HiDetailed Replacer] by '''BlackBlossom'''. | ||
| + | :* [http://rd.nexusmods.com/newvegas/mods/54438 DIMONIZED TYPE3 female body] by '''dimon99''' (Copied from FO3 section unmodified. Not ported, so clothing portion doesn't work. See FO3 version for full description.) | ||
| + | :* [http://rd.nexusmods.com/newvegas/mods/40401 Lings Playable Races] by '''Volek'''. | ||
| + | :* [http://rd.nexusmods.com/newvegas/mods/34825 Type3 Body and Armor replacer] by '''Exeter'''. | ||
| + | :* [http://rd.nexusmods.com/newvegas/mods/50612 Type3 Narrowed Shoulder BerryHD Acup body] by '''ChunchunMARU'''. | ||
| + | :* [http://rd.nexusmods.com/fallout3/mods/14359 Type3 F Body Replacer] by '''Exeter'''. (FO3 version) Not ported to FNV. | ||
| + | :* [http://rd.nexusmods.com/newvegas/mods/57627 Type3BG] by '''digimonkey'''. | ||
| + | :* [http://rd.nexusmods.com/newvegas/mods/44709 Type3M Body Replacer] by '''MAK'''. | ||
| + | :* [http://rd.nexusmods.com/fallout3/mods/5326 Type V Female Body and Armor Replacer] by '''Luchaire'''. ('Dimonized' FO3 version) Not ported to FNV. | ||
| + | :* [http://rd.nexusmods.com/newvegas/mods/45162 Type 6 Modification Body NV] (T6M) by '''Izumiko'''. | ||
| + | :* [http://www.nexusmods.com/newvegas/mods/65697 Type C Body Replacer] by '''Cytiene/AusAllerWelt'''. | ||
| + | :* [http://rd.nexusmods.com/newvegas/mods/37820 Athletic Female Body] by '''skims'''. | ||
| + | :* [http://rd.nexusmods.com/newvegas/mods/47986 Athletic Body Type Bouncing BNB] by '''Tattooedillusions via Skims'''. | ||
| + | :* [http://rd.nexusmods.com/newvegas/mods/42569 Muscle Girl Project - NV] by '''zomb_killer and Tigersan'''. | ||
| + | :* [http://rd.nexusmods.com/newvegas/mods/47277 SKINNY 6 Body BNB] by '''tattooedillusions via Humannature66''' | ||
| + | : NPC overhauls: | ||
| + | :* [http://rd.nexusmods.com/newvegas/mods/54460 Fallout Character Overhaul] by '''Drumber'''. | ||
| + | :* [http://rd.nexusmods.com/newvegas/mods/39218 Fallout New Vegas Redesigned 2] by '''Dracomies'''. | ||
| + | :* [http://rd.nexusmods.com/newvegas/mods/56312 Fallout New Vegas Redesigned 3] by '''Dracomies and Weijiesen'''. | ||
| + | :* [http://rd.nexusmods.com/newvegas/mods/39325 NVCE - New Vegas Character Expansions] by '''Machienzo'''. | ||
| + | :* [http://rd.nexusmods.com/newvegas/mods/64014 Simple Vanilla Nude Body Replacers] by '''Jokerine'''. | ||
| + | * [http://www.nexusmods.com/newvegas/mods/35878/? Beauty Pack PLUS -Project Mikoto- Hair - Eyes - Presets] by '''Matteius''' | ||
| + | * [http://forums.nexusmods.com/index.php?/topic/5184015-guide-replacing-vanilla-hair-with-modded-hair/ GUIDE: Replacing Vanilla Hair with Modded Hair] Forum Thread outlines the basic procedure using the GECK. | ||
| + | * [http://www.nexusmods.com/newvegas/mods/61538/? Hairs - Eyes - Races Auto - Patcher] mod by '''Fallout 2AM''' attempts to automate this "patching" process for custom races. | ||
| + | * [http://www.moddb.com/mods/lings-coiffure-nv/downloads/lings-coiffure-nv-v42 Lings Coiffure NV] by '''earache42'''. | ||
| + | * [http://www.nexusmods.com/newvegas/mods/44312/? Mojave Delight for Type3] by '''Glosshouse'''. | ||
| + | * [http://www.nexusmods.com/newvegas/images/102834 How to Create a Custom Race] by '''jim_uk'''. | ||
| + | * [http://www.nexusmods.com/newvegas/mods/62261/? How to Create a Custom Race PDF] by '''jim_uk'''. | ||
| + | * [http://www.nexusmods.com/newvegas/mods/40724/? DIMONIZED presets for Vanilla races for FNV] by '''dimon99'''. | ||
| + | * [http://www.nexusmods.com/newvegas/mods/61357/? FCO Bugfixes] by Lunarion Silver [http://www.nexusmods.com/newvegas/mods/54460/?tab=2&navtag=http%3A%2F%2Fwww.nexusmods.com%2Fnewvegas%2Fajax%2Fmodfiles%2F%3Fid%3D54460&pUp=1 Fallout Character Overhaul (FCO)] by Drumber. | ||
| + | * [http://www.nexusmods.com/newvegas/mods/64012/? Fallout Character Overhaul - Pink Hands Fix] by Vainlash. | ||
| + | * [http://forums.nexusmods.com/index.php?/topic/1876875-new-vegas-redesigned-3/page-96#entry16892164 the FNVR3 forum thread] | ||
| + | * [http://www.nexusmods.com/newvegas/mods/39218/? FNV Redesigned 2 (FNVR2)] by Dracomies. | ||
| + | * [http://www.nexusmods.com/newvegas/mods/56312/? FNV Redesigned 3 (FNVR3)] by Dracomies and Weijiesen. | ||
| + | * [http://www.nexusmods.com/newvegas/mods/37537/? Hi-Res Eyes Replacer by Zenl] for FCO2. | ||
| + | * [http://www.nexusmods.com/newvegas/mods/40595/? Dead Money Type3 Outfits] | ||
| + | * [http://www.nexusmods.com/newvegas/mods/41884/? Honest Hearts Type3 Tribal Armors] | ||
| + | * [http://www.nexusmods.com/newvegas/mods/41884/? Old World Blues Armors for Type3] | ||
| + | * [http://www.nexusmods.com/newvegas/mods/44034/? Lonesome Road Armors for Type3] | ||
| + | * [http://www.nexusmods.com/newvegas/mods/45505/? T6M Equipment Replacer NV] | ||
* [http://fallout.wikia.com/wiki/Help:Form_IDs Help:Form IDs] | * [http://fallout.wikia.com/wiki/Help:Form_IDs Help:Form IDs] | ||
| − | * [ | + | * [http://fallout.wikia.com/wiki/Fallout:_New_Vegas_characters Wikia: RefID of the player] |
| + | * [http://geck.bethsoft.com/index.php?title=Race GECK: Race (body part slots)] | ||
| + | * [http://geck.bethsoft.com/index.php?title=Reference GECK: Reference] | ||
| + | * [http://en.wikipedia.org/wiki/Z-fighting Wikipedia: Z-fighting] | ||
| + | * [http://wiki.step-project.com/Guide:Z-Fighting S.T.E.P. Guide: Z-Fighting] | ||
| + | * [http://www.youtube.com/watch?v=XjHt-4Z6PwI Gopher's "Mountain Flicker and Z-Fighting" video] | ||
| + | * [http://www.nexusmods.com/newvegas/mods/50817/? CAM - Chems Alcohol and Meds] | ||
| + | * [http://tesalliance.org/forums/index.php?/tutorials/article/28-oblivion-creating-compatibility-patches/ Oblivion: Creating Compatibility Patches - Worldbuilding - TES Alliance] | ||
| + | * [http://www.nexusmods.com/newvegas/mods/48509/? "Improved Automatic Ironsight animations"] | ||
| + | * [http://www.nexusmods.com/newvegas/mods/51577/? Dynavision 3] | ||
| + | * [http://www.nexusmods.com/newvegas/mods/39619/? The IMAGINATOR] | ||
| + | * [http://wiki.step-project.com/Guide:ENBseries_INI S.T.E.P. ENBSeries INI Guide] | ||
| + | * [http://www.overclock.net/t/1386086/guides-to-creating-and-customizing-your-enbs Guides to Creating and Customizing Your ENB's] | ||
| + | * [http://www.lagom.nl/lcd-test/ LCD monitor test images] | ||
| + | * [http://wiki.step-project.com/ENBoost#Recommendations S.T.E.P. ENBoost QuickStart] | ||
| + | * [http://web.archive.org/web/20170713081056/http://www.darkcreations.org/testg/wiki/Utilities TESTG Utilities] | ||
| + | * [http://www.nexusmods.com/newvegas/mods/45717/? Safe ShowRaceMenu] | ||
| + | * [http://www.nexusmods.com/newvegas/mods/49152/? Fallout NV Cheat Terminal Redux] | ||
| + | * [http://www.nexusmods.com/newvegas/mods/57113/ IMPACT] | ||
| + | * [http://www.nexusmods.com/newvegas/mods/34917/ Enhanced Blood Textures] | ||
| + | * [http://forums.nexusmods.com/index.php?/topic/6044613-wounds-not-appearing-on-npcs/#entry54108463 Wound Decal fix Example] | ||
| + | * [http://niftools.sourceforge.net/wiki/NifSkope Nifskope] | ||
| + | |||
| + | === Refs [[#Solutions_to_Mesh_(Red_"!"_icon)_or_Texture_(solid_color)_problems|Solutions to Mesh (Red "!" icon) or Texture (solid color) problems]] === | ||
| + | * [http://web.archive.org/web/20170713081056/http://www.darkcreations.org/testg/wiki/Category:VWD-OB "TESTG: VWD/LOD Overview"] | ||
| + | * [[How_to_fix_hard-coded_texture_paths_in_NIF_files|How to fix hard-coded texture paths in NIF files]] | ||
| + | * [http://en.wikipedia.org/wiki/Hexadecimal hexadecimal] | ||
* [http://geck.bethsoft.com/index.php?title=Glossary GECK Wiki] | * [http://geck.bethsoft.com/index.php?title=Glossary GECK Wiki] | ||
| + | * [http://www.neowin.net/news/windows-10-fall-creators-update-fixes-the-directx-9-memory-allocation-bug DirectX9 bug on Neowin.net] | ||
| + | * [http://www.nexusmods.com/skyrim/mods/62698/? TES5LODGen/xLODGen] Tool. | ||
| + | * [http://www.reddit.com/r/skyrimmods/comments/466vss/the_difference_between_lods_and_billboards/ The difference between LODs and Billboards explained] Thread. | ||
| + | * [http://afkmods.iguanadons.net/index.php?/topic/4051-wipz-tes5lodgen-for-trees-lod/ TES5LODGen for Trees LOD] Thread. | ||
| + | * [http://www.nexusmods.com/newvegas/mods/61206/? LOD additions and improvements] Mod by '''tomzik'''. | ||
| + | * [http://www.nexusmods.com/skyrim/mods/60733/? Tree LOD billboard creator for xLODGen] Tool by '''zilav'''. | ||
| + | |||
| + | === Refs [[#Solutions to Miscellaneous problems|Solutions to Miscellaneous problems]] === | ||
| + | * [http://www.nexusmods.com/newvegas/mods/59133/? Using the console doesn't disable achievements] | ||
| + | * [http://www.nexusmods.com/newvegas/mods/58277/? JIP LN NVSE Plugin] | ||
| + | * [http://www.nexusmods.com/newvegas/mods/41874/? Zion Exit Cave] | ||
| + | * [http://www.nexusmods.com/newvegas/mods/49021/? No Combat Gore No Environmental Gore] | ||
| + | * [http://www.nexusmods.com/newvegas/mods/40040/? Project Nevada - Rebalance] | ||
| + | * [http://www.nexusmods.com/newvegas/mods/62876/? Human Collision Sounds Removed] | ||
| + | * [http://fallout.gamepedia.com/Hardcore_mode Hardcore mode "Status Effects"] | ||
| + | * [http://www.nexusmods.com/newvegas/mods/34718/? Imps TimeScale Adjuster] | ||
| + | * [http://www.nexusmods.com/newvegas/mods/37254/? IMCNNV - Imps More Complex Needs] | ||
| + | * [http://www.nexusmods.com/newvegas/mods/34814/? Ambient Temperature] | ||
| + | * [http://www.nexusmods.com/newvegas/mods/34870/ Unlimited Companions] | ||
| + | * [http://fallout.gamepedia.com/Fallout:_New_Vegas_companions Companions] | ||
| + | * [http://www.nexusmods.com/newvegas/mods/51664/? YUP] | ||
| + | * [http://www.nexusmods.com/newvegas/mods/59147/ Ragdolls] | ||
| + | * [http://www.tomshardware.com/forum/id-1800828/intel-temperature-guide.html Intel Temperature guide] | ||
| + | * [http://downloadcenter.intel.com/download/24075 Intel® Extreme Tuning Utility] | ||
| + | * [http://software.intel.com/en-us/articles/intel-power-gadget-20 Intel® Power Gadget] | ||
| + | * [http://www.intel.com/content/www/us/en/support/boards-and-kits/desktop-boards/000005607.html Diagnostic and Performance Tools for Intel Desktop Boards] | ||
| + | * [http://www.almico.com/speedfan.php Speedfan] (freeware) | ||
| + | * [http://www.supercheats.com/guides/fallout-new-vegas/game-difficulty-hardcore-mode Game Difficulty and Hardcore Mode] | ||
| + | * [http://geck.foesmm.org/index.php/Factions GECK Category:Factions] | ||
| + | * [http://geck.foesmm.org/index.php/Category:Faction_Functions GECK Category:Faction Functions] | ||
| + | * [http://fallout.wikia.com/wiki/Securitron Securitron] | ||
| + | * [http://www.nexusmods.com/newvegas/mods/49080/? Securitron attack fix] by DonkeyMonkey | ||
| + | * [http://www.nexusmods.com/newvegas/mods/54991/ version 0.14.11.12 FOMM-Forked] | ||
| + | * [http://www.loverslab.com/topic/17895-fomm-custom-build-0141113/ "Custom" version 0.14.11.13 of FOMM] | ||
| + | * [http://www.gnu.org/licenses/gpl.html GPLv3] | ||
| + | * [http://www.nexusmods.com/newvegas/mods/35335/ Realistic Weapons Damage - New Vegas (RWD)] | ||
| + | * [http://www.nexusmods.com/newvegas/mods/35037/ Realistic Headshots (RHS)] | ||
| + | * [http://www.nexusmods.com/newvegas/mods/61141/? Bleed] | ||
| + | * [http://www.nexusmods.com/newvegas/mods/47285/ Project Nevada - Extra Options (PNO)] | ||
| + | * [http://www.nexusmods.com/newvegas/mods/59149/ Collision Meshes] | ||
| + | |||
| + | |||
| + | === Refs [[#Solutions_to_Post-Processor_.28ENB.2FSweetFX_et._al..29_problems|Solutions to Post-Processor (ENB/SweetFX et. al.) problems]] === | ||
| + | |||
| + | *[http://www.nexusmods.com/newvegas/mods/65525 New Vegas Reloaded - NVGE] | ||
| + | *[http://www.tesreloaded.com/board/24/technical-support Technical Support] | ||
| + | *[http://www.tesreloaded.com/ TES Reloaded] | ||
| + | *[http://www.nexusmods.com/skyrim/mods/24402/? ENB Manager and Changer] | ||
| + | *[http://www.nexusmods.com/skyrim/mods/57620/? ENB Man] | ||
| + | *[http://www.nexusmods.com/skyrim/mods/67077/? ENB Organizer] | ||
| + | *[http://www.nexusmods.com/skyrim/mods/7804/? ENB FXAA SweetFX Manager and Remover] | ||
| + | *[http://wiki.step-project.com/Guide:ENB#What_is_ENBoost.3F S.T.E.P. Project Guide:ENB] | ||
| + | *[http://enbdev.com/download_patch_falloutnv.htm ENBoost] | ||
| + | *[http://enbdev.com/download_vramsizetest.htm VRamSizeTest] | ||
| + | *[http://www.tweakguides.com/Fallout3_9.html switching ''shaderpackage013''] | ||
| + | *[http://enbdev.com/enbseries/forum/viewforum.php?f=19&sid=85dc9ae81dbe1b437e0d94f033efe84f ENB Series Support Forum] | ||
| + | *[http://enbdev.com/download.htm ENB series Graphic Modifications] | ||
| + | *[http://enbdev.com/download.htm ENB Series Download] | ||
| + | *[http://www.nexusmods.com/newvegas/mods/60812/? ENBAuto] | ||
| + | *[http://www.nexusmods.com/newvegas/mods/49882/? ENHANCED SHADERS - ENB] by '''tapioks''' | ||
| + | *[http://www.nexusmods.com/newvegas/mods/62366/? Bone Fide ENB (Great Performance ENB)] by '''Charmareian''' | ||
| + | *[http://wiki.step-project.com/Guide:ENB#Warning_About_Enblocal.ini Warning about ENBLocal.INI] | ||
| + | *[http://wiki.step-project.com/Guide:ENB ENBseries Guide] | ||
| + | *[http://wiki.step-project.com/Guide:ENBlocal_INI ENBLocal INI Guide] | ||
| + | *[http://wiki.step-project.com/Guide:ENBseries_INI ENBSeries INI Guide] | ||
| + | *[http://mcmoddingenbseries.wikia.com/wiki/ENBseries_0.248_enbseries.ini_documentation ENB Series] Wiki | ||
| + | *[http://enbdev.com/enbseries/forum/viewforum.php?f=20&sid=2ee4aed91d395987501630f1c2faccf2 ENBDEV Performance Forum] | ||
| + | *[http://en.wikipedia.org/wiki/PCI_Express PCI-Express] | ||
| + | *[http://www.nexusmods.com/newvegas/mods/35998/? Nevada Skies] (mod) | ||
| + | *[http://www.nexusmods.com/newvegas/mods/40040/? Project Nevada] (mod) | ||
| + | *[http://www.nexusmods.com/newvegas/mods/41790/? Blur Killer] (mod) by '''sortitus''' | ||
| + | *[http://notepad-plus-plus.org/ Notepad++] (freeware) | ||
| + | *[http://winmerge.org/?lang=en WinMerge] (freeware) | ||
| + | *[http://www.prestosoft.com/edp_examdiff.asp ExamDiff] (freeware) | ||
| + | *[http://support.microsoft.com/kb/971644 Vista Platform DXGI v1.1 Update] | ||
| + | *[http://www.tomshardware.com/forum/251596-44-procedure-entry-point-createdxgifactory1-located tomshardware.com] | ||
| + | |||
| + | Nexus wiki articles referred to by this article | ||
| + | |||
| + | *[[How_to_ask_for_help|How to ask for help]] | ||
| + | *[[How_to_read_most_Bethesda_game_error_logs|How to read most Bethesda game error logs]] | ||
| + | *[[HUD-UI-Menu_issues|HUD-UI-Menu issues]] | ||
| + | *[[2-4GB_game_memory_limits_and_solutions|2-4GB game memory limits and solutions]] | ||
| + | *[[Load_order_and_you|Load order and you]] | ||
| + | *[[Missing_Masters|Missing Masters]] | ||
| + | *[[Installing_Games_on_Windows_Vista+|Installing Games on Windows Vista+]] | ||
| + | *[[Merged_Plugin_Guidelines_for_Personal_Use|Merged Plugin Guidelines for Personal Use]] | ||
| + | *[[How_to_fix_hard-coded_texture_paths_in_NIF_files|How to fix hard-coded texture paths in NIF files]] | ||
| + | |||
| + | <br/> <br/> Nexus wiki articles that refer to this article: | ||
| + | |||
| + | *[[#FNV_General_Mod_Use_Advice|FNV General Mod Use Advice]] | ||
| + | |||
| + | <br/> | ||
| − | + | [[Category:Tutorials]] [[Category:Tools]] [[Category:New Vegas]] [[Category:Modding Guides]] | |
| − | |||
| − | |||
| − | |||
| − | |||
| − | |||
| − | |||
| − | |||
| − | |||
| − | |||
| − | |||
| − | |||
| − | [[Category: | ||
| − | [[Category: | ||
| − | [[Category: | ||
Latest revision as of 18:36, 12 May 2021
Contents
- 1 Overview
- 2 Checklist
- 3 ArchiveInvalidation by Manager
- 4 Mod Conflict Isolation
- 5 Towards Game Stability
- 6 Solutions to Starting the game problems
- 6.1 Issue - After moving game from the default install location FNV4GB fails to launch
- 6.2 Issue - Application load Windows errors
- 6.3 Issue - Black Screen on startup
- 6.4 Issue - Game freezing on launch after re-install
- 6.5 Issue - Game will not launch on Win10 for security reasons
- 6.6 Issue - GOG DRM-free non-Steam version of FNV compatibility
- 6.7 Issue - GOG version will not start from FOMM
- 6.8 Issue - How to disable the Steam Overlay
- 6.9 Issue - Incomplete save game load
- 6.10 Issue - Long loading times
- 6.11 Issue - Missing MSVCR120.dll
- 6.12 Issue - Modded game CTDs on startup
- 6.13 Issue - NVSE - fails to load after update KB4058043 to Win10 FCU v1709
- 6.14 Issue - Problems point to Steam as the source
- 6.15 Issue - Regional Non-English language version of the game displaying English dialogue
- 6.16 Issue - Regional Non-English language version of the game with different language audio
- 6.17 Issue - Regional Non-English language version of the game will not load NVSE
- 6.18 Issue - Unable to install FNC with MO2
- 6.19 Issue - Vanilla game bugs
- 6.20 Issue - Vanilla game CTDs on startup
- 6.21 Issue - Vanilla game Hangs on startup
- 7 Solutions to Performance problems
- 7.1 Guide - Performance Tutorial Videos
- 7.2 Issue - FPS drops over time
- 7.3 Issue - Full screen mode exhibits CTDs and stutters or micro-stutters
- 7.4 Issue - Game in slow motion
- 7.5 Issue - Graphics in vanilla game glitchy immediately after exiting Doc Mitchells
- 7.6 Issue - Lag or microstutters even with New Vegas Stutter Remover installed or not
- 7.7 Issue - Mouse sensitivity reduced
- 7.8 Issue - NPCs and Creatures are moving at hyper-speed
- 7.9 Issue - SOUND - Ambient music skips-jitters-hiccups-pops-stutters
- 7.10 Issue - SOUND - Combat causes audio desync
- 7.11 Issue - SOUND - Combat causes infinite loop sound
- 7.12 Issue - SOUND - No music or sound
- 7.13 Issue - SOUND - Radio station music does not play
- 7.14 Issue - System Network configuration
- 7.15 Issue - TTW Performance Guide abstract
- 7.16 Issue - Vsync aka V-Sync ON or OFF
- 7.17 Issue - What INI edits seem to be most beneficial to performance
- 8 Solutions to Crash To Desktop aka CTD problems
- 8.1 Issue - CTD after 10-20 minutes of play post-Win10 2017 FCU
- 8.2 Issue - CTD on interior or exterior or fast travel cell change
- 8.3 Issue - CTD without warning or Out of Memory error or stops responding after the Main Menu
- 8.4 Issue - CTD upon completion of DLC
- 8.5 Issue - CTD upon quitting a modded game
- 8.6 Issue - Ash and Goo Piles cause random CTDs
- 8.7 Issue - Hi-Rez Texture mod causes CTD
- 8.8 Issue - Removing a Project Nevada Implant freezes the game or CTDs
- 8.9 Issue - Swap aka Page file size and CTDs
- 8.10 Issue - WIN10 Freezes or Hangs and you can not use Task Manager to kill the process
- 9 Solutions to Control problems
- 9.1 Issue - Console - How to access the in-game console command line
- 9.2 Issue - Console - in-game console default key does not work
- 9.3 Issue - Console - Can not open the in-game console command line under Windows 10
- 9.4 Issue - Console - troubleshooting
- 9.5 Issue - Controls - GamePad Support missing
- 9.6 Issue - Controls - Have to remap some essential default key assignments
- 9.7 Issue - Controls - How to remove a game controller default button bindings
- 9.8 Issue - Controls - How to switch weapons using the mouse middle-button or wheel
- 9.9 Issue - Controls - Mods do not seem to have controller support
- 9.10 Issue - Controls - Mouse and-or keyboard does not work with a game controller installed
- 9.11 Issue - Controls - Mouse misbehaves
- 9.12 Issue - Controls - Mouse notably Logitech does not highlight or select menu choices
- 9.13 Issue - Controls - Remapping the ammo swap hotkey from key -2-
- 9.14 Issue - Gazing in certain directions causes a freeze
- 9.15 Issue - Grenade throw always falls at my feet
- 9.16 Issue - How to determine what keystrokes are being passed
- 9.17 Issue - HUD-UI-Menu messed up or unreadable or missing
- 9.18 Issue - MOUSE - not working after fast travel
- 9.19 Issue - MOUSE - sensitivity or weapon aiming is off or similar issues
- 9.20 Issue - Unable to add either of two weapon mods to a weapon
- 9.21 Issue - Unable to draw weapons or fire or crouch
- 9.22 Issue - WMM - The Weapon Mod Menu will not let me add a weapon mod in game
- 9.23 Issue - WMX - loses my existing weapon mods to the Weathered 10mm pistol
- 9.24 Issue - ZOOM controls
- 10 Solutions to Garden of Eden Construction Kit aka GECK problems
- 10.1 Issue - Where to obtain the GECK
- 10.2 Issue - GeckCustom INI file
- 10.3 Issue - GECKPrefs INI file
- 10.4 Issue - How to get GECK to load with NVSE
- 10.5 Issue - GECK Power-Up or NVSE cannot find GECK
- 10.6 Issue - GECK automatically loads unwanted DLC Masters
- 10.7 Issue - Where to start in creating mods
- 10.8 Issue - Where are the Warnings and EditorWarnings text files
- 10.9 Issue - GECK crashes upon editing a weapon
- 10.10 Issue - GECK crashes upon loading an exterior cell
- 10.11 Issue - GECK crashes upon starting
- 10.12 Issue - GECK crashes upon switching to a different tool
- 10.13 Issue - GECK does not automatically select FalloutNV or some DLC ESM file
- 10.14 Issue - GECK does not show Landscape
- 10.15 Issue - GECK hates me in general or how to get started working with it
- 10.16 Issue - GECK will not tell me what is wrong with my script
- 10.17 Issue - GECK is missing text in some fields
- 10.18 Issue - GECK Render Window shows a large gray square in new world space
- 10.19 Issue - How do I configure the GECK to do something
- 11 Solutions to Graphics problems
- 11.1 Issue - Aiming - 1st Person View aka FPV Iron Sights
- 11.2 Issue - Aiming - 1st Person View aka FPV is off center
- 11.3 Issue - Aiming - 3rd Person View aka TPV is off center
- 11.4 Issue - Aiming - Disable Auto Aim or not
- 11.5 Issue - Aiming - Full-Auto Iron Sights animation jump
- 11.6 Issue - Aiming - Weapon stays centered after releasing RMB
- 11.7 Issue - Animation Clipping
- 11.8 Issue - Authority Glasses worn weirdly
- 11.9 Issue - Blood Decal Duration
- 11.10 Issue - Blood-Gore-Limb Explosions and Dismemberment
- 11.11 Issue - Bobbing NPCs
- 11.12 Issue - Body Replacer - Big Head or Hair bug
- 11.13 Issue - Body Replacer - Custom Body Types
- 11.14 Issue - Body Replacer - Custom Hair-Eyes-Heads and-or Races
- 11.15 Issue - Body Replacer - Custom Race skin mismatch
- 11.16 Issue - Body Replacer - Default aka Vanilla
- 11.17 Issue - Body Replacer - Fallout Character Overhaul aka FCO not working or conflicting
- 11.18 Issue - Body Replacer - FCO or FNV Redesigned3 Characters have pink faces or clean bodies with dirty faces
- 11.19 Issue - Body Replacer - FCO or FNV Redesigned3 Eyes rolled to the side
- 11.20 Issue - Body Replacer - FNV Redesigned 3 aka FNVR3 and Qwinns Refined FNV Redesigned 3 aka QRNVR3
- 11.21 Issue - Body Replacer - In-game does not look quite like the authors images
- 11.22 Issue - Body Replacer - Installing Beware of Girl aka BoG FOMOD with Mod Organizer aka MO
- 11.23 Issue - Body Replacer - Type 6M
- 11.24 Issue - Broken Square/Hit Indicator
- 11.25 Issue - Character is suddenly invisible in both 1st and 3rd person views
- 11.26 Issue - Chinese Assault Rifle Textures are wonky
- 11.27 Issue - Disable Map Markers
- 11.28 Issue - Distant terrain or LOD flickers rapidly
- 11.29 Issue - Entering an Interior spawns the player in a huge ball of items and NPCs aka junkado or junknado
- 11.30 Issue - Female Character strafing left modelling glitch
- 11.31 Issue - First Person camera bug wearing Riot Armor family of gear
- 11.32 Issue - Fisheye lens effect in 3rd Person
- 11.33 Issue - Flickering Shadows on grass
- 11.34 Issue - Floating objects
- 11.35 Issue - Fog effect around the Vegas Strip
- 11.36 Issue - Head clipping through hair
- 11.37 Issue - Interior cell portions not visible
- 11.38 Issue - Invisible Companion
- 11.39 Issue - Invisible Corpses
- 11.40 Issue - Lighting - Exteriors at night
- 11.41 Issue - Lighting - Faces and surfaces glow
- 11.42 Issue - Lighting - Mod makes the Sun too bright off surfaces
- 11.43 Issue - Main/DLC - missing elements
- 11.44 Issue - Missing textures or walls
- 11.45 Issue: Naked NPCs aka missing armor or inventory
- 11.46 Issue - NPCs making annoying SHHHH sound and hand gesture
- 11.47 Issue - Permanent Limp
- 11.48 Issue - Pink teeth or tongue or mouth
- 11.49 Issue - Player hands are either stubs or too large or the fingers are missing AKA Fingers glitch
- 11.50 Issue - Pip-boy and Terminal screens are all white or blank
- 11.51 Issue - Playing at greater than 1920x1080 resolution
- 11.52 Issue - Scope zoom distortion problems
- 11.53 Issue - Screen brightness gets darker as the game progresses
- 11.54 Issue - Somehow without changing anything my character is glitched oddly
- 11.55 Issue - Textures randomly change only on particular items
- 11.56 Issue - TTW Centaur Face distortion
- 11.57 Issue - Visual special effect (IMOD) stuck
- 11.58 Issue - Weapons or Fists are displayed off-center in 1st Person
- 11.59 Issue - Win10 Blurry or small text or icons
- 11.60 Issue - Win10 Screen tearing in Borderless Windowed Mode
- 11.61 Issue - Wounds do not appear on Actors
- 12 Solutions to Mesh -Red Kite- icon or Texture -solid or off color- problems
- 12.1 Issue - What are these -Red Kite- icons in the game
- 12.2 Issue - What is with these Solid Green billboard signs in the distance aka LOD
- 12.3 Issue - Find the source mod-index of an object in-game
- 12.4 Issue - Fix a missing or solid color texture problem
- 12.5 Issue - Pink Screen or textures aka VRAM limitation
- 12.6 Issue - ShowRaceMenu or Changing Character or Uninstalling a custom race problems
- 12.7 Issue - Skin tone mismatch between head and body
- 13 Solutions to Miscellaneous problems
- 13.1 Issue - MAIN - Doc's Psych Eval gives wrong tag skill
- 13.2 Issue - MAIN - Goodsprings quest Ghost Town Gunfight - Joe Cobb explodes
- 13.3 Issue - MAIN - Nipton - Neither Vulpes Inculta nor Oliver Swanick appear
- 13.4 Issue - MAIN - Weapon Damage displayed for other weapons is unexpected
- 13.5 Issue - DLCs - Can companions travel to DLC worldspaces
- 13.6 Issue - DLC Dead Money - Cannot kill or dismember Ghost People
- 13.7 Issue - DLC Honest Hearts - Cannot kill Salt-Upon-Wounds
- 13.8 Issue - DLC Honest Hearts - Cannot leave Zion
- 13.9 Issue - DLC Honest Hearts - Cannot return to Zion
- 13.10 Issue - DLC Honest Hearts - Joshua Graham Narrows Dialogue not triggering
- 13.11 Issue - DLC Honest Hearts - Quest Crush the While Legs bug
- 13.12 Issue - DLC Honest Hearts - Year bug on entry or exit of Zion
- 13.13 Issue - DLC Old World Blues - Hoarder Trait with PN Sprint is broken
- 13.14 Issue - DLC Old World Blues - Quest Get your brain back bug
- 13.15 Issue - DLC Old World Blues / Lonesome Road - SleepDeprevation forced to 275
- 13.16 Issue - DLC Lonesome Road or other - DLC hangs after cutscene
- 13.17 Issue - DLC Lonesome Road - Freeze in Collapsed Overpass Tunnel
- 13.18 Issue - MOD ATTT - and WRP and WMIM combatibility
- 13.19 Issue - MOD IMPACT - FPS drop or stutter on semi-auto hits
- 13.20 Issue - MOD NVInteriors - Drunken Gnomes Quest cannot be completed
- 13.21 Issue - MOD NVInteriors - 52 Card Pickup cannot be completed
- 13.22 Issue - Adjust or eliminate limb dismemberment and body explosions chance
- 13.23 Issue - All NPCs have over-ridden dialogue
- 13.24 Issue - All Scripts Recompiled Warning
- 13.25 Issue - Can Timescale adjustments break certain quests
- 13.26 Issue - Change the Main Menu background image
- 13.27 Issue - Children cannot use that
- 13.28 Issue - Console player additem command fails
- 13.29 Issue - Corpse in -T- crucifix pose
- 13.30 Issue - Corpse hanging or floating
- 13.31 Issue - Corpses disappear too quickly
- 13.32 Issue - CTD after a fairly constant amount of time such as 20 minutes
- 13.33 Issue - CTD traveling from Cottonwood Cove to Fortification Hill aka Render Unto Caesar quest
- 13.34 Issue - Difficulty setting causes Player and NPC damage to be unbalanced
- 13.35 Issue - Disable the death scene splash of blood across the screen
- 13.36 Issue - Dying with red TMP displayed
- 13.37 Issue - FACTION - Still attacks even after reputation is Idolized
- 13.38 Issue - FACTION - Strip Securitrons unexpectedly become hostile
- 13.39 Issue - File exists error attempting to install mod
- 13.40 Issue - Flash Bang aka Combat skills reduced to zero Bug
- 13.41 Issue - Followers not moving or Navmesh Problems
- 13.42 Issue - FOMM can not install mods anymore
- 13.43 Issue - FOMM crash trying to login to Nexus using Package Manager
- 13.44 Issue - FOMM or FOMOD Invalid Field error
- 13.45 Issue - Foul Smell debuff to Charisma
- 13.46 Issue - GLOB variable GameDaysPassed does not advance or suddenly jumps
- 13.47 Issue - How to eliminate the bullet sponge effect
- 13.48 Issue - Is my game the latest version
- 13.49 Issue - Missing Pipboy after uninstalling the Readius mod
- 13.50 Issue - My Steam Achievements have stopped working
- 13.51 Issue - Mysterious building
- 13.52 Issue - No karma or XP for lowest tier level enemies
- 13.53 Issue - Obnoxious Companion Asshole
- 13.54 Issue - Plugin Limit Warning despite Limit Fix mod
- 13.55 Issue - Project Nevada Sprint suddenly not working
- 13.56 Issue - QUEST - is hung and will not advance
- 13.57 Issue - Recommended Project Nevada master file load order
- 13.58 Issue - Record conflicts in xEdit aka FNVEdit
- 13.59 Issue - Regional - non-English version has different FormIDs
- 13.60 Issue - Remove active effects
- 13.61 Issue - Restore vanilla animations
- 13.62 Issue - SOUND - Background Noise bug
- 13.63 Issue - SOUND - Music Licenses and Sources
- 13.64 Issue - Stuck effects or stats
- 13.65 Issue - Uninstall Fallout New California FNC aka FONC
- 13.66 Issue - Weapon quick key binding fails unexpectedly
- 14 Solutions to Post-Processor ENB or SweetFX et al problems
- 14.1 Issue - ENB and NVR-NVGE conflict
- 14.2 Issue - ENB Blur
- 14.3 Issue - ENB Interior windows are off-color
- 14.4 Issue - ENB is not working
- 14.5 Issue - ENB Nights are too dark even with nightvision
- 14.6 Issue - ENB Performance aka FPS drops
- 14.7 Issue - ENB Support for Windows versions later than Win7
- 14.8 Issue - ENB Texture disappears or turns shiny or black
- 14.9 Issue - ENB Transparency or Translucency problem
- 14.10 Issue - ENB Weather effects near water are off color
- 14.11 Issue - Get ENB to work while in GECK
- 14.12 Issue - Image Modifications aka IMODS aka fade to black etc do not work
- 14.13 Issue - Is ENBoost for everyone
- 14.14 Issue - Managing Post-Processor as in ENB or SweetFX or FXAA configurations
- 14.15 Issue - Problems using ENB or SweetFX - Long loading screen waits
- 14.16 Issue - Problems using ENB or SweetFX - alongside FNV4GB
- 14.17 Issue - Problems using ENB or SweetFX - on Windows 10
- 14.18 Issue - Render Error using ENB or SweetFX
- 14.19 Issue - SweetFX is not working
- 15 References
- 15.1 Refs Overview
- 15.2 Refs Checklist
- 15.3 Refs ArchiveInvalidation (by Manager)
- 15.4 Refs Mod Conflict Isolation
- 15.5 Refs Towards Game Stability
- 15.6 Refs Solutions to Starting the game problems
- 15.7 Refs Solutions to Performance problems
- 15.8 Refs Solutions to "Crash To Desktop" (CTD) problems
- 15.9 Refs Solutions to Control problems
- 15.10 Refs Solutions to "Garden of Eden Construction Kit" (G.E.C.K.) problems
- 15.11 Refs: Solutions to Graphics problems
- 15.12 Refs Solutions to Mesh (Red "!" icon) or Texture (solid color) problems
- 15.13 Refs Solutions to Miscellaneous problems
- 15.14 Refs Solutions to Post-Processor (ENB/SweetFX et. al.) problems
Overview
This a collection of specific common problems and solutions, along with a general checklist of things known to contribute to problems, collected from around the web. The "Fallout NV Mod Conflict Troubleshooting" thread in the "Fallout New Vegas Mod Troubleshooting" forum is for questions, suggestions, and discussion of this article's contents.
The article is organized around various generic topics, with specific mod conflicts or issues that don't fit into the other categories under "Solutions to Miscellaneous problems".
If you haven't already, it is suggested to read the wiki article FNV General Mod Use Advice first to understand basic terminology as used here and differences in FNV from other games you may be used to modding.
Troubleshooting is a logical process of elimination. If all logic fails, you have to revert back to a vanilla game and slowly re-install mods, testing each one thoroughly before adding the next. It is a trade-off of "time" versus "effort". Where that tipping point lies is up to you. This is why you are always advised to follow a slow "install and test each mod one at a time" procedure when first setting up your game. Then you know specifically which mod is causing your problem, which saves time.
The How to ask for help wiki article applies to any game. Read it before posting your next problem in the forums to speed up getting to the correct solution. The time you are wasting otherwise is not just your own.
Checklist
Standard list of things to ask yourself about your current FNV problem:
00. Did you install Steam under the default location of the "C:\Program Files" tree? This causes many "strange" problems not otherwise explainable. As painful as it may sound, read the wiki article Installing Games on Windows Vista+ and move at least FNV. That article has a link to the official Steam Procedure (a good indication that they now recognize the need to correct this). This should be the first solution you try. Otherwise you will spend a lot of time and effort trying other solutions, and still have to move the game files in the end anyway.
- Note that the GOG DRM-free version of FNV default install location is "C:\GOG Games\Fallout New Vegas". It does not have this issue, in addition to already being 4GB memory enabled. DO NOT run the 4GB Patcher against the GOG version. This situation has been known to prevent the ability to save any game files. Other unpredictable problems may occur.
01. Are you getting an error message? What is that pointing to as the source of the problem: the game, Steam, or Windows?
02. What most recently changed (as far as what you have deliberately done to your game is concerned: New, updated, or removed mods or plugins)?
02b. Did any of the following which interact with the game get updated or changed recently. They are prime suspects if nothing in the game itself changed:
- a. Video driver. (The latest is not always tested against an older game.)
- b. Sound driver.
- c. Mouse driver. ("Advanced features" are not always compatible with the game.)
- d. Power Outage? Run a chkdsk on the drive to fix any errors that might have occurred.
- e. Windows system update (consider rolling back to the previous restore point).
03. If you have recently "verified local files" or "re-installed" the game, try renaming both the INI files in the "C:\Users\<YourAccountName>\Documents\My Games\FalloutNV" folder, and let the game rebuild them. (There might have been some unexpected changes.) Rename to anything you choose. I usually just add to the extension: from "<filename>.ini" to "<filename>.ini.old". The purpose is to be able to examine the old files for things you want to be able to replicate in the new versions of the same file.
- Before you make any changes to the game INI files, please make backups and put them in a safe place. See the Game INI files section of the "FNV General Mod Use Advice" article for details.You have been warned!
- If you make any changes to any of the game INI files, remember to change it in all three files (after you have backups of the originals): the "Fallout_default.ini" in the game root folder (which only gets used to recreate the other two when they are not found), and the two in "C:\Users\<YourAccountName>\Documents\My Games\FalloutNV" folder ("FALLOUT.ini" and "FalloutPrefs.ini"). Otherwise you tend to lose track of which you actually changed if you have to "verify files".
- Note that if you are currently or have used "Mod Organizer", MO uses its own copies of "Fallout.ini" and "FalloutPrefs.ini" (from when the MO profile was created), located in the "<Steam install path>\steamapps\common\Fallout New Vegas\Mod Organizer\profiles\<Your Profile Name>" folder. These files need to be changed as well.
04. Does the most recent mod change use New Vegas Script Extender (NVSE) or supplemental plugins like JIP NVSE Plugin or "Lutana NVSE Plugin"? Check that log (in the game's root folder: i.e. "<Steam install path>\steamapps\common\Fallout New Vegas").
- According to this post in the JIP NVSE thread, mods are supposed to use and expect the following results when checking which version has been loaded, either in scripts or the game console ("<~>"); even from the Main Menu (without loading a "save game" file).
- * GetNVSEVersion: returns integer (e.g. "5")
- * GetJIPLNVersion / GetLNVersion: returns loaded JIP LN main version as float (xx.xxxx)
- * GetPluginVersion "<string>": (quotes are required)
- "JIP NVSE Plugin": returns loaded JIP LN main version as float (xx.xxxx)
- "lutana_nvse": returns loaded JIP LN main version as float (xx.xxxx)
- IsPluginInstalled:
- "lutana_nvse" returns 1
- If you previously had the "lutana nvse" plugin installed, make sure you have removed all "lutana*.*" files from both the game root and "Data\NVSE\Plugins" folders. Otherwise this can cause the "GetJIPLNVersion" command to fail with the error "command not found".
- NVSE and related plugins must be manually installed because most mod managers assume everything in them needs to go into the "Data" folder instead of their respective specific locations. Check their documentation carefully.
- When installing New Vegas Script Extender (NVSE), the nvse_loader.exe file should be in the game root folder: i.e. "<Steam install path>\steamapps\common\Fallout New Vegas"), so it's along with the FalloutNV.exe file. However, just unpacking the NVSE archive package to the "Fallout New Vegas" folder may not create a "Data\NVSE" folder or the "Data\NVSE\Plugins" sub-folder upon installation unless you tell it to include sub-folders when doing so. If not, you will have to do so manually. It definitely does not create a configuration file (in the "NVSE" sub-folder), nor automatically enable it's log files (which will be found in the game's root folder). You need to do so yourself, using any plaintext editor such as Windows NotePad. Supplemental NVSE Plugins such as JIP, Lutana, MCM, NVAC, or NVSR should go into the "Data\NVSE\Plugins" folder; along with their configuration/INI files.
- If not present, manually create folder "NVSE" under the game "Data" folder (at the same level as the "Meshes" and "Textures" folders), and then "Plugins" under the "NVSE" folder.
- Make sure "hide known file types" is disabled in Windows/File Explorer's "Folder Options" menu, or your new INI file in the next step will have a hidden ".txt" extension which you don't want. (The DigitalCitizen.life article 8 ways to open the Folder Options window, in Windows (all versions) will show you how to access that.)
- In the folder "Data\NVSE" create a new text file and name it "nvse_config.ini".
- Copy and paste the following into "nvse_config.ini":
- When installing New Vegas Script Extender (NVSE), the nvse_loader.exe file should be in the game root folder: i.e. "<Steam install path>\steamapps\common\Fallout New Vegas"), so it's along with the FalloutNV.exe file. However, just unpacking the NVSE archive package to the "Fallout New Vegas" folder may not create a "Data\NVSE" folder or the "Data\NVSE\Plugins" sub-folder upon installation unless you tell it to include sub-folders when doing so. If not, you will have to do so manually. It definitely does not create a configuration file (in the "NVSE" sub-folder), nor automatically enable it's log files (which will be found in the game's root folder). You need to do so yourself, using any plaintext editor such as Windows NotePad. Supplemental NVSE Plugins such as JIP, Lutana, MCM, NVAC, or NVSR should go into the "Data\NVSE\Plugins" folder; along with their configuration/INI files.
- This will enable the game's error log the next time you run it, which will then be found in your FNV root folder (where you put the NVSE executable files). There will be at least three files: "falloutnv_error.log", "falloutnv_havok.log", and "nvse.log". The first one is very useful for finding broken stuff in mods or the cause of crashes. Not everything in it is an error so keep that in mind; some are just warnings. The "nvse.log" is helpful to identify problems with NVSE itself, and plugins that rely upon it.
- The warnings are supposed to be written by the game engine in "C:\Users\<YourAccountName>\Documents\My Games\FalloutNV\warnings.txt", but this may be dependent upon the "log level" in the "nvse_config.ini". The default is level "1" and there is no "warnings.txt" file created; but it goes up to level "5" (debugging) with increasing verbosity. However, it appears this "warnings" file feature was never actually implemented for FNV, but have been restored by the GECK Extender Plugin for NVSE.
- To activate the "Sheson patch", Add the following before the "[Logging]" section of the "nvse_config.ini" file:
- Using a size of "240" or "256" is suggested if you are not using FNV4GB or some other means to utilize the maximum ~4GB of game memory. Too small or too large a heap size causes problems. Keep it under "500" (i.e. "496"), and in multiples of 16. Skyrim SKSE users may be aware of a "scrapheapsizeMB=" setting. This is carried over to NVSE, but is not used in the FNV game engine. Remember, nothing is "free memory". Everything you assign to a "heap" is no longer available to the game itself.
- See also entirety of the Issue: CTD without warning, "Out of Memory error", or stops responding after the Main Menu" in this guide.
- For help interpreting an error log, please see the How to read most Bethesda game error logs wiki article.
05. Did the mod need to be added to Mod Configuration Menu (MCM) / One HUD (oHUD) / User Interface Organizer (UIO)? (Those mods need to see it when they are installed. See the wiki article HUD-UI-Menu issues and re-install them.)
06. Is your version of Windows 32 or 64-bit? (32-bit may require BOOT.INI changes to use more than 2GB of memory. See this 2-4GB game memory limits and solutions article.) FNV is a 32-bit game, so you need the 32-bit versions of any downloadable tools or libraries, like "C++ Runtimes" or "DirectX drivers" installed on your 64-bit system. 32-bit libraries are not interchangeable with 64-bit versions. They install to different locations. There is a reason MS makes both versions available.
07. Are you using a FNV4GB Loader such as 4GB Fallout New Vegas Updated or an LAA flag Patcher like FNV 4GB Patcher? (Increases available memory. But see the previous question about 32/64-bit Windows. It's related.) Did you turn off any "anti-virus" checking software before patching? (They see any attempts to alter programs as "malware".)
- How can you tell if the 4GB Patch is working?
- The JIP LN NVSE Plugin has a function which can be run from the console: "GetIsLAA" (not case sensitive).
- Possible return codes:
- 0=patch is not applied
- 1=patch was applied to the executable, but extra memory is not being allocated
- 2=successfully allocated extra memory from the patch and is fully working.
- If "GetIsLAA" is returning code "1", try running the game from a "local administrator" account. If that is succesfull, you need to move the game install location out of the "C:\Program Files" folder tree, or correct the "permissions" on the folder you moved it to, as you are going to have other problems down the road. Please see the wiki "Installing Games on Windows Vista+" article for details.
- Alternatively: if the Windows "Task Manager" indicates the "FalloutNV.exe" program has more than 2GB (2,000,000KB) of "Memory (Private Working Set)", then the 4GB Patch is in effect. However, to the contrary: less does not mean it is not working. The game simply hasn't needed that much memory as yet.
08. Are you using an ENB preset? (Alters the graphics environment, including INI changes.) If you aren't sure, then probably not. This is a "third party tool" you would have to manually add. You should wait until you have a stable game before adding a "post-processor" like it to the mix.
09. Are you using Reshade/SweetFX? (Alters the graphics environment, including INI changes.) You should wait until you have a stable game before adding a "post-processor" like it to the mix.
10. Check the game graphic & ENB/SweetFX options do not conflict with video driver settings. (Anti-aliasing, ambient occlusion, anisotropic sample size, v-sync, anything else that is mentioned.) If you didn't install either of these then the question does do not apply.
11. Are you using LOOT to sort your mod "load order" (LO)? (Reduces mod conflicts.) If you don't like LOOT's results, or wish total control over your LO, see the wiki article Load order and you for an approach to organizing the LO and creating a "merge patch" file to manually resolve conflicts.
- It's always useful to post your "Load Order" (LO) with your problem description. (Use the "Special BBCode" button in the Forum "Reply" menu bar to put the LO in "Spoiler" tags. See the article How to markup images (etc) in forum posts and comments.) Screenshots are not the best way to convey your LO, because they usually can't include everything in one image and (depending upon where you took the shot) may not show the actual "load order". LOOT can copy your LO into a list suitable for posting on forums. (It's under the ":" with three dots to the extreme right in it's menu bar. Current Tome of xEdit online documentation here.) Most "mod managers" have a similar "LO List" capability. But the total number of mods you have installed in the DATA folder is also important, because even inactive plugins are counted against the so-called "140 cap". LOOT provides both numbers: active and total installed.
12. Do you have more than 130 active plugins in your LO, or more than 140 plugins installed (active or not) in the game DATA folder? The game can have problems with anywhere from roughly 130-140 active, or too many installed, depending upon your system. This may manifest in any number of strange ways to include apparent missing meshes and textures that were there before, along with CTDs.
13. If you are having a "red icon" problem, see the ArchiveInvalidation (by Manager) sub-topic.
- When in doubt, it will never harm things to try toggling "ArchiveInvalidation" off and then on again.
14. Are you missing any of the "game fixer" mods? See the Issue: Vanilla game bugs sub-topic for a list of specific recommendations.
- A more recent alternative to TES4LL is xLODGen - Terrain LOD beta for FNV, FO3, FO4, FO4VR, TES5, SSE, TES5VR, ENDERAL by sheson, an updated version of the basic xLODGen tool (of which FNVLODGen is a game specific implementation) which now has the option to generate LOD meshes and textures "exactly" like the CK. Read at least the first post instructions carefully. Specifying an "output file" should be considered mandatory.
- A more recent alternative to TES4LL is xLODGen - Terrain LOD beta for FNV, FO3, FO4, FO4VR, TES5, SSE, TES5VR, ENDERAL by sheson, an updated version of the basic xLODGen tool (of which FNVLODGen is a game specific implementation) which now has the option to generate LOD meshes and textures "exactly" like the CK. Read at least the first post instructions carefully. Specifying an "output file" should be considered mandatory.
- See the TESTG site for a glossary of terms and descriptions of/links to these and other utilities.
16. If the LO has changed, re-run FNVLODGen after LOOT. (Rebuilds LOD quadrants (quads), which are "load order" dependent.)
17. Use FNVEdit (loading the entire LO) to check for Masters that are missing or loading after Dependencies. See the wiki tutorial Missing Masters. There is full documentation of FNVEdit (for both FO3 and FNV) in the online docs Tome of xEdit and the downloadable PDF FNVEdit Training Manual.
18. Are you using a Wrye Flash Bashed Patch or a manually created "merge patch" file? (Resolves record level conflicts.) See S.T.E.P. Merging Plugins Guide which covers both approaches, or the video Making a Merge Patch by Roy Batty for the "merge up" approach. (Use of "Mod Organizer" is not required.) Use the Wrye Bash Pictorial Guide to quickly get functional with "Wrye Flash", which I think is the easier approach for a novice modder.
19. If you are using "Wrye Flash" to create a "Bashed Patch", have you gotten all "green" checkboxes for all your mods? See the first post in the pinned thread Fallout New Vegas Beginners guide to modding by gromulos.
20. Was there an update to a mod that has been included in a "merged plugins" or "merge patch" file? Rebuild the "merge" file.
21. Did any system or driver updates occur? (Third party processes might be the cause if nothing else changed.)
22. Does your hardware meet the game's minimum requirements?
23. Have you tried running the game in "windowed mode"? This has been known to unexpectedly fix CTDs and "out of memory" errors on some older hardware. If you prefer the "borderless" version of "windowed mode", install New Vegas Script Extender (NVSE) and use the One Tweak for FNV mod.
- Alternatively, there are free third-party tools that run games (not just FNV) in "borderless windowed mode", such as Borderless Gaming.
24. Try turning off any unnecessary background processes, such as "anti-virus" or "anti-malware" programs (unneeded if you are running your game in "offline" mode), multiplayer "overlays" like "OverWolf" (this is single-player after all), the Steam overlay, etc., at least on a temporary basis to see if they are interfering.
25. Finally, the problem might be an overheating hardware component. This usually shows up after a period of time which is typically fairly consistent but unpredictable as to when it manifests. Try installing and keeping an eye on a temperature monitor, such as Speedfan (freeware). Your motherboard manufacturer probably has one available as well. And it never hurts to clean out any dust collecting in the computer case. Be sure to block any fans from rotating when you blow it out, so they don't send any unfiltered power surges through the system.
ArchiveInvalidation by Manager
"ArchiveInvalidation" (AI) is a method by which the game is told to look for "loose files" in preference to those in the vanilla BSA files. This is the reliable method to get a mod's own texture and mesh files utilized, assuming you have properly installed those "assets". This post on manual invalidation explains the problem and history quite well.
Check you have "ArchiveInvalidation" (AI) enabled. You may need to "toggle" it off and then on again.
(For links to tutorials and documentation for the individual mod managers, please see the 'Mod Managers' section of the wiki "FNV General Mod Use Advice" article.)
- Open your mod manager.
- Mod Organizer (MO): Select your "Profile". Turn on "Automatic Archive Invalidation" in the "Configure Profiles" dialog. Close the mod manager.
- Some have found "AI" more difficult to get working in MO. In these cases the following steps are suggested:
- 1. In MO Settings 'Workarounds': uncheck 'Force-enable game files'.
- 2. Get a copy of "Fallout - AI!.bsa" (From FOMM or NMM) and copy it to your "Data" directory. (Basically this is an empty BSA file.)
- 3. Go to the 'Archives' tab in the right MO window. Make sure MO is managing BSA files. Move the "Fallout - AI!.bsa" to the top of the list.
- 4. Try "Automatic Archive Invalidation" in the Profile both OFF and ON.
- MO2 Support STEP Forum. Recommendations are mixed regarding it's use with FNV.
- Mod Organizer 2 Installation and Settings Video 1 of 5 by GamerPoets.
- Fallout Mod Manager (FOMM): Depending on the version you have, find "Archive Invalidation" either under the tools tab or find the button "Toggle Archive Invalidation".
- Nexus Mod Manager (NMM) or the newer Fallout Mod Manager - Forked (FOMM-Forked): if there is a "check mark" shown next to "Archive Invalidation", remove it and close the mod manager. Open the mod manager, open the "Tools" and place a "check mark" next to "Archive Invalidation".
- If there is not a "check mark" next to "Archive Invalidation", place one there and close the mod manager.
- Vortex: the new "official" Nexus mod manager handles "Archive Invalidation" with an extension called "Gambryo Archive Invalidation". It's enabled when Vortex is installed, and it works automatically for certain Bethesda games.
- It now has a dedicated button on the Vortex dashboard.
- Per the author Tannin here:
- Note that Vortex is now in "Production Release" state, meaning it is "stable", "feature complete", and "bug free" for the majority of users, but bugs may still be found and dealt with. See the Nexus news article for details. Please report problems to the Vortex Forum.
- Wrye Flash (WF): click on the "Installers" tab, then right-click on the "Package" column header (gray bar) and click to place a "check mark" on the "BSA Redirection" context menu entry. Then right-click on the "Package" column header again and select "Anneal All".
- If you don't use a "mod manager", you should. But there are mods out there that provide the same "BSA Redirection" functionality (the currently more effective form of "ArchiveInvalidation") as an addon.
- If a mod manager's AI doesn't seem to be working, check the INI files under "[Archive]" for the "bInvalidateOlderFiles=" setting. Try switching the value between "=0" and "=1". (Some seem to need it one way, and others the opposite.) See also the wiki article Archive invalidation for details on where the "fake bsa" file needs to go in the "sArchiveList=" line.
- Note that various mod managers can implement "BSA Redirection" in the same way, but be using different BSA filenames. This filename gets inserted in the INI files (under the "[Archive]" section in the "sArchiveList=" setting string of files) using variation names such as "Fallout - AI!.bsa", "Fallout - ArchiveInvalidation.bsa", etc. If you switch mod managers, make sure your INI files are using the correct filename as that manager is expecting. In general this file is placed first or second in the "sArchiveList=" list.
- If you are using the JIP LN NVSE Plugin optional "FalloutCustom.ini" file to override the standard INI file settings, make sure it has been changed as well.
- For other texture problems, see the TESTG Troubleshooting section.
Mod Conflict Isolation
If you have to isolate a mod conflict, try first "disabling" half your mods, and testing. If the problem disappears, then you know the mod conflict lies in the "disabled" half of the mods. Re-enable half of the "disabled" half of the mods (i.e. now down to 1/4 of the total) while disabling the entirety of the other (previously enabled) half, and test. Keep repeating this "halving the remainder" process until you have narrowed it down to the mod that causes the problem only when it is active. This is the quickest way to isolate a problem mod.
Whenever you "disable/deactivate/uninstall" a mod, make a "clean save" file before testing the result. For FNV a "clean save" from an existing game save seems to be just a "full save" file (not a "quick save") that has been loaded, displayed the "missing content" message for the disabled plugin(s), and you continued on into the game; and then waiting about 10 seconds for scripts to initialize before saving again. This is a minimal clean save procedure. (If you appear to still have "residue" remaining after trying this procedure, try the more complete process laid out in the Tes4Mod:Clean_Save procedure for Oblivion.) However, it is usually preferable to test using a "new" game "full save" file from just after you create a "new" character with a different name. This avoids the possible issue of any corruption or problems "burned into" the save file.
- Please see also the 'Fourth Rule: Reloading "save game" files' section of the wiki FNV General Mod Use Advice article.
If disabling mods does not pin down the culprit, then you have to uninstall them to completely remove their influence, because they overwrote something which is causing the problem. You can use the same "halving" technique but often it will be quicker to just uninstall everything and start over from a "vanilla" game that you have tested has no problems.
If you uninstalled and re-installed the game but even without mods it crashes on startup, likely you forgot to clear out your "C:\Users\<YourAccountName>\Documents\My Games\FalloutNV" folder. The game places your specific versions of the Fallout and FalloutPrefs INI files there, along with your "save games". Try renaming the "Users" folder INI files first. I usually just add to the extension: from "<filename>.ini" to "<filename>.ini.old", but it can be anything. The purpose is to be able to examine the old files for things you want to be able to replicate in the new versions of the same file. Then if that fails: move the "saves" elsewhere, delete that FalloutNV folder's content, and re-install again. If you have to re-install again anyway, be sure to install to a folder that is not under the default "C:\Program Files" folder tree. See Installing Games on Windows Vista+ for the rationale and guidance. (Actually, you should move your game from the default location regardless, but I realize this is unwelcome advice to most people. It is still the single best "fix" you can do for yourself. Read that article.)
When the above is not sufficient to resolve your problem, please report what steps you have tried so we don't waste time suggesting you repeat something. In such cases, report the actual steps: not just "I followed the guide". We need to know you didn't miss or misinterpret something.
It's always useful to post your Load Order (in "Spoiler" tags. Use the "Special BBCode" button in the Forum "Reply" menu bar, just to the left of the "Fonts" pick-list). Screenshots are not the best way to convey your LO, because they usually can't include everything in one image and make it difficult to determine if you have too many plugins. LOOT can copy your LO into a list suitable for posting on forums. (It's under the ":" with three dots to the extreme right in it's menu bar.) Most "mod managers" have a similar "LO List" capability. But the total number of mods you have installed in the DATA folder is also important, because even inactive plugins are counted against the so-called "140 cap".
Towards Game Stability
- The videographer GamePoets has recently (30 Oct 2018) released a definitive 12:11 minute Performance & Stability Guide YouTube video for "Tale of Two Wastelands (TTW)" covering many of the suggestions in this article. However, while it does not conflict with any advice here and works just as well for FNV, it also does not cover quite as many options. It does make an excellent and recommended starting point for initially dealing with such issues.
- If you want a stable game, don't make any changes to your setup once you start playing and making "save game" files. Even updates to current mods run the risk of making things unstable after the point they are added. If you do update, ensure you know which save to revert to prior to that update if it goes wrong, and test it thoroughly immediately.
- Removing a mod that has stored some elements in a "save file" will leave residue (even with a "clean save") that can cause problems down the road. In particular you have to watch out for mods that use scripts to permanently change form and leveled lists (such as, purely as an example, the popular Millenia's Weapon mods). This is not, in and of itself, a bad thing as there are compatibility advantages to using this "script" technique. Such mods usually point this out in their description. But it is something to pay attention to when experimenting. It's better to find out what causes problems before you start to play in earnest. The general rule is: NEVER remove a mod from your load order once you have it in a "save game" file unless you are prepared to start over at some (possibly considerably) later point.
- Do not use the game's "auto-save" feature. See the sub-topic Issue: CTD on interior/exterior/"fast travel" cell change for the explanation and alternatives.
NVSE Installation issues
If you are having a problem installing NVSE with your mod manager, first of all: DON'T! Install it manually to the "game root" folder. (This point is where mod managers get it wrong.) But if you installed it manually and still wonder if you did it correctly, here is where the various (original "Silverlock") files belong. The later, forked "xNVSE" version (v6.x.x and later) may include or move other files, but for "backwards compatibility" should keep these files in the same location.
- In the "game root" folder (where FalloutNV.exe resides):
- nvse.log (only once NVSE is successfully used.)
- nvse_1_4.dll
- nvse_1_4ng.dll (when installed after the GECK.)
- nvse_editor.log (only once NVSE is successfully used with the GECK.)
- nvse_editor_1_4.dll (when installed after the GECK.)
- nvse_extender.log (only once NVSE is successfully used with the GECK Extender mod.)
- nvse_extender_ng.log (only once NVSE is successfully used with the GECK Extender.)
- nvse_loader.exe (use instead of FalloutNV.exe to launch the game if you haven't run FNV 4GB Patcher. Once patched, use FalloutNV.exe as usual.)
- nvse_loader.log (only once NVSE is successfully launched.)
- nvse_readme.txt
- nvse_steam_loader.dll (only needed by the Steam version of FNV.)
- nvse_whatsnew.txt
- In the "Data\NVSE" folder (various files other than nvse_config.ini are optional; some may not be present by default):
- nvse_config.ini
- nvse_config.testAnim
- nvse_plugin_geckpu_ew.ini (from the older Geck 1.4 PowerUp mod. Not used with GECK Extender.)
- TestAnim.txt
- Everything else belongs under "Data\NVSE\Plugins" and it's sub-folders. When in doubt, just use the folder structure and files under each folder you find in the archive file.
- If you ran the FNV 4GB Patcher before installing NVSE, you may need to re-run the patcher so it will detect that NVSE has now been installed.
Solutions to Starting the game problems
Issue - After moving game from the default install location FNV4GB fails to launch
The FNV4GB.log looks similar to the following when trying to launch it:
- The "Executable name" (3rd line) points to the correct location. The registry key "HKLM\SOFTWARE\Valve\Steam" value "InstallPath" (9th line; value content shown in 11th line) does not.
- Cause: The registry has not been properly updated.
- Solution: Running the vanilla EXE launcher (from the Steam Client or 'FalloutNVLauncher.exe') first after moving (at least once) updates the registry addresses. After that FNV4GB will work correctly.
Issue - Application load Windows errors
- Cause-1: Specifically error codes: "P:0000065432" or "5:0000065434" indicatea problem with the Steam Client.
- The "P:" prefix seems to show up when the Steam Client is not running.
- The "5:" prefix appears to occur when starting the game from it's EXE (such as the Launcher or the "FalloutNV.EXE"), but then it fails to locate the Steam Client executable on local disk even though it is already running and loaded into memory. Which seems to be confirmed as it disappears when the SteamClient.exe (and only that one file) is placed in the game root folder.
- Both instances produce the same "error code" message with only the prefix different.
-
- Solution-1a: The Steam Client may be in "Offline" mode and minimized to the system tray, but must remain running while launching the game, even with "nvse_launcher" or "fnv4gb".
- Note that the Steam Client is what displays the "Library", "Store", etc. It is a separate piece of software from "the game" and performs the authentication that your copy of the game is legitimate.
-
- Solution-1b: Sometimes all that is needed is to open the "Task Manager" (<Ctrl+Alt+Del> or right-click on the "Task Bar" | "Start Task Manager"), switch to the "Processes" tab, and right-click the "image name" Steam.exe task and select "End Process Tree". Then restart the game again.
-
- Solution-1c: When this occurs with the "FalloutNVLauncher.exe" file (whether or not after installing NVSE), some people have found that COPYing the Steam.EXE file (usually located in the "<install path>\Steam\" folder), into the game root folder (i.e. along with the game and NVSE EXE files in "<install path>\SteamLibrary\steamapps\common\Fallout New Vegas"), resolves the problem. This copy of Steam.EXE may need to be updated as well after the Steam Client has updated.
- Cause-2: For some people, the game will not run without "Multi-threaded AI" enabled.
-
- Solution-2: In all three INI files, under the "[General]" section set the following values:
bUseThreadedAI=1
-
- and add the line:
iNumHWThreads=
and set that to however many cores your processor has. Note this added line is not a "performance" tweak (the game does multi-threading by default and the "iNumHWThreads=" setting may restrict it) and is not recommended for everyone in general. Some people have experienced adverse effects. Use with caution and test the result. When in doubt, start with "2".
- Cause-3: Error message "Application was unable to start correctly", and Windows "Event Viewer" Application Error: "Exception code: 0xc0000005".
- Generally this error code means the program is trying to access protected memory or outside of the space allocated to it. It's one of the most common OS errors seen. In this case the game is failing to start as a result.
- Solution-3a: The Nov 2016 Win10 updates should fix any WDDK based issues with video drivers or previous updates. Try applying system updates first.
- Solution-3b: See the article Exception Error Code 0xc0000005 Fixed on Windows 7 & 10.
- Solution-3c: See the article How to fix error code 0xc0000005 under "application was unable to start correctly" for other things to do to fix it.
- Solution-3d: The mod New Vegas Tick Fix (NVTF) was developed to correct specific problems encountered with Windows 10 as an alternative to the older "New Vegas Stutter Remover (NVSR)". Among it's NVTF.INI file settings is the entry "bInlineCommonFunctions=". Some have reported that disabling this entry ("=0") corrects this specific error, particularly if it occurs after the game has started.
- Cause-4: Error message "The application was unable to start correctly (0xc000007b)" has several possible causes. The TomsHardWare site has a good list of these. But when the problem only occurs with FNV on a Windows 10 or later system, the most likely reason is due to the age of the game. At the time it was released, the game was designed to look for DirectX9 files with specific versions in the file names. Later versions of DirectX might be "backwards compatible", but the file names are not the same and the game does not recognize them as being equivalent.
-
- Solution-4a: Please see "Cause-1" in the Issue: Vanilla game Hangs on startup section.
- Cause-5: Generally this only applies if you are unable to get the game to start at all, ever. If it had been running but suddenly starts failing for no apparent reason, most likely it is due to something on the OS side that recently changed: a Windows Update, or a new video/ mouse/ sound/ keyboard driver. See also: Issue: CTD after 10-20 minutes of play (post-Win10 2017 FCU).
- It is common advice to update video drivers, but manufacturers often stop testing for older game compatibility. Experience suggests you only update drivers when necessary to resolve a specific problem, and be prepared to "rollback" to an older driver version. Keep at least one version that is known to work "in reserve".
- Solution-5a: If running the game in online mode through Steam, Set/Change Steam Compatibliity:
-
- Run the Steam Client and login online.
- Right-click on the Steam Icon, choose Properties, and if it is on, turn Compatibility off.
- Close out Steam Client entirely.
- Open Steam again it and attempt to load the game.
-
- Solution-5b: If running the game in offline mode by launching from your computer desktop, or if setting "Steam Compatibliity" is not sufficient, Set/Change Windows Compatibility:
-
- Note that the Windows 10 "Fall Creator's Update" (FCU, v1709; aka "RedStone 3") reportedly no longer requires this compatibility setting.
- Right-click on the Fallout: New Vegas launcher application (FalloutNVLauncher.exe) in the game root folder. (This is C:\Program Files (x86)\Steam\steamapps\common\Fallout New Vegas (by default), but that location is not recommended. Please see the wiki Installing Games on Windows Vista+ article for why not and help on moving it.)
- Select Troubleshoot Compatibility.
- Choose the Troubleshoot Compatibility option.
- Check the box that says The Program requires additional permissions.
- Select Yes for the next window and then Test the Program.
- Choose Save these settings.
- Try to launch the game from your desktop again.
Issue - Black Screen on startup
- Cause-1: Usually if the game "freezes" but doesn't CTD during the loading screens, it's due to a missing or incorrectly referenced "master file". Usually this is a file with an ESM extension, but less commonly might be one with an ESP extension. (It is a "flag" internally in the file header that makes a file a "master"; not the extension.)
- A "missing master" problem can result just from a plugin being in the wrong sequence in the "load order".
- Solution-1: Use FNVEdit (loading the entire LO) to check for Masters that are missing or loading after Dependencies. See the wiki article Missing Masters for more detailed instructions.
- In general, make sure all your ESM files are loaded first with the game ESM (FalloutNV.ESM) as the very first file and those of the DLC next in the order they were released:
- FalloutNV.ESM
- DeadMoney
- HonestHearts
- OldWorldBlues
- LonesomeRoad
- GunRunnersArsenal
- and then the "pre-order packs":
- ClassicPack
- MercenaryPack
- TribalPack
- CaravanPack
- In general, make sure all your ESM files are loaded first with the game ESM (FalloutNV.ESM) as the very first file and those of the DLC next in the order they were released:
- Mod EMS files should follow.
- Use LOOT to get a basic sorted mod order. Note that some mods have ESMs that use the ESP extension, so if LOOT sorts them into the ESM group, leave them as it is determining that from the file headers and they really are flagged as ESMs.
- Cause-2: A Black screen but you can hear sounds and the game seems to be running usually means you have too many plugins active. You can start to have problems anywhere with between 130-140 active plugins depending upon your system. Here "plugins" refers to both ESM and ESP files that are active in your "load order", or present in the game "Data" folder even if not active.
- Solution-2: Try temporarily disabling enough plugins to get under the cap and see if that gets your screen back. If so, then you need to look into permanently reducing the active plugin count by means of a "bashed" or "merged" patch file, and "merged plugin" files. See the wiki article Merged Plugin Guidelines for Personal Use where the subject is discussed.
- Cause-3: A Black screen but you can hear sounds and the game seems to be running could mean you have corrupted a HUD-UI-Menu XML file, or have installed a mod that overwrites one. This can usually be confirmed by loading the game without any active mods or "save game" (i.e start a new game). If the screen remains black, you have an XML file issue.
- Solution-3: See the wiki article HUD-UI-Menu issues.
- Cause-4: A Black screen with CTD (or hang) during the loading screens is usually an indication of a mod conflict or a dependent plugin (i.e. an ESP) loaded before a master plugin (i.e. ESM for the same mod). See the wiki article Missing Masters for more detailed instructions to check for these problems.
- Solution-4a: Check the date/timestamp on the files in question. Even LOOT can occasionally set the times too close to each other when sorting. They need to have at least a full minute difference to not be considered "the same time" by the game. The ESP must have a later time than it's related ESM. You can use a "file properties" tool like Attribute Changer (freeware) to manually adjust any or all three timestamps (created, modified, accessed) on the files, or try manually moving files around in your mod manager. Note that no two files should have the same "modified" date/timestamp in your "load order" or other problems will arise.
- Solution-4b: To isolate a mod conflict, see the Mod Conflict Isolation sub-topic.
- Solution-4c: Installing HUD-UI-Menu mods in the wrong order can cause corruption of an XML file in a form of "mod conflict". Please see the wiki "HUD-UI-Menu issues" article.
- Cause-5: A Black screen during the game loading screen with the rotating roulette wheel, and no sound might be a problem with the audio driver.
- Solution-5: Locate the sound card or integrated audio device driver for your version of Windows on the vendor site and re-install. (These are often different from those available from "Microsoft Updates".)
Issue - Game freezing on launch after re-install
- Thanks to Kitty Black (Purr4me) for the basis of the following in a reply to the Nexus Fallout New Vegas Technical Support thread "Game freezing at launch - I'm stumped":
Upon launching the game after re-installing, it freezes upon getting to the Main Menu screen (where you choose to either "start a new game" or "continue to play").
- Cause: When you "change" the game executable to be "4GB/LAA aware", you are using an external program.
- That external program is NOT part of the game's structure.
- The registry values of the external program are hidden from the Steam and GOG game systems.
- The registry retains the updated information BY that "third party" program (e.g. 4GB Patcher, NTCore, etc.); not by the game publisher entry.
- Windows uses a "Prefetch", a hyperlink to that executable namesake. ("Prefetch" is an algorithm introduced in WinXP that helps anticipate cache misses (times when Windows requests data that isn’t stored in the disk cache), and stores that data on the hard disk for easy retrieval. See What is windows prefetch in windows 10? super-simplified for a basic explanation, or What is Windows Prefetch and Superfetch? for more details and tuning.)
- Software cleaners, & uninstaller programs will not touch "Prefetch" files. (They saved in the "C:\Windows\Prefetch" folder with a ".PF" extension if you want to try deleting them.)
- The "Prefetch" files do not belong to the games software nor installers programing.
- Windows uses those hyperlinks on launch OR verifying valid updates to the executable.
- The 4GB/LAA enabler is not part of the game so it's changes will override Steam and GOG systems "validation certificate", making them "invalid".
- To bypass the system you need to update the certificate that is downloaded and currently being blocked from installing.
- The Steam verifier will show at least 1 invalid or 1 file is in error. (That's the executable it downloaded.)
- Solution-1: Do not tamper with the properties of the executable unless you know what you are doing.
- If you just installed the game and the "Steam Client" Interface is running in "online mode", you will get access to the systems utility for certification. If a program refused to run, the utilities will be there in the file's properties menu to install certificates. Otherwise leave the software alone.
- <Right-click> on the game executable file (FalloutNV.EXE), and bring up it's properties. Follow the instructions given.
- If the "Steam Client" Interface is NOT running in "online mode" and the game is operational, you will NOT be given access to these utilities.
- Solution-2: Delete the existing "Pre-fetch" files.
- Run the "Steam Client" in "online mode".
- Open the "Library" tab, and select "Properties | Local Files | Verify Integrity of Game Cache".
- Once the files have been "verified" and updated, run the "FalloutLauncher.exe" BEFORE you patch the game for 4GB.
- Solution-3: Corrupted Steam "ClientRegistry.blob" file.
- Use the Windows "Task Manager". End all the Steam related tasks starting from “Steam Client Bootstrapper”.
- Navigate to the location of your "Steam" folder (default is "C:\Program Files (x86)\Steam").
- Locate and rename the "ClientRegistry.blob" file to another name such as "ClientRegistry.blob.old".
- When you next restart Steam this file will be recreated.
- If that still doesn't resolve the problem, return to that same directory, locate and run "Steamerrorreporter.exe", and relaunch Steam again.
- Solution-4: Make a backup copy elsewhere first, and then delete the "Steam\AppCache" folder contents. It will be recreated when Steam next launches.
- Solution-5: Ensure your "Time Zone" is set correctly. This can affect Steam's attempts to collect "real time" data.
- Open the Windows "Control Panel | Date and time".
- From the three tabs, choose “Internet Time” and click on “Change Settings”.
- Check the dialogue box which says “Synchronize with Internet time server”. Click on "Update now". Click on "OK" after the time is updated successfully, and restart Steam.
- Solution-6: Opening Steam in "Big Picture Mode" (Win10).
- Right–click on the “Steam.exe” icon on the desktop.
- Note: If you don’t have a "Steam" shortcut on the desktop, you can find the “Steam.exe” in the installation directory.
- Select the “Pin to Taskbar” option from the "context menu" list.
- <Right–click> on the “Steam” icon in the taskbar and select “Open in Big Picture Mode“.
- Sign in to your account and press <Alt+Enter> to access Steam in Big Picture mode.
- Open the Game and check to see if the issue persists.
- Solution-7: Unplug any JoyStick. (The presence of one sometimes prevents a game from starting until it has been properly configured.)
Issue - Game will not launch on Win10 for security reasons
- Thanks to rubjonny of the Nexus "New Vegas Technical Support" forum for investigating and reporting this issue and it's solution.
Symptoms: The game won't start despite all the usual resolution attempts (installed outside of the default "C:\Program Files(x86)" location, "verified local files", running as "System Admin", different methods of launching, etc.).
- Cause: More recent System defaults in "Windows Exploit Protection" security settings which are causing portions of the game code to be placed randomly in memory.
- Solution: Set a "Program" specific exemption for "FalloutNV.exe" as follows.

- Login as a "System Admin" account.
- <Right click> the Start Menu icon & select settings; or navigate to Settings (the "gear icon" in the left-hand navigation pane) from the Start Menu as usual.
- Select Update & Security in the left-hand navigation pane.
- Select Windows Security in the left-hand navigation pane.
- Select Virus & Threat detection in the right-hand main window under "Protections Areas". (A new window will open.)
- Select App & browser control in the left-hand navigation pane.
- Select Exploit protection settings in the right-hand main window under "Exploit protection". (The right-hand main window will change to show the list of "System settings".
- Select Program settings in the right-hand main window.
- Select the "+" icon to the left of Add program to customize in the right-hand main window.
- Select Choose exact file path from the "drop down list" that appears.
- Browse to and select FalloutNV.exe (or whichever executable is appropriate) as the file to Open. (A list of the current "Program settings: FalloutNV.exe" will now appear.)
- Move your cursor into that list and a scroll bar will appear on the right edge of the window. Scroll down to and select Force randomization for images (Mandatory ASLR) and make sure its set to Override system settings and Off.
- (See figure Exploit Prevention Setting. Click the link/thumbnail to see the enlarged image. Use your browser "<back page>" control to return to this page.)
- Select Apply. (The Program settings screen should be redisplayed.)
- Check that fully qualified path to the game executable is now listed with one more "system override" than previously indicated (e.g. "1 system override" for a newly added entry).
- Close the various windows.
- This procedure will also work for Fallout 3; and may for other programs which seem to have a similar problem.
Issue - GOG DRM-free non-Steam version of FNV compatibility
On 01 Jun 2017, GOG.COM, the on-line game store that licenses DRM-free versions of games released their versions of "Oblivion", "Fallout 3", and "Fallout New Vegas". As "DRM-free", they do not communicate with Steam. They have been modified to work with the GOG Galaxy client, which is similar to Steam's Client for an online community.
Thanks to vulchor and pixelhate on the Nexus "New Vegas Technical Support" forum for quickly assisting with the following information:
- By default, GOG installs the game to "C:\GOG Games\Fallout New Vegas". This avoids the problems with Steam's default location under the "C:\Program Files" tree.
- GOG provides a customized set of INI files. Be sure to backup the "Fallout_default.ini" file before making any changes as a precaution.
- Includes new line "STestFile2=FalloutNV_lang.esp". This file's function has not been determined, but removing the file itself does not prevent the game from running. It's removal may be related to the warning about content no longer being present, listed below.
- 4GB patching attempts don't work, but this is because that feature is already incorporated into the GOG versions of the games (and GECK). Patching is not required. They already will use up to 4GB of memory for the game. (NOTE: The latest versions of the "4GB Patcher" program are fully compatible and do not break the GOG version any more, but do cause the GOG version to automatically load the NVSE plugin if present. This feature may be required and tested for by some mods.)
- "NVSE" v5.0b3 (Stable) installs and works without modification. Problems reported are most likely due to attempting to install by way of mod managers. See Checklist item #4.
- "LOOT" v0.11.0 works without modification.
- "xEdit/FNVedit" should work, but might have trouble locating the GOG game folder until updated if not installed there.
- Warning message "Unable to start steam automatically. Your game may not launch correctly" is given when starting the game through FOMM (which has recognized it automatically). This warning can be ignored.
- Trying to start a save after installing NVSE v5.0b3 will prompt "This save relies on content that is no longer present. Some object may no longer be available" even for the first save after the Doc Mitchell "chargen" sequence, with no mod installed at the time. This warning can be ignored.
- The "G.E.C.K." is pre-installed, but has the original GECK.INI file. This needs to be modified to enable loading multiple masters. See Issue: GeckCustom.INI file.
- The "GOG Galaxy" support, however, requires Windows 7 so this has "broken" XP and Vista support by default. A post on the GOG forum says their tech support responded:
- There's a workaround for getting functional on systems older than Windows 7 that is reported to be effective involving taking a "steam_api.dll" from any Steam game, renaming it "GalaxyWrp.dll" and replacing the one in the GOG FNV folder with the renamed Steam file. Or you can simply delete (suggest rename by adding something to the extension) if you don't need the additional languages that file provides. Doing this will break "GOG Galaxy" integration, but since Galaxy doesn't run on older Windows versions any longer anyway, supposedly that doesn't matter to you. However, if you care about achievements, "local file verification", and cloud saving, those are "GOG Galaxy" only features as well. Suggest burning your downloaded files to a CD/DVD/Blu-ray in case you need to reinstall again and have a slow internet connection or are worried about losing access to the GOG servers. Check the game release thread on the GOG forums for more info.
- The "workaround" has been confirmed to work on Windows XP.
Issue - GOG version will not start from FOMM
You get the error message: "Unable to start steam automatically. Your game may not launch correctly."
- Cause: Unknown.
- Solution: The very first time, use the "FalloutNVLauncher.exe" so it will setup your specific hardware settings. The "load order" you established in FOMM will not change and NVSE should also work. Thereafter you can simply use the NVSE launcher "nvse_loader.exe", which FOMM can be configured to launch.
- Note that the GOG version does not need or work with any version of the 4GB patcher. It is already modified to use 4GB of RAM. See Issue: GOG DRM-free, non-steam version of FNV compatibility.
Issue - How to disable the Steam Overlay
Sometimes it is necessary to turn off the Steam Overlay in the Steam Client in order to resolve a conflict.
- Cause: The Steam Overlay uses a technique that can conflict with other applications or tools using a similar technique. This solution assumes disabling the Steam Overlay is the preferred method of resolving this conflict.
- Solution:
- Open the Steam Client.
- Select "Steam | Settings" from the top menu bar. This will open a "Settings" window.
- Select the "In-Game" option.
- Disable (uncheck) the "Enable the Steam Overlay while in-game" option.
- Click on the "OK" button to close the "Settings" window.
- (Optionally) Select "Go off-line". Without the Overlay, there is no real reason for the processing overhead of being "on-line" to the Steam Server. This will require restarting the Steam Client, but will thereafter remain in effect until you choose to change it again.
- Minimize the Steam Client. (Even in "off-line" mode, it is necessary to start the Steam Client for the DRM licensing engine to enable play.)
- Launch your game from a shortcut on the desktop.
Issue - Incomplete save game load
After loading a savegame (almost always in an exterior cell) most of the in-game sounds won't play, a lot of references won't render, some of the landscapes might be incomplete, and entering menus/console has a long delay; even though you are not using the built-in "auto savegame" feature.
- Cause: This seems to be related to the NVSR "post FCU" problem, even when using the redmaxblower configuration. (See 'Issue: CTD after 10-20 minutes of play (post-Win10 2017 FCU)').
- Solution: User VariableEagle discovered that disabling three Win10 background "local services" seems to resolve this. He happened to disable all three at the same time, and is not certain all three are required to resolve the problem.
- Logon using a local "Administrator" account.
- Open the Windows "Task Manager" (either by "< Right-click >" on the Taskbar and selecting it from the "context menu" that appears, or one of the other methods in the article How to use Windows 10 Task Manager to kill processes that drain resources).
- Select "Services" tab and then "< Right-click >" on "Open Services".
- Find the service: GraphicsPerfSvc, "< Right-click >" on it and select "Stop".
- Then go to the "Properties" of that service and change the "startup type" to "Disabled".
- According to GraphicsPerfSvc Service Defaults in Windows 10: "GraphicsPerfSvc is a Win32 service. In Windows 10 it is starting only if the user, an application or another service starts it." Apparently it was added in build 1709 ("FCU" aka "Redstone 3"), but existed as far back as Win7. There a number of reports in the past of this service consuming 100% of CPU resources continuously. It is also a suspect in game stuttering problems (especially in "full screen" mode). It's default "startup type" is supposed to be "manual".
- Repeat the last two steps for the service: GameRecorderSVC.
- This appears to be the service required by the "screen capture button" (at least on Lenova laptops; it is not listed on the site ServiceDefaults or other sites listing similar service defaults).
- Use the "registry editor" regedit to disable the Xbox Game Monitor service by going to HKEY_LOCAL_MACHINE\SYSTEM\CurrentControlSet\Services\xbgm and change Start REG_DWORD from "3" to "4". Restart Windows after making those changes.
- This service is used by the Win10 "Game Bar" DVR. - Source: How to disable the Game Bar and DVR in Windows 10.
Issue - Long loading times
Symptoms: Loading a "save game file" takes longer than it used to, by several (e.g. 5-10) minutes. It does eventually complete loading, so this is not the "infinite roulette wheel" problem discussed in "Issue - Incomplete save game load".
- Cause: Varies but is generally an indication the engine is processing more information in the save game file or having difficulty locating/reading the file. This may be the result of "save game bloat". The following are things to check first to determine the cause of the problem.
- Diagnostic checklist.
- Have you tried "defragging" your disk drive?
- Have you checked the NVAC and NVSE logs for loading errors?
- Are you using the same "file slot" for your saves or "quick saves"? (Not recommended. There are mods which ensure a new file is created for each of those purposes, such as "CASM" and "Clean Quick Saves".)
- Have you tried loading the save game immediately after exiting to the desktop and re-launching instead of from the main menu, and if so does the time to load vary? (This suggests the problem is with some plugin(s) that are loading when the game starts as opposed to something when the game is saved, or vice versa.)
- Does the game re-load fine upon the death of your character or using a quicksave file created in that game session? (This suggests the problem is with some plugin(s) that are loading when the game starts as opposed to something when the game is saved.)
- Did you check that you are using exactly the same mod manager "profile" (i.e. current game configuration) with the exact same "load order" as previously?
- Have you "merged plugins" together into custom ESP files to reduce the number of used plugin slots, and then possibly added the same plugin to multiple merged plugins or even loaded that plugin again separately? If the file names are NOT the same, the engine will load multiple copies of a plugin and uselessly add to it's processing load.
- Are you using a number of mods which spawn more "actors" (NPCs or Creatures) into the game?
- When you first add mod plugins, they don't have the same impact as later on because they haven't spawned as many actors in the beginning as later. The longer you play such a plugin, the more spawned actors the save game file has to keep track of (even when they are "dead", because each actor/corpse is also a "container"). At some point you cross the "tipping point" where you start to see the impact in terms of loading times. This is unlikely to be early in the game, unless you have a number of mods which spawn in the same cells. (The "Mojave Wasteland" exterior is primarily one large cell.)
- The same applies to everything you move (e.g. a door is opened but not closed again, as well as "loot" you pickup). If it is something unique to a mod (only that plugin has it defined), then the record for that item has to be found in that plugin, which is why you will corrupt your save game if you remove that plugin later on. The record is no longer valid. If you are a "hoarder" (like me) you have to be careful to sell off unique plugin items to keep the bloat down. Selling items lets the game reset them back to their default location.
- Solution: If you determine the problem is "bloat", follow the "Clean Saves" procedure after disposing of the items which create "bloat". Then, if you still have issues, you can try the tool "New Vegas Save Cleaner" after you have made backups of the save game files. Please read the instructions in the downloaded package carefully. If you don't understand what it is doing, then read the comments page or ask in the forum.
Issue - Missing MSVCR120.dll
Issue - Modded game CTDs on startup
- Cause-1: If the CTD occurs before you get to the Main/Pause Menu, likely it is a "missing master file" required by a mod plugin.
- Solution-1: Load your entire "load order" into FNVedit and see if it reports any "missing master" errors for any plugins. See the wiki article Missing Masters for a tutorial on how to determine the missing file and fix this problem.
- Re-check the mod download page for any required files you may have missed or removed.
- Cause-2: If the CTD occurs during an initial loading screen after you get past the Main/Pause Menu, likely it is a plugin that is sorted in the wrong order.
- Solution-2:
- Re-check the mod download page for any required files you may have missed or removed.
- Try sorting your "load order" with LOOT. You may need to make some manual adjustments to meet mod requirements to the "load order".
- Remove any unused plugins (ESM or ESP extensions) from the "Data" folder. They count against the "plugin cap" and the game loads all that it sees in that folder before determining if they are part of the "load order". As a result, even "Inactive" plugins can cause a "Missing Master" error.
Issue - NVSE - fails to load after update KB4058043 to Win10 FCU v1709
This can also manifest as a general slowdown and loss of some sounds.
- Once it has been installed previously functioning NVSE logs report the following when the game is launched:
old winmain = 01E1F720
couldn't write memory (update winmain)
couldn't init hook
Couldn't inject DLL.
terminating process
- Many thanks to Derialund of the "Fallout New Vegas Technical Support" forum for initial reporting and investigation of mitigation regarding this issue.
- Cause: Windows Update KB4058043, December 15, 2017 to Win10 FCU (v1709), also known as the "Meltdown and Spectre Vulnerability" patch. There are other KB numbers for the same patch applied to various build numbers. See the articles referenced below.
- According to Microsoft Support:
- This update makes reliability improvements to Microsoft Store and fixes an issue that could cause app update failures and cause Microsoft Store to generate unnecessary network requests. (Presumably (based upon timing and effect) this is part of the mitigation effort against the Meltdown and Spectre vulnerabilities in processors' “speculative execution” architecture existing since 1995. For a "layman's explanation" of this vulnerability. please see the What are Meltdown and Spectre article.)
- Microsoft is continuing to roll out a series of patches to fix this vulnerability. This article on Techarp dated 23 Feb 2018 has the rollout schedule and Knowledge Base article numbers for various builds. The official Microsoft word on this vulnerability is here.
- The problem occurs with FNV even when it is installed on a different drive from the default install location (i.e. NOT "C:\Program Files(x86)") and the executables have been added to the "Data Execution Prevention" (DEP) exception list.
- FCU now includes Windows Defender Exploit Guard (WDEG). This is the successor to "Enhanced Mitigation Experience Toolkit" (EMET), and "to prevent possible compatibility, performance, and stability issues, Windows will automatically block or remove EMET on Windows 10 systems starting with the Windows 10 Fall Creators Update." (Details in the linked article.) A 1:04:51 minute video focused on WDEG and how it fits into Microsoft's "End to End Protection" strategy is available as well. Configuration instructions are found in Configure Windows Defender Exploit Guard (WDEG) in Windows 10. WDEG works with DEP but apparently it's settings override those set in DEP.
- Solution: Unknown. The problem has been reported to the NVSE team.
- Mitigation (For Windows 10): As for the FNV and NVSE problem in particular, inside WDEG, there are two main configuration profiles: "System settings" and "Program/Application settings". To solve this problem it is necessary to add an entry for both FalloutNV.exe and NVSE_loader.exe to WDEG under "Program/Application settings". There, every security option must be override and/or superimposed on deactivate.
- Practically, you have to:
- Open the Windows Defender Security Center.
- Go to "App & Browser control".
- Scroll down the page and go to "Exploit Protection" section. Then click on "Exploit Protection Settings".
- Inside the result page, click on "Program Settings" tab.
- Click on "Add program to customize".
- Click on "Choose exact file path" and search for the game root folder (with the main game executables, where FalloutNV.exe and NVSE_loader.exe should be).
- In the "Program Settings" page should appear the entry with the full path (e.g. "D:\Fallout\FalloutNV.exe").
- Mouse over such an entry and click on it, and then on the button "Edit".
- Inside the resulting settings page, there are various entries like:
- Arbitrary Code Guard (ACG)
- Block low-integrity images
- etc.
- Then under each entry there's a check box with the description: "Override system settings". Under it there's an On/Off "switch" or "slide-box".
- That checkbox must be checked for every entry; and then every "slide-box" must be turned to OFF.
- Overall, 21 System overrides should be indicated under the "Fallout Executable" entry list, indicating that everything is turned "off".
- Mitigation (for older versions of Windows: untested): Those without access to WDEG can see if Enhanced Mitigation Experience Toolkit (EMET) 5.52 will suffice in the same manner instead. This free tool is approaching "end of life" on 31 July 2018 (at the moment). After that, only Windows 10 will be supported and security patched. Note that the "EMET User Guide" is a separate download.
Issue - Problems point to Steam as the source
Errors such as a "Preparing to Launch" message loop, or nothing apparently happening when you click to start any Steam game, or system error messages ask to troubleshoot Steam.
- Cause: A corrupted "ClientRegistry.blob" file.
- Diagnostic: First, confirm this is a Steam problem with the following steps.
- Use the "verify local files" option in the Steam Library.
- Ensure the launchers (FalloutNV.exe, FNV4GB.exe, nvse_loader.exe, nvse_steam_loader.dll, etc. as appropriate) are up to date.
- If you have the game installed in the default Steam location (under "C:\Program Files"), ensure the initial launcher or the shortcut used is set to "run as administrator". (All other files will be launched using this launcher's environment and credentials.) If you are having problems with the game installed elsewhere, try setting the launcher to "run as administrator" as a test.
- If all this fails, and if this problem is happening with all of your Steam games, then you have a "Steam Issue". The fix is simple.
- Solution:
- Ensure you have completely closed down (as in "log out" and wait for it to close) the Steam Client.
- Locate your "Steam" (not the game) folder (i.e. "C:\Program Files\Steam") and delete the "ClientRegistry.blob" file. (Though you could try just renaming it.) This How to FIX Steam Preparing to Launch Loop other Steam Problems 3.5 minute video shows you how to do exactly that if you are better with visual explanations.
- Now when you try launching your game the issue should be solved (or at least you should get a different error).
Issue - Regional Non-English language version of the game displaying English dialogue
Why are my DLCs in English instead of my Regional language?
- Cause: The menu and interface (text) files language is determined by the language you select when download/updating the game through Steam/GOG. You should have "<DLC>_lang.esp" files for your Regional language installed, but they are not "active". There should be corresponding "<DLC>_lang.nam" files, but aren't. Even when present the "*_lang.esp" files cannot normally be "made active", as the default "*.nam" files force the game to load the "INT (English)" versions of the DLCs instead.
- Solution-1a: Remove the incorrect language code "*.nam" files.
- If these "*.nam" files are not present, try to "activate" the "*_lang.esp" files. Then engage in conversation with a DLC NPC to verify you are now getting the dialogue in your Regional language.
- Solution-1b: The mod Voice Actor BSA files lets you swap the language Voice Actor BSA file (Fallout - Voices1.bsa) to a different one of your choice. This enables you to have the text in one language and the voices in another.
- Solution-1c: See also Issue: Regional Non-English language version of the game with different language audio? solution as that is a similar (though reversed) situation.
- Otherwise, contact your Regional Steam provider about the problem.
Issue - Regional Non-English language version of the game with different language audio
How do I get the audio in one language (e.g. "English") along with my Regional language (e.g. "Italian") for subtitles?
(With thanks to PipBoyUser of the Nexus Fallout "New Vegas Discussion" forum for investigating and reporting the following.)
- Cause: The language used for the Audio (voices) and subtitles installed for the game depend upon which Regional language version of the game you install. (The general process of making a game compatible with different Regional languages is described for Steam developers in this localization article.)
- Solution-1: In order to "mix" different voice and subtitle languages, you need to install both language versions (in the correct order) and copy files from one install into the other language version. You want to install the game for the language you want the Audio to be voiced in (to preserve the Audio filenames and paths used), and then replace the "*.ESM" and "*.NAM" files with those from the Regional language version. (Examination has shown the "*.ESM" files contain at least some "in-game" text in the Regional language. The "*.NAM" files tell the game engine to load certain "master" (i.e. the DLC ESM) files automatically even if they are not selected as part of the "load order", and come in language specific versions.)
- This is a multi-step process, taken in the following order:
- Install the game in your Regional language version (the one you want the subtitles to be using).
- Open the "Fallout_default.INI" file: "[General]" section, "sLanguage=" entry, and note for later use the exact language name used (e.g. "ITALIAN").
- Copy all the vanilla and DLC game "*.ESM" and "*.NAM" files somewhere else safe for later use.
- Now re-install the game, this time choosing the language version which you wish to hear spoken (e.g. "ENGLISH").
- Replace the the current install's "*.ESM" and "*.NAM" files with those you backed up from the Regional language version earlier.
- Edit the three INI files (see the Game INI files section of the wiki "FNV General Mod Use Advice" article), find the "[General]" section entry "sLanguage=" and change the value of that (e.g. "ENGLISH") to that of your desired subtitle language noted earlier. (Case and spelling are significant.)
- You should now hear the voices in the installed language and see the subtitles in your designated regional language. Remember that if you "verify local files", the "*.ESM" and "*.NAM" files will probably get restored to those of the Audio language, so you will probably have to replace them with your copies from the Regional language backup.
- Solution-2: See also Issue: Regional Non-English language version of the game displaying English dialogue solutions as that is a similar (though reversed) situation.
Issue - Regional Non-English language version of the game will not load NVSE
Example: Various methods to start the "enplczru" version of the game (Eastern Europe: Czech Republic, Poland, Hungary, and Slovakia; aka "PL/CZ/RU" version) with NVSE gets Steam error: "P:0000065432" or "5:0000065434". Normally this error indicates the Steam Client app is not running, but in this instance it is merely the closest guess by the game as to the cause of the problem.
- Cause: NVSE does not accept "language" parameters on the command line.
- Solution-1: NVSE should be launched indirectly from 4GB Fallout New Vegas Updated or FNV 4GB Patcher modified game executables, which will accept a language (i.e. "SteamAppID") parameter, and then launch NVSE. Each regional version of the game has a unique SteamAppID. Here is how to identify what this AppID is and apply it:
- Right click your FalloutNV.exe file in the Steam game folder, and create a shortcut to the desktop.
- Right click the newly created desktop shortcut and open "properties".
- It should say something like "steam://rungameid/22490". Copy that last number (the game's SteamAppID).
- Right click the 4GB launcher shortcut, and open "properties".
- In the "Target" text box, change the number in the " -SteamAppId 22380" parameter to your actual SteamAppID number (i.e. "22490").
- Note that because the path to the game contains embedded spaces, the entire path needs to be placed within quotation marks (i.e. "<path>") everywhere it is used in the shortcut. The AppID parameter goes outside of the quotes, on the "target" property line ... as in ("E:\Games\SteamLibrary\steamapps\common\Fallout New Vegas enplczru\fnv4gb.exe" -SteamAppID 22490) without the "(parentheses)".
- Solution-2: Some people reported early success by renaming their regional version named game folder (i.e. "Fallout New Vegas enplczru" to "Fallout New Vegas": the English version name). It is not reported if this causes issues later on with language specific patches, which is why it is the secondary solution.
- Solution-3: : User sanassar in the "New Vegas Mod Troubleshooting" forum thread provided the following solution. It has been [edited] and reformatted for clarification.
Issue - Unable to install FNC with MO2
Often described as being unable to find the FNV or FNC ESM files after installation.
- Thanks to Purr4me (Kitty Black) for the basis of following:
The "Fallout New California (FNC)" mod comes as an EXE installer. This causes confusion among users of the "Mod Organizer 2 (MO2)" manager. DO NOT point the installer to the game "Data" folder if you intend to operate the game from within MO2. Here is how to install FNC for use with MO2. (The basis of this may or may not work with other similar managers. It has not been tested with them like it has with MO2, so use at your own risk.)
- Install the base Fallout New Vegas game and NOTHING ELSE.
- Run the initial game setup from the "Steam Client" or GOG "Galaxy" if needed so it has detected and is configured for your hardware.
- DO NOT patch the Steam version to use 4GB of memory (GOG doesn't need it); and do not install NVSE or any other addons or mods. Just leave the raw base game files and folders alone.
- Install MO2 and point it's FNV profile setup to the location of the raw game files (where FalloutNV.EXE is located).
- Run MO2, and launch the FNV game from within it.
- Create a "save game" file and exit the game.
- Close MO2. (This is important to get the base game profile established correctly.)
- Open MO2 (again) and add the "Fallout New California (FNC)" EXE file as a "1 time executable" to the drop-down menu.
- The files from the "FNC EXE" should then be extracted into an isolated folder.
- MO2 will automatically create the appropriate folders for the game files as needed.
- When the "1 time executable" process is done:
- hit the "Sort" button, and then,
- run the game.
- Once the game has been entered and you can confirm you are now running "Fallout New California (FNC)", you can exit and apply the 4GB Patch (if needed), as well as NVSE and other plugins and mods as needed without any major problems beyond the usual mod conflicts.
Issue - Vanilla game bugs
Most that have been officially patched or are XBox or PS console only are available on the Wikia Fallout Portal: Bugs page.
- Solution: Community "game fixer" mods. The following are specifically recommended, though their effectiveness varies by system. Install and test individually in the following order:
- New Vegas AntiCrash (NVAC) (Essential: solves most common CTDs).
- New Vegas Tick Fix (NVTF) (Win7-10 alternative to NVSR, with fewer features.)
- New Vegas Stutter Remover (NVSR) (requires NVSE. The 5.0 beta versions are stable. Check version requirements of other mods when choosing which version of NVSE to use.)
- There are several reports in the download page "comments" that NVSR causes CTDs after 10-20 minutes of play once the Win10 "Fall Creator's Update" (FCU) of Nov 2017 has been installed where previously everything had been stable. Those experiencing this problem are recommended to see Issue: Recent (post-Win10 FCU) CTDs after 10-20 minutes of play. (Windows 7+ users are advised to consider using mod New Vegas Tick Fix (NVTF) instead, as it is designed to avoid the problems though with fewer features than NVSR.)
- Core processors prior to I5 or I7 are suggested to use NVSR_4-1-32 (simpler options) with the nvsr_older_processors file of INI edits from the first post on the linked TTW page.
- Those with later processors are advised to use NVSR_4-1-36 or later with the nvsr_newer_processors file of INI edits from the first post on the linked TTW page.
- (The only differences for 4.1.36 should be removing the overrides for previous versions as they aren't needed.)
- These INI edits are advised as performance settings suitable for FO3, FNV, and TTW.
- New Vegas Script Extender "Sheson memory patch". (Increases "heap size". Use either the "heap replacement" feature of NVSR or this. Both together do not conflict (different "heaps"), but seem to be "overkill" at the cost of almost 1GB of game memory.) See the Issue: CTD without warning, "out of memory error", or stops responding sub-topic for simple but detailed instructions for enabling this feature.
- Yukichigai Unofficial Patch (YUP) (and the various optional patches for it and other mods. Highly recommended. There are other YUP patch files than on that page you may have to search out for other mods).
- Mission Mojave Ultimate Edition - FNV Community Patch (MMUE) (and it's various optional mod compatibility patches). Use either YUP or MMUE, but not both as they overlap considerably and cause unresolved conflicts. YUP is more actively updated.
- New Vegas Enhanced Content (NVEC) (optional: Notice it has separate "bugfix" modules if you don't want the "complete version" with enhancement mod inclusions).
- Better Game Performance (optional: some reports of minor slowdowns. It removes "unessential" things that some mods or quests might rely upon).
Issue - Vanilla game CTDs on startup
Uninstalled and re-installed the game but even without mods it crashes on startup.
- Cause-1: Likely you forgot to clear out your "C:\Users\<YourAccountName>\Documents\My Games\FalloutNV" folder when you had Steam "verify local files". The game places your specific versions of the "Fallout" and "FalloutPrefs" INI files there, along with your save games. These are not replaced when you verify/re-install the game if they are found to already exist there.
- Solution-1a: Try renaming the "Users" folder INI files first. Recall that the "Prefs" INI file gets created only when you run the original "FalloutNVLauncher.exe" and identify your hardware under "Options" on the first menu. Subsequently if that fails move the "saves" elsewhere, delete that "Users" FalloutNV folder's content, and re-install again. If you have to re-install again anyway, be sure to install to a folder that is not under the default "C:\Program Files" folder tree. See Installing Games on Windows Vista+ for the rationale and guidance.
- Solution-1b: Consider if the problem happens with other Steam games. If so, check out the Issue: Problems point to Steam as the source entry.
- Cause-2: A third-party program running in the background is interfering with the game.
- Solution-2: Try turning off any unnecessary background processes, such as "anti-virus" or "anti-malware" programs (unneeded if you are running your game in "offline" mode), multiplayer "overlays" like "OverWolf" (this is single-player after all), the Steam overlay, etc.; at least on a temporary basis to see if they are interfering.
- Cause-3: In mid 2016, nVidia and AMD driver updates and some Windows 10 WDDM updates started to cause CTDs upon startup to previously trouble-free games. This was determined to be caused by changes to the "Windows Device Driver Kit" (WDDK) at that time.
- Solution-3a: Win10 November 2016 updates have fixed these issues. Make sure you have applied your system updates.
- Solution-3b: The "New Vegas Anti-Crash" (NVAC) mod as of v7.5.0.0 (released 25 Oct 2016) has been reported to fix the conflict with the broken video drivers from nVidia and AMD.
- Solution-3c: Rolling back to nVidia drivers 368.81 or 368.69; or AMD driver 16.8.3 have been reported to successfully resolve the problem with Win10. In general, avoid upgrading your video card drivers unless the latest fixes a particular problem you are encountering. (Support and testing for older games can get dropped in newer versions.) To prevent Win10 automatically doing such upgrades to any drivers in future updates, see this article on Taking back control of Windows 10 driver updates.
- Solution-3d: Depending upon the nature of the Windows update (all updates provide a link to a MS Knowledge Base article explaining the update in detail), reverting to the "system restore point" prior to the update may be a reasonable temporary solution if this occurs in the future. However, in the long term this might prove to be a security risk, so be sure to report the problem and track the status of the update for possible fix and re-release.
Issue - Vanilla game Hangs on startup
When you open the launcher, it functions as it should with the music in the background. Also have audio by the time the main menu loads. Whenever you load a game, the loading screen with the roulette wheel has no audio and this screen will freeze for one to two seconds (as evidenced by the ball in the roulette wheel stopping). Screen will then go black for a few seconds, and the game will load, but have no audio at this point and there is severe lag.
- Cause-1: Win10 has DirectX12 drivers, but the DX9 driver the game is expecting is not being found.
- While Win10 comes with DirectX12 installed and is backwards compatible with older DX versions, older games do not know that and are looking for specific versions of DX library files (i.e. d3d9_32.dll) and not finding them. So you need to install the appropriate "DirectX End-User Runtimes" as well: ones which are compatible with Win 8.1+.Note that you need the 32-bit version for 32-bit games. (I make it a practice to always download both the 32-bit and the 64-bit versions of any libraries I manually install, so I am covered either way. There is a reason they published a version for both 32-bit and 64-bit. They are not "interchangeable", and are separate installs going into different locations.)
- (Games that used DX7 and 8 are murky territory. Many will run on OS's newer than XP, but may require fixes/tweaks. Always use the latest available "runtime" versions of those DX libraries.)
- Some games try to install an older DX version they come bundled with. Those versions may not be compatible with the later versions of Windows, which is why you should manually install the version you know is compatible. Then those games will see that DX version is already installed and not try to install their bundled version causing incompatibility problems.
- Solution-1: For DX9, manually install the DirectX End-User Runtimes (June 2010) which is Win 8.1+ compatible. Download the full runtime package. DO NOT use the "Web Installer" version.
- When the DX installer asks where to install the files to, you choose any folder you like, but generally have it unpack the files to a folder on the desktop or one dedicated to that purpose anywhere, because this folder can be deleted or emptied after the final install is done. (DirectX does not actually get installed at this point. The files are only 'unpacked' from an archive)
- Once the files are unpacked to this folder you open the folder and locate DXSETUP.exe (the actual installer).
- Run this installer (as an Administrator) to finalize the DirectX re-installation.
- When the installer is finished delete this folder.
- Each game uses a specific DX file, or files, (e.g. d3dx9_32).
- A newer game may use two DX files (e.g. d3dx9_42 and d3dx10_42).
- See the MS article How to make Win10 run DirectX 9.0 for more details.
- Cause-2: The game is not finding all the asset and resource files it requires. Especially under Windows 10, some files upon installation can get "black listed", which means they get deleted immediately without the installer realizing it.
- Solution-2a: If you haven't already, move the game out of the default "C:\Program Files" folder. See the wiki article Installing games on Windows Vista+ for instructions.
- Solution-2b: If your graphics card is an "Intel" brand or on-board graphics chip, you need to install the mod Intel HD graphics Bypass package (from the FO3 section of the Nexus mod site but it works for FNV as well). This "by-passes" an issue with those chips by placing an expected DLL file in the game root folder.
- Solution-2c: Some have reported that playing in "windowed mode" (see Issue: Playing at greater than 1920x1080 resolution, Solution-2) has made the game playable when other solutions didn't.
- Solution-2d: If you are having any audio problems, check the manufacturer of your sound card for any updated drivers. The "default" drivers provided to the manufacturer of your computer or included with the original install of Windows may have updates that fixed problems surfacing after that point in time. Microsoft does not always distribute the latest versions of all subsystem drivers.
- Solution-2e: There are "behind the scenes" interactions between the video, sound, and mouse subsystems. Logitech brand mouse drivers have a long history of their more advanced features causing problems with games (such as the "jump to new button" or "locate cursor" features). Other vendor products are not immune to similar problems. Try using only the basic features and gradually add features after testing. If that is not sufficient, then see if an updated driver helps. Consider as well the possibility of rolling back to a previous driver which was known to work.
- Solution-2f: If you are still having problems, then you need to determine which assets are missing. Install the 32-bit version of the Dependency Walker tool. Then run "Dependency.exe", pointing to the game EXE to examine. You are looking for red entries which signal "missing assets", which means it is not finding files the game requires. Some of these will be Windows system files (typically 32-bit versions if you are running a 64-bit system; which is expected). Initially you are looking for missing game files. If there are none, then either the game files are corrupted or the "load order" needs to be fixed.
- If you have more than a few "missing assets" (i.e. files from Steam for Windows compatibility), then fire up the game with the Steam Client in "online mode" and launch it from the Steam Library (so it will install those assets it considers "temporary" while in game that it installs upon launch. If you can get to the main menu in "windowed mode", use <Alt+Tab> to switch out of the game and then run "Dependency.exe" again against the game EXE file (while it is loaded into memory). You should now find all or most of those "red" entries are now "black".
- If you still have "missing assets" from the game the files may be corrupted (in which case you can try to re-install or "verify local files"), or they are getting "black listed", in which case you may need to install them while in "Safe Boot" mode.
- Otherwise, make note of which are missing and seek assistance on the New Vegas Technical Support forum. Be sure to include your version of Windows, hardware specs, where you have the game installed, and what steps you have already taken.
Solutions to Performance problems
Guide - Performance Tutorial Videos
As many people prefer to view a video over reading instructions, the following "performance setup" tutorials are recommended:
- Fallout New Vegas | FPS & Stability (definitive guide) 12:11 minutes, 2018 video by GamerPoets.
- See also Issue: TTW Performance Guide abstract.
- Modding Fallout NV 'Ultimate Edition' part 7 : Performance 19:05 minutes, 2012 Video by Gopher.
-
- Please bear in mind that there are later alternatives to many of the specific mods he mentions in this video if any of them don't work for you.
Videos usually do not cover any particular part of their subject in depth. They are useful for getting started, but as they are seldom updated written guides are intended to provide more supplementary information when you encounter difficulties.
Issue - FPS drops over time
- Cause-1: This problem has been associated with FNV Project Reality MkI by JJC71 settings. (E.g. Initial FPS around 60, but over time it drops to roughly 30 FPS.) The mod was last updated in 2011.
-
- Solution-1: Go into "Mod Configuration Manager" (MCM) and enable all the options in Project Reality, then exit out of MCM and wait a few seconds. Now go back in and disable all the options under Project Reality in MCM again. Instantly your FPS should be restored to what it was initially. See the comments tab on the download page regarding other issues.
- Cause-2: There is some fairly compelling evidence that the game's texture cache system "leaks memory" over time. This generally means it allocates memory but fails to release it all properly when no longer needed; eventually leading to lowering FPS and CTDs. There is evidence that larger image sizes (aka "higher resolution images") speed up the problem to occurring after roughly 20-60 minutes of play.
-
- Solution-2: While not really a "fix", try using "low graphics quality" settings to see if this increases the amount of time you can play before seeing the same symptoms. If so, this is an indicator such leakage is your problem. If you have "texture replacements", try switching to low to moderate resolution images (1024x1024 or 2048x2048 pixels; the game default size is 512x512). Choose what you replace with care. "Post-processors" such as ENB and SweetFX, as well as mods that "improve" images and textures (e.g. "Fallout Character Overhaul" (FCO), "New Vegas Redesigned" (NVR), and "Freeside Open") can also contribute to the problem due to their increased demand upon the video stream. Use such in moderation and with careful examination of their impact on performance over time. Remember that the game engine has not been updated since 2010.
Issue - Full screen mode exhibits CTDs and stutters or micro-stutters
- Cause: Newer or "high powered" systems seem more prone to exhibit these symptoms. Recall the game was designed for Windows Vista+ and Xbox systems with no more than two CPUs and single monitors at 60 FPS.
-
- Solution: Try running the game in "windowed mode". This is a built-in game setting (under "Options" when you use the "FalloutNVLauncher.exe" to start) that has been reported to completely eliminate both stutter/micro-stutter and CTDs on some "high powered" systems.
- If you don't like the appearance in "windowed mode", try installing and using the (2015) mod "OneTweak for NVSE" by virusek instead of the older (2011) "Fake fullscreen" mod suggested in Gopher's video, or the slightly newer, more full featured (2013) version called "Game Companion - Fake FullScreen". All of these make "windowed mode" look as if "full screen".
- There is also an "open source" app called "Borderless Gaming" which works with virtually any game (including those from Steam). It's free, but confusingly talks about "buying it on Steam"; by which it means if you do choose to buy it ($3.99 USD) the proceeds support it's development.
Issue - Game in slow motion
The foundation of game performance is to first optimize your system for gaming. The wrong settings can actually hurt performance, and the defaults are very conservative.
- New Vegas Anti-Crash (NVAC)
- New Vegas Stutter Remover (NVSR) (Win 10 users: See also Issue: CTD after 10-20 minutes of play (post-Win10 2017 FCU).
- Complete System customization and optimization for Windows.
- Complete System customization and optimization for Windows.
- Tweakguide's ATI Catalyst Guide (driver optimizations for all games.)
- Tweakguide's nVidia GeForce Guide (driver optimizations for all games.)
- Tweakguide's General Fallout game guide (specifically for FO3 and FNV.)
- Tweakguide's nVidia specific FNV Guide.

Queued, the author of the NVAC mod, reports in the NVAC support thread:
'I looked through New Vegas code as I was making that list to determine if they read the setting and then if they actually used the variable set after reading the setting, so I'm fairly confident in the "Does nothing" notes in particular. Aside from INI settings, there is also a crazy amount of Game Settings (set via esp / esm / script / console) that also are never used by the game.'
- The "list" he mentions was from the tool New Vegas Configator, which outside of that program must be translated to settings in the INI files as described in "Tweakguide's General Fallout game guide". It follows with Queued's comments on the values (which are not recommendations) used by someone having CTDs, given in "("parentheses")" for reference only:
- Fullscreen (OFF) - No problem.
- Anisotropic Filtering (8) - No problem.
- Antialiasing (8x) - No problem, though 8x is ridiculously taxing; traditional MSAA is crazy inefficient and slow.
- Shadows (ON) - No problem.
- Shadow Quality (2) - No problem.
- Shadow Filtering (2) - No problem.
- Max Shadows in Interiors (12) - No problem.
- Full Scene Reflections (ON) - Probably fine; I'm not sure which setting this maps to as the Configator made up descriptive names.
- Water Reflections Width (2048) - No problem, though is Height also set to match?
- Object fade distance (15) - No problem.
- Item fade distance (15) - No problem.
- Actor fade distance (15) - No problem.
- Tree LOD fade (80000) - Technically no problem, but as far as I'm aware, vanilla New Vegas doesn't use the Tree LOD system and Tree LOD models are part of Object LOD instead.
- Object LOD fade (100000) - No problem.
- Land Quality (1.5) - No problem.
- Threaded Morpher (ON) - Does nothing; the game reads the value but never uses it.
- Threaded Blood (ON) - Does nothing; the game never even reads this value.
- Threaded Particles (ON) - Does nothing; the game reads the value but never uses it.
- Threaded AI (ON) - Possible cause of crashes; use at your own risk.
- Models Cloned in Background (ON) - Does nothing; the game never even reads this value.
- Load Files in Background (ON) - Likely safe; however, use at your own risk.
- Load lip files in background (ON) - Unknown impact; use at your own risk.
- Havok Threads (7) - Does nothing; the game never even reads this value.
- Grids loaded (12) - LEAVE THIS AT 5. This needs to be an odd value (5, 7, 9, etc.) and the game has code that only works properly when this is at the default of 5. Turning this up drastically increases memory and processor use. Also, this is probably why you're crashing outdoors. [Larger values may cause scripts to prematurely trigger upon cell loading.]
Added: Note that 'uGridsToLoad=' is directly linked with 'uInterior Cell Buffer=' and 'uExterior Cell Buffer=' values. Best to leave all three alone.
-
- Pre-Emptively Unload Cells (ON) - Possible cause of crashes; use at your own risk.
- Unload cells on fast travel (ON) - Possible cause of crashes; use at your own risk.
- Use hard drive cache (ON) - Unknown impact; use at your own risk.
- Preload Size Limit (223) - Dumb setting; this is the data buffer for Bink video.
- Others who have looked at the code do not disagree with Queued.
- As system components vary, only experimentation will tell which values will improve your performance.
- Cause-1: Fallout INI files are configured with wrong (too high) an "iFPS=" setting.
-
- Solution-1: Set the "FPS" setting to a maximum of "=60".
- Note that too high an FPS over 60 can cause a "havok physics" problem with objects falling from clipping through geometry.
- Make backups of the INI files before changing them.
- The Fallout INI files have an "iFPSClamp=" setting under the "[General]" section. Do not set this to other than "=0" if you have NVSR "bManageFPS = 1".
- New Vegas Stutter Remover (NVSR) "Data\nvse\plugins\NV_Stutter_Remover.ini" has to have "bManageFPS = 1" under the "Master = {" section before the setting "MaximumFPS = 60" under the "FPS_Management = {" section will take effect. Check that the "MinimumFPS" setting is not higher than the maximum; something like "= 20" is noticeable while still playable. If NVSR is managing FPS, do not leave the three Fallout INI files with a setting other than "iFPSClamp=0".
- Cause-2: For some people, the problem is New Vegas Stutter Remover (NVSR) "Data\nvse\plugins\NV_Stutter_Remover.ini" has "bManageFPS =" set to something other than 0.
-
- Solution-2: Edit the "NV_Stutter_Remover.ini" setting to "bManageFPS=0" and have the three Fallout INI files use "iFPSClamp=60" or less.
-
- Make backups of the INIs before changing them.
- Cause-3: Many mod scripts running, especially during mod initialization. If specifically in Goodsprings, be aware that the "Weapons.of.the.New.Millenia" "cache cabinet"/"cheat chest" is known to cause this, but only in Goodsprings.
-
- Solution-3: Review your mods and reduce the number that initialize only in that specific area.
- Cause-4: This seems to be a general problem with the FO3/FNV Gamebryo engine over time. The exact cause has not been pinned down.
-
- Solution-4: Reboot your computer. This seems to restore things to normal frame rates, at least for a time.
- Cause-5: You are running Windows 10. Win10 is not the best platform for running older, 32-bit games. It flat out says it is incompatible with FO3 for instance. It is easy to demonstrate that even in various "compatibility modes" it is not performing the same as under previous versions. (Though try either "Win7" or "VistaSP2" compatibility mode. Some have reported improvement after the Win10 FCU {aka "Redstone 3"} update by disabling any compatibility mode.) One report went from 10-15 FPS (or less) with Win10 on a high-end desktop box to 30-40 FPS with Win7 on an older laptop.
-
- Solution-5a: If possible, use a dedicated computer with an older OS such as Win7 for your 32-bit games.
-
- Solution-5b: For advanced users: If you have a Windows 10 Education, Professional, or Enterprise edition you can use the included Win10 Hyper-V system and try running the game in a Win7 "virtual machine". A "virtual machine" can get around some OS incompatibilities even though it is running on the same hardware due to the different drivers in use. See HyperV on Windows compatibility for the hardware requirements and a walk-through of the installation process. Note this requires you to have or obtain an ".iso" file of the desired OS install media. (If none of this option makes sense, you probably don't want to mess with it. Otherwise, educate yourself as it is beyond the scope of this wiki.)
- Cause-6: Your hardware can't cope.
-
- Solution-6: either reduce game settings for texture quality and/or screen resolution to less demanding levels, or invest in better hardware.
-
- Ensure you are using any Graphics card with it's own VRAM instead of your motherboard CPU to display and render your game. This means, if you have both an "addon" graphics card and a "builtin to the motherboard" graphics chip, use the addon card. An "onboard" graphics chip (typically without VRAM in a laptop) has to use "system ram", which is both slower than dedicated video VRAM, but also takes that memory away from what the game can use. This would just be a video driver (or possibly a BIOS selection) configuration change.
- Specific component upgrades recommended are (in order of effectiveness for the price):
- System RAM,
- More Video RAM in a faster graphics card,
- Faster CPU processor (number of cores is much less important for 32-bit games like FNV; but this option will often require a motherboard and/or power supply upgrade as well, typical making it more expensive than any other options overall),
- Faster disk drive. (This is the slowest solution; even an SSD, though that is the best choice for this option, is not really suited to games. It's most effective holding the OS.)
Issue - Graphics in vanilla game glitchy immediately after exiting Doc Mitchells
Unless the camera is pointed at the sky or your feet, the ground and all other textures disappear. Messages would become "black boxes", the entire screen becomes black and occasionally flash different colors. Just "glitchy". Eventually after a short period of time the game will CTD.
- Cause: You have some incompatible video settings.
-
- Solution: Re-run the game launcher (FalloutNVLauncher.exe) to re-detect your hardware. Try changing between "HDR" and "Bloom" in the game "Graphics Settings" under the game launcher menu. Note you want your video card adapter settings to be compatible with your game settings. Other common settings that may have been or need to be adjusted can be found the Issue: ENB is not working entry. See also the Solutions to Graphics problems section for other possible conflicts.
Issue - Lag or microstutters even with New Vegas Stutter Remover installed or not
All visual stuttering problems are caused by the video stream having to wait for the "art assets" required to render the display. Mostly these are due to the disk drive being orders of magnitude slower than VRAM, with System RAM (e.g. "ENBoost") being in between.
"Microstuttering" is caused by the game engine updating at an unusual refresh rate that does not sync with your monitor's refresh rate. You can try getting NVSE and NVSR to alleviate "microstutter" at the cost of overall frame rate.
Keep in mind that this game was designed for older PC and XBox console systems, and it is now possible for your new "latest and greatest" gaming machine to be faster than it can handle. There are internal design choices that cannot be overcome. The following are "mitigations" that have been found to help some people.
- Cause-1: Companions impose heavy script processing penalties. More than two companions, while possible, will definitely cause lag according to the game developers. The game is unable to tell if a vanilla companion is "actually with you" or merely "befriended" but sitting elsewhere in another cell (such as in the Lucky 38 suite).
-
- Solution-1: Release ("part ways" from) unused companions to return to where they were recruited. If you are not informed you have lost the Perk granted by that companion, you have not actually "released" them. There are "companion dismissal terminals" found in the game to help with this for companions, even those not currently with you. One is found in the Lucky 38 Casino by the Casino floor elevator and another in front of the Gun Runners HQ shack outside Freeside's East gate.
- Cause-2: Use of NVSR setting "bHookLightCriticalSections=1".
-
- Solution-2: Disable NVSR hooking Critical Sections ("bHookLightCriticalSections=0)" if you are experiencing heavy stutter or see Issue: Recent (post-Win10 FCU) CTDs after 10-20 minutes of play.
- Cause-3: The stutters can come from the game looking for control inputs from the attached game controller device first, then the keyboard/mouse though both are enabled.
-
- Solution-3: Disconnect the controller if you are not using it. Regardless, in the "C:\Users\<YourAccountName>\Documents\My Games\FalloutNV\FalloutPrefs.INI" file look for "bGamePadRumble=" and ensure it is set to "0".
- Cause-4: Video card settings are not optimized for the game.
-
- Solution-4a: nVidia - There is a third-party tool called nVidia Inspector. (The author's blog page is in German, but does not appear to have been recently updated.) There is a Increase nVidia GTX performance with nVidia Inspector video covering the basics of how to use the non-intuitive interface. If you are launching the game from any renamed executable other than the vanilla name (i.e. "FalloutNV.exe", which MO renames to "FalloutMO.exe"), you need to add it to the nVidia profile so it will recognize that name as "the game" and adjust it's performance settings accordingly.
-
- The driver profile for FNV/FO3 "Ambient Occlusion" (AO) is reported to be buggy ever since nVidia updated it to HBAO instead of SSAO years ago. You can use nVidia Inspector to change the AO profile though. The Wolfenstien profile is reported to work pretty well.
-
- Solution-4b: There is a later spin-off of nVidia Inspector called NVIDIA Profile Inspector, which is a tool created for pulling up and editing Application Profile settings within the Nvidia drivers.
-
- Solution-4c: AMD/ATI - AMD Catalyst Control Center has game settings for CCC as well. While not as full featured as "nVidia Inspector", there is also Radeon Pro which still works well even though development stopped in 2013 when it's author was hired to work with AMD Gaming Evolved's Raptr.
- Cause-5: Some older video systems may have to pull from the hard drive more often or need more processing room with "high definition" textures.
-
- Solution-5a: Disk Defrag (free) your hard drive. All hard drives that are not "solid state devices" (SSDs) require "defragmentation" periodically. This reduces the lag from the physical magnetic "head" movement to locate sections of file scattered the disk platter and increases efficiency.
-
- Solution-5b: See the 'Issue: Is ENBoost for everyone? ' entry which enables the dynamic use of more system memory (if available) to assist video processing. Some people have found this to help with stutters and lag.
- Cause-6: Some people have reported an improvement upon adjusting some INI settings.
-
- Solution-6a: In all three INI files, under the "[General]" section set the following values:
bUseThreadedAI=1
-
- and add the line:
iNumHWThreads=
and set that to however many cores your processor has. Note this added line is not considered a general "performance" tweak (the game does multi-threading by default and the "iNumHWThreads=" setting may restrict it) and is not recommended for everyone as a matter of course. Some people have experienced adverse effects. Use with caution and test the result. When in doubt, start with "2".
-
- Solution-6b: Some "sounds", such as large explosions, can cause video stuttering as well. (The video, mouse, and audio systems are all interconnected in that they compete for priority of resources at the same high level.) Some have found that adding more vanilla BSA files to the "sEssentialFileCacheList=" list under "[General]" in the INI files makes a difference. For example:
-
- and increasing the size of the "Audio cache" under the "[Audio]" section as follows:
-
- This basically allows the game to cache much more into memory then it otherwise would, as it seems textures and meshes are excluded from memory, as well as large sound effects, resulting in a momentary freeze whenever they are loaded. May not stop a slight lag on the first explosion, but should greatly reduce any lag on explosions shortly after that. Just bear in mind that memory given to "cache" is not available for other uses by the game engine. There is always a "trade-off".
- Cause-7: Some people has reported stuttering while standing in place and turning the camera.
-
- Solution-7: Try disabling Windows Superfetch and File search indexing features (available since Win7) to see if it improves the situation. (See Superfetch: How it Works & Myths for more detail.) Note that Windows system updates may restore these settings without notice as something MS thinks should be enabled.
- Cause-8: Writing files to disk is the slowest thing the game does. Whether these are "save game files" or "logs", you want to minimize the number of times these get written.
-
- Solution-8a: Disable game logging unless you have an immediate need for it.
-
- Solution-8b: If you are using CASM or some similar "auto-save" mod to manage your save game files (recommended), try increasing the "time between saves" set in the "save frequency"; and reducing the number of occasions it saves to the minimum (e.g. disable most "Autosave Events" in CASM) and see how that impacts the game seeming to freeze temporarily.
-
- Solution-8c: The one modern thing the game does benefit from is being put on an SSD. Load times aren't improved that much; but stutter is greatly reduced, and the pause when the game autosaves with CASM is gone.
- Cause-9: See also Issue - MOD IMPACT - FPS drop or stutter on semi-auto hits.
- Cause-10: There is a known game engine bug when firing a weapon that uses multiple projectiles (e.g. "shotguns").
- Solution-10: The mod JIP LN NVSE Plugin has a solution for this: "bMultiProjectileFix - Fixes an engine bug where using weapons which fire multiple projectiles per shot could often cause brief lags and FPS drops when hitting live targets." Reportedly, it'll still lag if the number of pellets the shotgun fires is large, but vanilla numbers should be fine.
Issue - Mouse sensitivity reduced
Symptoms: Mouse sensitivity inside any interior is about half that of the value in exteriors.
- Cause-1: "Image Space" systems can configure the base display effects for a cell or worldspace. This would allow designers to drive post-processed "film" effects through the editor, giving much greater control and more of a "film" feel. Some of the effects include blurring, coloring, and HDR/Bloom effects. The ImageSpace form can be opened from the World Spaces menu. Mods can make edits which damage how these work.
- Solution-1: The mod "PWV - Project Wasteland Vision" makes some edits to "ImageSpace Modifier (IMOD)" records for explosions, plasma, and scope FX. Removing those edits with FNVedit resolved the problem for the reporting user.
- Cause-2: Mouse driver, especially some brand "additional features" such as accelerators.
- Solution-2a: Check the vendor brand support forums to see if there are any similar reports.
- Solution-2b: Start troubleshooting by disabling any optional mouse driver features, test, and then add desired features one at a time.
- Solution-2c: If you have more than one mouse available, try swapping out brands.
- Solution-2d: Try an older version of the driver as well, as later versions often drop support/testing for older games.
- Solution-2e: There are hidden interactions between the Audio, Mouse, and Video drivers. If there has been a recent update to one of these, test by rolling it back to the previous functional version to see if there is an improvement.
Issue - NPCs and Creatures are moving at hyper-speed
See video FNV hypersped NPCs for an example. The NPCs in the background are following their AI routines at a greatly accellerated speed or twitching while standing idle.
- Cause: There is an actor value called "speedmult" that does pretty much as the name implies; it's a multiplier for player and NPC movement speed. The default value is 100. In fact, its rare to see any humanoid with a speedmult greater than 100. So ranges from 700-27000 are ridiculous, but a buggy script can have this result. Once such a bugged script gets into a "save game" it (or it's results) may be impossible to remove, so always know which save you can revert to before adding a new mod to your "load order". Just one of the reasons why any mod (even updates) needs to be tested prior to adding to your saved game.
-
- Solution: Isolate the mod causing the problem and report it to the author with detailed information as to how to replicate it so they can fix it.
- You can test by selecting any NPC exhibiting this behavior in the console (< ~ > key and click on the NPC) and entering "getav speedmult" to see the current value and "setav speedmult 100", which should set the speed back to normal. (The "getavinfo" version of the command gets the current value of a skill/stat like "speedmult" as well as any modifiers (but not their source) that are being applied at the moment.)
- However, you need to get the NPC to "reload" before this reset value will take effect. One way is to use the console "kill" command after selecting the target NPC, and then "resurrect" them. They should then behave at normal speed for them. (Note the console "kill" command will blame your character for their death.) Do not target "leveled list" generic NPCs such as those in a "faction" like "Raiders", "NCR", "Legion", etc.. The "resurrect" command respawns a random one from the "leveled list". You can use "resurrect 1" to get the same one you targeted to "stand up" as they are at the moment (i.e. naked if you stripped them of gear) as if they had been unconscious. "Named" NPCs are the safest targets for such tests.
- Known mods with the problem:
-
- The "JIP LN" version (contributed by someone else) of Awesome Crippling Effects mod by PsychorGames. The main "non NVSE/JIP LN" file version is confirmed to not have the problem. It seems the problem can persist in save games even after reverting to the "vanilla" (non NVSE) version until the above "setav speedmult 100" solution is applied.
- This mod has unresolved reported bugs which (as of v1.7) affect:
- Yes Man Quest: Change in Management - Because of the crippling effects, Yes Man dies when installing himself to the Mr. House terminal, breaking the quest, meaning that the quest doesn't progress and the Mr. House terminal cannot be interacted with.
- Securitrons in The Strip and/or Lucky38 suddenly become hostile for unknown reasons.
- Companions with crippled limbs stop following, or can't get up and the challenge "Knocked up" would get completed over and over again.
- There are reports that removal of the mod resolved these additional bugs.
- Version 1.8 of this mod has now been released to address these issues. Confirmation is needed. Check the "Comments" and "Bugs" tabs on the mod download page.
Issue - SOUND - Ambient music skips-jitters-hiccups-pops-stutters
The ambient music is choppy in both vanilla and modded games. This doesn't happen to the radio music during normal gameplay, but does during loading screens or transitioning between tracks (i.e. going from ambient "explore" music to "combat", or entering new locations with different music).
- Cause: Old advice for FO3 was to uninstall "ffdshow", a codec mainly used for decoding of video in the MPEG-4 ASP (e.g. encoded with DivX or Xvid) and H.264/MPEG-4 AVC video formats, but it supports numerous other video and audio formats as well. (The user configures ffdshow's audio and video settings by launching the "ffdshow video decoder configuration program" independently of any media player.) Alternatively one could try to add FO3 to it's "exception" list.
-
- Solution-1: FNV appears to require at least some of the codec features provided by "ffdshow". If needed it can be re-installed as part of the CCCP codec pack or directly from the ffdshow tryouts website. (Alternative codecs may also provide the needed features.) Be sure to install the 32-bit version, as that is what the game needs. Some have reported that only the "CCCP codec" (without "ffdshow") is needed. Install the same as any other Windows program.
-
- Remove falloutnv.exe and falloutnv4gb.exe programs from the list of "ffdshow" exceptions.
-
- Solution-2: Edit the "Users" INI files under the "[Audio]" section, and change the following settings as indicated:
-
- Solution-3: De-fragment your disk drive and reduce background programs to the essential minimum.
-
- Solution-4: The OGG Vorbis Libraries have an update mod which has solved a stutter occurring every 15 seconds for some users. (These libraries are used by the vanilla game.) The Vorbis OGG Library is a set of DLL files which you have to manually install/copy into the game root folder (where the "FalloutNV.exe" file is found). Mod managers don't recognize or place them properly. They will need to overwrite the existing files. GamerPoets has a "Performance & Stability Guide" YouTube video which covers this library at the 3:07 minute mark. (Note the different section timemarks are displayed at the top of the screen.) The mod FNV BSA Decompressor transcodes all sound fx in ".*OGG" format to ".WAV" so they function in the game. It's installation is described at the 10:12 minute mark of GamerPoets previously linked "Performance & Stability" video.
-
- Solution-5: You may need to use a Windows tool such as Process Explorer to track down which app or service is grabbing cycles.
Issue - SOUND - Combat causes audio desync
Upon entering combat: an audio desync occurs for the duration of the battle. This desync is a long (5+ second) delay in audio effects, and during this delay cannot switch weapons using hotkeys. Reported as an issue running "Tale of Two Wastelands".
- Cause: the AVAST anti-virus program specifically has been identified as causing this problem, even when "shields" are turned off and "falloutnv.exe" is excluded.
- Solution: Disable or uninstall AVAST anti-virus completely.
- If you play the game in "offline mode", you shouldn't need to have any anti-virus or anti-malware service running. There are programs (search the web on "game boosters") which help you shut down services which are not essential while playing a game.
Issue - SOUND - Combat causes infinite loop sound
A "weird" AmbientFX (special effect) noise appears during combat (freqently by firing a Laser weapon) and won't terminate unless you either quit the game or reload a save game.
(Thanks to users harlandgg for discovering the cause, and HadToRegister for reporting it to the FNV Forum so it could be included here.)
- Cause: Following instructions for installing the mod Vanilla Restored Audio Patch causes the folder "\Data\Sound\fx\amb\steampuddle" to be installed/restored. The files in this folder do not appear to have set "loop end" points, causing them to play infinitely. This problem is common to EVE, YUP and UPP (Unofficial Patch Plus) users as they will flag ash/goo piles and impact sounds with AMBSteamPuddleLP.
-
- Solution: Delete the entire "\Data\Sound\fx\amb\steampuddle" folder. (The rest of the mod works fine.)
Issue - SOUND - No music or sound
(See also Issue: SOUND - Radio station music doesn't play for that specific problem.)
- Cause-1: If this problem occurs when you first start the game, then it's likely there may be an audio "codec" conflict between what you have installed under Windows and what the game in question requires, or a necessary "codec" is missing. (A "codec" is a "DirectShow filter", and there is a chain of them in the registry establishing which order to try them in to determine which to use. "DirectShow" is a component of the DirectX (DX#) API system used by games running under Windows.)
-
- Solution-1a: Win10 has DirectX12 drivers, but the DX9 driver the game is expecting is not being found. See "Cause-1" under Issue: Vanilla game Hangs on startup.
-
- Solution-1b: Some have found that installing a third-party "DirectX: DirectShow codec" resolves the problem. There are a number available on the internet. The K-Lite Codec Pack is often mentioned especially for older versions of Windows. Be sure to get the 32-bit version, as FNV is using 32-bit libraries.
- Cause-2: If you are suddenly having a "slowdown" or lag; or a lack of sound; or problems getting NVSE to load, or really anything new unexpectedly, please see the 'Issue: NVSE - fails to load after update KB4058043 to Win10 FCU (v1709)' entry in the wiki "Fallout NV Mod Conflict Troubleshooting" guide. This may be due to a Windows Update for the "Meltdown and Spectre Vulnerabilities".
- See also the related Issue: Incomplete save game load.
- Solution-2a: Not all "codecs" are created equal, and sometimes Windows versions and specific games are very particular. Codec uninstall routines often fail to completely remove all signs from the registry, and the residue can create problems. The mod DirectShow Filter _Codec_ Reset by Blade FireLight is designed to "reset" the chain of "codecs" to the defaults used by Windows 7. However, it may not work with later versions of Windows. HEED THE WARNING ABOUT CREATING A 'SYSTEM RESTORE POINT' FIRST! Anything affecting the registry has the potential to turn your computer into "a brick", unable to do anything but sit there. A power outage can happen to anyone at any time.
-
- Do not, I repeat, DO NOT follow the advice you can find on the internet about installing AC3 encoder and configuring it… two of us in the forum lost *all* sounds because of that.
-
- Solution-2b: You might be able to resolve the problem with another tool designed to "reset" your codecs back to Windows defaults. There are a number of free tools avaialbe to deal with this listed on this web page
- Cause-3: If your problem occurs after you attempted to uninstall something and no solution you've tried has worked, you may need more drastic measures.
-
- Solution-3: Either return to a Windows system restore point prior to your installation of the problematic software, or use MS's own Use Reset to restore your Windows 10 PC.
Issue - SOUND - Radio station music does not play
Everything (ambient sound, footsteps, dialogue, radio announcer) is working fine except the radio music is missing.
(See instead Issue: SOUND - No music or sound for the more general problem.)
- Cause-1: There is an audio "codec" conflict between what you have installed under Windows and what the music in question requires, or a necessary "codec" is missing. (A "codec" is a "DirectShow filter", and there is a chain of them in the registry establishing which order to try them in to determine which to use. "DirectShow" is a component of the DirectX (DX#) API system used by games running under Windows.)
-
- Solution-1a: Win10 has DirectX12 drivers, but the DX9 driver the game is expecting is not being found. See "Cause-1" under Issue: Vanilla game Hangs on startup.
-
- Solution-1b: Some have found that installing a third-party "DirectX: DirectShow" "codec" resolves the problem. There are a number available on the internet. The K-Lite Codec Pack is often mentioned especially for older versions of Windows. Be sure to get the 32-bit version, as FNV is using 32-bit libraries.
-
- Solution-1c: Not all "codecs" are created equal, and sometimes Windows versions and specific games are very particular. Codec uninstall routines often fail to completely remove all signs from the registry, and the residue can create problems. The mod DirectShow Filter _Codec_ Reset by Blade FireLight is designed to "reset" the chain of "codecs" to the defaults used by Windows 7. HEED THE WARNING ABOUT CREATING A 'SYSTEM RESTORE POINT' FIRST! Anything affecting the registry has the potential to turn your computer into "a brick", unable to do anything but sit there. A power outage can happen to anyone at any time.
-
- Do not, I repeat, DO NOT follow the advice you can find on the internet about installing AC3 encoder and configuring it… two of us in the forum lost *all* sounds because of that.
-
- Solution-1d: Sometimes the music is there, but the volume (even with the settings to max) is so low you can barely tell it's there. This is likely a "codec" problem. See the earlier possible "codec" solutions.
-
- Alternatively, Tutorial - Fallout New Vegas Radio Fix video by KitsuneJimmy explains that in the game "Data\Sound\songs\radionv" folder, the MP3 files are recorded at 72 decibels, while normally commercial music is recorded at 89 decibels. The tool MP3Gain analyzes and adjusts MP3 files so that they have the same target volume (89 decibels). It can process the entire folder at once; but it's always a good idea to back it up first in case of problems. The first time you load the game after doing so, it may take longer than usual to get to the main menu.
-
- Solution-1e: The game doesn't like USB speakers/headsets and non-stereo setups. It is always worth a try to set your audio setup to 2.0 stereo in the Windows Control Panel.
-
- Solution-1f: Sometimes there is a technical difference between the jacks on the front and back panels of the computer chassis. Be sure to test using both sets.
-
- Solution-1g: Possibly your issue is speaker related. For example with 7.1 sound speakers: after testing them in control panel, found 2 of them werent working so set it to 5.1. Then they worked.
-
- Solution-1h: A known problem with the audio in this game is if you have that Razer driver installed that lets you hear surround sound on the headphones. Since it is an incompatibility issue, you cannot use both: either remove the Razer drivers entirely and use the headphone as stereo 2.0, or get another speaker/headphone that plugs into the standard audio-out jack.
-
- Solution-1i: Windows Control Panel "Realtek HD Audio Manager" control was set for 5.1 sound properly, except that there was a "speaker fill" setting that was unchecked and this little setting apparently turns the stereo-only signal into a 5.1 surround signal.
-
- Solution-1j: The last resort is trying to reinstall the drivers of your sound card. Either the latest one or the one that it came with on cd or from the manufacturer's site. This will put the default codec up top in the Windows preferred codecs list.
- Locate the sound card or integrated audio device driver for your version of Windows on the vendor site and re-install. (These are often different from those available from "Microsoft Updates".) Create a Windows System Restore Point first!
- Cause-2: By default the game only plays radio music while the Mojave Wasteland is enabled/loaded. When you load a DLC worldspace, the Mojave worldspace (and thus the music) is disabled. Sometimes it is not re-enabled upon returning to the Wasteland. This is usually confined to the save game made at that time, but it might be an unknown vanilla game bug or a mod conflict in your particular "load order", and can be carried forward thereafter. People have performed a "speed-run" through the same DLC from a save game made prior to entering it the first time and not had the problem occur upon exit. Others have had it happen only on subsequent runs through the DLC. It's a fairly rare problem.
-
- Solution-2a: You can use nearly any script command in the console. The difference is mainly that you'll need to use the numerical Reference-ID (next to the text Editor-ID or Base-ID in wiki tables). On that note, you can use these commands in-game on any reference if you have the correct ID it is expecting.
- (Here's a good comprehensive reference for console commands: Gamebryo and Creation console commands (all). Even though a command is listed, that doesn't guarantee full functionality. Best thing to do is to test it.)
- Fortunately, for every actor or object in the vanilla game, including the DLCs, these numbers are available on all the Fallout wiki sites, like Wikia's Nukapedia or Gamepedia's The Vault for example. But, unfortunately, NOT for the Radio Stations, which use Talking Activators (form type "TACT"). You will need to know their "common name", which you can look up by their "Editor-ID" in FNVedit under "Name" field. Then in the game console, enter the command:
-
- This will create a text "dump file" <SomeFileName>.fos.txt in your "My Games\FalloutNV\Saves" folder. This file is a list of various information (including Ref-IDs) currently in your loaded save game. (It's not documented what other parameters than "1" will produce.) Now search that file for the "common name" of the radio station you want. (Check the type of entry. You don't want quest or script references.) The first column entry is the "Ref-ID" of that station. Make a note of it.
- The Common Name "Mojave Music Radio" has Editor-ID "vCountryRadio" and a Base-ID of 0016B46F, but does not have a location marker as it is enabled by script automatically when you leave Doc Mitchell's house at the beginning of the game. At least in my "dumpfile" it did not appear as a Ref-ID.
-
- There's the command GetBroadcastState to make sure that it's not broadcasting. And then there's GetDisabled to confirm it's not a disabled reference. Then you can try SetBroadcastState from the console; as well as disabling and then enabling the radios' Talking Activator references. You can try Player.MoveTo <stationRef> to have a look at the "station" as well but many are buried inside terrain features such as mountains.
- Examples:
-
- Note that range considerations still apply. You won't pick up Black Mountain Radio if you aren't near it.
- The above are probably all you will need. But for completeness sake, here is the information on the JIP LN NVSE Plugin music functions: (parameter in brackets is [optional]).
-
- Note the "ambient or atmospheric music" is dependent upon the current cell and is separate and distinct from the radio "songs". They are controlled independently. These are JIP NVSE addon functions. As such they require JIP LN NVSE to be installed, and are intended to be used in scripts. Their use as console commands has not been verified.
-
- "(musicState:int) IsMusicPlaying [musicType:form]". Returns the playback state of the game's current background (ambience) music:
- 0 Not playing
- 1 Paused
- 2 Playing
- The musicType argument may be either a Music Type form, a Media Location Controller form, or it may be entirely omitted. Omitted paraemter returns currently playing music (if any).
- Examples:
- "(musicState:int) IsMusicPlaying [musicType:form]". Returns the playback state of the game's current background (ambience) music:
-
- "SetMusicState musicState:int{0, 1, 2}". Sets the playback state of the game's current background music:
- 0 Stop Playback
- 1 Pause Playback
- 2 Resume Playback
- Note: The Stop Playback state will stop music played by PlayMusic, otherwise it will replay the current music from the beginning.
- "SetMusicState musicState:int{0, 1, 2}". Sets the playback state of the game's current background music:
-
- Example:
- "SetMusicState 2" ; (resume Playback.)
- Example:
-
- Solution-2b: Failing the use of Ref-IDs and console commands, there is a mod Radio New Vegas Everywhere uploaded on the Nexus that keeps Radio New Vegas enabled always (as long as the Player is enabled), so you can try downloading that. The mod Music Pack for Radio NV - ver 1.3 by the same author adds 250 tracks (nearly every song in the game) to RNV.
-
- Solution-2c: FadeSFX disabled all the sounds except the music. This is useful when showing Bink Video files. FadeSFX is reversable, it appears, by simply playing a Bink video file. As soon as the video ends, sound is restored. As far as can be told, it is still irreversible without playing a video.
- The Bink video has to be on disk and not in a BSA. The only one on disk by default is "Data\Video\FNVIntro.bik". So try the console command: 'playbink "FNVIntro.bik" 1 1 1 1'. (The double-quotes around the ".bik" filename are required.) You can use the <ESC> key to interrupt the video, which should restore your music if "FadeSFX" was what disabled it.
Issue - System Network configuration
Unless you are running a LAN, there are some default configuration settings you can change to improve your Internet download performance and reduce system memory use. It may also reduce incidents of CTDs.
- Cause: Anything that searches for system updates, or all the computers in a home or business network; or tries to determine the Internet Bandwidth while online: all use RAM to run as "services" in the background. When you are running your game in "Offline" mode, you don't need any of those functions running at all. Most of the time you only need them when the computer boots up and not again until something changes.
-
- Solution: Read the following carefully. Not all will apply to your situation. Be prepared to revert to a known good configuration. YOU have to know what that configuration is. The system does not maintain "save files" for device configurations.
-
- Open the "Network and Sharing Center/Internet" Control Panel applet.
- "< Left-Click >" on the "Change adapter settings" option in the left hand edge.
- "< Right-click >" on the "Ethernet" adapter icon, and select "Properties". (This will require you to enter an "Administrator" password to proceed.)
- You should see a "Networking" tab which lists various "protocols" in the large white box under the identification of your network adapter model. Those with a "Check" in the box are "enabled". Any that are listed are "installed".
-
- "Client for Microsoft Networks". This protocol is intended for a "home" or "small business" Local Area Network (LAN) that cannot be seen across the Internet. It is actually the Workstation service. If you remove this service, the Netlogon and RPC Locator services are also removed. Unless you have such a setup, it is not of use to you, so disable it by unchecking the box.
-
-
-
- "Virtual PC Network Filter Driver" is only of use if you run a "Virtual PC with networking". The "Virtual PC" is not available at all on the "Home Edition" of any Windows verson. Unless you have a need, disable it.
- "QoS Packet Scheduler" is installed by default for Local Area Networks (LAN). It's purpose is to prioritize particular types of application traffic (e.g. "Voice over Internet Protocol" (VoIP)) where having a certain amount of bandwidth is crucial. If you do not need to prioritize network traffic and its works fine without QoS packet scheduler you may choose to keep it disabled. Testing to see it's effects is recommended.
- "File and Printer Sharing for Microsoft Networks" works in conjunction with the "Client for Microsoft Networks" protocol. Again it is of use only with a "home" or "business" LAN and it does require the "Client for Microsoft Networks" protocol to be installed and active. Even then, it can be disabled if you don't need to directly access files and printers between different devices in the network. Microsoft advises unbinding it from the TCP/IP protocols if possible and binding it only to a LAN protocol such as "Client for Microsoft Networks" for security reasons. See the linked article.
- "Link-Layer Topology Discovery" has two protocols:
-
- "Mapper I/O Driver"
- "Responder".
- "Link-Layer Topology Discovery" is used by Microsoft's "Network Map" feature to display a graphical representation of the local area network (LAN) or wireless LAN (WLAN), to which the computer is connected. It operates strictly on a given local network segment. It cannot discover devices across routers, an operation which would require Internet Protocol level routing. Unless your LAN needs it, disable both protocols.
-
-
Issue - TTW Performance Guide abstract
From the TTW Performance guide thread, and updated from GamerPoets' latest revised Fallout New Vegas | FPS & Stability (definitive guide) YouTube video.
Note: Tale of Two Wastelands (TTW) rewrite/update from v2.9.4b to v3.2 has been released as of 10 Nov 2018. It is only available on the TTW site.
For those not familiar with TTW, it is a conversion of FO3 (purchased separately) to run on the FNV game engine. You can effectively and seamlessly play the FO3 (East Coast campaign) storyline through into the FNV (Mojave Desert campaign) with the same character. Fallout New California (FNC) conceptually is a separate campaign (located in California) that occurs before both of FO3 and FNV, with a different character generation and requires a "new game" start, but is intended to eventually (currently in Beta test) allow you to continue as the "Courier" (or not) into the Mojave. TTW is not officially supported by FNC, but some have reported that they do work together. (Check the FNC Recommended Mods List AND the FNC Incompatibilities List for the latest information.)
As a result, the "Performance Guide" for TTW is applicable for FNV (and probably FNC) players as well.
Required:
- New Vegas Script Extender (NVSE) v5.1b4+.
- New Vegas Anti Crash (NVAC).
- FNV 4GB Patcher The newest 4GB patcher by RoyBatty and LuthienAnarion.
Recommended:
- Nvidia Profile Inspector highly recommended for Nvidia users, but aging.
- S.T.E.P. AMD Catalyst Control Center Guide For ATI users: you need to create a new profile in CCC.
- NVSR INI for Newer Processors Last updated 15 Dec 2017. Login to the TTW site is required for access.
- NVSR INI for Older Processors Last updated 15 Dec 2017. Login to the TTW site is required for access.
Details:
1.) Video Driver Profiles. Note this step has been moved in the GamerPoets' video to be part of the ENBoost section, but no longer mentions "Nvidia Profile Inspector" or AMD's "Radeon Control Panel". It only refers to the "Nvidia Control Panel" (and by implication the "AMD Catalyst Control Center") which are part of the respective driver installation. "Inspector" instructions are included here from the thread for completeness for those looking into the original recommendations, but the recommendation applies regardless of the tool used.
- Search for "Fallout New Vegas" within the "Nvidia Profile Inspector". You have to add the game EXEs to the profile, then hit <apply> and exit "Inspector", and you never have to do it again until you update your drivers.
-
- Set "Multi-display/mixed-GPU acceleration" to "Single display performance mode".
- Finally set "Power Management Mode" to "Prefer maximum performance".
- Here's a visual example.
2.) Fallout "User" INI files. Search through Fallout.ini and FalloutPrefs.ini within your "Users\Documents" game folder.
-
- Under "[General]":
-
- "bUseThreadedAI=0" to "1".
- insert "iNumHWThreads=2" below "bUseThreadedAI=1".
3.) Fallout_Default INI file. Search through Fallout_default.ini within your "Steamapps\common\Fallout New Vegas" folder. (This so if your "Users" folder INI files get reuilt for any reason they will include these tweaks.)
-
- Under "[General]":
-
- "bUseThreadedAI=0" to "1".
- insert "iNumHWThreads=2" below "bUseThreadedAI=1".
- Make a backup of this file, as it will be replaced if you ever use Steam's "verify local files" option.
- Note: "FalloutCustom.INI" is used by "JIP LN NVSE" plugin to override settings in default game INI files only.
- Here's a visual example.
4.) Cellpurging. If using Zan's AutoPurge Crash Protector mod, uninstall it and use the following superior INI setting changes in all three of the INI files from above:
-
- Under "[General]":
-
- "bPreemptivelyUnloadCells=0" to "1".
- Under "[BackgroundLoad]":
-
- "bSelectivePurgeUnusedOnFastTravel=0" to "1".
5.) Audio. These may help with "audio stuttering" problems. However, some people have found these adjustments to cause some Win10 NVSR configurations to CTD. Test.
-
- Under "[Audio]"
-
- "iAudioCacheSize=2048" to "8192".
- "iMaxSizeForCachedSound=256" to "1024".
6.) NVSE. Open the game "Data" folder, and search for the "NVSE" sub-folder. (This assumes you have installed NVSE.)
-
- Once there, create a text file and name it "nvse_config.ini." Make sure to create it inside the "NVSE" folder, not the nested "plugins" sub-folder.
- Add the following lines:
- Here's a visual example.
7.) NVSR. Stop by the New Vegas Stutter Remover Nexus page, and download file "NVSR_4-1-32" (under "Old Files") if you're processor predates i5 or i7. For newer processors, download "NVSR_4-1-36" or later.
-
- Edit the "Data\NVSE\plugins\sr_New_Vegas_Stutter_Removers.ini" file as follows:
-
- Under the "Master = {" section, set all settingsto "= 0" except:
-
- "bReplaceGetTickCount = 1"
- "bFastExit = 1"
- This is as far as the GamerPoets' Fallout New Vegas | FPS & Stability (definitive guide) YouTube video takes things. Various security updates have complicated the NVSR configuration situation immensely. Things are still being discovered. The following were previous recommendations which still tend to work for versions of Windows prior to Win10.
-
-
-
- Setting "bHookCriticalSections = 1" is generally recommended, but can be problematic for many Win10 users depending upon the level of updates installed. See the Issue: CTD after 10-20 minutes of play (post-Win10 2017 FCU) entry and the Nexus NVSR download comments page for various options. Expect to need "trial and error" testing.
- Note: If you do not use any texture mods you may enable bReplaceHeap = 1. In that event, Set the "Heap = {" section" settings "iHeapSize = 384" and use "iHeapAlgorithm = 6".
-
- When allowing NVSR to manage your FPS: "bManageFPS = 1" and settings under the "FPS_Management = {" section; "Vsync" provided by the game's engine or other sources must be shut off to avoid conflict between them.
-
8.) V3.0 Shaders.
WARNING: If you intend to use ENB's graphics post processing, it only works with v2.0 Shaders. DO NOT perform this step, nor enable the Fallout INI's "[Display]" setting "bAllow30Shaders=1". Leave it at "=0".
- Edit both the "Users" folder Fallout INI's "[Display]" setting "bAllow30Shaders=0" to "1". This will ALLOW (not force) the use of v3.0 Shaders.
- Open the "Renderinfo.txt" within your documents; "Documents\My Games\FalloutNV". There will be a line for the "Shader Package : ##" (where "##" is "13" in the following example). This is the number suffix of the filename of the shader package expected to have a v3.0 Shader supported by your video card. If not present, your card was not detected by DirectX as able to support v3.0 Shaders.
- Now, go to the Shaders folder within your game "Data" folder, and rename shaderpackage013.sdp to shaderpackage013.sdp_backup. Once done, make a copy of shaderpackage019.sdp (which is always the provided v3.0 Shader package), and rename it to shaderpackage013.sdp so it will get utilized. Ignore the periods ending my sentences of course.
- Do note, 13 is solely an example; the shader package "19" should be renamed to depends on the number your "Renderinfo.txt" displays.
9.) VORBIS Libraries. Download Ogg Vorbis Libraries to improve audio performance. The mod FNV BSA Decompressor will automatically install these libraries if their archives are found in the game root folder. TTW will include the Decompressor as part of it's installer.
10.) ENBoost. At this time the latest version is v0.322, which has been updated without changing the version number ... so be sure to download again. You should be able to use the "WrapperVersion". See this post about ENBoost from MajinCry Configuring ENB Fallout New Vegas. The basic points (and quotations) are:
-
- Play the game in "Windowed" mode if you don't want to crash upon "alt-tabbing" with EnableUnsafeMemoryHacks=true (below). "That setting is a game changer, as it greatly reduces stuttering if not completely eliminating it, when models and textures are being loaded (e.g, traveling across cells, transitioning from interior <-> exterior). So have New Vegas in windowed mode, and everyone's happy. Also, when a game is in windowed mode (Windows 7 and newer), the game gets triple buffering. This means you can have VSync enabled without the framerate juddering between 15 <-> 30 <-> 60fps."
- Disable the Steam Overlay (actually any game overlays; this is not multi-player). "It causes issues when the interface pops up (e.g, recieving a message from another player) where many objects become fully transparent, and has caused issues for some users when ExpandSystemMemoryX64=true."
- in the video card driver configuration, set:
-
- Anisotropic Filtering = "Use Application Settings"
- Anti-Aliasing Mode = "Use Application Settings"
-
- in the enblocal.ini file, set:
- [GOBAL]
-
- UseENBoostWithoutGraphics=true
- UsePatchSpeedhackWithoutGraphics=true (set "false" if using ENB Graphics as well)
- If you want to use ENB's graphics modifications alongside the ENBoost part, set:
-
- UseENBoostWithoutGraphics=false
- UsePatchSpeedhackWithoutGraphics=false
-
- [MEMORY]
-
- ExpandSystemMemoryX64=true
- ReduceSystemMemoryUsage=false
- DisableDriverMemoryManager=false
- DisablePreloadToVRAM=false
- EnableUnsafeMemoryHacks=true (loads all images into VRAM, reducing "hitches" while loading cells)
- ReservedMemorySizeMb=512 (test by lowering in increments of 128)
- VideoMemorySizeMb=<value from ENB's "VRAMsizetest" tool> for a single GPU. (Win 8 users are limited to 4096 due to a bug in the DirectX driver.)
- Notes:
- ReduceSystemMemoryUsage=true (for those hitting an out of memory issue (not necessarily GPU VRAM, but application virtual ram); noticable FPS increase; fires off multiple copies of enbhost.exe as needed, reducing "virtual game memoryy").
- MajinCry found: "When EnableUnsafeMemoryHacks=true, ENB will automatically disable ReduceSystemMemoryUsage." So, we might set ReduceSystemMemoryUsage to "true" and not worry about it whenever we change EnableUnsafeMemoryHacks=false.
- [ENGINE]
-
- ForceAnisotropicFiltering=false (uses the game settings instead)
- Example enblocal.ini files for:
-
- best performance (no texture replacers, 2GB VRAM).
- game with texture mods & small GPU VRAM (size of all loaded resources > GPU VRAM size).
Issue - Vsync aka V-Sync ON or OFF
"Short for Vertical Sync, Vsync is a display option found in some 3-D computer games that allow the gamer to synchronize the frame rate of the game with the monitor refresh rate for better stability. If the Vsync is turned off, gamers might obtain a higher frame rate but this action may introduce artifacts in the game." - Webopedia. Vsync can also have an effect on "lag". The purpose of Vsync is to eliminate "tearing", a disjointed image. For an in-depth explanation of how VSync (aka "V-Sync") affects "tearing", see the How VSync works, and why people loathe it article on the "HardForum.com" site.
- Cause: The short answer is: if you have "triple-buffering" on your video card, then use VSync, because "3buff" is designed to solve the problems with Vsync. If you don't have triple-buffering, then you have to make a choice based upon the effect on your game and FPS rate. Read the article!
-
- Solution-1a: Some games (including FNV) have a setting for disabling VSync. Most modern video cards have an option for it in their driver control programs. Some "post-processors" (such as ENB) have an option as well. You need to check them all.
-
- Solution-1b: FNV's hardware configuation option doesn't seem to actually have any effect. You can try manually setting this "off" in all three of the "Fallout.INI" files by changing the "iPresentInterval=1" variable to "iPresentInterval=0". Be sure you have a backup of the original INI files before making any changes. (See the Game INI files section of the "FNV General Mod Use Advice" article for details if you don't know about the locations of the INI files.)
Issue - What INI edits seem to be most beneficial to performance
- Cause: There are many INI settings you can adjust across many utilities, but it can be difficult to tell which are most helpful to improving performance in general.
- Solution: The information provided in the Tale of Two Wastelands (TTW) Performance Guide covers specific INI settings for a number of different utilities such as the three game INI files, NVSE, the correct version of NVSR to use depending upon your processor, and some nVidia card specific tweaks. These setting seem to be equally helpful for both FNV and FO3 as well as TTW. See also the Issue: TTW Performance Guide abstract entry.
Solutions to Crash To Desktop aka CTD problems
Issue - CTD after 10-20 minutes of play post-Win10 2017 FCU
(Formerly: Issue: Recent (post-Win10 FCU) CTDs after 10-20 minutes of play)
Update: The mod NVTF - New Vegas Tick Fix is a lighter, fully Windows 10 compatible, completely rewritten version of the 64hz micro-stutter bug script fix from NVSR, including Fast Exit and a high FPS fix for exceeding 60FPS. NOTE: NVTF v3.0 is now NOT supported when used in conjunction with NVSR.
- There are several reports in the download page "comments" that NVSR causes CTDs after 10-20 minutes of play once the Win10 "Fall Creator's Update" (FCU) of Nov 2017 has been installed where previously everything had been stable.
- Please read ALL the proposed solutions before implementing any. Expect to need to engage in some "trial-and-error" testing.
- Solution-1: The mods New Vegas Heap Replacer (NVHR) combined with NVTF - New Vegas Tick Fix should round out all the needed functionality of NVSR, enabling it's complete removal. This is now the recommended solution for Windows 7 and 10 users.
- Solution-2: Those experiencing this problem who still want to continue using NVSR can try setting the NVSR INI file "Master" section to bHookCriticalSections= 0, which will disable the use of "CriticalSections" features and the heap related algorithm and size settings in NVSR. (The bFastExit fix still reportedly works.) Some have found it necessary to discontinue use of NVSR completely. Others have found that they could implement partial solutions (detailed below as "other" solutions). "Your mileage may vary." Note that this may re-introduce some stuttering and depressed FPS if using large texture replacement images (e.g. greater than 2048x2048).
- Solution-3: If "Solution-2" eliminates the CTD problem, or once you have installed the Win10 April 2018 SCU "1803/Redstone 4" system update, you may be interested in trying the configuration posted by user redmaxblower here in the NVSR thread which restores much of NVSR's stutter reduction functionality. It includes ENBLocal.ini settings for ENB Series users as well.
- Solution-4: It has been found that you can set bHookCriticalSections= 1, and then iDefaultMode = 1 in the "CriticalSections" subsection of "sr_New_Vegas_Stutter_Remover.ini". The "1" value just means NVSR uses the vanilla mechanism anyway. Setting "iDefaultMode =" to anything other than "1" seems to cause the problem. (It defaults to "3".)
- Solution-5: User Brad852 (and others) has achieved a stable and stutter free game with the following tweaks to the NVSR v4-1-36 configuration:
- Make sure the settings under "Master = {" are:
- bManageFPS = 1
- bHookCriticalSections = 1
- bHookLightCriticalSections = 0
- bHookHashtables = 1
- bReplaceHeap = 1
- bReplaceGetTickCount = 1
- bLogToConsole = 0
- bFastExit = 1
- bFlushLog = 1
- iSchedulingResolution = 1
- bReplaceRandom = 1
- bExperimentalStuff = 0
- iMainHookPoint = 1
- Under "CriticalSections = {, set:
- "iDefaultMode=3"
- "bUseOverrides=1"
- Under "OverrideList = {", third "Critical Section = {" ("CallerAddress = 0xA044FE") section:
- delete "Spin = 6000"
- This Brad852 configuration seems to CTD for some users if the iAudioCacheSize or iMaxSizeForCachedSound values are altered in accordance with GamerPoets' latest revised Fallout New Vegas | FPS & Stability (definitive guide) YouTube video (i.e. "[Audio]", "iAudioCacheSize=2048" to "8192"; "iMaxSizeForCachedSound=256" to "1024").
- Solution-6: User AnonymousPlum has posted a promising Stabilised NVSR ini File for Windows 10 after a number of experiments which can be used as a starting point. However, take the time to read the comments page as there are various reports of success, failure, and alternative settings from commenters (including user redmaxblower, author of Solution-2). There is now a version of the file which disables the NVSR "heap replacement" in favor of the NVSE replacement technique (which was the most severe criticism).
- Solution-7: Team Moki has posted a "mod" Ultimate Fallout New Vegas Stutter Removal for WIndows 10 and 7 consisting of a fully tweaked NVSR "\NVSE\Plugins\sr_New_Vegas_Stutter_Remover.ini" file.
- Solution-8: See also the related Issue: Incomplete save game load which covers some background services that may need to be disabled.
Issue - CTD on interior or exterior or fast travel cell change
- Cause-1: Most crashes on cell-change are caused by the autosave feature choking because it's trying to write data into a save it corrupted the last time you changed cells. Note this may mean your last several saves are corrupt. "Auto-saves" are dangerous because they are seldom able to tell when the game is in the middle of doing something else critical.
- Solution-1: Most importantly, completely disable all manner of autosaves in the game options. The CASM and CASM with MCM mods attempt to provide more control over such situations. Simple Saves provides timed interval "full saves" without all the features of CASM, but only keeps 5 versions before it starts overwriting older files after the 5th save. They are all better than the built-in mechanism, but don't rely upon any auto-save exclusively. Manual "full saves" after waiting about five seconds with nothing happening are still safest. Also, you can use Clean Quick Saves to create a new "quick save" file every time, which is safer than overwriting an existing file. You will need to periodically clean old ones out (they count against the total number of save files you are allowed), but the purpose of a quick save is as a "temp" for safety's sake rather than a place to resume the game session from. They do not save as much data as a "full save". QSaves are best reloaded when you are still in the same cell (preferably in the same position) as when you saved.
- Please see also the 'Fourth Rule: Reloading "save game" files' section of the wiki FNV General Mod Use Advice article.
- Cause-2: Crashes on cell transition will happen more often the more mods you have that affect NPC's & levelled lists.
- Solution-2: You can't run different mods like that, reliably, without a "bashed" or "merged" patch. See S.T.E.P. Merging Plugins Guide for a description of both approaches.
- Cause-3: The default game "heap size" is too small for some modded games.
- Solution-3: See Issue: CTD without warning, "out of memory error", or stops responding sub-topic.
Issue - CTD without warning or Out of Memory error or stops responding after the Main Menu
Happens without error messages, as if the game runs out of memory, or the OoM error message.
- Cause-1: By default 32-bit games can only use 2GB of RAM not matter how much is installed, even if you are running a 64-bit version of the Operating System (OS).
- Solution-1a: If you are on a 32-bit OS system with at least 3GB of RAM, see this 2-4GB game memory limits and solutions article on configuring to use the maximum memory you can before implementing the next solution. 64-bit OS systems usually do not need to alter their configuration, but that article covers them as well.
- Solution-1b: You need to be using a FNV4GB Loader such as 4GB Fallout New Vegas Updated or an LAA flag Patcher like the more recent FNV 4GB Patcher. This will give the game access of up to 3.8 GB of memory. (The remainder is used by the system.)
- Cause-2: The vanilla game's default "heap size" is very conservative and can easily be exhausted by a modded game. There are a couple of distinct types of "heap" and it is not clear which is running out of memory. One is used in programming to implement a data structure such as a priority queue, and another in memory management as an area for dynamic memory allocation and swapping code around. Both types are commonly used.
- Solution-2: Increase the heap allocation size. Initially it's recommended to enable the "New Vegas Script Extender" (NVSE) "Sheson memory patch". If that does not resolve the issue, you can try configuring "heap replacement" in "New Vegas Stutter Remover" (NVSR). The current NVSR (v4.1.36) "heap replacement" can also run into "out of memory" errors regardless of the algorithm chosen in some situations. It's effectiveness varies among users and systems. Both can work together, as they are not attempting to change the same heap allocation, but their combined effect with the suggested sizes is to use up almost 1GB of game memory (out of 2-3.8GB) for this purpose. NVSR's current "heap replacement/allocation" routines have problems and should be used with caution. See Issue: CTD after 10-20 minutes of play (post-Win10 2017 FCU).
- Solution-2a: Activate the "Sheson memory patch" (unknown type of heap) in NVSE.
- When installing New Vegas Script Extender (NVSE), the nvse_loader.exe file should be in the game root folder: i.e. "<Steam install path>\steamapps\common\Fallout New Vegas"), so it's along with the FalloutNV.exe file. However, just unpacking the NVSE archive package to the "Fallout New Vegas" folder may not create a "Data\NVSE" folder or the "Data\NVSE\Plugins" sub-folder upon installation unless you tell it to include sub-folders when doing so. If not, you will have to do so manually. It definitely does not create a configuration file (in the "NVSE" sub-folder), nor automatically enable it's log files (which will be found in the game's root folder). You need to do so yourself, using any plaintext editor such as Windows NotePad. Supplemental NVSE Plugins such as JIP, Lutana, MCM, NVAC, or NVSR should go into the "Data\NVSE\Plugins" folder; along with their configuration/INI files.
- If not present, manually create folder "NVSE" under the game "Data" folder (at the same level as the "Meshes" and "Textures" folders), and then "Plugins" under the "NVSE" folder.
- Make sure "hide known file types" is disabled in Windows/File Explorer's "Folder Options" menu, or your new INI file in the next step will have a hidden ".txt" extension which you don't want. (The DigitalCitizen.life article 8 ways to open the Folder Options window, in Windows (all versions) will show you how to access that.)
- In the folder "Data\NVSE" create a new text file and name it "nvse_config.ini".
- Copy and paste the following into "nvse_config.ini":
- This will enable the game's error log the next time you run it, which will then be found in your FNV root folder (where you put the NVSE executable files). There will be at least three files: "falloutnv_error.log", "falloutnv_havok.log", and "nvse.log". The first one is very useful for finding broken stuff in mods or the cause of crashes. Not everything in it is an error so keep that in mind; some are just warnings. The "nvse.log" is helpful to identify problems with NVSE itself, and plugins that rely upon it.
- The warnings are supposed to be written by the game engine in "C:\Users\<YourAccountName>\Documents\My Games\FalloutNV\warnings.txt", but this may be dependent upon the "log level" in the "nvse_config.ini". The default is level "1" and there is no "warnings.txt" file created; but it goes up to level "5" (debugging) with increasing verbosity. However, it appears this "warnings" file feature was never actually implemented for FNV, but have been restored by the GECK Extender Plugin for NVSE.
- To activate the "Sheson patch", Add the following before the "[Logging]" section of the "nvse_config.ini" file:
- Using a size of "240" or "256" is suggested if you are not using FNV4GB or some other means to utilize the maximum ~4GB of game memory. Too small or too large a heap size causes problems. Keep it under "500" (i.e. "496"), and in multiples of 16. Skyrim SKSE users may be aware of a "scrapheapsizeMB=" setting. This is carried over to NVSE, but is not used in the FNV game engine. Remember, nothing is "free memory". Everything you assign to a "heap" is no longer available to the game itself.
- Solution-2b: Optionally, the mod New Vegas Stutter Remover (requires NVSE) contains both an adjustable heap size and alternative heap algorithms (unknown type of heap). These are disabled by default for maximum stability, so it is necessary to read the provided NVSR documentation and edit the "sr_New_Vegas_Stutter_Remover.ini" file, which is under the "Data\NVSE\Plugins" folder.
- That NVSR "heap" section is only used if you have "bReplaceHeap=1" in the "[Master]" section of that INI. You should want to implement it because you are still getting crashes after implementing "Sheson". It's effectiveness has varied results for different users.
- A larger heap size of 450(MB of RAM) is suggested, but Intel processors work more efficiently when they align with multiples of 16 bytes, so I suggest using a heap of 448, 464, or 496. Keep it under 500, which seems to be the limit for NVSE.
- There are several "heap algorithms" and only three algorithms that use the "heap size" setting (3,5, or 6), so some experimentation on your part will tell you which works best (if at all) for your system. This is documented in the INI file as well as the download page.
- The current NVSR (v4.1.36) "heap replacement" and algorithms can be reliably demonstrated to increase the number of CTDs and "out of memory" errors under certain circumstances, so only testing will tell if it is a solution for you. However, many have success with it in typical modded games.
- Other features of NVSR are still of practical use. Some people have found that disabling NVSR's heap ("Heap Replacement=0") solves their "out of memory" CTDs.
- Cause-3: Too many cells loaded consuming memory.
- Solution-3: Enable two "purge cells" options in the three "INI" files:
- [General]
- bPreemptivelyUnloadCells=1
- and
- [BackgroundLoad]
- bSelectivePurgeUnusedOnFastTravel=1
- Cause-4: Exhausting video memory.
- Solution-4: See the sub-topic Issue: Is ENBoost for everyone? in this article about an option to increase available memory for rendering video related objects.
- Cause-5: Some have found it either necessary or desireable to configure their system to disable the "onboard" video adapter and use only the "addon" video card GPUs. Depending upon the hardware architecture of the system, this may not be optimal.
- Solution-5: As a general "rule of thumb": the more processors, the better. The video card may have a "device driver" or "control application" which will allow configuration of the use of the GPUs for specific purposes. Unless you have specific knowledge and reasons, it is best to let the system choose how to handle ALL the GPUs. A bad configuration may cause CTDs.
Solutions 1-4 can safely be combined, but those with less than 4GB of system RAM need to exercise caution and only implement one at a time, as they will come at the expense of memory otherwise needed by the game and OS.
Issue - CTD upon completion of DLC
For example: 'Fallout New Vegas keeps crashing to desktop, every time I complete the "Old World Blues (OWB)" DLC. In the "Think tank" after having the last conversation with Dr. Klein, and then exiting the think tank... It crashes to desktop. I can tell it's the end of Old World Blues, because of the fact that sometimes it will play music for a second, (like it does at the end of the other DLCs, along with your video ending). But it just crashes to desktop.'
- Cause-1: According to Bethesda Softworks Tech Support - This only happens when playing in "Hard Core" mode and your character is the least bit hungry.
- Solution-1a: Simply feed your PC until they are full before the final exit from the DLC.
- Solution-1b: There is the mod Skippable DLC Cutscenes, which skips the slideshow but cautions it is not a fix for CTDs.
- Cause-2: If not playing in "hard core mode", more than likely you are running out of "heap space" when the slideshows are started.
- Solution-2: Please search this guide for the term "heap size" (several entries are primarily in the 'Solutions to Performance problems' and 'Solutions to "Crash To Desktop" (CTD) problems' sections.
Issue - CTD upon quitting a modded game
Upon using the game menu to "Exit to desktop", it simply hangs and Windows reports FNV has stopped responding. It becomes necessary to use the Windows "Task Manager" ("<Ctrl+Alt+Del>") to terminate the current instance of the program before it can be restarted. As this can leave system memory in an unknown state, best practice is to reboot the system first. Naturally this is very annoying.
- Cause: This is a common problem with the game engine when enough mods have been added.
- Solution: New Vegas Stutter Remover (NVSR) has a "fast exit" option in it's INI file that fixes this problem (among others). DO NOT install with a Mod Manager unless it recognizes that NVSE based plugins like NVSR need to go into the "Data\NVSE\plugins" folder. Follow the "manual install" instructions instead. Then edit the "sr_New_Vegas_Stutter_Remover.ini" file in the same location from "bfastexit 0" to "bfastexit 1". Note: This setting still works for most people having the problems addressed in Issue: Recent (post-Win10 FCU) CTDs after 10-20 minutes of play.
- Related: The NVSE plugin New Vegas Anti Crash (NVAC) implements structured exception handling and sanity checking to reduce frequency of game crashes. While this may not be directly related, it is a recommended stability improvement anyway.
Issue - Ash and Goo Piles cause random CTDs
When a spawned actor is killed with an energy weapon, they leave either an "ash" or "goo" pile instead of a body attached to the actor reference in the save game file. If not "cleaned up" these pile up and eventually lead to "save game corruption". The problem goes back to FO3 and a script which was supposed to be activated but wasn't. It can be particularly noticable in exterior "encounter spawn zones" when using energy weapons exclusively with mods that increase the number of encounters before the default cell reset timer kicks in or if the player lingers in the cell too long.
- Cause-1: Ash and Goo Piles not being cleaned up before they can cause a problem. This does not seem to occur with interior cells as the number of piles usually remains low and the default cell reset interval is usually fast enough.
- Solution-1: There are mods intended to resolve this problem by various methods. Some of these are:
- EVE - JIP Ash Pile Tweaks - replaces EVE's new ash and goo puddles' implementation, from one that uses containers and scripts to move the deceased's contents to them, to a NVSE + JIP LN one that replicates the vanilla mechanics of the piles being activators. The pile's own scripts has been changed to remain until a cell reset takes place, instead of disappearing right when you revisited them.
- Ash and Goo Begone - does also remove piles of "named NPCs" (including those of "quest NPCS") so don't use energy weapons on them. It does NOT affect the placed Ash piles in the sacked caravans (they use a different ID) nor the Ash pile left in the Silver Rush after the first time you enter.
- FOOK Ash Goo Pile Fix - Complete - only affects "vanilla" piles, but not those from EVE weapons. (This fix has been incorporated into YUP.)
- NOTE: This problem persists in the exterior "BigMT" sections of the DLC "Old World Blues" (and possibly in "Honest Hearts" as well) with all these mods, but not in the interiors. Until a fix is identified, it is suggested avoiding the use of energy weapons in "BigMT" exteriors unless you can somehow exit the cell (which can trigger the cleanup script upon returning).
Issue - Hi-Rez Texture mod causes CTD
Specific known example of this is the 26.3MB Training Dummy Retexture file from the mod of the same name. It is implied (by the alternate 3.1MB "Sane Edition" file) that this image is 6000x6000 pixels.
- Cause: Image files have to be sized as a power of 2 from the base of 512x512 pixels. (512: *2= 1024; *(2^2)= 2048; *(2^3)= 4096; *(2^4)= 8192.) Normally the GPU will attempt to re-scale images that do not fit, but a very large size may be sufficient to push GPU processing and VRAM limits enough to cause a CTD. The various images sizes of the textures rendered in a given scene are cumulative.
- Solution: Either use a more normal sized image, or resize it using a tool such as Optimizer Textures that can correct the scale. Please see also the wiki Display resolution versus Image Size article before you decide to simply grab the largest possible size images.
Issue - Removing a Project Nevada Implant freezes the game or CTDs
This is particularly evident when removing a "skill-based" one (i.e. raises the Sneak skill).
- Cause: It appears that, by design with this mod, not only are there distinctions between individual doctors (all are not equally skilled; some need the "cybernetic surgery" book before they can install implants), but it also tracks which installed a particular implant. More investigation is needed into the untrapped error that is causing the freeze or CTD itself.
- Solution: It seems the only safe way to remove a PN implant is to use the same doctor who installed it, especially with "book trained" doctors like Doc Mitchell.
Issue - Swap aka Page file size and CTDs
- Cause: The size set for your "page file" can make a difference as well in terms of something called the "commit limit". This is the sum of physical memory and the sizes of the paging files. The default system page file configuration does not follow this advice, so it's something to look into if you are still having CTDs.
- Solution: To properly size the paging file requires determining the maximum total commit charge for the programs you like to have running at the same time. See "Page File Size and The Commit Limit" section in the wiki 2-4GB Game memory limits and solutions article for details.
Issue - WIN10 Freezes or Hangs and you can not use Task Manager to kill the process
In Windows10 (Home or Pro versions at least) if the game freezes, even if you press "< Ctrl+Alt+Del >" and open the "Task Manager", you are unable to "< Alt+Tab >" from the game to the "Task Manager" in order to kill the process. However, you can press the "Windows Logo" key (assuming your keyboard has one). (Those without a "< Windows Logo >" key should read the thread Windows logo key equivalent in non-windows keyboards if they feel the lack.)
- Cause: The game "freeze/hang" is preventing normal keyboard "< Alt+Tab >" function.
- Solution: The "mod" Kill Fallout 3 by raz3rITA is really a simple BAT file that can be edited to kill the "Task Manager" process of Fallout3.exe, FalloutNV.exe, or Fallout4.exe, and so on, as a single command from the "start menu" accessed by the "< Windows Logo >". This will enable you to regain keyboard control. Customization and use instructions are in the mod description.
Solutions to Control problems
Issue - Console - How to access the in-game console command line
There is a setting of "bAllowConsole=1" under the "[Interface]" section of the "Fallout_Default" INI file that must be present as well. (This setting is also necessary for Oblivion and Fallout 3.)
To access the console in the game, press the <~> (tilde) key on the keyboard. For a complete list of the console commands, type help in the console.
NOTE: The Tilde key should be to the left of the 1 key on the top row. If you are in the UK, and have your keyboard configured for the UK, the key is not going to be the same. To get to the console, press the <`> (grave accent) key top left of keyboard, instead of the <~> (tilde) key. (That's where the tilde is on most US keyboards).
Source: The Elder Scrolls III: Morrowind Support page:
Issue - Console - in-game console default key does not work
Source: The Elder Scrolls III: Morrowind Support page:
If you have a system with the Microsoft eHome (remote sensor, aka "infrared") or MS Media Center devices, these will conflict with the program being able to read the scan code for the tilde key from the keyboard. Those Microsoft eHome devices or drivers need to be disabled in order to allow the game to 'see' the tilde key being pressed. The MIRC (Microsoft Infrared Remote Control, aka "Inf Transcvr") seems to disable the tilde <~> key in both Oblivion and Morrowind. Simply disconnecting the MIRC from the USB port will fix this issue.
Issue - Console - Can not open the in-game console command line under Windows 10
- Cause: The "key binding" to open the console is hard-coded in the game and apparently this binding is broken under Windows 10. There is no game provided mechanism to change this.
- Solution: There are a couple of mods that use NVSE as a workaround that may help in this situation.
- Console Fix Glasses by Random Unit
- Console Key Rebinder by Random Unit
Issue - Console - troubleshooting
Source: Gamebryo and Creation console commands
- To enable the "console" for use in-game, in the INI files you must first locate "bAllowConsole" under the "[Interface]" section and set it to "=1" and save, before starting the game.
- Furthermore, the console can be altered in these INI files to modify the text displayed on-screen.
- Assuming a minimum of 768 pixels of vertical display resolution (for 720p monitor), you can change the following values under the "[Menu]" heading to:
iConsoleVisibleLines=XX
- Replace "XX" with a number of 25 or greater (depending on your screen resolution) to set the maximum number of text lines shown on screen at any one time in the console.
- Troubleshooting the console
- The left side of the console might not be visible if you are not using a widescreen display. In this case, type several <tab>s to move the cursor to the right before entering your commands to make typed commands visible. Commands either typed off-screen or tabbed into view will still work equally.
- Alternatively, The position of console text can be set in the INI files.
- Set "iConsoleTextXPos" to 200 or so. Higher figures move console text to the right. This is the main problem.
- "IConsoleTextYPos" should be approximately 100 or 200 less than your Y resolution. A lower figure moves it up (0 is the top of the screen).
- An example for a 1280x1024 (X x Y) 5:4 ratio display:
- Console improvements for "ease of use" are now available:
- Console Paste Support enables copy-and-paste from other documents.
- Console Background Adds a background to the console to enhance readability in bright surroundings.
- Auto SCOF - Console Logging Automatically creates a file in your FalloutNV folder titled "ConsoleOutputFile - mm_dd_yyyy" and starts the log with the time of creation to capture console output.
- Console key rebinder in the event your default key <~> doesn't work.
Issue - Controls - GamePad Support missing
Symptoms: GamePad or Controller does not natively recognize key and mouse controls.
- Cause: The game does not provide built-in support for the device.
- Solution: Use a controller adapter keybard mapping program to add this functionality. See Issue - Controls - Mouse and/or keyboard don't work with a game controller installed for some options.
- Note that FNV will also require reconfiguring INI file settings and the use of the JIP LN NVSE Plugin to support the controller (see Issue - Controls - How to remove a game controller's default button bindings).
Issue - Controls - Have to remap some essential default key assignments
- Cause: Various.
- Solution: For a hardware key failure, most laptops will let you use an external keyboard plugged into the PS2 or USB port. But if that is not an option, you can "re-map" most crucial key assignments.
- First of all you are going to need to find a copy of the DirectX "scan codes" that gives you the hex code values, such as this GECK document.
- Then open the "FalloutPrefs.INI" file in your "Users" folder and locate the "[Controls]" section. That lists various "functions" with the "hex scan code" for each. Change the ones you need (preserving leading zeros so each code is exactly 8 characters long) and save.
- (Suggest you only change what you have to there to get you into the game main menu where you can use the "Settings | Keyboard" menu interface to make most changes.)
- See 'Issue - How to determine what keystrokes are being passed' if you have problems.
Issue - Controls - How to remove a game controller default button bindings
- Cause: The game lacks a "User Interface" or "Menu" option to change the default keys assigned to console-game type controller buttons.
- Solution-1: If you are using "Lutana's NVSE plugin" (now included as part of the JIP LN NVSE Plugin), you can call it's GECK: DisableButton function from the console (default toggle key "~"), which will ignore the input from the specified controller button but still permit scripts to function. You can put a series of console commands into a "batch file" and call that to execute them all at once. See the "Batch Examples" section of Gamebryo Console Commands.
- Solution-2: Edit the "FalloutPrefs.ini" file in your "C:\Users\<YourAccountName>\Documents\My Games\FalloutNV" folder as follows.
- Find the [Controls] section
- For the last 4 characters of each control that you want to unbind, put "FFFF".
- (ex: "Use=00FF0011" becomes "Use=00FFFFFF".)
- Save FalloutPrefs.ini
- Now you should be able to use a controller-keyboard mapper program like Xpadder to assign new keys to the buttons.
Issue - Controls - How to switch weapons using the mouse middle-button or wheel
- Cause: This feature from "First Person Shooters" (FPS) is not implemented in FNV.
- Solution: The mod FPS Weapon Wheel by vivanto provides this functionality to both assignable hotkey and mouse wheel. MCM menu configuration.
Issue - Controls - Mods do not seem to have controller support
Some mods don't seem to work with a game controller, even though the game works fine in general.
- Cause: Select mods do have controller support, others require an addon such as the "Lutana NVSE plugin", and still others (like Project Nevada) don't have explicit support but can be used with Lutana's "DInput emulation" which maps controller buttons to keys on your keyboard. What they all have in common is that they require NVSE, another third-party tool. There just isn't any provision for modders to add controller support to their mods, or even custom keyboard hotkeys, without these community toolsets.
- Solution-1a: Install the New Vegas Script Extender (NVSE) plugin. Note that this has to be installed at the game root folder, so your mod manager may not be able to deal with it properly. Best to install manually.
- See Checklist item #4 for how to followup installation and determine the plugin is loading properly.
- Solution-1b:
- See also Issue - Controls - Keyboard and-or mouse don't work with a game controller installed. This plugin must be installed to the game "Data\NVSE\Plugins" folder. Your mod manager may not recognize that location, and manual installation may be required.
Issue - Controls - Mouse and-or keyboard does not work with a game controller installed
- Cause: The game checks for it before the keyboard, and if detected ... disables the use of the keyboard. Merely being connected can cause the game to ignore the keyboard and mouse. Game controllers usually do not have the ability to be programmed to send key strokes and mouse buttons to the game interface. FNV requires a controller (such as the XBox 360) which is "Xinput" compatible. Some mods will require DirectInput/"DInput" emulation to work with a controller. (See this DirectInput Wikipedia article for an overview and comparison of the two Device Input APIs.)
- Solution-1: Third-party controller adapter software. There are others, but the most commonly referenced is:
- Xpadder ($9.99) - maps keyboard keys and mouse button actions to your game controller buttons.
- Xpadder also allows you to map the mouse pointer to your game controller sticks.
- Xpadder can also handle combinations, sequences, toggles, triggers, shift sets, multiple controllers and more.
- Xpadder v5.3 (last freeware version: 13 Apr 2008)
- Note that you will lose rumble/vibration on your controller since you will have to choose the "keyboard" input device in the game options menu. Xpadder essentially treats the controller like a secondary mouse & keyboard.
- antimicro (freeware) Gamepad device specific support with various Linux distributions, Windows (Vista and later), and FreeBSD, but with limited support for FreeBSD and Windows XP.
- FNV Gamepad for mods (Antimicro Profile) Mod: Gamepad profile for Antimicro configured to offer support for certain FNV specific mods.
- Solution-2a: The "Lutana NVSE plugin" provides DirectInput (aka "DInput") emulation modes (as opposed to the newer, more current DirectX Input (aka "Xinput") mode) which enable controller input with mods that normally require the keyboard, such as Project Nevada. See the mod download page for instructions. As this plugin also provides many other additional functions, it is often required by other mods.
- Solution-2b: A missing configurable feature of JIP LN NVSE mod, and a cleaner implementation of the original Lutana version is:
- Controller Support NVSE by Luthien Anarion (the LN of JIP LN), Emulates keyboard and mouse inputs when controller buttons are pressed.
- Solution-3: A "Keyboard/Video/Mouse" (KVM) switch that mechanically let's you switch those devices between one computer and another MAY be a possible solution if your game controller will connect to it and you can disconnect the controller from the computer by means of the switch instead of unplugging it.
- Solution-4: Disconnect your controller and use only the keyboard.
- Disconnect the game controller from your computer.
- In the game's Main Menu, select "Settings" and then "Key Mappings".
- In the bottom right corner click on "Device" and change it from "controller" to "keyboard/mouse".
- Then exit the game and restart it from the vanilla launcher. (This is necessary so it will update the hardware settings in your INI files.)
- See also the Issue - Mods don't seem to have controller support entry.
Issue - Controls - Mouse misbehaves
Your mouse doesn't behave "in-game" as it does on the desktop.
Pipboy hotkeys:
- TAB = Toggle Pipboy open/closed. Hold several seconds to toggle Pipboy "flashlight".
- F1 = Stats (submenus for reputation, challenges completed, etc.),
- F2 = Inventory (submenus for weapons, apparel, aid, miscellaneous),
- F3 = Data (submenus for map, quest status, notes, and the radio).
- Cause-1: Game INI "[Controls]" settings.
- Solution-1: The default "fForeground=" and "iPresent=" values can conflict with the system mouse acceleration, but changes to them can make menu speeds crazy high, so you need the "bBackground=0" changed to "=1" to fix (slow) the menu speeds. Some users find that "bBackground Mouse=1" makes the mouse in menus too slow, so some experimentation may be needed.
- Backup first (see the Game INI files section for details), and then edit all three Fallout INI files so they use the following settings:
- Add: under [Controls] to disable mouse acceleration:
- and Change: (from 1 to 0)
iPresentInterval=0
- Cause-2: Using a "more than one monitor" setup, and the mouse does not stay confined to the game screen/window, but unexpectedly moves onto the other monitor(s) causing unwanted events when configured to "extend/span" across the monitors.
- Video cards designed to drive multiple monitors have their own "video control panels" for configuring the monitor setup to either "span" (display a video screen across all the monitors at one as if one large monitor), or "duplicate" the same screen on each monitor.
- Solution-2: Use the vendor provided control panel to configure the display to "span" the monitors. Then configure the game to run in "windowed" mode by changing the three INI files setting to "bFullScreen=0". (Full screen would span across all the monitors at once otherwise.) If you do not have a vendor "control panel" with multi-monitor setup for your monitors, try this tool:
- Dual Monitor Tools (open source generic multi-monitor control).
- It has a setting to lock the mouse to a certain screen with a hotkey if necessary.
- Finally use one of the following tools to "confine" the cursor to the game window by running it in a "fake fullscreen borderless window":
- OneTweak by virusek. Requires NVSE. (There is a Skyrim version as well.)
- FullScreenWindowedMode by TimThompson89. Also requires a "Script Extender", but works with OBSE, SKSE, FOSE, and NVSE.
- Cause-3: There are points in the game where scripts "DisablePlayerControls" deliberately. Usually this is to prevent the Player from interrupting messages or "cut-away scenes", but sometimes control is not returned to the Player, with the result that the Pipboy menu and other functions like attacking, blocking, and crouching (either with the mouse or the keyboard) fail to work.
- Solution-3: Use the console command (<~> key) "EnablePlayerControls" (without the quotes). If this solution is only temporary, see the earlier "Causes" and the Issue - Controls - Mouse and/or keyboard don't work with a game controller installed entry.
This issue occurs with the vanilla game and no mods installed. It may have worked fine with older versions of Windows, but now fails with the latest.
- Cause: Logitech drivers have a long history of problems working with Windows games if any of their "advanced" driver features are used.
- Solution-1: Obtain the latest version of the Logitech "SetPoint" driver, and disable any advanced features like "snap to default button", etc. If there are "game compatibility" options, select those.
- Solution-2: Uninstall all Logitech drivers and add-on software like "SetPoint". Reboot, and install the bare bones "Microsoft Mouse compatible" driver and any updates instead. If the Logitech mouse won't work with a bare bones MS certified driver, use a different more compatible mouse.
Issue - Controls - Remapping the ammo swap hotkey from key -2-
The issue revolves around the fact the game control configuration permits you to remap the "ammo swap" key from the default < 2 > hotkey to something else.
- Cause: Contrary to expectations, this ability to remap "ammo swap" to a different key does not enable you then use the < 2 > key like the other number hotkeys. You cannot get the use of the < 2 > key as an 8th hotkey. Once you unassign the < 2 > key, it won't ever seem to function again. The game control configuration menu simply ignores any attempts to remap < 2 > to any command; not even back to "ammo swap" again.
- Solution: Edit the "FalloutPrefs.INI" file (located in the "Users" folder).
- Locate the "[Controls]" section.
- Find the "Hotkey2" entry; which is called "AmmoSwap" instead.
- To restore "AmmoSwap" back to using the < 2 > key, change the value to "0003FFFF".
- There is an optional ability to consolidate the 7 hotkeys to the number key sequence "1-7", and move the "swap ammo" function to the number "8", as follows. (Everything after a semi-colon is a comment which should not be entered.) This one won't re-order the icons in the inventory, but it'll still work. In the inventory, if you press the < 2 > key, it'll basically light up slot 8, is all.
Issue - Gazing in certain directions causes a freeze
In certain locations the game appears to freeze when looking in certain directions. Attempting to use the mouse to turn in place takes 10-30 seconds to respond in changing the direction of view.
Known problem locations:
- Looking South of Matthews Animal Husbandry Farm.
- Looking West from the Searchlight Airport's Western fence.
- Looking North of Guardian Peak.
- Looking South from The Devil's Throat.
- Cause: Mod conflict.
- Solution: The "Fallout Character Overhaul" (FCO) mod's included "Glowing Ghouls" optional file "FCO - GlowingOne.esp" has been identified as at least one source of this problem. No reports of any patches to this file correcting the situation.
Issue - Grenade throw always falls at my feet
- Cause: The "grenade throw" (thrown explosive) weapon has been separated in FO3 and FNV from other "throwing" weapons and is now based upon "explosives skill". The "grenade throw" key is not clearly documented in the list of PC Controls for Mouse and Keyboard.
- Solution-1: Once a "grenade type"/"thrown explosive" is selected, just press and hold the "attack/fire" key/button for a couple of seconds. The longer you hold it, the further the distance thrown (depending in part upon your aim and trajectory).
- NOTE: thrown explosives doesn't work as well as expected in VATS mode as explained in that section of the link.
- Solution-2: Project Nevada has an option to have the distance thrown based on your Strength (STR) instead of the default of "explosives" skill, in addition to using a "hotkey" to combine the selection and throw.
- Solution-3: There are also two other "grenade key" mods that are intended to make "grenade" (explosive) throwing easier:
- Grenade Hotkey by vivanto
- Grenade Key by svartberg
Issue - How to determine what keystrokes are being passed
Sometimes "strange things happen" when you press a key and you wonder just what keystrokes were being sent.
- Cause: Either a mechanical fault in the keyboard or a remapped key function in the software. Unfortunately there is no universal way to tell just which software has remapped conflicting keys. These are usually "context specific", meaning they are part of the application and depend upon what it is expecting at that particular moment. In the case of mods, the last to assign the key mapping "wins".
- Solution: Software has been developed for showing even unprintable keystrokes (i.e. mouse-clicks) in real-time for streaming screencasts. This can be used for troubleshooting as well. The following are representative examples of available free programs:
- PxKeystrokesForScreencasts by Phaiax.
- QiPress by aalapshah. Lite version is free; Pro version requires a license.
Issue - HUD-UI-Menu messed up or unreadable or missing
- Cause-1: You are using an HUD-UI-Menu mod such as DarNified UI (DarnUI) which requires fonts other than the vanilla provided ones to display properly.
- Solution-1: DarNified UI comes with a set of "DarN" fonts which must be added to the INI files, but there are other fonts available such as:
- DarnUI instructions to edit the "Fallout_default.ini" file come from the DarnUI support thread, but it is recommended to edit all three INI files to be sure ("Fallout_default" in the game root folder and the two in the "Users" folder). The mod DarnifiedUI Configuration is a script to automatically make the edits to the default INI file.
- Manual edit instructions are to replace the existing [Fonts] section with the following:
[Fonts]
; sFontFile_1=Textures\Fonts\Glow_Monofonto_Large.fnt
sFontFile_1=Textures\Fonts\DarN_FranKleinBold_14.fnt
; sFontFile_2=Textures\Fonts\Monofonto_Large.fnt
sFontFile_2=Textures\Fonts\DarN_FranKleinBold_16.fnt
sFontFile_3=Textures\Fonts\Glow_Monofonto_Medium.fnt
; sFontFile_4=Textures\Fonts\Monofonto_VeryLarge02_Dialogs2.fnt
sFontFile_4=Textures\Fonts\DarN_Sui_Generis_Otl_10.fnt
sFontFile_5=Textures\Fonts\Fixedsys_Comp_uniform_width.fnt
; sFontFile_6=Textures\Fonts\Glow_Monofonto_VL_dialogs.fnt
sFontFile_6=Textures\Fonts\DarN_Sui_Generis_Otl_13.fnt
; sFontFile_7=Textures\Fonts\Baked-in_Monofonto_Large.fnt
sFontFile_7=Textures\Fonts\DarN_Libel_Suit_Otl_24.fnt
sFontFile_8=Textures\Fonts\Glow_Futura_Caps_Large.fnt
sFontFile_9=Textures\Fonts\NVFont_Test.fnt
- Note a semi-colon (";") at the beginning of a line "comments out" that line so it is not read but remains for reference. Other alternative fonts can be used in place of the "DarN_<style>_<size>.fnt" entries, but in that instance it is recommended to add them and comment out the DarN fonts as well. The "<size>" portion of the name is the number of "points tall" for that font. A large number equals a larger character size, so "6" is very small (short) and "24" is quite large (tall). Either "10" or "12" is normal for most text.
- Cause-2: An XML file is missing an expected element. Usually this is caused by a mod installation overwriting the XML file in question.
- Solution-2: It can get complicated. Read this HUD-UI-Menu issues wiki article.
Issue - MOUSE - not working after fast travel
- Cause: Unknown
- Solution-1a: After "fast travel", enter the Pipboy "map" tab (see Issue - Mouse Misbehaves for hotkeys), move the mouse cursor around a bit and then "<Right-Click>" on the map to enter into the "marker placement" menu to see if it is working again. It may take more than one attempt at wiggling the mouse cursor around, but once it responds to the mouse click it should work until the next time you "fast travel".
- Solution-1b: Rename the "Fallout.INI" and "FalloutPrefs.ini" files located in the "C:\Users\<UserAccountName>\Documents\My Games\FalloutNV" folder to some different name. (Just adding a different extension such as ".org" works.) Then use the game "FalloutNVLauncher.exe" program to cause them to be rebuilt. Refer to the backed up original version files for your previous changes.
Issue - MOUSE - sensitivity or weapon aiming is off or similar issues
Monitor is set to a higher than 1920x1080 resolution.
- Cause: FNV was designed for monitor resolutions common prior to 2010. "In 2010, 27-inch LCD monitors with the 2560 × 1440-pixel resolution were released by multiple manufacturers including Apple." - Wikipedia on "Display resolution". "High Definition" (1920x1080, 16:9 aspect ratio) "FHD standard" was generally considered "high end" for gaming. Newer monitors may have a higher default resolution.
- Solution: Use a lower, more standard (in 2010) display resolution. (Note the LED/Plasma monitors have a default resolution according to the screen size and "aspect ratio". Lower resolutions may not fill the screen, resulting in "black borders" (e.g. "letterbox style"). "Windowed mode" may be a way around this visual problem.) See the Wikipedia article quoted above for more on the subject, including a table of "resolution standards".
Issue - Unable to add either of two weapon mods to a weapon
- Cause: The mod The Weapon Mod Menu (WMM) only checks the first of 3 possible mod slots. If this is blank, it assumes there are no mods available.
- Solution: Edit the "Items | Weapon" entry with GECK so the first and second "Mod Info" tab slots under "Game Effects" are not empty. Typically this will mean moving the second and third slot entries up by one. Be sure to make the plugin containing the Weapon in question the "active" one, as that is the plugin that will get saved. Note this edit will only work if there are already weapon mods available for that weapon. Adding weapon mods that do not already exist is a more involved "customization" process.
Issue - Unable to draw weapons or fire or crouch
Also related: Sunny Smile's initial greeting dialog is actually that from a later stage:
- Initial greeting: "Cheyenne, stay. Don't worry, she won't bite, unless I tell her to."
- Later greeting: "Yeah alright. Let's just get done with this first and we'll talk later. Preferably somewhere I can get a stiff drink and Cheyenne can cool down".
- Cause: Removal of all "tumbleweeds" from the game. The first "tumbleweed" seen upon exiting Doc Mitchell's house after creating a character is scripted. It's absence (i.e. a mod to remove all tumbleweeds also removes that script event) breaks the game.
- Solution:
- Temporary: Move to somewhere you know you should be able to use all those functions, open the in-game console (<~> key), and enter "EnablePlayerControls" (without the quotes) and hit <Enter>.
- Permanent: Uninstall any mods that remove all tumbleweeds before creating a new character. Often this functionality is incorporated into "performance" mods, so if it isn't mentioned in the description some testing may be required. However, once the character has stepped outside of Doc Mitchell's so the scripted "tumbleweed" event occurs, they may be installed.
Issue - WMM - The Weapon Mod Menu will not let me add a weapon mod in game
- Cause: There are a number of unspoken assumptions by The Weapon Mod Menu (WMM) that, when verified/resolved, are the usual solutions.
- Solution-1: You are trying to "modify" the currently equipped weapon when you hit the "x" key.
- Solution-2: You have a "weapon mod" that is appropriate for that specific weapon. Most "weapon mods" only apply to very specific weapons. There are (to the best of the collective knowledge) none that apply to ALL weapons. So you have to check the name of the mod very carefully as the differences in the names are subtle. The easiest way to determine the correct mod for a weapon in game is at the "green vending machines" provided by the additional mod Weapon Mods Expanded (WMX), which are generally found at all the "Gun Runners Arsenal" (GRA) storefronts.
- (There are a very few instances where WMM will refuse to add weapon mods. See Issue - Unable to add either of two "weapon mods" to a weapon entry, but it will require you to look at the mod plugin internals in either FNVedit or GECK to verify.)
- Solution-3: You have installed both Mod Configuration Menu (MCM) and WMM in the correct order. (See the wiki article HUD-UI-Menu issues.)
- Solution-4: You do NOT have a game controller attached. If you do, see the Solutions to Control Problems section.
- Solution-5: If none of the above are the problem, see if you can find anything in the "fallout_nv_error.log" file. (See Checklist item #4.)
Issue - WMX - loses my existing weapon mods to the Weathered 10mm pistol
- Cause: This weapon has an unfortunate (seemingly hard-coded) bug that means that any weapon mods applied to it will not be visible on the weapon.
- Solution: Weapon Mods Expanded (WMX) detects that you have equipped the 'Weathered 10mm Pistol'. The WMX menu (in the Pip-boy "Inventory" screen for the selected weapon) allows you to swap the defective original Weathered 10mm Pistol for a fully-functional duplicate of it. Doing so will effectively erase any weapon mods already applied to the weapon, so it is recommended to remove them first using The Weapon Mod Menu (WMM). When you are ready to proceed, select the 'Swap Weapon' button. Select 'Cancel' if you are not ready to proceed (this menu will appear again when you next equip the bugged Weathered 10mm Pistol).
Issue - ZOOM controls
Symptoms: Suddenly vision "zoom" features (such as "scoped weapons" and dialog "close-in to observe the speaker's face") and related manual controls are no longer working.
- Cause: Likely a "Field of View (FoV)" setting or conflict.
- Solution: Check FOV related setting in recently added mod INI files, such as (purely for example) "New Vegas Reloaded" and "FOV Slider", or enhanced configuration mod tools like lStewieAl's Tweaks.
Solutions to Garden of Eden Construction Kit aka GECK problems
Issue - Where to obtain the GECK
- Cause: The Construction Kit is a separate download and not automatically installed by Steam. (It is with the GOG DRM-free version.)
- Solution-1a: You can download the "GECK. - New Vegas Edition" through Steam. It's under the "Library | Tools" tab in the Steam launcher.
- Solution-1b: Download from the following links:
- Official GECK Wiki by Bethesda Softworks.
- GECKWiki Community maintained (more up to date) version of GECK Wiki.
- FNV 4GB Patcher by Roy Batty - LuthienAnarion. Sets LAA flag specifically to work with Steam versions of FNV and GECK.
- Recommended: The community developed optional NVSE plugins supplement the GECK, and are considered essential due to the error fixes and additional diagnostic messages (especially for scripts that won't compile) it displays. They require you to launch GECK with NVSE in order to function.
- GECK 1.4 Power-Up (Forked) by hlp. NVSE Plugin.
- Script compiler warnings will now be displayed. Scripts will no longer silently fail to compile.
- Many other warnings were restored: in cell loader, in NavMesh checker, and so on, more than in 1000 places. [back for testing in 0.1.7.1 beta 1]
- Adds a special Marker hack which makes RoomMarkers and PortalMarkers visible and transparent in the render window [since 0.1.3].
- Unfortunately, cannot make them completely invisible as they should be, but it's better than having to move them all away just to see the cell.
- You can now save scripts without compiling them (useful if you want to save your script and finish it later).
- The spell checker can now be enabled and disabled at runtime.
- Fixed the bug which caused the GECK to crash when user double-clicks on empty space in Form List Editor.
- The "Edit" menu item in Form List editor will now work.
- All MessageBox'es will now be in English, regardless of your system's language. This also means that "Cancel" will be replaced by "Yes to all" where intended by GECK developers. [since 0.1.2]
- ESM are now active and editable directly.
- ESP used as masters will remain in the masters list.
- ONAM records in ESM will be preserved. No guarantee new required ONAM will be added. When in doubts, use FNVEdit to update the ONAM records.
- GECK Extender by Roy Batty - LuthienAnarion. NVSE Plugin.
- Enables level 2 LOD generation for large worldspaces
- Fixes bUseMultibounds = 0 crashes in cells with multibounds
- Extends GDI handle limit: This cleans up opened windows better when closing them so you can edit for long periods without fear that you won't be able to save your plugin because the GECK can't open any new dialog windows.
- Help links point to new community maintained wiki: GECKWiki.
Issue - GeckCustom INI file
TIP - Disable Audio in GECK
TIP - Enable loading multiple master files at once
TIP - Enable more than one copy of the GECK
- (or both the FO3 and FNV versions).
TIP - Enable MultiBounds
- Thanks to pixelhate of the Nexus Fallout "Mod Talk" forum for the basis of the following:
TIP - Load ENB Series with GECK
TIP - Master files
- GECK Tutorial - Loading Multiple Masters by Seddon4494.
- Thanks to madmongo of the Nexus Fallout "New Vegas Mod Troubleshooting" forum for the basis of the following:
Issue - GECKPrefs INI file
In the "Users" game folder, along with the three INI files generated for your game is the GECKPrefs.INI file. This file gets created when you first start using the GECK, and saves any customizations you make to it's interface (e.g. such as if you change any values for the "map editor" color masking).
The problem that can arise is when your changes don't work out as you intended and you wish to revert to the default values. There is no built-in mechanism to restore the defaults in that file, nor is there a file for the GECK to refer to similar to the "Fallout_default.INI" file. (There may be a "reset" button in the GECK window, but it only affects the current edit session: resetting to the values in effect when the window opened.)
Therefor: it is your responsibility to make a backup of either the initial or your stable customized version of GECKPrefs.INI so you have the default values to refer to. Otherwise, all you can do is delete (or rename) the file and let GECK rebuild it the next time it starts.
Issue - How to get GECK to load with NVSE
- Cause: "New Vegas Script Extender" is an addon library of functions developed after GECK was "finished", so it doesn't know about the extensions. Without including NVSE, use of commands from that or the older FOSE (which is incorporated) extension will produce script errors of "unrecognized command" preventing compiling and saving them.
- The GECK Extender NVSE Plugin with the Optional "Patcher" to make GECK 4GB aware and auto load NVSE is recommended. (Do not use together with GECK Powerup (nor the Forked version), which it replaces.)
- While the GECK 1.4 PowerUp for Fallout New Vegas addon comes in both "standalone" and NVSE plugin versions, that does not mean that NVSE is automatically loaded as part of the GECK itself, so it doesn't otherwise recognize those extensions. The suggested method is to use the NVSE Plugin version of PowerUp when also loading NVSE. Then it will automatically be included when your shortcut points to the "nvse_loader.exe". (Replaced by GECK Extender. Do not use both together.)
- Note you must launch GECK as an "Administrator" account: no matter if you are also loading "Extender", "NVSE", or the "GECK Power-Up StandAlone"; or only GECK.
- Solution (for Powerup only):
- Create a Windows shortcut to the GECK. Name it something to reflect this is for the GECK + (PU or/with NVSE) (e.g. "GECKPU+NVSE").
- < Right-click > on the shortcut and select "Properties | Shortcut".
- To load "NVSE" (with or without plugins such as PowerUp or GECK Extender), in the link shortcut "Target:" field put the complete path to the nvse_loader, and include the "target command line":
- in double-quotes (because of the embedded spaces in the path.) The "-editor" must be placed outside of the double-quotes of the path so it will be recognized as a "parameter" of the executable.
- If you use the "Power-Up Standalone" version 0.1.6 or later, in the "Target:" field put the complete path up to and including the target command line:
- (This is a change from previous instructions for "Power-Up", as documented in the PU "ReadMe" file.)
- Select the "Advanced" button on the same "Shortcut" tab, and enable (check) the box "Run as administrator" on the window displayed.
- Click the "OK" button until the shortcut window closes.
- Note that if you add this shortcut to "Steam", it will initially strip off the "-editor" parameter. Be sure to double-check the "Target" within "Steam" for the presence of this parameter.
- Select the "Advanced" button on the same "Shortcut" tab, and enable (check) the box "Run as administrator" on the window displayed.
- Click the "OK" button until the shortcut window closes.
Issue - GECK Power-Up or NVSE cannot find GECK
- Cause: You must launch anything to do with GECK from an "Administrator" account.
- Create a shortcut, and on the "Properties | Advanced" tab enable (check) the "Run as administrator" box. This will cause you to automatically be prompted to enter a valid Administrator account and password each time you try to run the command so you won't forget.
- NOTE: The GECK Extender, which should be used instead of the "GECK Power-Up", includes an optional patch as a separate file to make GECK "4GB aware" and auto load NVSE.
Issue - GECK automatically loads unwanted DLC Masters
Issue - Where to start in creating mods
- Cause: The GECK is only part of what you need to create mods, and it doesn't have a training manual.
- Solution: Please see the wiki article Getting started creating mods using GECK for an overview of what is involved and links to various tutorials on specific subjects.
Issue - Where are the Warnings and EditorWarnings text files
They are supposed to be in the game root folder (where the FalloutNV.exe is found).
- Cause: It appears that Bethesda dropped these output files after FO3.
- Solution: Instead, the "GECK Power Up" and "GECK Extender" plugins have now provided that functionality. Try setting NVSE to report them.
- In Data\NVSE\nvse_config.ini, set:
- In Data\NVSE\nvse_plugin_geckpu_ew.ini there is a "[WARNINGS SELECTION]" followed by a list of hex offsets. Each offset is set to a reporting level, as described at the top of that file. The default (=1) is to both display the warning in a "MessageBox" in the GECK and write it to file. When the nvse_config.ini LogLevel is set between "2" and "5", the warnings are written to the nvse_plugin_geckpu_ew.log file in the game root folder (where the FalloutNV.exe is found).
Issue - GECK crashes upon editing a weapon
"Every time I attempt to use the GECK to edit a weapon it crashes, even when only the main NV master file is selected." This also occurs when "Fallout Character Overhaul" (FCO) is installed.
- Cause-1: GECK needs to have the LAA flag enabled in order to take advantage of more than 2GB of memory.
- Solution-1a: See article 2-4GB_game_memory_limits_and_solutions for an explanation of the LAA issue and a link to the general purpose tool, or just use the NTCore 4GB Patch on the GECK executable.
- Solution 1-b: The GECK should also be patched to use up to 4GB of memory (i.e. FNV 4GB Patcher, the NTCore 4GB Patch or their more general CCF Explorer, or the like).
- Cause-2: This has been traced to the presence of a specific file that is overwritten by "Fallout Character Overhaul" (FCO): eyebrowm.nif in: Data\meshes\characters\hair.
- Solution-2: Remove the troublesome file when using GECK, and restore it when playing. If you put it into a batch (.cmd) file such as the following to launch GECK you won't forget.
@echo off
cls
::REM As GECK has to be run from an 'Administrator' account, you should launch it from a
::REM   shortcut (.lnk file) that has that "run as" setting in the 'Properties'.  This will
::REM   be run in a separate sub-process window.  Otherwise the 'start' command won't WAIT
::REM   until GECK is done before continuing with this script.
::REM Change the 'set runpgm=' line to point to your GECK shortcut.
set runpgm=C:\Users\Public\Rec\FalloutNV\GeckPU.lnk
::REM Change the 'set gamedir=' line to point to your game install folder.
set gamedir=E:\Games\SteamLibrary\steamapps\common\Fallout New Vegas
::REM Nothing else below this point should need to be changed.
set tgtdir=%gamedir%\Data\meshes\characters\hair

pushd "%gamedir%"
if exist "%tgtdir%\eyebrowm.nif"  ren "%tgtdir%\eyebrowm.nif" eyebrowm.nif.hld && @echo SCRIPT: Removed file [eyebrowm.nif]

@echo SCRIPT: Manually close the separate window GECK is launched in.  When you do, DO NOT
@echo SCRIPT:   select to 'Terminate batch job' (answer "N") or you won't restore files properly.
start "GECK" /D "%gamedir%" /WAIT cmd /k "%runpgm%"
if exist "%tgtdir%\eyebrowm.nif.hld"  ren "%tgtdir%\eyebrowm.nif.hld" eyebrowm.nif && @echo SCRIPT: Restored file [eyebrowm.nif]

:DONE
pause
popd
- Cause-3: If the GECK seems to "hang" while loading your plugin, this may be due to failing to select other plugins your target plugin requires as "masters", but which are not ESM files and/or not automatically included by GECK.
- Solution-3: You can use the xEdit/FNVedit "File Header" to identify all the files that are masters to your plugin, and then be sure to select all of them when loading it into the GECK. Please see the wiki Missing Masters article for details.
Issue - GECK crashes upon loading an exterior cell
Sometimes, after initially creating an "interior" cell, upon trying to work on an "exterior" cell, the GECK crashes when the cell tries to load.
- Cause: Unknown
- Mitigation-1a: Make sure you have patched the GECK to be able to use 4GB of memory. The GECK Extender mod includes a separate file download that does this. Some have found it necessary to use the third-party tool 4GB Patch - NTCore instead.
- Mitigation-1b: Anything in the meshes/textures folder will also load in the GECK. A modded mesh could be causing your CTD. You might find it advantagious to keep different "profiles" or copies of the game "Data" folder (depending upon your "mod manager") so your GECK work "Data" folder only contains the essential files for your mod.
- Mitigation-1c: Try to avoid loading an exterior cell directly. Instead: load up an "interior" cell, then use a "door teleport" to cause the GECK to load the "exterior" cell (indirectly) for you. This seems to avoid the CTD.
Issue - GECK crashes upon starting
- Cause-1: You don't have the correct permissions for running GECK.
- Solution-1: GECK must be "run as administrator".
- Navigate to the program folder of the program you want to run (i.e. FalloutNV game root folder).
- Right-click the program icon (i.e. the "Geck.exe" file).
- Choose Properties.
- On the Compatibility tab, select the "Run This Program As An Administrator" option.
- Click OK.
- If you see a "User Account Control" prompt, accept it.
- Now each time you run GECK you will be prompted to enter an "Administrator" account password. If you enter it wrong, GECK won't start.
- Cause-2: There is not enough available memory in the default 2GB allocated for 32-bit programs. GECK needs to have the LAA flag enabled in order to take advantage of more than 2GB of memory.
- Solution-2: See article 2-4GB_game_memory_limits_and_solutions for an explanation of the LAA issue and a link to the general purpose tool, or just use the 4GB Patch or FNV 4GB Patcher on the GECK executable.
- Cause-3: GECK seems to be overly sensitive to the correct "system compatibility" mode when run on versions of Windows after Vista SP2.
- Solution-3: Set the "Properties | Compatibility tab" to "Run this program in compatibility mode for: Windows Vista (Service Pack 2)" for both the GECK.EXE and the (PowerUp) GECKPU-NV-14.EXE files.
- Cause-4: You installed an ENB or the pre-ENB "enhanced shader" mod containing a custom D3D9.DLL file placed in the game folder. The GECK tries to load all of the DLL files it finds when it starts, and it doesn't know what to do with that one: so it crashes.
- Solution-4: Put the D3D9.DLL file somewhere outside of the Fallout game root folder whenever you want to run the GECK. Make sure to put it back before you start your game; otherwise it will not load. (A "batch file" to handle this that is run when you click on the link to start the GECK is the best way to avoid forgetting this. See Issue: GECK crashes upon editing a weapon for a similar example.)
Issue - GECK crashes upon switching to a different tool
- Upon switching from a current operation (e.g. selected an interior cell in the Render Window) to another operation (e.g. "World | Object Palette Editing" or editing an "AI Package") the GECK crashes. The problem is not consistent: erratically occurring.
- Cause: Unknown. Reported by Vista users as far back as 2008 with FO3 version of GECK.
- Workaround: Disable the Windows "Tablet PC Optional Components" found under 'control Panel | Programs | "Programs and Features" | "Turn Windows features on or off'. Click the "OK" button and restart Windows. The exact location of that setting may differ in other versions of Windows. This may also be related to enabled "infrared" device settings when there are no such devices in use.
Issue - GECK does not automatically select FalloutNV or some DLC ESM file
Normally, when starting GECK and opening the "File" menu it has automatically "checked" (enabled) the DLC ESM files for loading, but not the "FalloutNV.ESM".
- Cause: This is controlled by the presence of the "*.nam" files, which by default are present for all the DLC (but not for "FalloutNV.ESM"). If any are not found, that DLC is not automatically selected (enabled) either. These files cause the game to load those DLC even if they are not "active" in the "load order". (It is recommended you rename rather than delete them if you don't want a particular DLC to be loaded.)
- Solution: The "nam" file contains nothing more than the common name (i.e. "Dead Money") of the respective DLC. When a plaintext "FalloutNV.nam" file (which does not exist by default) with "Fallout New Vegas" as content is created, "FalloutNV.ESM" will be automatically checked (enabled) in GECK's "File" menu just like the DLC.
Issue - GECK does not show Landscape
- Cause: There is a barely mentioned "shortcut key" combination that toggles the display of Landscape in the "Render Window" when you have an "exterior worldspace" loaded. It does not appear in any menus so it is usually an accidental toggling.
- Solution: <Shift+L> will toggle the display of the Landscape. (Thanks to VenonXNL for reporting the solution to this "mystery".)
Issue - GECK hates me in general or how to get started working with it
- Cause: The GECK is frustratingly buggy. It is not intuitive to use. The GECK website makes assumptions that you understand concepts introduced in earlier game Construction Kits (CKs).
- Solution: Please see the wiki article Getting started creating mods using GECK, which provides a more extensive overview and learning path on this subject, along with links to tools and tutorials.
TIP - Fallout New Vegas Game Engine Bug List
Issue - GECK will not tell me what is wrong with my script
- Cause: The GECK does not report problems with scripts, and won't allow a script with errors to be saved.
- Solution-1: the GECK Extender Plugin re-enables 1220+ Warning, Error, and General messages, in addition to providing more verbose messages and fixing many bugs. (Do not use together with GECK Power-Up (nor the Forked version), which it replaces.)
- Solution-2: the GECK 1.4 Powerup Plugin comes in a "standalone" version for the "vanilla" GECK functions, and one for GECK with NVSE functions. It fixes and improves some issues while providing the missing messages when the GECK compiler finds an error or warning, and lets you save a script without compiling it. Considered "essential" by mod creators. (Replaced by GECK Extender. Do not use both together.)
- Solution-3: The CIPSCIS Script Validator allows you to quickly indent your script while simultaneously checking it for several errors, many of which are not picked up by the GECK's compiler. It works with Skyrim, Fallout 3, and Fallout New Vegas. Includes it's own tutorials.
Issue - GECK is missing text in some fields
GECK seems to be missing the text associated with certain columns of AI Package, Dialogue, Effects, and Perks (possibly others) information (Editor ID, Topics, etc.). Typically this is a "list box" type field on the form.
- Cause: This occurs in the GECK for both "Fallout 3" and "New Vegas". The problem originally appeared following the installation of Microsoft Knowledge Base article 3000850 (a Win8.1 "rollup update"), was fixed by rolling back that update, but then the problem got "baked in" to Win10. The issue causes the column's right border to be shifted to the far left of the field so the column text is not visible. (See the GECK: Collapsed Text Field. Click the link/thumbnail to see the enlarged image. Use your browser "<back page>" control to return to this page.)

- GECK Extender Solution: Intended for Windows 10 users (no reports on how effective it might be for older versions) the geckextender.ini file has the "[General]" option bListEditFix disabled by default. Set to "=1" to enable.
- Solution (Partial): This "fix" seems to stick only so long as you do not open an AI Package. Switching between Perks, Effects, and Dialogue condition columns work perfectly if you don't open an AI Package's conditions; but then ALL condition columns become squished for any form you open. The next time you start a GECK session, all will be fine again; but once you open AI Package's conditions the bug remains for the session until you implement the "temporary" or "workaround" solutions in each form.
- Set "compatibility mode" for the GECK to "Vista SP2" or "Windows 7 SP 1". (Either seems to work as well.) For example: Right-click on your GECK-NVSE shortcut or the GECK executable directly, chose the Properties | Compatibility tab, Change settings for all users, and select Windows 7, and hit OK. Load up the editor and things should look normal for the first time since upgrading to Windows 10. (See the GECK: Expanded Text Field. Click the link/thumbnail to see the enlarged image. Use your browser "<back page>" control to return to this page.)

- Temporary Solution: Place the mouse cursor in the top left corner of the "blank" field that is missing text until it changes the cursor shape into a "split cross" (column resize) cursor. (See GECK: Expanding Collapsed Text Field. Click the link/thumbnail to see the enlarged image. Use your browser "<back page>" control to return to this page.) Left-click and hold while dragging to the right, and the missing text should be displayed. Continue dragging to the right until everything is shown or the mouse cursor is no longer the "split cross" shape. When you release the mouse button the display field should be corrected. However, this "fix" may not be persistent from one GECK session to another.
- Workaround: there is a Windows "hotkey" for expanding all columns in the currently active window of Windows Explorer and some programs (including GECK).
- First you have to select a field with the problem (i.e. the "Conditions" field in the GECK: Collapsed Text Field) in the displayed GECK window,
- Then press "Ctrl" and the "+" key on the cursor/number-keypad. (The "+" key on the regular keyboard won't have this effect. See GECK: Expanding Collapsed Text Field. Click the link/thumbnail to see the enlarged image. Use your browser "<back page>" control to return to this page.)
- Now all columns should be expanded fully by themselves. (See the GECK: Expanded Text Field. Click the link/thumbnail to see the enlarged image. Use your browser "<back page>" control to return to this page.)
Issue - GECK Render Window shows a large gray square in new world space
Created a new world space and set WastelandNV as parent, using land and map data from the parent. Everything seems to be working fine except for a huge gray square covering most of the render window when trying to view the new world space.
- Cause: The gray square is the water table.
- Solution: Go to your 0,-0 point, zoom past the gray till you can see your land, and then add a static. Close, save, and then open your world space in GECK again and your land surface should now be visible.
Issue - How do I configure the GECK to do something
- Please see the GeckCustom.INI entry.
- Also see the wiki GECK: Tips and Tricks article.
Solutions to Graphics problems
Issue - Aiming - 1st Person View aka FPV Iron Sights
This is a built-in game Main Menu setting, under: "Settings | Game Play | True Iron Sights [ON | OFF]". It is also accessible from the "Pause Menu" screen during a game session. It is only visibly in effect in FPV.
Only certain weapons have this "feature", though some mods add it to weapons that lack it in vanilla. When this setting is enabled, those weapons will switch:
- from "the weapon is shifted to the right of the center of the screen so it is not aligned between your 'eyes' and the target, and you aim using the crosshair" mode,
- to "the weapon is centered in the screen between your 'eyes' and the target so you aim by lining up the front and rear 'iron sights' on the weapon (no crosshair) just as in real life";
- when you click using the (default) Right-Mouse button (aka "<RClick>") as if "blocking with a melee weapon" or "zooming in on the target with a scoped weapon".
Without the "True Iron Sights" setting to ON, the same "weapon centered in the screen" view is displayed, but the "rear sight" on the weapon is lower down and you cannot "truly" align the front and rear sights. You use the "crosshair" instead.
Issue - Aiming - 1st Person View aka FPV is off center
The situation is a bit more complex than it appears on the surface. Apparent weapon position is determined by the animation files. It is also tied in with whether or not you use the game's "Auto Aim" feature, which is active by default. In addition there are various "Field of View" (FOV) settings the game switches between under certain circumstances, which affect what is visible of the scene.
- Cause-1: This is controlled by a single variable: "fFirstPersonHandFollowMult". The default value is ".85", so this was a deliberate design decision to impose some inaccuracy by the developers, as a value of "1.0" is "dead center" of the aiming point.
- Solution-1a: The mod Gun Follows Crosshairs in First Person by Grasscid applies this fix.
- Note the mod First Person Gun No Follow by Azrael Dark combines nicely with "Gun Follows" so the gun doesn't follow the cross-hairs up out of the "neutral carry position" until you actually fire.
- Solution-1b: Set "fFirstPersonHandFollowMult" to "1.0". (Some other mods use this setting as well, so conflicts are possible.)
- Cause-2: Your problem might be a result of changing the "Field of View" (FOV).
From TweakGuides:
- fDefaultFOV=75.0000 - Shows the default Field of View in degrees for the game, which is 75 degrees. Changing the Field of View using this variable doesn't seem to work properly as it is not applied when the game starts, so instead you will need to use the FOV console command (See Console Commands section) each time you start them game to set a different field of view.
- Update: It has been discovered that by inserting the line fDefaultWorldFOV=75.0 at the bottom of the Display section of the Fallout.ini file, and assigning it a value equal to the FOV you want, you can now permanently change the default Field of View in the game. Remember however that if you change the default FOV, you may also need to change the FOV for other screen elements - see the fRenderedTerminalFOV and fPipboy1stPersonFOV commands below. Note also that you can alter the fDefault1stPersonFOV=55.0000 value to alter how much of your body/weapon is shown in front of you (Fallout.ini).
- Solution-2a: FOV Slider by Roy Batty is a simple mod that adds an MCM menu that allows for adjusting the Fields of View for all of the game's camera views. Look into "Weapon FOV scale" (to compensate for larger or smaller Player Fields of View and their affect on aim speed).
- Solution-2b: Other than adjusting the various FOV settings, try tweaking the following default values (which set the camera position relative to the head node in FPV) in the INIs [General] section:
- Make backups of the INIs before changing them.
- fCameraPosX=0.0
- fCameraPosY=9.5
- fCameraPosZ=6.0
- bUseThirdPersonArms=1
- bTPArmsEnableIronSights=1
- Cause-3: A surprising number of vanilla weapons have misaligned meshes between the projectile nodes and the cross-hair.
- Solution-3: The Weapon Mesh Improvement Mod (WMIM) by Roy Batty is an on-going effort to fix the vanilla weapons wholesale. Similar issues with mod added weapons have to be taken up with their respective authors in comments on those mod download pages. There are various individual mods to be found by using the Nexus "search" function on the term "iron sights".
- NOTE: While WMIM is "meshes" and Weapon Retexture Project (WRP) by Millenia is "textures", the latter includes modified meshes that are required for his textures to display properly with their own sub-folder, so it's incompatible with any other mods that adjust vanilla weapon meshes. (Notably most "Nifskope Weapon" mods and WMIM. WRP v1.95 from 2012 uses vanilla folder paths and is somewhat more compatible.) The Rifle 1st Person Accuracy Fix mod by joefoxx082 is an alternative solution to the accuracy issue, though obviously not as comprehensive as WMIM. As is often the case, you may have to give up one mod or the other.
Issue - Aiming - 3rd Person View aka TPV is off center
- Cause: This is a more complex issue than aiming in 1st Person View (FPV). The player is always viewing the action from the perspective of the camera. The camera location is independent of the character's eyes, and from the weapon. It is always "center of the screen". In FPV, it is positioned to simulate the eye view of the character. In 3rd Person View (TPV), the camera (and you) are not looking from the perspective of either the character or weapon. Instead the camera is positioned behind and off to the side so the back of the character and more of the scene to the opposite side of the character is in view. This camera setting is not generally adjustable, though there are mods that help. The cross-hair is positioned in the center of the screen. It is not accurately aligned with the character's eyes or the weapon. The "Field of View" (FOV) controls how much of the cell scene is visible. This is adjustable and there are actually a number of inter-related FOV settings.
- Please see the Issue: Aiming - Disable Auto Aim or not? section first to understand the role of Auto Aim on the problem. As pointed out there, weapon animations are not aligned consistently the same. In TPV, if Auto Aim is disabled there is no expectation that the alignment of the weapon is with the cross-hair. As the camera position is behind and offset to the right (by default) from the center of the body so you are looking more or less along the angle of the weapon towards the cross-hair, but you can't even expect the cross-hair to be aligned with the position of the body facing either.
- It is important to understand: the game is not designed for accuracy while shooting in TPV. You are in essence always "shooting from the hip", while situational modifiers ("iron sights", crouching, weapon skill, etc.) affect the "spread" inherent in the weapon. (See GECK: Gun Spread Formula.) If you need accuracy, then by design you need to be in FPV (which is why the game switches you to that mode when you use certain weapons or a "Scope" and have "True Iron Sights" enabled). Not all weapons have "Iron Sights" (i.e. some energy weapons) and some "Power Armor" mods are known to "break/replace" the vanilla "True Iron Sights" functionality. For accuracy, you want a smaller "fOverShoulderFOV" value to more closely align the center of the screen with the cross-hair.
- Solution-1: Use a mod that allows you to adjust the left to right offset of the camera position. Either of works well combined with Solution-2 options:
- Centered 3rd Person Camera by Jahandar.
- Dynamic Third Person Camera by claustromaniac.
- Solution-2: Use a mod that allows you to adjust how far behind the camera is offset from the PC's back.
- 3rd-Person-Camera-FIX by humannature66.
- Further 3rd Person Camera by Silverglade.
- Solution-3: FOV Slider by Roy Batty is a simple mod that adds an MCM menu that allows for adjusting the Fields of View for all of the game's camera views.
- Those interesting in fighting primarily while in TPV should experiment with "fOverShoulderFOV" and "Iron Sight FOV Zoom Time".
Issue - Aiming - Disable Auto Aim or not
- Cause: In Fallout 3 and New Vegas bullets can actually curve or shoot in a direction they shouldn't based on a dice roll (on top of the normal bullet spread).
- If we completely remove the Auto Aim features, the game fires your bullets from your weapon parallel to the 3D model (like it should be physically). The only issue is that every weapon is somehow differently aligned: the .44 Magnum is slightly pointing under the cross-hair, the Hunting Rifle is pointing to its right, etc .. So without Auto Aim enabled, the cross-hair is not really where you are aiming anymore and it's different for each weapon.
- Basically the Auto Aim feature redirects your bullets toward the center of the screen. This would be a great feature if it wasn't also used in combat as a targetting aid. When your cross-hair is near the bounding box of an enemy's limb, Auto Aim instead shifts the bullets towards the nearest limb.
- Solution-1: No Auto Aim by EddieV223. Rather than completely disabling Auto Aim, this mod uses some settings with values so small the effect is negligible. Uses the following values (default = FalloutNV):
- fAutoAimMaxDistance: 50000.000000 (default: 1800.000000)
- fAutoAimScreenPercentage: 0.000100 (default: 10.000000)
- fAutoAimMaxDegrees: 0.000100 (default: 3.000000)
- Solution-2: Advanced VATS and FIXED Autoaim with Improved Binoculars by orgolove. Sets the focus of the Auto Aim to the edge of the game engine's rendering distance, and thus ensures that any bullet accurately goes to wherever your crosshair is pointing. Uses the following values (default = FalloutNV):
- fAutoAimMaxDistance: 1000000.000000 (default: 1800.000000)
- fAutoAimScreenPercentage: 10.000000 (default: 10.000000)
- fAutoAimMaxDegrees: 3.000000 (default: 3.000000)
- fVATSH2HWarpDistanceMult: 0.100000 (default 0.270000)
- fVATSMeleeWarpDistanceMult: 0.100000 (default:0.320000)
- fVATSMaxChance: 100.000000 (default: NA, added by mod)
- fVATSMAXEngageDistance: 10000.000000 (default: NA, added by mod)
- fVATSMeleeMaxDistance: 1500.000000 (default: NA, added by mod)
- Solution-3: FOV Slider by Roy Batty is a simple mod that adds an MCM menu that allows for adjusting the Fields of View for all of the game's camera views.
- Those interesting in playing while in 3rd Person View (TPV) should look into "fOverShoulderFOV" (which isn't available in FO3 but is added by the mod Greatly improved 3rd person aiming by Peste.)
Issue - Aiming - Full-Auto Iron Sights animation jump
With "full auto" weapons, when aiming down the "iron sights" in 1st person and firing (even with "JIP Select Fire" set to single shot) the whole weapon seems to jump down so that the iron sights are below the actual aim point. When you stop firing it returns to normal.
- Files that modify "iron sight" firing animations always have the word "attack" in them, and end with "is" (for "iron sight"). They begin with the number of hands holding the weapon (1h/2h), followed by the general weapon type ("P"istol, "A"utomatic, "R"ifle, "M"elee, etc.), which combined make up the "weapon category". Automatic weapons all use one attack animation in their category: 1hpattackloopis ("OneHandPistol" animation type in GECK or "Pistol - Ballistic" in FNVedit); 2haattackloopis ("TwoHandAutomatic" or "Rifle - Automatic"); and 2hrattackloopis ("TwoHandRifle" or "Rifle - Ballistic"). Other "iron sight" weapons have their attacks marked with a number (2hrattack3is for example).
- In order to know which animations cause problems, it would be beneficial to have FNVEdit installed, load all the mods affecting that weapon, and check which attack animation the weapon in question uses. Or if you use GECK, you can discover this in the "Art & Sound" section of the weapon.
- Cause: When you fire it starts the full-auto attack loop and screws up aiming through the scope or iron sights.
- Solution-1: Mod Improved Automatic Ironsight animations
- Solution-2: Mod Weapon Mesh Improvement Mod
- There are other "weapon animation" replacement mods as well that may perform better with a particular weapon. Now you know enough to "pick and choose" which files to replace between mods.
Issue - Aiming - Weapon stays centered after releasing RMB
Basically: when you fire your weapon in TPV and press the (default) "Right Mouse Button (RMB)" (switching to FPV "scope" or "iron sights" aiming) and IMMEDIATELY let go of the RMB, the weapon stays centered for a second or so before it goes back to normal. This DOES NOT happen if you fire and hold RMB/Aim for those 1-2 seconds; it's almost as if the weapon is stuck in it's FPV firing position for a second or so every time you fire. The camera zooms back out, but nothing else.
- Cause: This is a bug in some animations. It is particularly noticeable with the "plasma rifle".
- Solution: Try an alternate source for the animation in question, and replace the vanilla ".kf" file. Search the Nexus on the keyword "animation". (There is also the mod Asurah Reanimation Pack which will not get picked up by that keyword search.) The mod Animation Resources by Fallout2AM includes some, as well as a "AnimTool (AnT)" which allows you to invoke an animation after you choose it from a menu, on you or on a target (NPC or Creature) for testing.
Issue - Animation Clipping
A common problem is "clipping" of the hand/fingers gripping a weapon while aiming or reloading. Sometimes this appears as a gap between the hand and the weapon; sometimes as the weapon cutting into the hand.
- Cause-1: IF you are using combinations of mesh/texture and animation replacements, or various "post processor" packages such as "ENB", "Reshade/SweetFX", or "NewVegasReloaded/NVGE" then there may be conflicts just as with other mods.
- Solution-1: Engage in Mod Conflict Isolation to identify where the conflicts reside. Identify a consistent, readily determined example of the conflict. In general, removing the most sweeping, broadly affecting "overhaul" addition first will be more efficient. It may even be necessary start from a bare-bones vanilla load order without any enhancements of any kind to determine the issue does not occur without any modifications. Then, gradually add and test.
- Cause-2: It's simply how the game handles weapon animations. Weapon animation is shared between weapons of the same type (e.g "two handed weapons"). For example, both the "Hunting rifle" and the "Varmint rifle" use the same animation set, based upon the vanilla meshes. Some weapon mesh used by a given mod might be thicker or thinner, resulting in clipping.
- Solution-2: Not much can be done about it. As most of the time these are "transient" temporary issues, it's best to just ignore them. If it really bothers you, then you will have to give up whichever mod is providing the altered mesh causing the clipping.
- Note that mods considered purely one thing or another (such as "texture replacers") still might include their own meshes. Every mesh has embedded in it the path to the texture file it uses. If the mod uses a unique folder structure, then it HAS to have altered the mesh as well in order to find the correct textures. Case in point: version 2.x of Weapon Retexture Project (WRP) by millenia. Version 1 used a vanilla folder structure; version 2 has a unique one making it incompatible with some other popular mods (e.g. WMX) and animation replacements. Always check both the general mod description and that of the individual files.
Issue - Authority Glasses worn weirdly
Symptoms: When worn, the Authority Glasses don't "sit right"; as in dangle off the face incorrectly hanging down the side as if from one ear.
- Cause: Conflict between "Yukichigai Unofficial Patch - YUP" and any mod that replaces the mesh for the Authority Glasses.
- Solution: Let YUP overwrite those mods (somewhat difficult with just the "load order" as YUP should be loaded early/"low numbered" in the sequence) or resolve the conflict with a "Bashed/Merge Patch" file. Please see the 'The Rule of One' and 'Merge Patch File' sections of the wiki "FNV General Mod Use Advice" article. When in doubt, create a "Merge Patch" file for your overall "load order" anyway.
Issue - Blood Decal Duration
Adjust how long the "decals" of blood spatter remain on things when they take damage.
- Cause: This is controlled by several settings in the game INI files. Change in all three files: see the Game INI files section for the location and names of each.
- Solution: The following information is collected from several sources. Just enter the numeric values given. The "[def: nn]" notation is the game default value for reference. The remainder of each entry is informational only and should not be entered.
- Mod: Enhanced Blood textures(EBT) by dDefinder.
- See also: Fallout New Vegas Default Values for All Valid INI Settings
[Display]
fDecalLifetime=[def: 10.0000] ; the lifetime of all decals. The number can be changed to further increase or decrease the duration. EBT increases this to 800.000.
iMaxDecalsPerFrame=[def: 10] ; maximum number of decals (mainly blood splatters on the ground) visible on screen at any time (FalloutPrefs.ini).
fDecalLOD0=[def: NA] ; increases the distance that blood decals appear. EBT adds & sets to 70000.
fDecalLOD1=[def: 1000.0000] ; undefined functionality but FNV default setting.
fDecalLOD2=[def: 1500.0000] ; undefined functionality but FNV default setting.
iMaxDecalsPerFrame=[def: 10]
iMaxSkinDecalsPerFrame=[def: 3]
[Decals]
uMaxDecalCount=[def:100] ; This variable seems to determine how many decals will remain on screen for longer than a few seconds. It won't prevent multiple decals from being shown, but if you lower the number, additional decals above the value you set for this variable will fade out very quickly (FalloutPrefs.ini).
Issue - Blood-Gore-Limb Explosions and Dismemberment
The Fallout series is known for being "bloody" and "gory" with dismembered limbs, exploding heads, and chunks of viscera ("gore globs") and splashes of blood lying about. The game does have a generally undocumented setting to turn ALL the blood and gore off, which is apparently enabled by default in the German regional "no gore" version; but no finer control over the chances of such occurring when sufficient damage is applied.
- Cause: This is by design. The points of dismemberment are defined in the mesh file as "animation nodes", and are called "meat caps". These "meat caps" are the visible stumps remaining on each end when the limb is dismembered or exploded. A detached limb can then be further dismembered into "gore chunks".
- Solution-1: To completely disable all gore and blood effects:
- Open Fallout "INI" files (located in both the game root folder and the "Users" folder).
- Add under the "[General]" section of all three:
-
bDisableALLGore=1
- Save the file.
- Solution-2: To adjust the chance of Limb Dismemberment and Explosion in finer detail, the mod Ragdolls by MadAce, under it's MCM menu has settings affecting:
- "Limb Explosion chance"
- "Limb Dismemberment Chance"
- "Limb Dismemberment Chance"
- "Explosion Strength"
- "Projectile Strength"
- which can be set all the way down to zero percent (pt). Please note this does not distinguish between the damage inflicted by "projectile" and "energy" weapons.
Issue - Bobbing NPCs
Symptoms: All NPCs start to bob up and down whenever looked at from close range. Zooming in on them causes it from any distance, even with a vanilla game.
- Cause: Framerate higher than 60FPS. The more your framerate is above 60 fps, the more likely you'll see this problem.
- Solution-1a: Make sure that your in-game framerate is capped below 120 FPS. Use some FPS counter within the game to double check if it really is below 120.
- Solution-1b: There is a trade off between player foot dynamic placement efficiency and the absence of foot bouncing glitches for NPCs. It eliminates NPCs bouncing glitches almost entirely, but also makes player dynamic foot placement work slightly worse.
- Set these lines in either "FalloutPrefs.ini" or "FalloutCustom.ini" to the following:
[FootIK]
fOnOffGain=0.01
bFootPlacementOn=0
fPelvisUpDownBias=0
fPelvisOffsetDamping=0
fOriginalGroundHeightMS=0
- Solution-1c: Disable FootIK completely.
[RagdollAnim]
bFootIK = 0
Issue - Body Replacer - Big Head or Hair bug
When you unpack the BSA's to do modding for Fallout NV, the Actor's grow abnormally large foreheads which make people look half-bald, and make it so hair sticks out of hats, or hats become embedded in the heads.
Cause: EGM files don't work outside of BSA archives in Fallout New Vegas.
- Meaning, you have to have the head / hairs / character files for the mod in a BSA file (named after the mod). The problem occurs when any of the files (even original vanilla ones) are "loose" outside of a BSA. It's a quirk of the game engine.
- Solution: Package the modded loose files into a BSA when done.
- The rules for naming a BSA are simple: the first significant portion (enough to distinguish it from any other similar but different mod name) must match that of the mod plugin ESP file, and have the ".BSA" extension. There can be more than one such BSA plugin, but usually this "matching significant portion of the ESP filename" is up to any embedded space (e.g. "Fallout - Textures.bsa"). It must be packaged as a "Bethesda Software Archive" (BSA) using a tool like "BSArch", and containing the same folder paths as the loose files used by the mod in question.
- See also the other "Issue: Body Replacer -" entries under 'Solutions to Graphics problems' section in the wiki "Fallout NV Mod Conflict Troubleshooting" guide.
Issue - Body Replacer - Custom Body Types
Problems getting various custom body replacements, such as "Type 3" and "Type 6", to work correctly. (Since most of these are classified as "Adult" mods, you may need to change your Nexus Profile "Content Blocking" setting to access them.)
- Cause: Install failures, usually from not understanding what is involved.
- Solution: This is a general guide to what is involved in replacing the vanilla body of one gender with a "Custom Race" one for the Player Character Only. Mods for NPCs are separate. There are separate mods for Males and Females or other Custom Races. Refer to the specific body mod install instructions for specific details appropriate to that mod. But understanding what is involved will make it easier to understand those options. For another detailed explanation, see the Body Replacement Basics section of the "FNV General Mod USE Advice" article.
- Replacing the vanilla body involves two different sets of files: "meshes" and "textures", which usually come as separate mods. Mods labelled "body type" are actually "meshes" that have a different shape (proportions) in some regards to those used for the vanilla body. They are generally going to be found in the Nexus site New Vegas Models and Textures category.
- Body replacement only affects the "unclothed" body. "Clothing" and "armor" (collectively: "garments") have their own "body shape", which is independent of that of the underlying body. They do not "warp around" or "conform to" the underlying body; they completely replace it. If you have body replacement type "A" and clothing/armor for body type "B", what you see is type "B". So the "nude" body type does not appear at all; even the "bare skin" elements are part of the garment. ALL "garment" mods are based around some body type (assume "vanilla" if not specified). FNV does not have separate "slots" for different parts of the body: only distinguishing between the head, hands, and the remainder of the body (misleadingly called "upper body slot" as there is no "lower body" nor "legs" slot). Further on the consequences of this below.
- The vanilla body "texture" has underwear included, so it is not removable. Custom body textures may have both a "nude" option and an "underwear" option texture. These are "all-or-nothing" choices: everyone is nude underneath their armor and clothing, or everyone wears underwear. Select a custom body texture mod that is designed to be compatible with your custom body type (i.e. the mesh) mod. Otherwise you may have apparent "black bands" around the groin area or huge scars on the breasts because the vanilla texture (used by default) doesn't fit correctly to the adjusted body mesh. There is now at least one "nude body" texture mod for vanilla meshes: Simple Vanilla Nude Body Replacers by Jokerine (linked below under "NPC overhauls"). Toggling "ArchiveInvalidation" off-and-then-on again as with other texture replacements may be necessary.
- As a consequence of these custom meshes, vanilla clothing and armor will have "clipping" issues where body parts show through or don't seem to "fit" correctly leaving gaps or seams. Some "clipping" is minor, but often it is major enough that you have to also install mods for clothing and armor that are made specifically for that body type. Note that armor usually has it's own "body mesh" included, avoiding this clipping. (This is not true for "accessories" that go on sub-sets of the body: such as gloves, bracers, and shoes.) This means armor ignores the underlying "body" shape and instead that you can choose among those using the same texture UVmapping based upon the same base model (i.e. Type 6M, Type 6, Type 4, Type 3M, Type 3F, and Type 3). As a consequence, your Type 6 naked body can "wear" a Type 3 armor, but will appear to be Type 3 in proportions until it is taken off.
- "B-n-B" or "Bouncing Breasts and/or Butts" mods are meshes based upon a different "armature" or "skeleton" rigged with added "bones" (e.g. "breast bones") and weights to support the "bouncing" parts. (These different bones and weights are also the case with some "Havok" and "Power Armor" mods.) They will either provide or tell you to use a specific "skeleton" in order to work correctly. Without that customized skeleton, the "bouncing" parts will not bounce and may appear "deformed" (i.e. stretching out to the horizon) or otherwise appear "weird". There is only one skeleton used by each race in the game, so it will not adversely affect any "non-bouncing" meshes which will just ignore the added bones they don't know about. As a consequence, in order to see the "bouncing" effect in clothing and armors, you may need to install mods with those "bouncing" features enabled. Sometimes special animations for certain actions (i.e. walking, sneaking, jumping, swimming, dancing) are also available. Not all mods can use the same specialized skeleton, so check the description/documentation for each carefully. This "skeleton" choice can easily limit your options. There are three "universal compatibility skeleton" mods for FNV on Nexus designed to overcome this compatibility problem:
- NV Compatibility Skeleton by Kicho666, Xilandro, Fallout2AM. A skeleton with compatibility for the latest mods (such as "Ragdolls", Xilandro's various B42 mods (Head Tracking, Quickthrow, Inertia etc.), and "Titans of the West").
- Compatability Skeleton - BnB BodyExtender FAFF NVG by Astymma.
- The Skeleton by Deedes.
- Read their descriptions carefully.
- "B-n-B" or "Bouncing Breasts and/or Butts" mods are meshes based upon a different "armature" or "skeleton" rigged with added "bones" (e.g. "breast bones") and weights to support the "bouncing" parts. (These different bones and weights are also the case with some "Havok" and "Power Armor" mods.) They will either provide or tell you to use a specific "skeleton" in order to work correctly. Without that customized skeleton, the "bouncing" parts will not bounce and may appear "deformed" (i.e. stretching out to the horizon) or otherwise appear "weird". There is only one skeleton used by each race in the game, so it will not adversely affect any "non-bouncing" meshes which will just ignore the added bones they don't know about. As a consequence, in order to see the "bouncing" effect in clothing and armors, you may need to install mods with those "bouncing" features enabled. Sometimes special animations for certain actions (i.e. walking, sneaking, jumping, swimming, dancing) are also available. Not all mods can use the same specialized skeleton, so check the description/documentation for each carefully. This "skeleton" choice can easily limit your options. There are three "universal compatibility skeleton" mods for FNV on Nexus designed to overcome this compatibility problem:
- Because the head is separate from the body, that means it too can have custom versions of it's mesh and textures. In all other regards it is similar to but independent of the body. As the head (hair and face) is a separate component from the rest of the body, custom meshes often have a problem with a visible "seam" where the head mesh joins with the body mesh. It is just a fact of life you will have to live with; nothing the mod creators can completely eliminate (though some come very close). There are "seam concealer" mods that provide necklaces and similar to hide this seam.
- "Face mods" are yet another category subject to preference. You might want to look at the Loose Comparison of Face Mods (Document) PDF which compares 3 female NPCs (Cass, Sunny, and Veronica) among a number of separate mod treatments and combinations to get an idea of their differences.
- Some features, such as scars and tattoos, are part of the texture and not a separate addition. Others have to use specific body part slots, which are broken down into "Body Data", "Face Data", and "FaceGen Race". Only one mesh can be assigned to each body part. For instance, "Face Data" has only "Eye colors" and "Hair styles". Which in turn means you can have "hair" or a "hat/helmet" but not both. If there is hair showing under a hat or helmet, it is part of that "hat" mesh. FNV does not have a separate slot for "facial hair" (i.e. beards, mustaches, "mutton chops", etc.). Mod authors have to cannibalize the use of a different slot for the purpose, or make the facial hair part of the texture itself.
- Because they use a slot on the head, custom "Hair" and "Eye" mods can get complex to install. Sometimes they require using the GECK to add their mesh and textures to the "head" mod. Read their installation instructions carefully before choosing.
- FAQs:
- Q: What are the common male body replacers? Female ones?
- A: This is subject to change, but as of this writing these "meshes" are often mentioned and can be found in the "New Vegas: Models and Textures" category unless otherwise indicated. As they are often in the gated "Adult" section of the site and feature nudity, the links are provided but may not be accessible without changing your site access permissions. With the full name AND authors you should easily find their descriptions using the "search" feature:
- Males:
- Breezes New Vegas Males by sesom.
- Improved Vanilla Male Body - Seamless - 4k by zzjay and 7thNighthawk.
- Roberts Male Body FNV by Nivea and Favoredsoul.
- Robert N - Male Body Replacer by Robert, Nivea, AlienSlof, and Allnarta.
- Roberts and Brawler Body Complementary Resource for FNV and TTW by Good0593 and Nivea and Favoredsoul and RocketLombax.
- Females:
- Beloved Girls Race Type4 body by pr4ch. (Note the screenshots are taken using ENB.)
- BEWARE OF GIRL Type 3 HiRez HiDetailed Replacer by BlackBlossom.
- DIMONIZED TYPE3 female body by dimon99 (Copied from FO3 section unmodified. Not ported, so clothing portion doesn't work. See FO3 version for full description.)
- Lings Playable Races by Volek.
- Type3 Body and Armor replacer by Exeter.
- Type3 Narrowed Shoulder BerryHD Acup body by ChunchunMARU.
- Type3 F Body Replacer by Exeter. (FO3 version) Not ported to FNV.
- Type3BG by digimonkey.
- Type3M Body Replacer by MAK.
- Type4 Female Body and Armors by unkacc11. No neckseams and much improved arms and upperbody. Complete set of armor and clothing with support for all DLCs, TTW, and Impact.
- Berry and Aliceberry Type4 compatible Body by ChunchunMARU. This is a Replacer mod for Type4 Female Body! Slim and breasts smaller than Type4. And, Type4 head file for Shojo race is also in the optional file.
- Type V Female Body and Armor Replacer by Luchaire. ('Dimonized' FO3 version) Not ported to FNV.
- Type6 Sexy outfits with nude body (Replacer (T6) and Non-Replacer) by munnibhai. The "replacer" version includes the original Type 6 Body (by Necroscope, now hidden) for the Player character only.
- Type6 Nude Body Mod (BNB) Edition3 by munnibhai. This edition in the series adds BNB to the body and contains new outfits including denims, sexy frocks and a bonus Pakistani Lehenga. African Skin tone is working.
- Type(6) Sexy Outfits Merged BNB Compatible by munnibhai. Type6 Sexy Outfits Edition 1 & 2 merged into 1 and made BNB compatible. 43 Outfits.
- Type 6 Modification Body NV (T6M) by Izumiko. This is often (incorrectly) called just "Type 6" by some mods. If it refers to Izumiko's version, then it means "Type 6M".
- Type6-P (T6P) nude body BNB Replacer by munnibhai is a more "petite" version of the Type-6 body.
- Type C Body Replacer by Cytiene/AusAllerWelt.
- Athletic Female Body by skims.
- Athletic Body Type Bouncing BNB by Tattooedillusions via Skims.
- Female bodybuilder race and companion by Bernt . "Brenda" Race and NCCS companion. Together with a variety of outfits and a pose pack. Requires NCCS companion system and ACM companion wheel for NCCS.
-
Muscle Girl Project - NV by zomb_killer and Tigersan.(No longer available. See "Female bodybuilder race and companion" by Bernt instead.) - SKINNY 6 Body BNB by tattooedillusions via Humannature66
- Wasteland Gals - Body Textures and Playable Races Type 3 4 6 is a retexture of type 3, 4 and 6 female bodies and faces that makes raiders, ghouls and old people playable.
- NPC overhauls:
- Simple Vanilla Nude Body Replacers by Jokerine.
- Jokerine's Website with additional resources including apparel mod patches for vanilla bodies such as "Spice of Life - Variety Armor and Clothing" for Vanilla/Default Body.
- NVCE - New Vegas Character Expansions by Machienzo.
- Fallout Character Overhaul by Drumber.
- Fallout New Vegas Redesigned 2 by Dracomies.
- Fallout New Vegas Redesigned 3 by Dracomies and Weijiesen.
- Males:
- FAQs:
- Q: What is the difference between Body Type 3 and Body Type 6M, etc?
- A: It's a matter of personal preference in "shape": breast, hip and/or butt size. All are potentially weighted differently ("bounce" effect). Type 6 has an "apple bottom", Type 3 are thinner "waifs". Apparently T3 originated in Fallout 3 along with Type V; Type 6 (another variant of Type 3) by Necroscope came along when NV came out, but has since been hidden by the author. Type 6M (by Izumiko) is a "rounder" modification of the basic Type 6 model. Why do they have numbers? Your guess is as good as any. Any that have T3 in the name are derivatives of the original Dimonized Type 3 set from Fallout 3 (variants: Alice, Berry, Cali = A Cup, B Cup, C Cup).
- HD versions have more polygons, which place a heavier demand on the video memory.
- Hentai versions have puffy nipples and are based on T3F.
- It's best to use clothing and armor specific to the particular body type or they won't render properly. And it's not simple to "fix".
- Q: What is the difference between Body Type 3 and Body Type 6M, etc?
- Q: Can Body Type6M (or T6, Type V/T5, T3BG, or T3M) can be used with textures for Body Type3?
- A: Yes, if they have the same UVmapping (part of the texture "*.dds" file). However, the dimensions of the armor will not change from the Type3 to the others. The armor contains it's own body mesh. (See the next question.) The mod Wasteland Gals - Body Textures and Playable Races Type 3 4 6 is a retexture of type 3, 4 and 6 female bodies and faces that makes raiders, ghouls and old people playable. (Note the caveats near the bottom of the description carefully.)
- Q: Can Body Type6M (or T6, Type V/T5, T3BG, or T3M) can be used with textures for Body Type3?
- Q: What about clothing and armor compatibility between body types?
- A: Compatibility is a problematic term to use in this case. Generally, the only thing that is needed for the body types and associated armors to work together is for them to share the same UVmap. Any mesh that shares a UVmap can also share textures. And generally the ones that are variations on Type3 do. There are more choices for Type3 bodies than any others. Remember: the "garment" completely replaces the body supposedly underneath it. You are seeing the shape of the garment mesh, not that of the naked body.
- "BnB" is a little more complicated. Basically, in order to use BnB you have to have the skeleton. So you can't just take an individual BnB outfit and have it work unless you've downloaded the skeleton from the main file. The reason is because the outfit will have two reference bones (left breast and right breast) that aren't in the normal skeleton, and that causes glitches or crashes. But you can have the BnB stuff installed and still use other non-bounce outfits, because those outfits don't need the extra bones.
- Now, if your idea of compatibility is for your character's body to stay the same size no matter the outfits, then you're generally out of luck. For the time you're wearing an outfit, your body will be that size, for most things. This is because virtually all major outfits include their own body meshes as part of the outfit. The exception are accessory-type items like individual shirts or shorts or whatever. Those are usually fitted to a particular body that is NOT included in the mesh file, and in this case if you're not using the right body then the clothing will clip badly. As always, read the documentation carefully.
- However, with that said, there was a tool called KGTools Clothing Converter. This would automatically convert Armor, Clothing, or Equipment from one body style to another! Unfortunately the KGTools web site containing the downloads is no longer accessible. Use the links on this site (adults 18+ only) instead. The documentation is still available on the first link provided.
- Q: What about clothing and armor compatibility between body types?
- Q: Can I use a different body type for my companions (and NPCs) than for my character?
- A: Yes, as long as they have their own male/femaleupperbody.nif file.
- Q: Can I use a different body type for my companions (and NPCs) than for my character?
- In summary, you can expect to need "Body Type", "Body Texture", "Clothing and Armor", and possibly "Head", "Hair", and "Eyes" mods that are all compatible to work together.
Issue - Body Replacer - Custom Hair-Eyes-Heads and-or Races
Problems getting custom heads or head elements (e.g. Hair and Eyes) to work correctly with a specific body replacement mod.
- Cause-1: As pointed out in Issue: Body Replacer - Custom Body Types you can't just assume every mod affecting the head will work with every other, or even with the body mod you have chosen. They are not "mix-n-match" and you can only use one such mod at a time for each race. For example, if it says it's for "Head03", then it won't work with the vanilla game heads. The popular mod Mojave Delight for Type3 by Glosshouse is for Type3 bodies only, while Beauty Pack PLUS -Project Mikoto- Hair - Eyes - Presets by Matteius is not intended to work with any custom race body mods like Type3. Read the description and installation instructions carefully to determine what the mod is designed to work with. Most known issues are noted either on the description page or under the "comments" page. Note that some require MANUAL installation.
- The following is taken from the description on the "Mojave Delight for Type3" download page:
- Once you have successfully changed eye color, then you can safely change to your custom hair style. But any time later that you wish to change any of these features you must repeat the process: vanilla hair, custom eyes, custom hair.
- Solution-1: Hair and Eyes are "slots" on the head. This mean such mods are either replacement textures for the head model (either vanilla or some custom head), or have to edit the mesh and texture files to point to the mod's elements using the GECK. The solution depends upon the mod.
- Megaton Hairs - Vegas Edition by zzjay is for the vanilla game races only, but includes a tutorial on how to add it MANUALLY to your custom race.
- Beauty Pack PLUS -Project Mikoto- Hair - Eyes - Presets by Matteius
- GUIDE: Replacing Vanilla Hair with Modded Hair Forum Thread outlines the basic procedure using the GECK.
- Hairs - Eyes - Races Auto - Patcher mod by Fallout 2AM attempts to automate this "patching" process for custom races.
- Hair Patcher Two mod by Fallout 2AM adds a few differences to Hairs - Eyes - Races Auto - Patcher (by the same author).
- Lings Coiffure NV by earache42.
- Mojave Delight for Type3 by Glosshouse
- Cause-2: Unsuccessfully trying to switch between race or hair mods. The character becoming invisible, getting stuck in the ground and unable to even use the console to toggle the "clipping" command (TCL), or unable to access the Pip-boy, usually happens if you uninstall/disable the race that your character is set to. Trying to use the console command "ShowRaceMenu" here will probably crash the game.
- Solution-2: Instead reinstall and enable whatever mod contains the race you were playing, then use the console ShowRaceMenu command to switch to something else vanilla before removing it again. Then perform a "Clean Save" as laid out in the 'Clean Saves' section of the wiki "FNV General Mod Use Advice" article before attempting to install a replacement.
- A guide on custom race creation that covers adding hairs to races is: How to Create a Custom Race by jim_uk in the "Images" section of the Nexus. There is also a How to Create a Custom Race PDF version in the Mods section.
Issue - Body Replacer - Custom Race skin mismatch
This is most commonly seen as a difference between the skin color of the head and the body. This is a "texture" problem. Adjusting the tone sliders in the racemenu does not change anything.
- Cause: This generally occurs when the plugin is an ESP rather than an ESM file.
- Solution: Note that the Player and NPCs are distinct and what is a problem for one may not be for the other.
- A custom race defined in an ESP will work properly for the player, even though the head and body will be mismatched for NPCs.
- Defining the NPC in an ESM is the only solution that works for everyone.
- If you are using this on an NPC, make sure the NPC is defined in an ESM and not in an ESP. There are some tweaks to your INI files that can kinda fix it for ESP files, but they don't work for everyone.
- In both the "Fallout.INI" and "FalloutPrefs.INI" files in the "C:\Users\<AccountName>\Documents\My Games\FalloutNV" folder, and the "Fallout_default.INI" in the game root folder, set:
- Toggling "ArchiveInvalidation" sometimes works, as does repeatedly reloading the save game again and toggling it until the head and body match skin tones.
- It is also possible that the shader type and shader flags are set wrong in the race's body mesh. Skin parts need the shader type to be SHADER_SKIN, and the SF_Specular, SF_Skinned, SF_FaceGen, SF_Remappable_Textures, and SF_ZBuffer_Test flags need to be set. You can check and modify these using NifSkope. If these are not set properly, then the custom race body and skin won't work properly for both NPCs and for the player, if the player uses that race.
- Another thing to check is that the skin textures are all there and are all named properly. If the body texture for the race is named UpperBody.dds, then the normal map needs to be named UpperBody_n.dds and the skin needs to be UpperBody_sk.dds, and all of those files need to be in the same folder. You only define the base texture (UpperBody.dds) for the race in the GECK'. The GECK just assumes that the other files will be in the same place and will have the same name.
- And finally, keep in mind that whatever clothes or armor you use will have body parts defined, and those skin textures will show instead of whatever body you have defined in the GECK. In other words, if your character is wearing overalls and bare arms are visible, those bare arms are part of the overalls mesh and are not the bare arms from the race's body mesh. If the clothing wasn't created especially for your custom race, the bare skin parts of the outfits might not match the rest of your custom body type.
- See also the following in the wiki Getting started creating mods using GECK article:
- TIP: When can you use an ESM only mod? This contains the "rules" of making an ESM.
- TIP: Custom Race & Faces.
- TIP: Custom Race & Skin Textures.
- See also the following in the wiki Getting started creating mods using GECK article:
Issue - Body Replacer - Default aka Vanilla
No matter your opinion of the matter, one of the most common reasons for installing a "body replacer" is to enable a "nude body" when clothing and armor are removed. (Since these are classified as "Adult" mods, you may need to change your Nexus Profile "Content Blocking" setting to access them.) Some would prefer to not have to get into the complexities of resorting to "custom races" to get this feature.
- Cause: The provided default (vanilla) bodies in the game have "underwear" as an integral part of the body texture. This cannot be "removed" along with other clothing or armor. There are some mods which provide alternative "underwear", but these are also integrated into the texture.
- Solution: The mod "Simple Vanilla Nude Body Replacers by Ghostwalker71 and Jokerine is a simple mesh and texture replacer that gives the default bodies anatomically correct appendages. They are the same resolution (1024x1024) as the vanilla "race" files they replace.
- Related:
- DIMONIZED presets for Vanilla races for FNV by dimon99. Female FaceGen presets only.
- zzjay's body and face textures workshop - Type 3 and 6 by zzjay. Includes optional "face texture" files for vanilla "race" heads as well as Type 3 and Type 6 races.
- Improved Vanilla Male Body - Seamless - 4k by zzjay and 7thNighthawk. High poly, improved and SEAMLESS version of the male body. Compatible with VANILLA outfits and comes with actual feet instead of blocks, thanks to Robert's. Underwear, nude and "erect" versions.
Issue - Body Replacer - Fallout Character Overhaul aka FCO not working or conflicting
- Cause-1: Usually the problem is not understanding or following the installation instructions.
- Note that FCO is a "high resolution" texture replacement of characters and NPCs. These will place additional demands upon your video system. Not all older systems will be able to handle the challenge.
- The extensive FCO "comments" forum thread on the subject has the answers to pretty much every conceivable question not answered here. Use the forum search function.
- Solution-1: Make sure you have complied with the following requirements:
- Install the latest version of NVSE (original version from the Silverlock site has been at 5.1b4 for many years. The current version known as "xNVSE" from GitHub is in version 6.x).
- Install User Interface Organizer (UIO).
- Have the official "Old World Blues (OWB)" DLC installed and active.
- Use one of the mod managers recommended by the author, or understand enough to be able to manually install it yourself. If you can't or have to make a choice then use of Fallout Mod Manager - Forked (FOMM-Forked) is recommended as FCO has an install wizard written for it.
- Only install optional components of FCO you actually need. When in doubt, don't. You can add them later.
- Toggle your "ArchiveInvalidation" off-and-on again after installing FCO, as it is replacing texture files.
- Start a new game either upon installing or uninstalling FCO. The changes it makes to characters are such the effects upon a game in progress are not supported.
- Cause-2: "Fallout Character Overhaul" (FCO) v3.01 has some bugs that can make it unplayable if you don't understand how to correct them yourself.
- Solution-2a: The author recommends the authorized patch FCO Bugfixes by Lunarion Silver to correct these issues.
- Solution-2b: Fallout Character Overhaul - Pink Hands Fix by Vainlash.
- Solution-2c: Other mods may also have their own patches for FCO. Be sure to check the download pages for any mods already installed for "compatibility patches" for FCO. Be careful as to which version of FCO each patch is designed to work with.
Issue - Body Replacer - FCO or FNV Redesigned3 Characters have pink faces or clean bodies with dirty faces
- Cause: While FCO and FNV Redesigned3 (FNVR3) can work together, there are often difficulties such as pink/magenta faces or fiends/raiders who normally are "dirty" looking suddenly having "clean" bodies with dirty faces depending upon the options chosen for each mod.
- Solution: While the FNVR3 recommendation is to install it after FCO, the proper solution is a "compatibility patch file" between the two mods. Finally there is one specifically to address this issue. Make sure you have all patch files provided by either mod installed first. Then install the mod Fallout Character Overhaul Pink Faces fix by Fheese. See the comments for additional information.
Issue - Body Replacer - FCO or FNV Redesigned3 Eyes rolled to the side
Commonly seen with Fallout Character Overhaul (FCO) (designed to remodel NPC faces) in combination with various other character mods and mods that affect appearance, especially eyes. This often is related to attempts to use both FCO and "Fallout New Vegas Redesigned" (FNVR; similar goal) in combination.
- Cause-1: Mod conflict with FCO. Note the older version (v2.3.1) is available on the same download page under "Old Versions".
- Solution-1: The current version of FCO is v3.01, which has new eye textures.
- Cause-2: According to the author of all FNVR versions, with FNVR3 the correct approach in conjunction with FCO3 is to use one or the other. 'Although FCO will "technically" work with New Vegas Redesigned 3, it's best not to. It's best to use one or the other. But not both. This makes it so that you will get New Vegas Redesigned 3's faces instead of the ones in FCO and it leaves the characters I left alone (ie. Lt. Monroe), etc. alone.' A more detailed expanaition can be found in the FNVR3 forum thread.
- Note there are separate mod download pages for FNV Redesigned 2 (FNVR2) and FNV Redesigned 3 (FNVR3).
- Solutions-2: As FCO3 does not work well with "Fallout New Vegas Redesigned" (FNVR), despite the author's advice people have had some success (with the same caveats as listed in the post above) using FCO2 instead of FCO3 in combination with FNVR2. Any one of the following may also be required to resolve the "eye roll" problem.
- Hi-Res Eyes Replacer by Zenl for FCO2.
- Try reinstalling and not using the "child eye fix".
- Do you use a Bashed Patch and tag "FCOMaster.esm" with "Eyes"?
- Possible conflict with another mod that affects eyes, such as "Beauty Pack PLUS -Project Mikoto- Hair - Eyes - Presets by Matteius" or various "Project Mikoto for <specific companion>" mods.
Issue - Body Replacer - FNV Redesigned 3 aka FNVR3 and Qwinns Refined FNV Redesigned 3 aka QRNVR3
Dracomie's "Fallout New Vegas Redesigned 3 (FNVR3)" mod is often combined with Drumber's "Fallout Character Overhaul (FCO)" mod. This can be done successfully, but requires close adherence to the FNVR3 install instructions. Even so, many people have had problems with crashes and performance in heavily modded games.
- Cause: The mod has been in production since FNV was released in 2010, and it's never had a thorough cleaning. Over the near-decade that Dracomies has spent working on it, the GECK added tons of wild edits (it does that), and there were even some obsolete values from before the Fallout Official Patches were applied back in 2010/2011 still lurking in the plugins.
- In addition, FNVR3 relied on both an ESM and an ESP plugin. The main reason for the ESP is that when "NPC Actor" records are stored only in an ESM, you can get visual glitches such as what some call "whiteface", generally intense bright discoloration. FNVR3 also suggests setting bLoadFaceGenHeadEGTFiles=1 in the various INI files to further help with this problem, but that setting is an intense resource hog (it generates textures for every character on the fly while in game), which is a lot to ask of your modded setup on what is already a fairly unstable engine. There is a better way to resolve this though, using the "Export Face Textures" feature in the GECK, eliminating the need for an ESP file.
- Solution: The mod Qwinn's Refined FNV Redesigned 3 (QRNVR3) by Qwinn is an authorized overhaul of FNVR3 to cleanup all the old issues. The mod is currently a "beta test" of the cleanup which, if successful, will be rolled into the official FNVR3 release. It is applied as a "patch" to an existing FCO+FNVR3 installation, and takes care of the question about disabling the FCO ESM file by replacing it with an empty "dummy" version.
- Qwinn has authored two articles to supplement QRNVR3:
- Complete NVR3 Installation Instructions This should help every NVSR3 user, even if they don't use Qwinn's mod.
- How to Export NPC Face Textures for ESMs
Issue - Body Replacer - In-game does not look quite like the authors images
- Cause: Mod authors usually choose 3rd Person "poses" available from other mods to show off their results. Those poses accentuate the figure in a way that the normal in-game animation does not. Also, the game has a horrible "fisheye lens" effect with the default of 75 or higher "Field of View" (FoV). The problem lies with the way the game is displaying the image. For screenshots modders and imageshare users tend to greatly reduce the FoV to correct the problem, sometimes going as low as 30 or even 20. The game is unplayable with the FoV this low; but it makes for better character screenshots.
- Solution: Ignore it, or play around with the FoV using a mod such as FOV Slider. However, note there are several different FoV settings and they have some impact upon each other. The mod Further 3rd Person Camera for normal game play may also help.
Issue - Body Replacer - Installing Beware of Girl aka BoG FOMOD with Mod Organizer aka MO
Many people have had problems getting this to install. The following needs to be understood.
- There is more than just the body to consider when replacing appearance. Please see the Issue: Body Replacer - Custom Body Types section of this article.
- BoG is a high resolution texture FOR Type3 bodies, not vanilla bodies.
- BoG is not itself a "body replacer" mesh.
- BoG is designed for Type3 bodies, NOT vanilla bodies. (Yes, this is almost the same thing as the first point, but it bears repeating.)
- If you only install this BoG texture replacer on vanilla bodies, there will be ugly underwear seams on a naked body. Like two textures/meshes are conflicting.
- To use this body mod (BoG), you should install a Type 3 Body & Armor mesh Replacer. An example would be Type3 Body and Armor replacer by Exeter. It is not the only one.
- Download & Install your chosen "Type3 body and armor replacer" main file and their respective updates/patches.
- Remember to Merge instead of "replace" them when installing.
- Download & Install "Type 3 Armors" for the DLC's and their respective updates/patches in this order if applicable. Examples by Exeter:
- Dead Money Type3 Outfits
- Honest Hearts Type3 Tribal Armors
- Old World Blues Armors for Type3
- Lonesome Road Armors for Type3
- Remember to Merge updates/patches, not "replace".
- Download the "Beware of Girl Type 3 HiRez HiDetailed Replacer (BoG) FOMOD.
- Double click the "BOG Body Replacer FOMOD" from your downloads. Click Next.
- Check "I have installed Invalidation myself and it works perfectly."
- Click through the FOMOD installation and choose your options. Click Install.
- After install, it will give you errors like these:
- Unable to install default meshes.
- Unable to install (Selected) Body Mesh.
- Unable to install default textures.
- Unable to install textures for (Selected private parts).
- Unable to install (Selected Raider) textures.
- Unable to install Sleepwear meshes.
- Unable to install default textures for Sleepwear.
- Unable to install (Selected) texture for Sleepwear.
- Just click "OK", ignoring them.
- Activate the plugin (check marking it).
- Post install:
- Go to profiles -- > click "Profile Name" -- > uncheck 'Automatic archive invalidation' .
- Close and reopen profiles.
- Now go back to "Profile Name" -----> recheck 'Automatic archive invalidation'. Close.
- Verify the Install Order (on the left MO pane):
- Type3 Body and Armor replacer
- Dead Money Type3 Outfits
- Type 3 Honest Heaart Tribal Armors
- Old world Blues Armors for Type 3
- Lonesome Road Armors for Type 3
- BEWARE OF GIRL Type 3 HiRez HiDetailed replacer
- Notice how BoG is last, so it overwrites Type3 Body and Armor replacer.
- You should now see the BoG textures when you launch the game.
Issue - Body Replacer - Type 6M
Problems getting this body replacer to work correctly.
- Cause: You need, in addition to a Type 6 body replacer, the correct body texture and "clothing and armor" mods. Such mods usually need to be installed MANUALLY. Read their documentation carefully.
- Solution: Type 6 bodies are based upon Type 3 bodies. This makes many Type 3 based mods compatible with Type 6. (An "M" suffix just means it is slightly modified from the base Type body in some dimension. This is usually not enough to make it sufficiently different to cause problems.) Keep in mind the meshes are separate from the textures, but the meshes contain the path to the texture files they use. Common choices that work are:
- BEWARE OF GIRL Type 3 HiRez HiDetailed Replacer by BlackBlossom. Note that SOME FO3 body textures MAY generally work as well but must MANUALLY install only the texture files.
- DIMONIZED TYPE3 female body by dimon99. Straight copy from FO3 (not ported). Use textures only; as a "lower" resolution alternative to other body texture replacements.
- T6M Equipment Replacer NV by Izumiko. Type 6M Clothing and Armor.
- Don't forget to toggle "ArchiveInvalidation" off-and-then-on again after installing new textures.
Issue - Broken Square/Hit Indicator
Basically every time you get shot or hit, a very broken square pops up in the direct middle of the screen with no idea what exactly is causing it.
- Cause: According to the author "Just Mods: The Hit Indicator" textures from Just Mods Assorted (2.6d) only support high texture size.
- Solution: Go to "settings" [SIC] and change your texture size to "High".
- NOTE: The comments page indicates that some individual "Just" mod components work fine when installed separately; but not when installed as part of the umbrella "Just Assorted" package. YMMV.
Issue - Character is suddenly invisible in both 1st and 3rd person views
Upon opening a save, the player character is suddenly invisible except for their shadow. NPCs act like the character is present. Loading an earlier save doesn't have the problem.
- Cause: Unknown, but might be related to use of the game "Auto-Save" feature.
- Solution: In the game console (default toggle key "~") enter the following commands (where "14" is the RefID of the player):
- prid 14
- enable
- and close the console.
Issue - Chinese Assault Rifle Textures are wonky
- Thanks to XP47JSuperbolt of the Nexus Fallout "Mod Troubleshooting" forum for the basis of the following:
- Cause: "Project Nevada" appears to cause a texture problem with the "Chinese Assault Rifle".
- Solution: Strangely, installing one of the Asurah Reanimation Pack "Iron Sight Fix" files resolves the conflict.
Issue - Disable Map Markers
Desire to remove visible map markers in a mod that appear before the site has actually been visited.
- Cause: The map marker in GECK (an "M" in a box with a large circle around an area in the Render window) has been flagged as "visible".
- Solution-1: This is much easier with FNVedit if you apply a filter to only show "map markers".
- Start FNVEdit and load your current load order (selected by default).
- When it's done loading, right-click somewhere in the left panel and select "Apply Filter".
- In the "Filter" dialog, check the option titled "Base Record EditorID contains" and in the field below it type "MapMarker".
- Confirm by pressing "Filter" and wait for a minute or two while the program is working.
- Find the map marker you want to disable.
- Find the "Record Flags" sub-record (in the right panel, almost at the top). Right-click the sub-record and select "Edit".
- At this point you may be introduced to a warning. Accept it.
- When the "Edit Value" dialog pops up, check the "Initially disabled" option and press "OK".
- The sub-record is now shown with a bold font, indicating that it has been modified.
- If the map marker is in "FalloutNV.esm" or one of the official DLC, you need to save your change as an "override" in a new plugin. It may also be prudent to avoid modifying mod plugin files directly unless you fully grasp the consequences of the changes you're making. Saving your change to a new plugin makes it easy to revert.
- Right-click the record and select "Copy as override into...".
- In the dialog that opens, select "<new file>" and enter a name for your new plugin.
- Selecting the record will now also list the override from your new plugin in the right panel.
- Proceed from step 6 (Find the "Record Flags" sub-record ...) in the previous set of instructions, but apply them to the record in your new plugin.
- When you're all done, close the FNVEdit program. You will see a list of all the plugins that has been modified in your current session. If a plugin is listed that you did not intentionally modify, deselect it. Press OK to save your changes and close FNVEdit.
- Solution-2: Click on the marker in GECK to bring up it's "reference" interface window (see GECK: Reference page), and then check it as "initially disabled" so the marker will only appear when you actually discover the location. Then click the "OK" button, and save the file.
- Solution-3: If you wish to unset the "visible" flag (in the "Marker Data" section of the GECK: Reference window) instead of disabling the marker, that can be done in "FNAM - Flags" (near where the name and location type is also defined.) If the visible flag is set, it'll be listed below and you can right-click the entry and select "remove" to unset it.
Issue - Distant terrain or LOD flickers rapidly
This problem seems to occur more frequently with high-end systems, but across all sorts of platforms and video cards.
- Cause: Known as "Z-fighting" or "stitching", this is a complex problem in 3D rendering where two or more "primatives" such as "layers" have similar or identical values in the "z-buffer", so they essentially occupy the same space. The result is the pixels from each layer "fight" to be the one displayed on screen, especially when the point of view changes. This causes a flickering, noisy display of first one then another color pixel. See the "Z-fighting" article from Wikipedia for the full technical description.
- Solution: There is no single solution that applies to every system, and some of these effects cannot be resolved by the player. See the S.T.E.P. Project Guide Z-Fighting for examples of the issue and some INI tweaks that may help. An FNV user tried some similar suggested in Gopher's "Mountain Flicker and Z-Fighting" video and had the most success with adjusting the "fNearDistance=" value under [Display] in the "FalloutPrefs.INI" file. He reports that anything above "10" results in clipping with arms and weapons in first person mode, but a balance can be reached with some testing.
- Tweaks to create "Fog" in the distance to mask Z-Fighting: The following are derived from the TweakGuides for Fallout. Page numbers refer to that document.
- [GRAPHICS] (Page 9)
- "BlockLoadDistanceLow=" (default: 50000; corresponds to [Distant LOD] "Object LOD Fade" in INI /In-Game settings (page 7), but more extreme.)
- "fTreeLoadDistance=" (default: 40000; corresponds to [Distant LOD] "Tree LOD Fade" in INI /In-Game settings (page 7), but more extreme.)
- See also "fSplitDistanceMult=" in this section, though this is less likely to be effective if you are trying to increase the "fog" effect.
Issue - Entering an Interior spawns the player in a huge ball of items and NPCs aka junkado or junknado
Also sometimes referred to as a "vortex on junk" or "compacting of cell contents".
- Cause-1: This has been traced to a corrupt ESM plugin from the mod CAM - Chems Alcohol and Meds by SenterPat.
- Solution-1: The problem has been fixed in version 9 of the mod. Apparently it was resolved by removing the internal file header "ESM" flag from the ESP file.
- Cause-2: File "FINAL Searchlight Airport NCR.esm" in mod Searchlight Airport NCR or Legion. To put it simply, this mod makes a few minor adjustments in the "Camp Forlorn Hope Messhall" cell, which wouldn't be an issue except it moves one of the decals to something like (-3000) under the cell. No idea why the game responds this way, but the result is that the decal inexplicably pulls everything not nailed down along with it. Its like a powerful electromagnet dragging everything along the ground.
- Solution-2a: Thanks for Merik2013 for diagnosing the source and solution to the problem. He simply reset that decal back to its default settings and everything went back to normal. You probably could also just delete it from that ESM as well. As always, make backups of the mods before editing.
- The cell is CampForlornHope01 and the decal is NVNCRDecalCLeg. You'll want to right click the decal and click the "edit" option.
- Its the Z Position that needs to be changed. He changed it to its default value, which is 671.1060. Also disabled (unchecked) all the miscellaneous changes made to it just to be sure it took, but that might not be necessary. The changes the mod made were enabling the "Persistent Reference" and "Initially Disabled" options as well as the "Flags: Set Enable State to Opposite of Parent " option under the "Enable Parent" tab. (The last has also been suggested as a possible general fix to the problem on it's own.)
- Solution-2b: Thanks to Roy Batty for the following:
- Go into FNVedit and change the cleaning setting "set z -<some high number>" (ex: -3000) and TURN IT OFF.
- Reclean your mod.
- (Note this solution predates v4.x of FNVEdit which has replaced such settings with the "AutoClean" function. Presumably this is implemented in that function but we lack reports on how effective it is for this purpose, which is why it is not the primary solution.)
- Solution-2c: Thanks to user826 for experiments based upon the above "Solutions" leading to the following theory for mod creators:
- Placing (either deliberately or accidentally) "objects" (to include GECK things with "collision": like "trigger box activators") outside the "havok range boundary" of a cell seems to cause the "junknado". (While this seems to occur in the "z-axis" most commonly, there is nothing to suggest so far this cannot occur when exceeding that boundary along any axis.) The following warning about "accidental placement" is found in the Bethsoft Tutorial Optimization article on GECKWiki:
WARNING: Havok physics and the room markers do not play well together. Avoid placing Havokable objects [to include movable statics] near portals that they might be knocked through. [If an object is in, say, room A, then drawing of that object is restricted to people who are in room A, or who can see the object through a portal to room A. If the Havok engine causes the object to move (because the player picked it up with the Z key, or an explosion threw it) then the object will continue to be drawn so long as the object is in the motion under the control of the Havok system. However, once the object comes to rest, it is passed back to the normal renderer, and is once again drawn only for people in room A... even if it is now in room B. If you are in room B, with the object, it will be invisible to you.]
- Cause-3: Some Weather mods cause this problem as a conflict in the interior cells of some mods.
- Solution-3: If applying the "Solution-2a/2b" fixes above to either or both of the mod plugins in question fails to resolve the issue, try switching to a different Weather mod.
Issue - Female Character strafing left modelling glitch
The left arm appears totally mangled. Only seems to affect female models, and persists even if the entire FNV game and "Users\<acct>\documents\My Games\FalloutNV" folders are deleted and re-installed with only vanilla files (no mods).
- Cause: Why the problem persists through a re-install is unknown. However, the cause appears to be related to the "left movement" animations used.
- Solution: For at least one user this was "mitigated" (though not actually resolved) by downloading a "BnB" (Bouncing Natural Breasts) skeleton and copying the "left movement" animations located in that mod's "meshes\characters\_male\female" folder to that of the "Data" folder tree.
Issue - First Person camera bug wearing Riot Armor family of gear
There can be a problem with the mod New Vegas - Enhanced Camera by LogicDragon when drawing a weapon (even bare hands) in "First Person View" while wearing Power Armor or Elite Riot Armor in which half of the view is blocked by the left shoulder pauldron.
- Cause: This is due to a bug in the mod Yukichigai Unofficial Patch - YUP that makes it so the Riot Armor family has its left shoulder appear in first person. The source of the problem seems to be from YUP version 11.3 onwards (and possibly earlier versions.) The YUP team is aware of the problem, but it has not been fixed as of version 11.7. The same problem has also been referenced in the "Enhanced Camera" comments without attributing it to YUP.
- Solution: Remove YUP from the load order. As YUP provides many, many other bug fixes this is less than ideal and not recommended, but does resolve this particular problem.
- Partial Workaround: The mod Elite Desert Combat Gear offers a Desert Ranger Combat armor and helmet with the same stats as Elite Riot gear. The helmet is however still light armor to reflect the changes made by YUP.
Issue - Fisheye lens effect in 3rd Person
Both FO3 and FNV have a horrible "fisheye lens" effect with the default of 75 or higher in 3rd Person "Field of View" (FoV). This affects what can be seen in the HUD, especially distorting items at the edges.
- Cause: The problem lies with the way the game is displaying the image. For screenshots modders and imageshare users tend to greatly reduce the FoV to correct the problem, sometimes going as low as 30 or even 20. The game is unplayable with the FoV this low; but it makes for better character screenshots.
- Solution: Use the "mouse wheel" to zoom the "chase camera" in or out as needed, or play around with the FoV using a mod such as FOV Slider. However, note there are several different FoV settings and they have some impact upon each other. The mods Further 3rd Person Camera or Definitive Camera Hotkeys - a PHW Module for normal game play may also help.
Issue - Flickering Shadows on grass
- Cause: Video settings issue.
- Solution: Any one or combination of the following may work:
- Switch between "HDR", "Bloom", and "No Lighting Effect" (NLE) settings in the game video panel. HDR is the default and increase the "glow" of the lighting accents, at some (varying) cost in FPS. Some feel Bloom makes the sky seem overly bright but doesn't have the FPS hit. NLE really tones down the glare and is more subdued.
- Set Ambient Occlusion to "Quality" in the video adapter card control panel.
- Set Negative LOD Bias to "Clamp" in the video adapter card control panel.
- Disable Anti Aliasing in the video adapter card control panel.
- In all three INI files, try setting "bShadowsOnGrass=0" under "[Display]" section. However, reportedly this only affects the shadows of Actors.
- Use the Lagom LCD Monitor Test Site to check if you need to adjust the color controls (e.g. "brightness or contrast") on your physical display monitor.
Issue - Floating objects
Some objects in a cell "float" above ground level.
- Cause: More than one plugin is changing the same thing, causing a record level conflict.
- Solution-1: Use a "compatibility patch" file to resolve the record conflict. See the Oblivion: Creating Compatibility Patches - Worldbuilding - TES Alliance article for basic guidance on creating one.
- Solution-2: Edit each floating object in the "console window" (typically toggled with the "~" key), and then save the game. The result would persist from that save game point onwards. However it will re-appear if an earlier save were loaded, or a new game started, or a new mod added which also conflicts: so it is only a temporary solution to that specific conflict. The edit would consist of:
- Click on the floating object.
- Use the "getpos [x|y|z]" commands, where "x"= is the horizontal, "y" is the vertical, and "z" is 'the height above the water table (AKA "ground level")' axis location in the cell. Each axis must be retrieved individually, i.e. "getpos x", "getpos y", and "getpos z". Record each result.
- Use the "getangle [x|y|z]" commands in the same manner. Record each result.
- Use the "setpos z 0.00" command to reset the height of the object to "ground level". Note the floating decimal number value.
- The record of "getpos" and "getangle" entries will enable you to restore things with the appropriate "setpos" or "setangle" commands if anything goes wrong.
- Repeat the above steps for each floating object as needed.
- Make a "full save" to a new "save game" slot.
Issue - Fog effect around the Vegas Strip
- Cause: The area around New Vegas (outside the strip itself) uses the "NVWastelandHazy" weather type which includes the same effect that the distance fog does, but it's set as if the distance is nothing (-10) causing it to be present right where you are. Apparently it's there to give everything a sort of dirty/dusty appearance, as if lots of sand and dirt has been kicked up by the amount of human activity around Vegas. The weather that does that nasty looking fog is "NVUrbanClear [WTHR:00173564]".
- Solution: Forcing the weather from "NVUrbanClear [WTHR:00173564]" to "NVWastelandHazy [WTHR:00100A4E]" will remove the fog. "NVWastelandClear [WTHR:000FFC88]" doesn't "fog".
- Looking at NVUrbanClear, it has FNAM - Fog Distance Day & Night "- Near fog" set to "-10". ("NVWastelandClear" does as well), although during the night time it doesn't fog your eyes.
- So essentially to get rid of the fog using xEdit/FNVedit, you would expand the "Weather" Object category, select "NVUrbanClear", and then scroll down to "FNAM - Fog Distance" and change "Night - Near" from "-10" to "2000"; and also for "NVWastelandClear" change both "Night - Near" and "Day - Near" from "-10" to "2000". Any Fog setting that is "-10" should be set to "2000" if "Near", and "200000" if "Far", to get rid of the foggy effect.
Issue - Head clipping through hair
- Cause: FNV requires the vanilla hair meshes to be located in BSA archives to display properly. If you need to edit one of them, unpack it somewhere other than your Data directory. If the problem is with custom hair styles, it is most likely that they were not made properly.
- Solution: If you have "Data\Meshes\Characters\Hair" and "Head" folders, delete them and toggle "ArchiveInvalidation" so the game uses the files in the "Fallout - Meshes.BSA".
Issue - Interior cell portions not visible
You may find some things invisible, not rendered, or apparently "transparent walls" in some interior cells; without ENB or other "post processor" installed or active.
- Cause: Mod conflict with more than one attempting to modify the same interior cell. Often this is done by an author "copying" the interior cell and making changes without taking proper precautions regarding optimizations. See the GECK TIP: Enable "MultiBounds" for details.
- Solution-1: You may want to experiment with changes to the "interior buffer size" setting. Start small, as the memory has to come from that used elsewhere. Please see the "Memory, Loading & Multi-threading" entry in the TweakGuides.com "Fallout 3 Tweak Guide".
- Solution-2: The problem in the offending plugin has to be resolved by the author. In the meantime, you have to identify the offending plugin(s) and remove from your "load order". Please see the 'Clean Saves' section of the wiki "FNV General Mod Use Advice" article.
- See also Issue - Followers not moving or Navmesh Problems entry under the "Miscellaneous Solutions" section.
Issue - Invisible Companion
A companion has suddenly gone "invisible" in the game, and nothing seems to make them visible again. Their marker appears on the Pipboy map, but they do not seem to physically be there upon traveling to that location.
- Cause: Unknown, but the situation has been reported to occur before.
- Solution-1a: Load an earlier save from before they disappeared to obtain the companion's "Ref-ID".
- Travel to the companion's location so your character is near them.
- Open the in-game console (default is the < ~ > key).
- < Click > on the companion. This is all that is needed. Note this will display an 8 character "Ref-ID" above them, which you will need to remember.
- Enter the console command: "prid <Ref-ID>" and < Enter >, but without the quotes (where "Ref-ID" is what you noted for the companion in the previous step).
- Now enter: "disable" and < Enter >.
- Follow with "enable" and < Enter >.
- This sequence should make the companion visible again.
- Solution-1b: Revert to using the earlier save from prior to their disappearance.
- Solution-1c: If "Solution-1a" doesn't work and "Solution-1b" is not really feasible and you prefer to live with the consequences, try "resurrecting" the companion. They may end up without their current inventory: losing everything you gave them to carry and reverting to their starting equipment. It might also interfere with some of their quests as well, which is why it's the least preferred solution. Follow the same basic process with the commands:
- "prid <Ref-ID>"
- "kill"
- "resurrect"
- "disable"
- "enable"
- This may require you to "re-hire" the companion and reset it's "companion command options".
Issue - Invisible Corpses
Symptoms: Any type of preplaced corpses in game (regardless if it's from primary ESMs for the game, edited ones, or even entirely new preplaced corpses from mods) turn entirely invisible and have no physical form to interact with, but can still be opened/searched as a container.
- Cause: The mod Slow Death (file "(Animation)_Slow_Death.esp") has been confirmed to be at least one cause.
- Solution: Remove the mod. (It has been suggested the likely culprit for this issue is the 'SlowDeathBEScript' script, but not confirmed.) This mod is based upon another (Near Death) which might serve as an alternative.
Issue - Lighting - Exteriors at night
Symptoms: Walls and ground textures seem to strangely disappear and re-appear from close view at night. This might appear to be due to a missing or fading texture.
- Cause: FNV has a known "lighting problem " due to the game engine being limited to a maximum of 4 lights per exterior cell. This causes lights suddenly disappearing, terrain not lighting properly, random polygons going unlit, etc..
- Solution: The mod Improved Lighting Shaders fixes the shading code to work with up to 13 light slots, and also includes 28 re-assembled shaders that make full use of them.
- In other words this pretty much gets rid of the lighting bug, and your Pip-Light can shine brightly without interfering with other lights!
- Lights besides the Pip-Light are also improved: no more lights disappearing/reappearing depending on your camera position, or lines appearing when a light crosses cells - lights will now almost always remain lit if they're active!
- ENB Users: Please note the "sticky" at the top of the comments page.
- Solution: The mod Improved Lighting Shaders fixes the shading code to work with up to 13 light slots, and also includes 28 re-assembled shaders that make full use of them.
Issue - Lighting - Faces and surfaces glow
Symptoms: After installing mods, actors' faces and some surfaces have an excessively bright glow or shine in both interiors and exteriors.
- Cause: This has been noted for some users of the mod "Nevada Skies - Weather Effects".
- Solution: Simply disabling the plugin is not sufficient. The report indicated it was necessary to run the "quick auto cleanup" function of FNVEdit to completely remove the effects and restore things to "vanilla".
Issue - Lighting - Mod makes the Sun too bright off surfaces
[Formerly "Issue - Mod makes the Sun too bright off surfaces".]
Symptom: Note this is not "sun glare", which is when you look directly at the sun in game. Be aware that there is a "light dome effect" around the New Vegas strip which is quite visible from a distance at night. Daylight surfaces within this dome area are blindingly bright from some angles on default settings. This appears to be by design.
- Cause-1: Lighting mods make adjustments to various lighting values, resulting in uncomfortably bright reflections off some surfaces. Sometime these are by way of tweaks to the INI file, and sometimes controlled "in-game".
- Solution-1a: Only use one lighting mod for exteriors, and one for interiors. Read their documentation carefully for recommendations on where to position them in your load order.
- Some mods intend you to use hats and sunglasses to mitigate the effect. Changing the facing direction may also have an effect.
- INI tweaks depend upon which surfaces and where they are located. See the Tweakguide's General Fallout game guide (specifically for FO3 and FNV) for the effects of particular settings.
- Solution-1b: The mod Dynavision 3 incorporates (saving a plugin slot) The Imaginator which "allows you to separately control visual elements like Brightness, Contrast, Saturation, Light Output, Depth-of-Field, Focus, Motion Blur and Tint all from within an easy-to-navigate PIP-BOY menu". Dynavision 3 now works with UIO instead of requiring it's own installer.
- This is a recommended alternative to ENB and other "post-processors". However, Dynavision has a persistent and annoying bug which frequently causes NPCs to go invisible. Some people recommend using the older "Dynavision 2" + "Imaginator" instead, but the same "invisible NPCs" bug was reported with it. A patch file to fix this issue in "Dynavision 3" was posted in mid 2016, but there are no comments regarding how effective it is.
- Solution-1c: INI Lighting tweaks. The following is derived from the TweakGuides for Fallout. Page numbers refer to that document.
- [View Distance] (Page 7)
- Specularity Fade: This slider controls how shiny reflective surfaces appear to be. In practice the only obvious impact of changing this setting is that some metallic objects will lose their shine. However you can also manually adjust the value of this setting by editing the INI "fSpecularLODStartFade" variable, and if you want to disable specularity altogether, either to further boost performance, or if you believe the game world is too shiny, then see the "bDoSpecularPass" variable covered on page 9.
- [Display] (Page 7)
- Brightness: This gamma slider controls how bright or dark the overall screen image will be. Adjust it so that at night the image is visible but not washed out. It has no impact on performance, so set to suit your taste. If you need to increase gamma to be much brighter than the maximum on the slider allows (e.g. on very old monitors), see the "fGamma"-related variables on page 9.
- Solution-1d: Sometimes "post-processors" like the ENB Series can compensate, though remember that these often impose a penalty upon your "frames per second" (FPS). The first resort in these cases is often choosing a different "preset", but if you want to adjust settings yourself, see the S.T.E.P. Project ENBSeries INI Guide page which "is intended as THE comprehensive reference to the functionality of all parameters found within enbseries.ini as it evolves." Suggest you start with the "[BLOOM]" and "[REFLECTION]" sections.
- The Guides to Creating and Customizing Your ENB's thread is another ENB settings resource.
- Cause-2: Your monitor brightness/gamma is too high.
- Solution-2: Use the LCD monitor test images web site as reference to adjust your monitor calibration to what you desire.
Issue - Main/DLC - missing elements
Symptoms: A "vanilla" (from the publisher) component of the game (Main or any DLC) is missing or has "messed up" components such as missing the buildings or objects in the distance, meshes, textures, etc..
- Cause: Cleaning the ESM file.
- Solution: Despite what any "generalized" tool (such as LOOT) or elsewhere for any other Bethesda games may advise as a general practice, DO NOT clean any of the publisher's game files. If you have done so, use the "verify local files" procedure or your backed up copies to restore the vanilla files. You may possibly need to rebuild any "merged patch" and FNVLODGen files if simply restoring the ESMs is not enough.
- Even with mods, such cleaning should be performed by the mod author: who is the only one who really knows if an ITM is needed in their mod. FNV came along after the usual problems that required cleaning were well known, and most authors have taken on that responsibility. Inform them of any such problems you encounter.
Issue - Missing textures or walls
Entering some locations (e.g. "Hidden valley bunker", "Kings school", and "Camp Golf") the walls appear to be transparent or missing, allowing a view of some elements of the adjacent interior rooms. Collision still seems to be functioning (the character doesn't fall through the "gray areas" if they are entered).
- Cause: Mod conflict
- Solution: The plugin "PrnOut.esp" (apparently a component of the "Sexout" mod) seems to be at least one culprit. Deactivating it has been reported to correct the issue.
Issue: Naked NPCs aka missing armor or inventory
- Cause: Vanilla Bug - Some NPCS are naked/have a weird inventory: An engine bug will sometimes not correctly refresh named and unnamed NPCs. The problem seems most often when they are supposed to be wearing leather armor. (This appears to be a problem with "leveled lists".)
- Solution-1: As always with any texture bug, try toggling "ArchiveInvalidation" off-and-on again.
- Solution-2: Use/rebuild your "merged patch" file. Please see the 'Third Rule: The Rule of One' and 'Merge Patch File' sections of the wiki FNV General Mod Use Advice article. Note that mods adding armor/clothing that is not appearing in-game may need to have the "bash tags" "Delev" and "Relev" added.
- Solution-3: Just open the console (default "<~>" key), click on the NPC and note it's displayed "Base-ID". Then type "resurrect <Base-ID>" (replacing "<Base-ID>" with the value noted when you clicked on the NPC). The NPC will be correctly refreshed with its gear. If that doesn't work, try "resetinventory <Base-ID>".
Issue - NPCs making annoying SHHHH sound and hand gesture
Some NPCs in the game, such as General Oliver & the Holograms & Dean Domino (when you meet him in the theater in Dead Money DLC), make that annoying SHHHH sound & hand gesture.
- Cause: This has been traced to the mod Axepriests Face Aches for FNV by SariDecember, which is a port of the FO3 mod FAFF - Face Aches For Fallout by Axepriest (who hasn't been active on Nexus since Feb 2016). This adds facial expressions to idle animations ("*.kf" files).
- Solution: The mod is designed only to work with vanilla head meshes and textures, adding "morphs" which reference the data built into the FaceGen TRI files. (See the "FaceGen: Heads, Faces, Hairs, and Helmets" section of the wiki "Getting started creating mods using GECK" article.) Either remove the mod, or refer to the FNV and FO3 mod descriptions to attempt to change the morphs associated with the idle animation in question.
Issue - Permanent Limp
Symptoms: the Player displays a limp even after having been healed of damage.
If it's an animation, then it's a 'feature' of the game (or some mod); not a bug. It indicates the Actor has broken a limb. If it "heals" without the proper treatment, it becomes "permanent".
- Cause: With the legs, it's typically from a fall from a height or critical hit to the leg.
- Solution: You need to heal the limb with a "doctor's bag" (which contains a "splint") or by an actual doctor before saving. (Just healing damage with Stimpacks, etc. won't "set the break".) Once it has gotten in your "save game" files, it has (for some people) been fixable by reloading the save file during the same "game session" (i.e. not exiting to the desktop). Others found it necessary to go back to a save prior to the injury.
Issue - Pink teeth or tongue or mouth
- Cause: This is another "missing texture file" problem, usually because of failing to allow overwrite of a file during installation of the mod in question; sometimes by not actually making a choice of options.
- Solution: Uninstall the mod entirely from your mod manager (or the "Data" folder), close the manager and re-open, and re-install the mod. This time always make a choice to "overwrite" when offered unless you have very good reason to not do so (knowing it may cause problems with the mod).
Issue - Player hands are either stubs or too large or the fingers are missing AKA Fingers glitch
- Cause: Fallout 3 and New Vegas have a bug when using iFPSClamp (in the game INI file), causing the hands of NPCs and the player to either become massive, or collapse into themselves.
- This problem seems to also be linked to the "64Hz bug" fix for "microstutter" included in "New Vegas Stutter Remover" (NVSR) and "New Vegas Tick Fix" (NVTF). The reason why the "64Hz bug" occurs is because the renderer uses GetTickCount which returns a variable frequency that jumps between 13-16ms, whereas TimeGetTime will consistently return a frequency of 1ms. This is an "Unreal Engine" bug which persisted into 2015 (at least).
- As both NVSR and NVTF use the same code for the "64Hz bug", the end result is that you can choose between having a microstutter and no "fingers glitch" or having no microstutter and fingers glitching out.
- There is no one reliable solution to the problem. The following "mitigations" have helped people to different extents.
- Mitigation-1: See also the related Issue - Vsync aka V-Sync ON or OFF regarding "frame rate synchronization", "screen-tearing", and "lag".
- The various "Borderless Window" or "Fake Fullscreen Window" mods (such as "OneTweak for NVSE" by virusek) may prevent Vsync issues if you don't have a triple buffered video card.
- Mitigation-2: Setting "bManageFPS=0" in NVSR.INI, the "finger glitch" problem is gone, but then stuttering is back.
- Mitigation-3: Limit your FPS to 60. If that doesn't help, try using a setting just below that (ie. 57-59).
- Mitigation-4: Manage your FPS setting in only one location (e.g. NVSR or the INI file, but not both). If you do have to manage it in more than one location, then ensure you have the same cap in all setting locations. (There are suggestions about this in the "Causes" under the Issue - Game in slow motion entry.)
- Note there may be different settings for "maximum" and "minimum" FPS. Setting a "minimum" below 30 causes the render engine into a "slow display mode".
- Mitigation-5: Others have reported that "drawing a two-handed weapon" or exiting to the desktop and re-loading the game save file have temporarily resolved the "fingers glitch" problem.
- Mitigation-6: Try a different video driver.
- Or, an alternative solution to a driver update: Grab Powerstrip and follow simple instructions in this GFY.
Issue - Pip-boy and Terminal screens are all white or blank
- Cause-1: This is a known game bug.
- Solution-1: Try toggling the Pip-boy light on and off a few times (hold down the < Tab > key for a few seconds) to see if it resolves the problem.
- Cause-2: A mod for the Pip-boy 3000 or attempts to optimize texture files have installed texture files causing the problem.
- Solution-2: Check the "Data\Textures" folder for a "Pip-boy 3000" sub-folder and if it exists, delete the sub-folder. The game will then use the default files in the BSA.
Issue - Playing at greater than 1920x1080 resolution
- Cause: By default the game hardware setup options only permit a maximum of 1920x1080 resolution. This is a factor due to it's age. It simply didn't know what later advances in screen sizes would establish as standards.
- Solution-1: In the "FalloutPrefs.ini" file under the "[Display]" section (near the bottom) are two entries where you should specify your desired game screen size to match your default/native monitor resolution:
- However, these only work if you have the "bFullScreen=1" setting enabled so the game starts in "full screen" mode. In "windowed mode", the game will revert back the maximum of 1920x1080 that it knows about.
- Solution-2: If you prefer to run the game in "fake fullscreen windowed mode" so you can get to other programs or screens, then you need to use a setting of "bFullScreen=0" (windowed mode), along with the above "iSize" settings, AND a NVSE mod which handles the "fake fullscreen" effect while recognizing the larger screen resolutions. NVSE knows and can read the INI setting and override the game. These are reported to do so:
- OneTweak by virusek (from the Nexus Skyrim Catelog, but works with FNV.)
- FullScreenWindowedMode by TimThompson89.
- Solution-3: If you are using a "post processor" such as ENB, make sure it is not adding some feature like "cinematic bars" to create an effect similar to "letter-boxing" of your display.
- You will probably want to see the Issue: Scope zoom distortion problems entry as well.
Issue - Scope zoom distortion problems
Playing with widescreen (16:9) and high resolution (1920x1080 or higher) and have a problem with scope zooms (white square edges or just edges in the reticle and the scopes have an outstretched circle).
- Cause: Game masking that is automatically applied to scopes.
- Solution: add the line "fScopeScissorAmount=0", in the "[Display]" section of all 3 INIs.
- Make backups of the INIs before changing them.
- When you make any changes to the game INI file, remember to change it in all three files: the "Fallout_default.ini" in the game root folder (which only gets used to recreate the other two when they are not found), and the two in "C:\Users\<YourAccountName>\Documents\My Games\FalloutNV" folder ("FALLOUT.ini" and "FalloutPrefs.ini"). Otherwise you tend to lose track of which you actually changed if you have to "verify files", and they may not appear to "take".
- When you make any changes to the game INI file, remember to change it in all three files: the "Fallout_default.ini" in the game root folder (which only gets used to recreate the other two when they are not found), and the two in "C:\Users\<YourAccountName>\Documents\My Games\FalloutNV" folder ("FALLOUT.ini" and "FalloutPrefs.ini"). Otherwise you tend to lose track of which you actually changed if you have to "verify files", and they may not appear to "take".
Issue - Screen brightness gets darker as the game progresses
- Cause-1: Conflict between ENB and SweetFX settings.
- Solution-1: Identify the conflicting settings in the INI files and choose one.
- Make backups of the INIs before changing them.
From TweakGuides:
- fGamma=1.0000
- fGammaMax=0.6000
- fGammaMin=1.4000
- The above variables are useful particularly for those with older monitors. They are the same as the in-game Brightness slider, however here you can adjust both the overall brightness level with fGamma as well as altering the upper and lower limits allowed, in case you need to adjust Brightness beyond the limits allowed in the game (FalloutPrefs.ini).
- Cause-2: Don't ignore your monitor's role. Monitors are like TVs: they react to the ambient light levels in the room. Do not play in a completely dark room.
- Solution-2: You need a source of steady light level (a non-flourescent lamp) to prevent your monitor reacting to changing game light levels.
- Amelioration: A mod that gives you more control over lighting in-game: The IMAGINATOR. This might be useful to confirm some mod is the culprit, by loading it near the end/bottom of the LO.
Issue - Somehow without changing anything my character is glitched oddly
- Cause: Unknown.
- Workaround: Something that's always worth trying is blowing yourself up or otherwise get killed: i.e. throw a grenade against a wall so it bounces back and kills you. Then let the game reload. Sometimes that can clear oddities. However, it doesn't address any underlying cause, so it's only useful as a temporary solution. Try to see if you can reproduce a reliable set of circumstances to re-create the problem.
Issue - Textures randomly change only on particular items
- Cause: There is more than one BSA containing the named texture file, but they have different content. The game does not have any mechanism to deal with this situation, so it randomly grabs the texture from one or the other BSA file.
- Solution-1: Try the simple solution of toggling "ArchiveInvalidation" off-and-then-on again. This should cause any loose file to be used instead of one in a BSA.
- Solution-2: Determine which mods have the different textures. See Issue: Find the source mod-index of an object in-game. Once you have identified the one with your preferred texture, either remove the other offending plugin or extract the preferred texture from the BSA as a "loose file", and toggle "ArchiveInvalidation".
Issue - TTW Centaur Face distortion
When playing "Tale of Two Wastelands" (TTW) the Centaur face may appear to stretch off into the distance.
Note: this is very similar to the problem with "B-n-B" bodies discussed under the Issue - Body Replacer - Custom Body Types entry: having the same issue of differences in "bone attachment points" and "bone weighting".
- Cause: The TTW version 4.1 of the Ragdolls mod version of the Evolved Centaur is missing modifications to the skeleton (armature) and mesh needed to fix dismemberments. The author is aware of the problem, which will be fixed in releases after 4.1. In the meantime he suggests the following "workaround".
- Workaround "fix" for v4.1 (TTW): Install or unpack the Ragdolls TTW mod as usual, goto under the "meshes | creatures | centaur" folder, and delete "skeletonevolved.nif" file. (You may want to repackage the "Ragdolls TTW" archive so that file is not later re-installed by accident.) Then toggle "ArchiveInvaliation" off-and-then-on again.
Issue - Visual special effect (IMOD) stuck
Some visual effect (such as "Cateye", "HUD Shudder", or "chem" induced blur) won't wear off or go away.
- Cause: An "imagespace modifier" (IMOD) remains in effect.
- Solution: The console command "rimod <imodID>" will remove the specified IMOD. The mod "Clear Imagespace Modifiers BAT file" is a console "bat" file containing that command for all of the vanilla IMOD effects to clear them all at once.
Issue - Weapons or Fists are displayed off-center in 1st Person
3rd Person view displays correctly.
- Cause: This is the result of a bug with the mod "A Familiar Friend", or with "Readius PipBoy" mods.
- Solution: Uninstall and start a new game. It's hard to get the bug out of an existing game. If you still wish to attempt this, be sure to follow the specific mod's uninstall instructions carefully.
Issue - Win10 Blurry or small text or icons
The problem may be particularly apparent with "install programs".
- Cause: This problem occurs on high-PPI resolution monitors and TVs (such as "Full HD" 1920x1080 and 4K-UHD 3840x2160 or higher resolutions). Windows 10 introduced a solution called "High DPI Scaling", but earlier versions of the OS do not have the same capability because such displays were not in common use at the time.
- (The terms "DPI" and "PPI" are often used interchangeably but actually have different technical meanings: DPI (Dots Per Inch) is correctly used for "scan" output in "dots" such as printers and analog displays, while PPI (Pixels Per Inch) is used for output in very small fixed sized "picture elements" aka "pixels".)
- Solution-1a: See the How to adjust high-DPI scaling in Windows 10 article for the explanation of how Windows 10 deals with this issue for both modern and older programs. You may need to temporarily turn off the "Settings | System | Display | Advanced scaling settings | Fix scaling for apps | Let Windows try to fix apps so they're not blurry" setting and use a "Custom scaling" of "100%" when running "install programs".
- Solution-1b: If you have a multiple monitor setup, then you want to use "individual display scaling". Also see the Use Windows 10's individual display scaling to perfect your multi-monitor setup article in that instance.
- Solution-1c: There are other built-in Win10 tools you can use to "fine tune" your display. See the 6 display settings you should be using in Windows 10 article if the above is not sufficient to your needs or you want the best possible results.
Issue - Win10 Screen tearing in Borderless Windowed Mode
Based upon this Reddit thread
- Cause: Apparently, Win10 "Full Screen Optimizations" setting is enabled by default in Win10 since the Anniversary Update. It basically forces a game to run in "borderless fullscreen mode" (even if you selected "fullscreen mode" in the game's options) making the game stutter more, frametimes more variable, and there may be some performance loss.
- It is not putting games into standard "Fullscreen Windowed/Borderless Mode". It's a new presentation mode that is intended to combine the best of both "Windowed" and "Fullscreen Exclusive Mode". Before the Windows 10 Creator's Update, it was exclusive to DX12 UWP apps. Now there are 80+ non-UWP, non-DX12 games which support it.
- "Standard Fullscreen Windowed Mode" passes everything through the desktop compositor which forces "triple-buffered V-Sync" to be used, and adds a frame of latency. This new presentation mode can bypass the compositor, reducing latency and allowing you to disable "V-Sync". At the same time, it enables fast <Alt+Tab>ing if there's no display mode switching.
- "Fullscreen Windowed Mode" games are also handled slightly differently with this enabled. So long as there are no other windows overlaying the game, they can also bypass the compositor and disable "V-Sync".
- It's supposed to perform as well as "Fullscreen Exclusive Mode", and in one demo, it outperformed FSE Mode by a small amount.
- Solution-1: Disable Win10 "Full Screen Optimizations".
- Here's how to disable it by default: Windows Settings | Gaming | Game Bar. The settings: "show game bar when I play full screen games Microsoft has verified" and "record clips, screenshots..." should both be OFF.
- Either that or you can do it individually in each game's properties.
- Related commentary:
- It also resets the "International Colour Consortium" (ICC) profile of the monitor(s) to default every time you start a fullscreen game or <Alt+Tab> to one or switch to "fullscreen mode". You would think that in trying to apply the advantages of borderless to fullscreen that they'd also make ICC profiles work in fullscreen. But no, they make it even worse in that aspect.
- This setting, along with 4k, causes all kinds of scaling issues. Only 1/4 the game on screen, or green tint across the screen with wrong refresh rate.
Issue - Wounds do not appear on Actors
After installing a Body, Armor, or Skin replacement mod, wound decals no longer appear on most enemies. When they do appear, it's only on the legs. This happens with non-humanoid NPCs like Bighorners as well. The wound decals are supposed to come from mods like IMPACT and Enhanced Blood Textures.
- Cause: The problem lies within NIF files for armors/outfits and creatures. Each NIF has to be modified so that the main armor/creature NiTriStrips (or shapes) appear above all other NiTriStrips (like gore caps ) in the tree. Only then will decals appear correctly.
- It's a HUGE amount of work because of the number of faulty armors (just vanilla; not including modded ones like "Type3" and "Roberts"), because sometimes you'll need to join meshes via a texture editor such as Blender in order to reduce the number of NiTris as only the FIRST 2-3 mesh shapes are used for decal placement. By default, gore cap meshes are placed above main outfit meshes and are cut into multiple parts. Consequently wounds are not appearing.
- Solution-1a: Example of corrected NIF files, explained by KiCHo666:
I joined all gore caps into one mesh (1 for torso caps, 1 for limb caps), joined all possible armor parts into one via Blender (Outfit1 and Outfit2 were separated because they use different texture paths.) and then reordered them via Nifskope. "Arms" mesh need to be separated for arms to appear in first person view. PipboyOn/Off are replacement meshes used when NPC has Pipboy equipped.
After all that, wounds appear correctly in the game.
However, for any addon body part, like heads, arms, other armor parts ... wounds won't appear no matter what.
A friend here on Nexus, VWgolfR1, told me about that. So give kudos to him!
- Solution-1b: No gore was a problem that was reported in the Bouncing Natural Breasts mod comments. One solution is to use a "gore compatible" texture replacer like Beware of Girl Type 3 HiRez HiDetailed Replacer.
Solutions to Mesh -Red Kite- icon or Texture -solid or off color- problems
Issue - What are these -Red Kite- icons in the game
This Red irregular "kite shaped" hexagon with a white "!" icon is the "missing mesh" indicator.
- Cause-1: You added meshes as "loose files" that replace the vanilla versions in the BSA files, but the game engine doesn't realize it needs to use them instead.
- Solution-1: Toggle "ArchiveInvalidation" off-and-on again in your mod manager. This is discussed in detail in theArchiveInvalidation (by Manager) sub-topic.
- Cause-2: Your load order is not sorted correctly.
- Solution-2a: Check that you have the vanilla game and Official DLC ESM files in the correct sequence. Please see the "Vanilla "Load Order" section of the FNV General Mod Use Advice article.
- Solution-2b: Use LOOT to sort your "load order". Like most automated tools, LOOT is not 100% accurate; yet it is infinitely better at determining a correct load order for a large number of mods than anything other than manually examining each mod in an editor like FNVedit (a generic tool called 'xEdit' which is renamed for working with specific games) and building such an order by hand (each time you add or remove a mod). (There is a FNVEdit Training Manual specific to both FO3 and FNV.) LOOT works by examining the file header of each plugin and working out all the records each modifies, and determines the relationships between those mods. For the beginning mod user, it is essential to resolve most fatal mod conflict problems. LOOT does provide the "metadata" mechanism that allows you to customize it's sorting to preserve such adjustments as you determine necessary. Read it's documentation to exploit all of it's capabilities.
- Cause-3: Different texture/mesh replacement mods can conflict with each other. The "install order" can be the cause of the "missing mesh" indicator suddenly appearing, especially where things had been fine before adding the new mod.
- Solution-3a: Be sure you are using compatible meshes and textures. See "Body Replacement Basics" in the wiki FNV General Mod Use Advice article.
- Solution-3b: As a general rule, install replacement mods that predominately affect the "background" on the horizon or mountains first, then those that affect the mid-ground (like billboards and trees/flora), with those affecting things you normally don't see well until in the mid- to foreground (like creatures) last. Some experimentation with the "install order" may be necessary.
- Remember that "view while distant" (VWD) objects require "_far.nif" files and rebuilding of the ".lod" quadrants for landscapes with FNVLODGen after updating the "load order". See the "TESTG: VWD/LOD Overview" page to understand the issues and for details on resolving them.
- Cause-4: The path to the mesh and/or texture file must be in "relative" format to the "Data" folder (i.e. "textures\<SpecificSubFolderPath>" rather than "absolute" format (i.e. "C:\<PathToGameFolder>\Data\textures\<SpecificSubFolderPath>").
- Solution-4: See the wiki article How to fix hard-coded texture paths in NIF files.
Issue - What is with these Solid Green billboard signs in the distance aka LOD
- Cause: The underlying problem is how the game handles distant 2D objects generally called "trees" or "billboards".
- The game engine treats distant 2D "vegetation trees" and "sign billboards" identically beyond the immediate foreground as "level of detail"(LOD) distant "tree" objects. The resulting "images" collectively make up "billboards" which are combined into an "atlas". xLODGen can combine billboards from different mods into new atlases when you select the "Trees LOD" option. When you run xLODGen after updating the "load order", it will replace any missing "billboard" LOD textures to this "solid green" color during LOD generation. It also lists these "missing" textures in the xLODGen log file.
- (For more details about this, please see the article The difference between LODs and Billboards explained on Reddit's Skyrim forum. Note there are some technical differences in how this works between Skyrim (Creation) and Oblivion/Fallout (Gamebryo) as they use different game engines.
- See this TES5LODGen for Trees LOD thread for information on how billboards work in TES5LODGen.)
- (For more details about this, please see the article The difference between LODs and Billboards explained on Reddit's Skyrim forum. Note there are some technical differences in how this works between Skyrim (Creation) and Oblivion/Fallout (Gamebryo) as they use different game engines.
- Solution-1a: The mods with LOD additions (such as LOD additions and improvements by tomzik) are highly recommended to be installed before LOD generation as they provide extra distance models missing in the vanilla game.
- Solution-1b: Re-run xLODGen, enabling the "Trees LOD" option. You may also find that adjusting the game INI files uGridsToLoad setting value to a larger "odd number" (e.g. 7, 9, 11) may help with the issue of "pop-in" (where objects such as "sign billboards" appear "green" until you are much closer to them). However, note that you may want to also increase the uExterior Cell Buffer value to accommodate the greater cell data and prevent crashes and stuttering. Larger values have an impact upon performance. And once you save the game with a higher setting, you cannot lower it again except by starting a new game. (See the related entries in the Fallout TweakGuides for details.)
- Solution-1c: The tool Tree LOD billboard creator for xLODGen by zilav can be used to "grab an image of a tree directly from preview/render window of official editor (Creation Kit, GECK and Construction Set) or NifScope, calculate alpha mask, scale, adjust brightness and contrast, generate mipmaps and save ready to use DDS billboard image in a single click." Please read the "usage guide" on the download page carefully.
Issue - Find the source mod-index of an object in-game
This is often desired to determine the source of a missing texture (solid color) or mesh (the White "!" on a Red background symbol in game), or when the file for one has been overwritten producing the "wrong texture".
- Cause: The only way to identify a "Reference Object" (one that has been placed into the game world and begins with the "mod-index" of "FF") is to use the console to identify an object in-game. "Usable objects" that can be picked up must have the object in a container's inventory ("the Player" {your character}, another Actor such as a NPC or creature, or a container such as a cabinet or chest) in order to obtain their "Base-ID". "Static objects" like signs or billboards that are not movable can be targeted directly to obtain their "Ref-ID", which you will need to turn into a "Base-ID".
- For more on the distinctions between the various terms associated with "Reference Objects" and "Form-IDs", please see the 'GECK Form-ID, Base-ID, Ref-ID, and Editor-ID' section in the wiki Getting started creating mods using GECK article. These distinctions are VERY important to understand.
- Solution:
- Open the in-game console (default is the <~> key).
- For "static objects", < Click > on the target. This is all that is needed. Note this will be a "Ref-ID".
- For "usable objects", < Click > on the PC, NPC, or container and enter "showinventory" in the game console. Note this will be a "Base-ID".
- The Form-ID (e.g. "001735E4") will be displayed at the top of the screen. See this article Help:Form IDs for an explanation of how to interpret the Form-ID. In short, the first two characters are the "load order index" (aka mod index) (in hexadecimal, starting with "00"). The mod index tells you the source mod's position within the "load order".
- If you have NVSE installed and the plugin file name, then you can use the console command GetModIndex "<pluginname>.ES<M|P>" (double quotes required) to get the "load order" mod index while in-game (i.e. GetModIndex "DeadMoney.esm" should return "01").
- The NVSE console command "GBO" (GetBaseObject) after selecting the item will return the "base object id" (Base-ID). The Form-IDs listed in the Object window of GECK are "Base-IDs". A "Base-ID" is only associated with an object template in the editor, never with an instanced object in-game. Note: Will return the leveled character/creature form if called on references spawned by a "leveled list". Use "GBF" (GetBaseForm) to return the NPC/creature "Base-ID" instead. Source: GECK Wiki.
- If you have the "Lutana" or "JIP LN" NVSE Plugin installed, you can use it's console command `search "<item name>"' (double quotes required), which will show you a list of matching items with Form-IDs.
- Note that a "00" mod index means it's from the game master file (i.e. FalloutNV.ESM).
- DLC masters follow the game master, and should be in order of release. (See Vanilla Load Order.)
- The mod index for other plugins may change as their position on the "load order" changes due to the addition or removal of others.
- The "FF" index means it is a "spawned" character or item, which happens when you place or drop the item to the ground in the game-world. This mod index is never that of the "source mod". It's a "Ref-ID". (These get included in the save game file.) You will need to use the NVSE "GBO" or "GBF" command to get it's "Base-ID" which should contain the "mod-index" of the "source mod".
- To determine the source of conflicts:
- Once you have the Base-ID, load your entire "load order" into FNVedit, enter the Base-ID you found (e.g. "001735E4") in that field (upper left corner of FNVEdit), press < Enter >, and in the right-hand pane select the "View" tab. (Note that a "Ref-ID" beginning with "FF" will not work for searching purposes. You need to determine the "Base-ID" using NVSE "GBO" or "GBF" first.)
- This will now show you ALL the plugins which touch that record, in the order in which they do so. The last (right-most) is the one that "wins" the conflicts (red backgrounds) for that record. All you really need is to see which plugin (column) is the winner.
- Note that you cannot use a "Ref-ID" with the "player.additem" console command. It requires a "Base-ID".
- "Ref-IDs" will be located in the left-hand pane under the "World" category, and once found their record information in the right-hand pane will tell you the "Base-ID" they are a reference back to.
Issue - Fix a missing or solid color texture problem
- Cause-1: the texture (DDS) file is missing, incorrect, can't be located, or corrupt.
- Solution-1a: This is a multi-part procedure presented in increasing level of difficulty. Details in other articles or sections of this guide cover those aspects in more depth, so read everything first before attempting.
- Identify the load order "mod index" of the plugin the object in question belongs to using the procedure laid out in Issue: Find the source mod-index of an object in-game entry in this guide.
- Make sure you have installed all the "art assets" of that plugin (that is: any ESM and BSA files required). Check the mod "requirements" carefully. Sometimes these are a separate "mod" or file download.
- Toggle "ArchiveInvalidation" off-and-on again.
- Solution-1b: You have a mod conflict that is overwriting that object's record, which requires a change in the "load order" sequence or a "merge/bash patch file" to correct; though this is much less likely for a "missing texture only" problem. (Please see the Third Rule: The Rule of One and Merge Patch File sections of the wiki FNV General Mod Use Advice article.)
- Solution-1c: If neither of those solutions is enough to fix the problem, then you have to determine if the texture (DDS) file is missing or corrupt.
- Examine the mod archive package to check if the folder where it got placed is somewhere the engine isn't looking for it. You can manually drag the folders to the correct locations, or repackage the archive to avoid that problem against the next time you need to install it.
- For example
- In the case of "Weapon Retexture Project" (WRP) v1.95, the package has a "non-standard" folder structure. (Not an uncommon mistake by mod authors, so learn from this.) The game (to include most mod managers like NMM, MO, and FOMM) is expecting the top level folder of an archive package to be standardized; with folder names such as "Textures" or "Meshes" (etc.), or ESM/ESP/BSA files. It assumes they are being placed under the game "Data" folder. This example package starts with a "RLS" folder, which the game does not recognize, and so it places that as the "top level" under "Data". (Sometimes this is the author's name or initials, other times it's the mod name and version, but anything unexpected is treated the same way: as a new folder or file. Sometimes it's "Data" so you end up with "Data\Data" which is also unexpected.) Most likely when the files are "installed" but aren't found correctly, something similar to this is your problem. Unpack the mod archive (WRP in this instance) to some other location and then either rebuild the archive so the top level folders are "Textures" and "Meshes" (in other words, without the "RLS" folder from WRP at all), and then install with your mod manager, or manually drag those folders into the game "Data" folder.
- BTW: The text file under the WRP "RLS" folder is a documentation file. If you want to keep similar in the package, just place it in the top level along with the "Meshes" and "Textures" folders. Recommend renaming such to "<mod_name>_ReadMe.txt" so you know which package they came from, and place them all in a "Docs" folder for easy access, but it's not a requirement. (Many authors act as if their mod's text file is the only one that might possibly exist in the same location or use the same common name (i.e. "Readme.txt"), so consequently only the last installed exists.)
- Examine the plugin in FNVEdit. (Note that the "mod index" will be different because you probably won't be loading all of the plugins from your "load order".)
- Locate the object, using the "Form-ID" that was returned when you identified the object in Solution-1a.
- Find the "model" (MODL/NIF) filename and path of the object in question. (The "texture file" name and path is located within the model/mesh "NIF" file.)
- Use NifSkope to open that NIF file.
- See the wiki article How to fix hard-coded texture paths in NIF files for the procedure to locate the texture file entry within NifSkope. (The path needs to be "relative" instead of "absolute"/"hard-coded" in order to be found, which is what that article covers.) But in short form the procedure is:
- Open the NIF file in NifSkope.
- Click on the part you want the texture for; it will highlight it in the Block list.
- Expand it and highlight BSShaderPPLightingProperty. Expand that.
- Highlight BSShaderTextureSet.
- In Block Details you will see textures (DDS files). Expand it.
- There you will see the paths to the textures used by that mesh.
- Once you have identified the texture (DDS) file in question, first ensure it is present. If it is, then you want to replace it as it might be corrupt. Either way, install or replace by extracting that file from the plugin archive (or extract the DDS file from the appropriate BSA with FOMM) and overwrite the file (if any) in that location.
- Toggle "ArchiveInvalidation" off-and-on again.
- Test the result.
- If nothing changes, then you most likely identified the wrong object and need to start over.
- Cause-2: Sometimes installing a mod can replace a vanilla "normal map" (aka "bump map") or fail to include one, which in turn causes some strange effects such as "transparency" and problems with texture Alpha channels (brightness).
- Solution-2: Removing the mod should restore things, but you have to toggle "ArchiveInvalidation" off-and-on-again once it is uninstalled. If a loose file was actually overwritten, you will need to "verify local files" or re-install the other mod to restore it.
- Cause-3: Failure of the mod to include a "mipmap" (which includes the same image at various resolution sizes) so it's default size fails to match that of your game settings.
- Solution-3a: Try changing the "Texture Size" to "LARGE" in the main game "Settings | Display" menu and "exit to the desktop" to restart the game session. If that doesn't resolve the problem, try gradually lowering the "Texture Size" settings. While this will eventually match the size of the mod image allowing to appear correctly, it is likely to causes problems with other mods which don't have mipmaps either and use a different default size. It's best to bring the matter to the attention of the mod author.
- Solution-3b: Mipmap generation is a "properties setting" in the "Mesh Editor" (e.g. Blender) when creating the NIF file. You can try to rebuild the NIF file to also produce a "mipmap" file, but that process is beyond the scope of this article.
Issue - Pink Screen or textures aka VRAM limitation
- Cause-1: Usually this means you are running out of graphics VRAM (the physical memory on your video card); typically from too many High Resolution Texture replacement packs. These pink textures can show on faces, hands, and hairs, but also can happen with entire loading screens. When you start seeing this "pink stuff", a CTD is just around the corner.
- Cause-2: If you are on any version later than Windows 7, the game can handle less "High Quality" / "High Definition" textures due to how the Direct3D API reports available VRAM. "The API in question simply reports to the app an estimation of how much memory remains available to allocate. On Windows 7, when more than 4GB are available, this API will not report accurate information. For example, if 4.1GB of memory are available, the app will see 0.1GB available. […] On Windows 8 and newer, this API will only report 4GB. Up until the change in this Fall Creator’s [sic] Update, once the counter reports 0 you can expect future memory allocation requests to fail." - Jesse Natalie, Senior Software Engineer in the Direct3D team at Microsoft as reported to Neowin.net. So in short, if your game ran fine in Win7, it will and cannot handle as many textures as it could before upgrading to later versions of Windows or video cards with more than 4GB of VRAM. This can cause your symptoms of pink textures or worse a CTD if you had more than 4GB total of video memory use loaded under Win7.Note this VRAM limitation is fixed in Windows 10 Version 1709 (aka the Win10 "Fall Creator's Update") which started it's release rollout on 17 Oct 2017.
- Diagnostic: You can see if reducing the in-game "texture quality" setting from "High" to "Low", or if reducing your screen resolution down to 800x600, or both, makes any difference to confirm the above are the cause.
- Solution 1-2: There are several things you can try, individually or in combination, in order of effectiveness:
- Implement "ENBoost" (which is NOT the "ENB Series" graphics post-processor with it's attendant FPS hit) if you have more than 4GB of system RAM. See the S.T.E.P. ENB Guide and S.T.E.P. ENBoost QuickStart pages.
- Uninstall some HD texture replacement packs.
- Run the game at a lower screen resolution.
- Reduce the texture resolution down by half each time (i.e. from 4096x4096 to 2048x2048, 1024x1024, or 512x512). See the Utilities "DDSOpt" and "Optimizer Textures" on the TESTG Utilities page.
- Upgrade your video card. However, note the limitation in Windows 10 in "Cause-2" above.
- For advanced users: If you have a Windows 10 Education, Professional, or Enterprise edition you can use the included Win10 Hyper-V system and try running the game in a Win7 "virtual machine". See HyperV on Windows compatibility for the hardware requirements and a walk-through of the installation process. Note this requires you to have or obtain an ".iso" file of the desired OS install media. (If none of this option makes sense, you probably don't want to mess with it. Otherwise, educate yourself as it is beyond the scope of this wiki.)
- Cause-3: When this occurs with faces, you may need to adjust profile settings in Fallout.INI, FalloutPrefs.INI, and Fallout_default.INI. Note some Character overhaul mods change the mesh for faces as well and may require additional setting adjustments. Read their documentation carefully.
- Solution-3: Set
 [General]
 bLoadFaceGenHeadEGTFiles=1
Issue - ShowRaceMenu or Changing Character or Uninstalling a custom race problems
Example: Uninstalled "Fallout Character Overhaul" (FCO) in mid game, but forgot to switch to a vanilla race first and got stuck in the ground and constantly have to use the "tcl" console command to rise up vertically. Tried re-installing FCO and using the "ShowRaceMenu" console command but it CTDs upon loading.
- Cause-1: Failure to provide a "replacement" for fundamental features the game is expecting (such as switching to a vanilla "race" prior to removing a "custom race" mod) will cause a CTD, similar to a "missing master" problem.
- Solution-1a: Basic troubleshooting on the "CTD upon loading" symptom in the example case identified that the re-installed plugin was not enabled as an active plugin. (This permitted the use of the "ShowRaceMenu" command.)
- In general, uninstalling any mod from an active game is going to cause problems. Many will not be fully resolveable by simply re-installing the mod. Anything that has a "FormID" with the plugin index of the removed mod will be purged when the save game is loaded (the "missing content" message), but some elements such as scripts might not. Understand what you are getting into before attempting. Safest is to go back to a "save game" file from before the mod was installed.
- Solution-1b: It's been reported using the "ShowRaceMenu" console command can have harmful side effects, especially after "level 5". You can safely change "face proportions" and "hair". Changing the character's race will "deactivate" your stat related Perks, Traits, and Implants. They will still be listed in your Pip-boy, but the effects supposedly won't be active any more. There are safer, more specialized alternatives to "ShowRaceMenu": such as "SexChange", "ShowPlasticSurgeonMenu", and "ShowBarberMenu".
- There is a mod Safe ShowRaceMenu that let's you "Revise your character no matter what level you are, without resetting your stats, skills, traits and perks simply by activating a mirror". However, read the comments for some known issues before plunging ahead.
- The mod Fallout NV Cheat Terminal Redux that allows, among other things, the removal and addition of Perks, Traits, and Implants. This can be used to "fix" those deactivated by changing race.
- Cause-2: Switching custom races causes a CTD in the "RaceMenu".
- Solution-2: It is also reported you can avoid the crash in the "RaceMenu" when switching between "custom" races by first switching from the old custom race to a vanilla one, and then switching to the new custom race. No need to save; just switching to vanilla first and then to the new race is enough for the menu to avoid the problem.
Issue - Skin tone mismatch between head and body
This commonly occurs when using a body replacement like "Type 3 Body" or facial overhaul like "Fallout Character Overhaul" (FCO) or "Fallout New Vegas Redesigned 3" (NVR3). The most obvious symptom is a Caucasian head on an other racial body.
- Cause: The vanilla game by default assumes only vanilla races for matching skin tones. Various forms of replacement to either the head or body fall into the general category of "custom races".
- Soution-1: The "bLoadFaceGenHeadEGTFiles=" setting needs to set to "1". This line may be missing from the three INI files, in which case it should be added to the "[General]" section just before the "[Display]" section.
- Solution-2: Make sure if you have more than one such mod installed that they are compatible. Check to documentation carefully for version numbers and install instructions.
- Other, less likely suggested solutions if the first two are not sufficient:
- Toggle "Archive Invalidation" on and off several times.
- Ensure FCO is installed before NVSR3 and the FCO plugins are disabled (per instructions, you only require the FCO assets).
- If you haven't already, create a "merged/bashed patch" to resolve any potential record level conflicts. If you have one, rebuild it.
- Use the "showracemenu" console command to switch to a vanilla race on a test character, and then to your custom race, and save. Then reload your the test save file several times until the character head and body skin tones match. Once they do, try loading your normal game save file and see if the skin tone matching carries over. This "work-around" may only last for that game session and need to be repeated the next time your play.
Solutions to Miscellaneous problems
Issues that don't fit well into other subject categories.
Issue - MAIN - Doc's Psych Eval gives wrong tag skill
- Thanks to Shadyfan4500 of the Nexus "Fallout New Vegas Discussion" forum for identifying and researching the problem.
Symptoms: Despite carefully tailoring the Vigor Testor "psych eval" answers to get specific "tag" skills, there is always one unanticipated skill "tagged", such as Lockpick even though there are only three answers that should "tag" it.
- Cause: In the VCG01Test quest (the in-game code related to the psych eval) is the script that controls what happens as a result of the dialogue. The script has three skill pools, and guarantees a player gets at least 1 tagged "combat" pool skill and 1 tagged "gate-opener" pool skill. Among the "gate-opener" skills are Science, Lockpicking, Speech, and Barter. Regardless of the other answer options you chose, you will get one of the skills from each of those two pools tagged if none were chosen.
- Solution: Functioning as intended by the developers. Use a "cheat" tool (such as "Fallout NV Cheat Terminal Redux") to change the result to what you want instead.
Issue - MAIN - Goodsprings quest Ghost Town Gunfight - Joe Cobb explodes
- Thanks to TheCrimsonCommando of the Nexus "Fallout New Vegas Mod Troubleshooting" forum for identifying and researching the problem.
Killing Joe Cobb in the last bit of the GoodSprings quest Ghost Town Gunfight causes an explosion. The explosion does the following:
- Forces the player into a constant stagger and camera shake. Entering and exiting VATS doesn't fix this.
- Blinds the player and forces the camera to go white. HUD is unaffected. Opening and exiting the Pause menu causes the camera to go black, then returns to white after a second or two.
- An explosion sound effect plays, then seems to loop/stretch/compress with increasing intensity and volume. Opening and exiting the Pause menu only restarts the sound effect and makes it worse.
- No damage is done to any NPCs or the player, and the player can still move around.
- Cause: This is a scripted effect from the mod "Sinitar's Gameplay Overhaul for Fallout New Vegas (SGO)" that requires the "JohnnyGuitar NVSE" plugin. (The SGO mod is hosted off-site of the Nexus. Search the web on "sinitargaming".)
- Solution: The required "JohnnyGuitar NVSE" plugin is missing or not the correct version or it's required NVSE files are not present/compatible.
Issue - MAIN - Nipton - Neither Vulpes Inculta nor Oliver Swanick appear
Symptoms: Upon first arriving at Nipton neither Swanick nor Vulpes appear (although they can be spawned through the commands). However the Legionanaires that should accompany Vulpes do appear.
- Cause: Mod conflict.
- Solution-1: The mod "Simply Uncut" has been identified as one culprit, though others have the problem without that specific mod. Note that the author of "Simply Uncut" suggests (in the comments thread): "I'm pretty sure you have to approach from the road at the Nipton Road Pit Stop for Oliver to spawn, then walk down that road that curves off into the Crucifixion road for Vulpes to spawn." [Oliver appears on the West side of Nipton as you approach the edge of town.] Anyone having this problem should try this first.
- Solution-2: Please see the Mod Conflict Isolation section.
Issue - MAIN - Weapon Damage displayed for other weapons is unexpected
- Thanks to holyshitijustwantanaccount of the Nexus Fallout "New Vegas Mod Troubleshooting" forum for discovering the basis of the following:
Symptoms: When equipping a weapon (specifically noticed with a "shotgun"), the damage for all other Player weapons changes wildly until it is "unequipped". This occurs even without any mods installed.
- Cause: (Thanks to miguick for investigating and providing this information.) This is vanilla game behavior. The game displays the damage of all weapons adjusted by the ammo effects of your currently loaded ammo, even if those weapons don't use it. Since the default ammo for shotguns has something like a x1.2 damage multiplier, you'll see all other weapons adjusted by that much.
- So other than that annoyance when viewing weapons in the Pipboy and containers, it isn't much of a problem? Well, it is, because it can also change the damage and effects of things like mines you've laid that go off while you have that ammo loaded. Which means that if you have "bean bags" loaded, a mine you laid will deal 5% damage and will cause fatigue like a "bean bag" impact. And with HP ammo loaded: a mine will deal 175% damage, but then faces a x3 DT increase in whatever it harms in the blast, etc. It's affected by any current ammo you have. Most of the time it's "cosmetic" but the game treats all damage you cause as affected by your current ammo's effects behind the scenes, which under normal circumstances would only come into play when mines are involved, but the problem is still real.
- Solution: Vanilla behavior. Not a mod conflict. Not previously identified or "corrected" by any mod. (People didn't notice it over the last decade, so why worry about it now just because "you know"? The good news is that an experienced modder has become motivated to look into fixing it.)
Issue - DLCs - Can companions travel to DLC worldspaces
All the official DLC (except the "Pre-Order Packs") require you to "part ways" from your companions before starting the DLC quest. However, sometimes only the first companion in the list is sent away, and the others come along as part of your party.
- Cause: The game is designed to only allow one humanoid and one "non-human" (robot, dog, etc.) companion each. Consequently, the DLC only check for and release the first one of each if you have more than one. This is circumvented by mods like Unlimited Companions. Unpredictable design consequences (such as a lack of navmeshing or appropriate AI packages) may cause problems if they do accompany you.
- Solution: Manually "dismiss/part ways" with each companion prior to beginning the DLC; such that they must be "re-hired" to regain their services/perks. Merely sending a companion to "wait" somewhere is not sufficient for any of the eight permanent vanilla companions, as that still leaves them as a member of your group but in a different cell ... "out of range" of orders. The game engine is not fooled by this; only "part ways" counts. This situation may or may not apply to companions added by mods but the consequences of bringing them along will have similar risks.
Issue - DLC Dead Money - Cannot kill or dismember Ghost People
The problem occurs if using a mod (such as "Return To Sierra Madre", "Sierra Madre EXIT Door", or "Return To The Sierra Madre Casino") which enable you to return to the Sierra Madre after completing and leaving the original DLC. Upon returning, Ghost People are nearly "invincible" as reported in each of the mentioned mods comments.
- Cause: the DLc was only intended and designed to be played through once without leaving.
- Suggested Solution: It has been suggested that the "Ghost Hunter" special perk needs to be enabled upon returning to the DLC (possibly via a tool such as "Fallout NV Cheat Terminal Redux"). (None of the mentioned mods do so.) The perk "Bloody Mess" (which grants a +5% damage bonus) does not seem to be sufficient against Ghost People to make a material difference in their fatality rate.
- NOTE: There have not been any reports as to whether this strategy is successful.
Issue - DLC Honest Hearts - Cannot kill Salt-Upon-Wounds
Near the end of the "Crush the White Legs" or the opposing "Flight from Zion" quest, there will be a scene where Joshua Graham will kill some White-Legs and confront Salt-Upon-Wounds. There are a couple of potential bugs here. See the bug reports at the bottom of the Nukepedia Crush the White Legs or the Vault Flight from Zion quest pages.
- Cause-1: Certain "trigger" events have to occur.
- Solution-1a: For "Flight from Zion", you can not kill Salt-Upon-Wounds until after initiating conversation.
- Solution-1b: For "Crush the White Legs", after reaching the Three Marys' caverns, the White Legs detonate mines from above a rock formation, blocking the direct way to the camp's center (this obstruction will not be cleared, even after the ending). This explosion needs to happen to trigger the event. The Courier must then go through Three Marys' caverns to reach the other side of the blockade, reaching the innermost parts of the camp. After reaching the destination, a cut-scene initiates with Joshua Graham executing two White Legs.
- Solution-1c: See also Issue - DLC Honest Hearts - Quest Crush the While Legs bug Solution-1c.
Issue - DLC Honest Hearts - Cannot leave Zion
Even though you have completed "Honest Hearts", gotten everything from the rewards locker and have the "Map of Zion" from the Sorrows Camp, upon activating the cave door to the Southern Passage you get the message that without a guide or a map you have no hope of finding your way back to the Mojave.
- Cause-1: You are using "Mission Mojave - Ultimate Edition" (MMUE), which has changed the original "misc item" into a "note" the game engine doesn't recognize as the required map.
- Solution-1: Disable the MMUE plugin from your "load order" and perform a "Clean Save" to flush out the MMUE "note" quest item. Then add the original NVDLC02ZionMap quest item with the console (toggle "~") command:
- (Replace "xx" with Honest Hearts's 'mod index', which is usually "02"). You should now be able to actually activate the cave door to leave Zion.
Issue - DLC Honest Hearts - Cannot return to Zion
Even though you have completed the "Honest Hearts" DLC, you are unable to return without joining the (now deceased) "Happy Trail Caravan company".
- Cause: The footlocker with the DLC item rewards appeared before you left Zion, and you should have gotten the quest "Departing Paradise" and the objective "Return to the Mojave via the Southern Passage". The script that enables the footlocker also gives you the "Zion Canyon Map" after the DLC ending slides. Without it, you can't find your way back on your own.
- Solution-1a: You need the Zion Canyon Map in order to return.
- You can give yourself a new copy of the map with this console command:
- (Replace "xx" with Honest Hearts's 'mod index', which is usually "02"). Just save and quit after entering the command. You won't lose any progress and by exiting the game you will be able to resume pursuing achievements that was disabled by using the console.
- OR
- you can use the mod Using the console doesn't disable achievements
- Alternatively installing the JIP LN NVSE Plugin also has the same feature to avoid disabling achivements, and doesn't use up an "active plugin" slot.
- Solution-1b: Primarily of use to someone who has already completed the DLC, the mod Zion Exit Cave provides an alternate entry & exit point to Zion. However, do know that leaving ANY DLC not using the proper route will remove the Mojave's radios, as they do this as a immersion since the signal can't reach you in those areas, but *intend* to return them to you on the trigger event that you leave through the preordained exit. Leaving through a new exit will result in these radios being lost until you go back through the proper exit or use a solution under "Cause-2" of Issue: Radio station music doesn't play.
Issue - DLC Honest Hearts - Joshua Graham Narrows Dialogue not triggering
Just after completing the "Deliverer of Sorrows" quest: Joshua Graham will approach when you leave the Narrows and speak to you with a quote from the bible. However, with this bug he leans in to talk but then pans back out. You can't go into third person until you speak to him: but the dialogue doesn't trigger. (This is an old bug reported at least as far back as May 2013.)
- Cause-1: This glitch is caused by having Walking Cloud as a companion. It causes Joshua's "NVDLC02JoshuaNarrowsForceGreetTrigger" script to glitch.
- Solution-1: Reload a save and reject Walking Cloud's offer, in which case the conversation will trigger as normal. Then you can go back and recruit Walking Cloud.
- Cause-2: The mod Humping the Mojave v003 (last updated Nov 2011) causes this issue even when you don't recruit Walking Cloud.
- Solution-2: Disable that plugin, don't recruit Walking Cloud, and talk to Joshua. Then you can re-enable the plugin afterwards.
Issue - DLC Honest Hearts - Quest Crush the While Legs bug
Can't get past the final "Crush the White Legs" dialog with Joshua Graham.
- Cause: Script glitches.
- Solution-1a: If you are using the mod "Mission Mojave - Ultimate edition", see "Cause-1" under Issue: (Honest Hearts) Can't leave Zion.
- Solution-1b: Use the console command:
- (Replace "xx" with Honest Hearts's 'mod index', which is usually "02"). The quest should complete successfully, the "Crush the White Legs" challenge completed, all relevant xp awarded, Joshua Graham's final dialogue started, the ending slideshow played, and the "Departing Paradise" quest started.
- Just save and quit after entering the command. You won't lose any progress and by exiting the game you will be able to resume pursuing achievments that was disabled by using the console.
- OR
- you can use the mod Using the console doesn't disable achievements
- Alternatively installing the JIP LN NVSE Plugin also has the same feature to avoid disabling achivements.
- Solution-1c: Sometimes after the Three Marys' canyon detonation when Joshua moves on ahead of you, he leaves his entire inventory (including his Companion Ammo, Magical) with you. When this happens, at the end of the trail there will be a cut-scene where Joshua will kill some White-Legs and confront Salt-Upon-Wounds, but he won't actually do anything because he has no ammo. In order to continue this scene, you need to use the console and after selecting him:
Issue - DLC Honest Hearts - Year bug on entry or exit of Zion
The year will advance +1 if you enter/exit Zion on February 28th; and the date will be reset to January 1st.
- Cause: Game does not account for February 29th in a bissextile (leap) year.
- Solution: The mod Door to Zion Advance Year Fix by CivisRomanus (who tracked down and fixed the bug).
Issue - DLC Old World Blues - Hoarder Trait with PN Sprint is broken
- Thanks to IntenseMute of the Nexus Fallout "New Vegas Mod Troubleshooting" forum for the basis of the following:
Issue - DLC Old World Blues - Quest Get your brain back bug
This can be caused by either a "vanilla game" or mod capability issue.
- Cause-1: Dialog with the Courier's brain in the OWB "Brain Tank" fails to initiate if (somehow) you already have the "Big Brained" Perk. (This is normally a possible "reward" for this quest.)
- Solution-1: Use a "cheat terminal" mod such as Fallout NV Cheat Terminal Redux to remove the "Big Brained" Perk before attempting to speak with the Courier's Brain in the tank.
- Cause-2: "Dialog loop" when the player eventually gets to and select certain dialog options with the Courier's "Brain Tank" (specifically observed with: "So, what, you'd rather just stay here? Never leaving that tank of... whatever that stuff is?").
- Solutions-2: Use the in-game console (default key "<~>") and enter the command "player.cam" (Close All Menus) to exit the dialog with the "Brain Tank". This enables the player to walk away or enter dialog again. Note the loop can occur again, so choose differently.
Issue - DLC Old World Blues / Lonesome Road - SleepDeprevation forced to 275
- Thanks to GamerRick of the Nexus Fallout "New Vegas GECK and Modders" forum for the basis of the following:
Issue - DLC Lonesome Road or other - DLC hangs after cutscene
As in blowing up the silo and running back to the elevator, get stuck unable to move after the cutscene is done playing. (Consider "Lonesome Road" as an example of similar problems with any DLC. The issues can appear both before and after a cutscene plays.)
- Cause-1: Mod conflict. Nevada Skies has been identified as at least one culprit, because it likes to kick off a storm after a cutscene ends.
- Solution-1a: Enter the console (toggle "<~>" key) command: "EnablePlayerControls". (Using the console prevents achievements in the current game session only. Save your game and exit to desktop, then continue playing and you will get achievements)
- Solution-1b: Disable "Nevada Skies" (or other Weather Mods) before you enter the final part of Ulysses's temple. You can re-enable it once you are completely done with the DLC.
- Cause-2: In "Hardcore Mode", if you are low on sleep or other "needs", cutscenes can cause problems.
- Solution-2: See Issue: Can Timescale adjustments break certain quests, etc.?.
- Cause-3: It seems like the invisible trigger box that you get teleported into leaving "Lonesome Road" sometimes doesn't get enabled.
- Solution-3: Once you get stuck, use these console commands:
Issue - DLC Lonesome Road - Freeze in Collapsed Overpass Tunnel
The freeze is always immediately preceded by the growl of a tunneler. For some, when they come close to the exit point of the Tunnel, their also FPS drops massively.
- Cause: Unknown.
- Solution-a: Try editing the "Users" INI files under the "[Audio]" section, and change the following settings as indicated:
- Solution-b: The mod Lonesome Road - Tunneler freezes fix by Francksteel replaces the "use of" / "call to" the "playidle emerge" animation with the "playidle emergereveal" animation instead in the following scripts:
- NVDLC04TunnelCodeHolderSCRIPT
- NVDLC04TunnelCodeSupportSCRIPT
- NVDLC04TunnelerAmbusherSCRIPT
- NVDLC04TunnelerAmbusherTESTSCRIPT
- NVDLC04TunnelerSCRIPT
- NVDLC04TunnelerTESTSCRIPT
- NVDLC04VenomousTunnelerAmbusherSCRIPT
- This simple "playidle" animation replacement is a candidate to resolve all instances of similar freezing in other situations as well. The problem appears to reside in that particular animation implementation.
Issue - MOD ATTT - and WRP and WMIM combatibility
The mod Armed to the Teeth (ATTT) "allows you to dynamically holster up to three weapons on your character at once." It requires (among other plugins such as NVSE and JIP LN NVSE) the mod Weapon Retexture Project (WRP) to work correctly. The latest version 2.x of WRP also requires the mod Weapon Mesh Improvement Mod (WMIM) which fixes accuracy (and other) issues with vanilla weapons. Even with all the required mods, there can be problems getting things to work correctly.
- Cause: When developed, there was only one version of WRP available (v1.95 from 2012), which ATTT was designed to work with. WRP, while primarily a "texture replacement" mod, does include some modified "meshes" in order to get things aligned correctly. That version used the same folder structure as vanilla. Now however there is a "version 2" release which uses it's own unique folder structure. WMIM fixes only vanilla weapons, which means it (along with ATTT as well) uses the vanilla folder paths.
- Solution: Use the older v1.95 version of WRP with ATTT.
- Be aware that by installing WMIM before WRP, you are going to lose the accuracy fixes to meshes from WMIM that do not have those fixes incorporated into the older WRP. If you install WRP first, then you will lose the "texture fit" changes to the overwritten meshes when WMIM is installed.
>
Issue - MOD IMPACT - FPS drop or stutter on semi-auto hits
Whenever shooting repetitively from a semi-auto weapon or in that firing mode, the game stutters more and more until it eventually freezes for 0.5-1 sec every shot that hits. Upon switching to shooting "full auto" or after not shooting completely for a second or two before resuming again, the stutter is gone and everything is just fine again.
- Cause: This is a consequence of the "ricochet" custom particle VFX effect from hits on metal and stone materials in the mod IMPACT.
- Solution: Use the Option - No Refract Hits file under the "Optional" section OR use one of the less demanding ("The Gaming Rig" or "The Basement Dweller") versions of the base mod.
Issue - MOD NVInteriors - Drunken Gnomes Quest cannot be completed
This is a joke "easter egg quest" to obtain 30 specifically named "drunken gnome" statues, included as part of the "NVInteriors Project" mod by ChuckSteel.
Hint: The author located them almost the same distance apart from one to the next with only a couple exceptions.
- Cause-1: Some mods can make the location of a given gnome unreachable as they cause a "conflict". Some gnomes are placed in the "exterior worldspace" as well as "interior" cells modified by Chucksteel's "NVInteriors Project" mods.
- Solution-1a: The mod "Freeside Open" for one, is known to cause such a conflict as it moves "Freeside" locations from an interior cell into the exterior worldspace. If you are using TTWInteriors, gnome "P.B.R." was moved to the part of Freeside with the King school; and was supposed to be moved for NVInteriors as well (acknowledged by the author in 2014) but no update has been published since 2013.
- Solution-1b: The mod Vurt's "Wasteland Flora Overhaul" (Dead Version, at least) is known to place a rock on top of "Willy the Wino".
- Cause-2: Your quest fails to update after you are forced to use a console command (such as "TCL" to toggle "clipping") to retrieve one.
- Solution-2: Try dropping that gnome in question to the ground, save, exit to the desktop, and then reload the game. When you reload the game, pick him up and the quest should advance (with a travel marker to your prize at the end. Check your Pipboy map).
- SPOILER ALERT: Here are the locations of the 30 Gnomes, in Alphabetical order.
Issue - MOD NVInteriors - 52 Card Pickup cannot be completed
This is a separate mini-quest in NVInteriors which is a bit harder to get started but much easier to finish if your looking. Successful completion gets an apartment overlooking the North Gate of the Strip. To the right as you face the Strip Gate, there is a locked set of double doors at the end of the multi-story building. Based off the description in the ReadMe file, that should be the location of the prize for finding the cards.
Issue - Adjust or eliminate limb dismemberment and body explosions chance
Is it possible to reduce or eliminate the "gore" factor?
- Cause: The basic formulae is:
- Large edged weapons dismember.
- Powerful laser weapons dismember.
- Blunt weapons explode.
- High powered rifles and pistols explode.
- Powerful plasma weapons explodes.
- Explosives explode. (Strangely not allowed in vanilla)
- By this it seems nothing can change the fact a lead pipe can cause an arm to explode.
- Many effects are scripted to occur, so simple settings will not affect them. Some gore is the result of combat, while some is placed in the game world for atmosphere.
- Solution-1: Changing the setting "bDisableAllGore=" to "1" in the three INI files reduces limb dismemberment, but not completely.
- Solution-2: : While there are several mods on Nexus for tweaking Gore for various weapons, most seem unable to eliminate it completely.
- No Combat Gore No Environmental Gore "is dedicated to eliminating all gore from the game. The gore from fighting, the extra gore added from the Bloody Mess perk, environmental gore that is piled in areas and even scripted gore such as your head exploding due to Dead Money's many radios setting off your collar."
- Project Nevada - Rebalance lets you adjust the chances of bodies to dismember and explode.
- Solution-3: You can try to make changes in the GECK for yourself.
- In the GECK, the "defaultbodypart" setting (and other bodypart settings) are all found in "Actor | Data/Body | Part | Data". Just double click on the region you wish to disable gore on and uncheck the boxes for "Severable" and/or "Explodable". This applies to Actors instead of the weapons, and prevents scripts from dismembering/exploding them.
- There are two settings in the GECK for each weapon that control the Gore chance:
- iCombatDismemberPartChance (default = 50%)
- iCombatExplodePartChance (default = 75%)
- You can try to edit these settings for each weapon more to your liking.
Issue - All NPCs have over-ridden dialogue
All NPCs give the same response, as for example: "See you later" when saying "Goodbye".
- Cause: All NPCs are supposed to have at least three dialog "topics": a "GREETING" (for the first response when the Player initiates dialog); a "Hello" which is all actors' way to start conversations (but usually only between NPCs); and a "GOODBYE" which is essential to be able to terminate a conversation. These dialog topics are supposed to have "qualifying conditions" to control which actor they belong to and when they are triggered, but the first dialog response which has all of it's conditions "true" is used. If one is poorly constructed so it's conditions can always be "true" and it is tested earlier, it will prevent the correct response from being used.
- Solution-1: At least one report has determined that the "Vanessa" companion mod by GePalladium can cause her "GOODBYE" response to override all others. Removing the mod resolved the problem.
Issue - All Scripts Recompiled Warning
- Thanks to wfandrews and LStewieAL of the Nexus "New Vegas Technical Support Forum" for identifying and investigating this issue.
- Symptoms: A "Command Prompt" Window appears to flash briefly with the message:
"Warning!
< some plugin name > has recompiled all scripts. This is dangerous to your save game. Quit and remove the mod from your load order or clean it of ITMs using FNVedit."
- This message may also appear in a NVSE logfile.
- Cause: The warning has been confirmed to be from "lStewieAl's Tweaks" versions 5.20 and later. It is based upon detecting the named plugin is overwriting two unused vanilla scripts no mod should be touching, which are used to determine this is the likely condition.
- When someone uses the GECK Script Editor command to "recompile all scripts", it causes EVERY script currently loaded into the GECK (all from vanilla and DLC and any mods) to be recompiled and included in the modified plugin which is currently "active". While that might initially seem to not be a "bad thing", it means that every other identical preceding loaded script file (including those of the vanilla game) gets overridden by that plugin and will cause problems as those scripts will now have the mod index of the modified plugin instead of the originals, which will cause errors for everything referencing them. The problem won't be within that mod, but in everything else: breaking them all. NO MOD AUTHOR SHOULD USE THIS COMMAND but many are not aware of why. There is no internal GECK warning associated with the command.
- Known instances:
- Extended Repair Kits v1.02 by vivanto.
- Known instances:
- Solution-1a: Inform the mod author and do not use the mod until it is resolved.
- Solution-1b: If you want to ignore the error and are willing to risk later save file corruption, you can add to "nvse_stewie_tweaks.ini" file:
[INI]
bShowRecompiledAllScriptsWarning = 0
Issue - Can Timescale adjustments break certain quests
The default Timescale is a "30:1" = "Game Time":"Real time" ratio. "Units of measurement" are the same on both sides of the equation: "seconds:seconds", "minutes:minutes", etc., i.e. default is 30 game minutes = 1 real minute. So "Timescale: 6" equals "6:1" ("6 game minutes:1 real minute" or "60 game minutes for every 10 real minutes").
- Cause: Setting too high or low a ratio can break AI packages; and anything other than the default "30:1" can cause crashes in some quests which jump the time forward or during the "sleep/wait" command. "Hardcore mode" can be especially problematic, and certain main quests in both TTW/FO3 and FNV can consistently break if any timescale other than "30:1" is used. This appears to be a vanilla bug. Results vary with some users reporting no issues over multiple replays with adjusted timescales in "normal mode" despite others able to reliably reproduce the issue on multiple play-thru and save-game reloads.
- FYI: FNV Game start date = 19 Oct 2281.
- "Hardcore needs" decrease their current state at a rate based upon "game time", while their recovery is based upon "real time". See Hardcore mode "Status Effects" on The Vault Fallout wiki.
- FYI: FNV Game start date = 19 Oct 2281.
- Reported quest problems if timescale is other than "30:1".
- In FNV:
- Cutscenes.
- "Dealing with Contreras" (stuck in "I'm not ready yet, come back tomorrow").
- "Young Hearts" (Janet never makes it to Nellis Base).
- (Personally had both of these quests succeed using a timescale of "6:1", but they did take some hours of gameplay to complete. Some "stuck" issues may simply be a lack of patience/forgotten need for the increased time required.)
- In FO3/TTW:
- "Finding the Garden of Eden".
- "Take It Back".
- "Death from Above".
- "Head of State".
- "Temple of the Union" (slaves never make it to The Mall).
- In FO3/TTW:
- See also the possible related consequence: Issue: Stuck effects or stats.
- Solution: There is a long standing game engine bug affecting the accuracy with how time is tracked. See the entry Issue: GLOB variable 'GameDaysPassed' doesn't advance or suddenly jumps for the problem and solutions.
- Adjustment mechanisms: (Not solutions; use with care.)
- The "Bashed Patch" (BP) global "Timescale setting" gets baked into saves, but each BP rebuild gets reset.
- "Project Nevada" has a global "Timescale" setting.
- Timescale adjustment mods:
- Imps TimeScale Adjuster by Imp of the Perverse. Basic adjustments by circumstance, to include reset to default for conversations to avoid quest crashes.
- IMCNNV - Imps More Complex Needs by Imp of the Perverse. More complex "hardcore mode" settings than "Imps TimeScale Adjuster", including integration with the Ambient Temperature by Imp of the Perverse mod. Can be used in combination with "Project Nevada" timescale adjustment to modify the rate at which "needs" go up.
Issue - Change the Main Menu background image
When you want to change the FNV Main Menu background image, it's actually very simple.
- The image used in the main menu is called "main_background.DDS" and resides in "Fallout - Textures2.BSA" under "Textures\interface\main". If you just want to replace it completely with a different image, you can use a ".JPG" (JPEG) formated image. You don't even need to convert it to a "DDS" file; just rename it.
- On the other hand, if you intend to edit the default image somehow, you will first need to extract it to a separate file from the BSA file using a tool such as BSArch or the "BSA Browser" in Fallout Mod Manager (FOMM) or similar. Load the image into your paint type program (such as Paint.Net), edit as desired, and save as a ".DDS" file.
- Either way, name the new file "main_background.dds" and copy it into "Data\Textures\interface\main". Then toggle "ArchiveInvalidation" off-and-on-again and you should be seeing it in the main menu.
Issue - Children cannot use that
Unable to perform actions like harvesting plants or use a campfire because the game thinks you are a "child".
- Cause: Occasionally the game gets your character's size wrong, and that makes it think you are a "child".
- Solution: Use the console (toggle key "~") and command: "player.setscale 1" to reset your size to default. If that doesn't work, you can also try "player.IsChild 0" to tell it you are not a young person without adult supervision.
Issue - Console player additem command fails
The proper console (default is < ~ > key) command syntax is: "player.additem [item code] [count] < Enter >" (without the quotation or [bracket] marks).
- Cause: Either the command failed to include the "[count]" parameter (which is required), or the "[item code]" parameter is a "RefID" instead of a "BaseID". (Please see GECK Form-ID, Base-ID, Ref-ID, and Editor-ID for the distinction.) In the console, clicking on the target item displays it's "Reference ID" (RefID). "Usable items" that can be picked up must have the item in an Actor's (the PC {your character}, an NPC, or a container) inventory; or if "persistent" or "spawned, while lying on the ground.
- Solution: With NVSE installed, after clicking on the target use the command "gbo" (GetBaseObject), which will return the "BaseID" of the target item.
Issue - Corpse in -T- crucifix pose
The corpse unexpectedly remains upright until 'bumped' by the player. This 'havok' collision will cause the corpse to drop to the ground and sprawl out.
- Cause: The actor's ACHR (Actor Reference) record did not have the "Starts Dead" flag enabled when it was placed in the "world" (Render window). This flag has the "uint32" data field value of "0x00000200" when set. See also the sub-topic Issue: Floating objects which points out that more than one mod affecting a cell may also cause this.
- Solution-1: The JIP LN NVSE Plugin mod (as of version 55.40) provides an engine level bug fix to this problem.
- Solution-2: The YUP mod fixes this for some vanilla game actors.
- Solution-3: The mod Ragdolls, which fixes havok collision for most skeletons, may help. It now includes a small script called "Havok Bounce" designed to automatically "poke" every corpse every time you change cells.
- Solution-4: Inform the mod author of the problem.
Issue - Corpse hanging or floating
- Thanks to KiCHo666 of the Fallout New Vegas "Mod Talk" forum for the basis of the following.
Some Actors appear to hang by a limb in the air after they are dead. (As in: they appear to dangle from their wrist or ankle or crumbled over an invisible fence.) While similar, this is not the same as the Issue - Corpse in -T- crucifix pose problem.
- Cause-1: The issue is caused by one animation file in the mod Weapon Mesh Improvement Mod. According to the author (as of v1.3):
- Solution-1: Remove the single "mod added" file (Data\meshes\characters\_male\1hpequip.kf). (Not the entire WMIM mod.) Toggle "ArchiveInvalidation" afterwards.
- Cause-2: There is an engine level bug where dead bodies of actors that were killed while being ragdolled would assume a T-pose when loading a game.
- Solution-2: The JIP LN NVSE Plugin mod (as of version 55.40) provides an engine level bug fix to this problem.
Issue - Corpses disappear too quickly
This is not a bug, or something that can be "fixed". It takes some understanding of how this necessary game "garbage collection" works.
- Cause: Corpses count against the number of actors in a cell. All actors (dead or alive) have scripts running against them which affects your processor load. Too many can crash your game, so the game runs "garbage collection" routines to remove them.
- Mitigations: Could not find a vanilla INI setting for this, but the "Bashed Patch" (BP) from "Wrye Flash" (WF) has an adjustable "Combat: Max Actors" setting. The BP also has a "Max Active Actors" setting, and a multiplier of that for the number of "Dead Actors". Someone claimed you could have about 80 actors max, and about 50 before taking an FPS hit. "Your mileage may vary."
- Corpses with a Quest marker never disappear (perma-corpses). Named NPCs (like "Joe Cobb") usually have this marker.
- Normal corpses disappear in exterior cells when the cell respawns or is purged (i.e. fast travel or switching to an interior cell), so you need to loot first.
- Corpses in an interior cell don't disappear because such cells don't respawn. (Note that does not apply to "containers" which are flagged to respawn.)
- You can't "carry" (<grab> key) a body through a door or fast travel with it.
- Adding an item (even one that was originally in it's inventory but removed) to a corpse turns it into a "container", causing the corpse to persist through a cell respawn.
Issue - CTD after a fairly constant amount of time such as 20 minutes
- Cause: Usually this is a symptom that you have an "overheating" hardware problem. While possible it is due to "memory exhaustion" from a "memory leak", such seldom are as consistent in their timing.
- The "chassis cover" for a computer's case is an integral part of it's cooling system. Generally (there are variations) it is designed to cause air flow in a reverse "S" pattern through the case: cool air from the outside coming in through the front bottom, through the open internal spaces (over the memory and CPU), and out the top back of the case. There are usually fans in the lower front, and in the enclosed "power supply" at the top back. Often there are additional fans to assist. The removable "slot covers" in the back where additional "addon" component cards can be added to the motherboard need to be in place over unused slots to ensure this flow remains as designed. Some people think removing the cover will improve air flow, but they are mistaken. The cover is needed to cause the flow to be directed as intended. It's the difference between using a sprayer or stream of water to rinse a bowl, and simply pushing it down under the surface of the water. The former pushes residue out the other side, while the latter tends to trap it in the center because the water is pouring in from all sides.
- Dust collects on electronics from the "static electricity" effect. This build up reduces the efficiency of the heat dissipation, causing the component to "run hotter". Normal circulating air flow will not help with this dust buildup as it will not be able to overcome the "static" effect. The use of compressed air on an unplugged system will be needed, but be sure to block the movement of any fans as that will generate unregulated currents in the system which can damage components.
- Modern CPUs run at relatively hotter temperatures than the rest of the system, so they usually have either "heat dissipation fins" for passively drawing heat away and into the air flow or CPU "coolers" to actively do so. The more rapidly it heats up, the more active the necessary measures. But the monitoring threshold issue gets complicated when you have "multi-core" CPUs. There are recommended temperatures for individual cores and for the entire "CPU" package. Please see the Intel Temperature guide or it's equivalent for your brand of processor chip to determine what the suitable temperature ranges are for your device.
- Solution-1: You need to ensure there is adequate air flow around your box (at least "one inch"/"2.5 cm" around the back and sides), and that all the fans in your case are actually running. This will be easier to determine when you temporarily have the case more accessible and visible. Still, you can't see the cooler on the CPU, so a temperature monitor set to alert you when you are nearing the CPU's thresholds is the most reliable way to detect overheating. One from your motherboard manufacturer is preferable, or you can try one of the Intel tools: Intel® Extreme Tuning Utility or Intel® Power Gadget or others Diagnostic and Performance Tools for Intel Desktop Boards. There are more generic "third party" tools like Speedfan (freeware) as well. Check when you first start playing the game and then again about 5 minutes before you anticipate a CTD.
- Solution-2: A temporary solution is to run a fan directed to improve air flow around the computer box. If this prolongs the time before the crash, you have fairly conclusively proven an overheating problem.
Issue - CTD traveling from Cottonwood Cove to Fortification Hill aka Render Unto Caesar quest
The game attempts to autosave or "load screen" and crashes before arriving at Fort Hill.
- Cause-1: You are using the built-in game "Autosave" feature. This is not recommended at all. See Issue: CTD on interior/exterior/"fast travel" cell change for more on this.
- Solution-1: Disable "auto-save" and use either of the CASM or CASM with MCM mods instead. "Timed saves" are not recommended because they can't detect if something critical (like a script processing) is going on in the background. "CASM with MCM" allows you to fine tune when it saves.
- Cause-2: You failed to trigger all prior stages of the quest.
- Solution-2: Be sure to speak with the guard who halts you when you enter Cottonwood Cove after starting this quest. Do not bypass him.
Issue - Difficulty setting causes Player and NPC damage to be unbalanced
Desiring a damage mechanism to work the same for both.
- Cause: According to this Game Difficulty and Hardcore Mode article the "difficulty" setting causes the damage inflicted to be inversely proportional between the Player and NPCs. "Hardcore" mode has no effect on damage calculations.
| Difficulty | iDifficulty= | by Player | by Opponent |
|---|---|---|---|
| Very Easy | 0 | 200% | 50% |
| Easy | 1 | 150% | 75% |
| Normal | 2 | 100% | 100% |
| Hard | 3 | 75% | 150% |
| Very Hard | 4 | 50% | 200% |
"iDifficulty=" setting is found in the "FalloutPrefs.ini" file in the "C:\Users\<YourAccountName>\Documents\My Games\FalloutNV" folder.
- Solution: Adjust "Difficulty" to "Normal" for the same damage calculations to apply to both sides.
- Note you can change difficulty "on the fly" in game, so you should be able to easily test what works best for you with any combination of mods.
Issue - Disable the death scene splash of blood across the screen
"When I die, I like to see what happens to my body. But this is usually hindered by all the [omitted] blood on the screen and I can barely see what's going on."
- Cause: Default game setting.
- Solution: Edit all three of your Fallout INI files by setting the following (at the bottom) from "=1" to "=0".
- [ScreenSplatter]
- bScreenSplatterEnabled=0
Issue - Dying with red TMP displayed
Symptoms: The letters "TMP" have appeared in red on the right hand of the HUD screen. Every time this occurs, character loses 5 or 6 HP. Also, keeps getting sleep deprivation even though "Hardcore mode" is not on.
- Cause: The mod "Nevada Skies - Weather Effects" prior to version "Final" (04 Oct 2020) had a feature called "Frostfall" that could be enabled in the "Mod Configuration Menu (MCM)". The "Frostfall" setting adds a 'heat stroke'/hypothermia function to the game; switching on "Hardcore Mode" in the process (even if it says it's off in the settings menu).
- "TMP" = Temperature
- The "Frostfall" feature was cut because it was never finished and the author has stopped working on the mod.
- Solution: Shut off the "Frostfall" setting in the MCM, or upgrade to the "Final" version which removes the feature.
Issue - FACTION - Still attacks even after reputation is Idolized
This applies when any large number of NPCs (who are probably in the same Faction) are suddenly not acting as expected.
Example: Even with the "Mark of Caesar" and while wearing Legion faction armor, legionnaires attack.
- Cause: Various faction members belong to their own faction groups (e.g. "CaesarsLegionNelsonFaction", "VCaesarsLegionCCoveExplorerFaction", "VCaesarsLegionCCoveFaction". etc). If you have been detected committing a crime against their faction, it may be tracked specific to that faction.
- Solution: Identify the faction. (See the GECK Category:Factions under "Actor Data", or find the NPC and their "Factions" tab in the "NPC" category under the "Actors" tab; both in the "Object Window".) Then see the Category:Faction Functions page for other commands you can use in the console to determine your status with each. Use "player.addtofaction <FactionID> <rank>", where setting your rank to "0" which will clear your "crime" record, but leaves/makes you a member of that faction. Setting the "rank" to "-1" will remove the player from the faction.
- Avoid changing the relationships of the various existing factions (even "PlayerFaction") to each other, as they can have wide ranging unintended effects on scripts and quests. Stick to changing the player's personal status within the faction in question. If you feel it essential to change faction interrelationships, create your own new faction, and set up the relationships desired with other factions and include "Player" as a member in that new faction, or make the "PlayerFaction" "friendly" or "allied".
Issue - FACTION - Strip Securitrons unexpectedly become hostile
Apparently people have had this issue intermittently over the years.
- Cause: The following causes have been suggested but not all are confirmed.
- Under "notes" on the wiki entry for Securitron is:
- It appears that all the Securitrons in the Mojave belong to Mr House, except those in the Big MT. So likely that last bit about killing a Securitron applies to all of them outside of a vault. However, it was also suggested that this occurs if you go to new Vegas AFTER exploring "Vault 11", so that advice may apply to killing any Securitrons in the Mojave. (Faction interrelationships are "foggy" at best.)
- Under "bugs" are a couple of similar instances:
- Solutions: None confirmed. Please see the Issue: FACTION - Still attacks even after reputation is "Idolized" entry for how to try to determine the actual faction relationships between the Player and the various Securitrons. The Securitrons (under GECK "Creatures") in the Luck38 (including Victor) belong to the factions:
- Lucky38Faction
- VVictorFaction.
- Those outside the Lucky38 belong to:
- VStreetSecuritronFaction
- VNCRStreetFaction (which includes all the NPCs on The Strip).
- There is a mod (Securitron attack fix by DonkeyMonkey) on Nexus that gets around the problem by adding the Securitrons to the PlayerFaction. However, this would be considered a "cheat" as they normally wouldn't be allied until after you had completed the "platinum chip" OS upgrade, and it's subsequent effect on other quests and scripts is unknown.
Issue - File exists error attempting to install mod
While most commonly seen when using FOMM as the mod manager, the problem can occur when attempting to install the mod by switching between different mod managers.
- Cause: The underlying problem is the use of the default "Windows' temporary folder" (of which there are a couple of possible choices) by the install process to unpack a mod package's component files. If the files present were not "Owned" (created) by the process currently executing, or are "locked" as being "in use" by another process, this error message is displayed. The possible "temp file" locations are "C:\Users\<your_user_accountname>\AppData\Local\Temp", "C:\Windows\Temp" (both setup automatically by the system), or any other path the system installer may have set the environmental variable "temp" (when referenced in a script or code it will appear between two percent signs <%>) to point towards.
- Solution-1a: There are several tools and ways to Delete, Move, or Rename a "locked file". In general, if the file wasn't locked by the Windows system upon starting up, "rebooting" the computer (this may require "power off", with "hibernation" disabled) will free it.
- Solution-1b: Delete any files currently in the "temp" folder. As the Windows system creates some of these when it starts, the best way to ensure you can delete the most files is to Clean Boot or boot into "Safe Mode" first. Any files you can't delete in that situation will be required by Windows and must be left alone.
Issue - Flash Bang aka Combat skills reduced to zero Bug
Some effects such as "flash bangs" or electronic "zaps" may suddenly reduce all your "combat skills" to zero.
- Cause-1: While these are supposed to be "temporary", they don't always reset to normal as intended.
- Solution-1: "Temporary damage" effects should be restored to normal with the console command:
player.RestoreAV <ActorValue> <value:Int>"
where <ActorValue> is one of the skills:
- Barter
- BigGuns (Fallout 3 - unused in Fallout: New Vegas however the code is still active in the engine)
- EnergyWeapons
- Explosives
- Guns (Fallout: New Vegas - equivalent to SmallGuns in Fallout 3)
- Lockpick
- Medicine
- MeleeWeapons
- Repair
- Science
- SmallGuns (Fallout 3 - equivalent to Guns in Fallout: New Vegas)
- Sneak
- Speech
- Survival (Fallout: New Vegas - repurposed from Throwing in Fallout 3)
- Throwing (Fallout 3, unused - repurposed for Survival in Fallout: New Vegas)
- Unarmed
and <value:Int> is "0" (for no damage) or a negative number as a damage modifier. The value of "0" should remove any damage applied to the <ActorValue> skill, restoring to it's previous <value>. Positive values are not permitted.
You can use the:
player.GetAVInfo <ActorValue>command to determine the value before and after the "RestoreAV" command to return the current & computed base values. In addition, you'll see the values that make up the base value, including the amount from the actor base (i.e. the amount autocalced or entered into the GECK), the result of the derivation function if any, the value as overridden by calling SetAV if any, whether or not the derived value is added to the base, and finally the three modifiers.
- Cause-2: If "RestoreAV" fails to work, it likely means the effect was not applied as "damage" to the skill but rather as a permanent reduction, probably by using the "ForceAV" or "ModAV" commands which make "permanent" changes. (If you believe this was caused by a "mod", consider replacing it with an alternative as it is bad design implementation for a "temporary effect".) The problem with making "permanent" changes is that they ignore bonuses (from situational perks, equipped items, drugs, etc.). Perks (e.g. "Tag!") and items (e.g. "skill books") that add permanent skill increases are included when you use the command
player.GetPermAV <StatName>
to return the base value of the stat without any Trait or Perk bonuses. However, these commands will only return the current values of those stats. You may need to use a previous "save game" to determine what those skill values were prior to the "damaging event".
- Solution-2a: Use a "<value:Int>" (which is used as a 3-digit percentage for skills) with the command:
- Solution-2b: Use a mod like "Fallout NV Cheat Terminal Redux" by gir489 to check and reset your skills.
- Thanks to MysteryMachineX and randonwigwam of the Nexus Fallout forums for the basis of the following:
Issue - FOMM can not install mods anymore
Symptom-1: When attempting to install a ".FOMOD" file, there is almost always a problem preventing it.
- Cause-1: The FOMOD package has to be unpacked. This problem usually is then due to insufficient free disk space in the "temporary folder" used for this purpose. This location varies by version of Windows, but there is always one at "C:\Windows\Temp" (used by the OS), and in later versions: the default is at "C:\Users\<username>\AppData\Local\Temp" (used by processes initiated by the user).
- Solution-1: Disk Cleanup the drive containing the temporary folders. This can also be manually done, but some of those files are currently "in use" by open programs, so to be safe you might want to do a Clean Boot (or even boot into Safe Mode), delete the files, then reboot again.
Symptom-2: Installing FOMODS initially went fine, but now a crashdump is indicating "System.UnauthorizedAccessException: Access to the path [...] is denied".
- Cause-2: Something prevented FOMM from releasing it's "file lock".
- Solution-2: Use a tool like LockHunter to identify the process holding the lock and then unlock, delete, copy, or rename a locked file.
Issue - FOMM crash trying to login to Nexus using Package Manager
- Cause: This feature has not worked in years, but just hasn't been disabled in the most recent updates. It is well documented in the comments section of the download page.
- Solution: Open FOMM, go to "Settings" and disable (uncheck) the box for "Check for new FOMod Version". This will prevent the login screen in FOMM from showing. If that alone is not sufficient, uncheck ALL the settings boxes and test re-enabling them one by one.
Issue - FOMM or FOMOD Invalid Field error
Using NMM to download mod files and FOMM to install them, the latter reports an invalid field in the file "InstallLog.xml" and then exits to the desktop without installing.
- Cause: NMM is inserting some fields into your mod archive's "fomod.xml" file upon installing them.
- Solution-1: Re-download the mod(s) "manually" and install with the last version (0.14.11.12) of FOMM-Forked.
- Solution-2: Use the "Custom" version 0.14.11.13 of FOMM. This version provides support to undo NMM changes, along with bug fixes. (Note: The download site is "adults only 18+" and requires registration to download, but the linked page has no "adult content". FOMM is licensed under GPLv3.)
Issue - Foul Smell debuff to Charisma
When acquired this debuff reduces Charisma by -3.
- Cause: From cleaning the men's bathroom in the Adult quest mod Coito Ergo Sum by Belthan. This is by design, and not a bug or conflict.
- Solution: Use the shower on the third floor to get rid of the "Foul Smell" debuff.
Issue - GLOB variable GameDaysPassed does not advance or suddenly jumps
GameDaysPassed is a GECK "base type" Global Variable used to return the number of days that have passed "in-game". However, it has been found to become inaccurate over time (more quickly if the timescale is adjusted to anything other than the default of 30) and eventually to fail to advance at all. This causes problems with many vanilla and mod scripts; particularly in "Hardcore Mode" where the sudden advance can cause instant, unexpected death.
- Cause: "The nature of [the problem] seems to be that single-precision floating point math is only accurate up to so many digits, 7 to 8, depending. Sleep, wait and fast travel update the var by sufficiently high values to never go unnoticed. But during gamemode GameDaysPassed [(GDP)] is updated by tiny fractions, every frame. That means that every frame, it should be updated by something close to TimeScale / (FPS * 86400). At 30 timescale and 30 FPS, that's 0.0000157407407407 (etc.); 0.000005787037037 (etc.) at FPS 60.
- "If you add it to the existing GDP value, then even at day 1 in the game (day 6, isn't it?), the result of this addition, stored in the GDP var, will only be reliably accurate until 6 digits after the decimal point. The var itself could store more precise data, but it's the calculation that is inaccurate and the result of that is what's being stored. So it may only accurately apply an increase of 0.000005 at 60 FPS or 0.000015 at 30. The following digits of the GDP value will be very much random, and each time the increase is added, it just results in new randomness beyond those digits, possibly rolling over to a higher digit and affecting its accuracy too.
- "Then, when GDP hits 10, or 100, the whole problem becomes much larger because from then on only 5, or 4, digits behind the decimal point are theoretically reliable, and because of earlier inaccuracies that happened over time, it's hard to trust them either.
- "The sad part is that all numeric variables in FNV are actually stored as double-precision, but math involving any var is single-precision."
- Solution-1: The JIP LN NVSE Plugin v51.60+ now include a "game fix" to this problem. Once installed, the issue is automatically corrected. There is a "jip_nvse.ini" configuration file under the "NVSE\Plugins" folder where this behavior is enabled by default.
- Solution-2: The mod Timescale Pacemaker by Asterra was developed specifically to address this issue. The information provided here comes from that mod and comments on it by DoctaSax. Thanks to both for exposing a long standing "mysterious bug". It actually predated the JIP NVSE fix, but the author has left it available for those who decide not to use that plugin for whatever reason.
Issue - How to eliminate the bullet sponge effect
As in: a critical hit to the head should generally kill a human. A few (1-3) bullets to the torso should knock a human out of the fight. Can't shoot through openings in railings, bridges, vehicles, etc.
- Cause-1: See sub-topic Issue: 'Difficulty' setting causes Player and NPC damage to be 'unbalanced'.
- Solution-1: Adjust "Difficulty" to "Normal" for the same damage calculations to apply to both sides.
- Cause-2: The designers appear to have chosen the rather simple approach of using 'difficulty' to determine how much health ('hit points' or HP) each opponent has, but in a non-linear manner. This, combined with the inverse calculations of the "difficulty damage calculations", tends to create "bullet sponges" ... opponents that soak up multiple hits before appearing to be effected.
- Solution-2: There are mods designed to 'correct' the balance between the player and other opponents in the game. These tend to proclaim themselves as "more realistic".
- Some popular ones (but not all available) include:
- Realistic Weapons Damage - New Vegas (RWD) - modifies Body Parts Data to make fights more tactical. (Your enemies won't be able to take 5 shots in the head and stand still, same thing for you...) Fights are deadlier.
- Realistic Headshots (RHS) - A shot to the head for most opponents is almost always an "instant kill".
- Bleed - designed to change the way that ballistics, energy, explosives, poison, fire, electricity, plasma and shrapnel inflict damage and other effects in a challenging and more deadly way. BLEED provides enhancement to all forms of damage, and also provides more realistic knock down mechanics.
- According to one of the authors does essentially the same thing as RWD (and possibly RHS), but without the CTDs of RWD due to weird edits, and the two mods (Bleed and RWD) will conflict with each other. Use either RWD or Bleed, but not both.
- Project Nevada - Extra Options (PNO) - enables you to turn the level multiplier down for endurance and level. Set them to 0 so they don't get the game default of exponential HP scaling. You must have the PN "Rebalance" and "Rebalance Complete" modules for this. This will also affect how the "enemy artificial intelligence" acts. Turn on the helmet DT requirement, too.
- Cause-3: Objects and terrain in the game world have "collision boxes" around them so "actors" don't walk through them. Often these boxes are larger than the player might desire and cause the blocking of projectiles from passing through apparent "openings".
- Solution-3: Collision Meshes fixes some of the worst collision meshes in the game! It allows shooting through the obvious gaps in and between vehicles and bridge struts for example.
Issue - Is my game the latest version
Wondering if the problem might be because it doesn't have the latest patch?
- Cause: I bought the game before more recent versions like "Ultimate", which I know have the latest patch.
- Solution: Steam will automatically patch the game, but if you want to check for yourself:
- Navigate to your "FalloutNV.exe" file in the game root folder using Windows Explorer,
- right-clicking on the file to bring up the context-menu, and
- click on "Properties".
- Look under the "Details" tab for the game "Product Version".
- The last patched version is 1.4.0.525; dated 27 Nov 2015.
Issue - Missing Pipboy after uninstalling the Readius mod
- Cause: The "Readius" is an handheld piece of "equipment" replacement for the "Pipboy" glove ("apparel") automatically provided by Doc Mitchell. The glove is "unequipped" but should remain in your inventory when the "Readius" is installed. Upon uninstalling the "Readius", the glove is not automatically re-equipped.
- Solution: If you can't select it under the "Apparel" tab, use the console command to equip the "Pipboy glove" from your inventory:
player.equipitem 15038
- If the glove is missing from your inventory, first add it with:
player.additem 15038 1
Issue - My Steam Achievements have stopped working
- Cause: Most likely you used a console command (like "tcl") during a play session. This will automatically stop "Steam Achievements" as an "anti-cheat" measure.
- Solution: Save and exit the game to the desktop. Upon reloading, Achievements will resume automatically. You won't lose any progress.
- OR
- Install the mod Using the console doesn't disable achievements
- Alternatively installing the JIP LN NVSE Plugin also has the same feature to avoid disabling achievements, and does not use up an "active plugin" slot.
Issue - Mysterious building
There is a building added by the mod ELECTRO-CITY - Relighting the Wasteland by MyGoodEye that can be seen in the distance near the El Dorado Gas & Service station, but disappears when you get close to it.
- Cause: The building was scrapped in one of the updates and now exists only as a "mirage".
- Solution: Ignore it. OR you can use console commands to attempt to enter it as the interior cell technically still exists in the mod. Just remember there is usually a reason behind the author scrapping all their work and doing so is "unsupported".
Issue - No karma or XP for lowest tier level enemies
People have notice when combining the plugins for:
- JSawyer Ultimate Edition
- Project Nevada - Extra Options "Rebalance"
- JSawyer Ultimate Edition Patches "JSawyer Ultimate Edition - Project Nevada Patch" compatibility patch
you don't get any karma or XP for killing lowest tier enemies like "Powder Gangers". Using either of the main plugins alone has no apparent problem.
- Cause: According to the author of the JSawyer Ultimate Edition mod"
"Some low-level NPCs don't award XP when killed. This is also vanilla; however, you may notice it for more NPCs due to my corrections to enemy level tiers, meaning that more weak NPCs are now considered low-level. Powder Gangers, for instance, are easily killable with a BB Gun, hence they should belong in the lowest tier, and so forth."
- So, this is working by design.
- Workaround: It seems there's a script named NVJSawyerFnMCMConfig and inside the script source there's a line SetNumericGameSetting "iXPRewardKillNPCVeryEasy" 0. If this is set to some non-zero value such as "1", it now awards that amount of XP for the kills. This requires the use of the GECK. The following is a basic outline of the procedure. It is not a tutorial on using the GECK.
- If you haven't already, you will need to download and install the GECK. Please see Solutions to "Garden of Eden Construction Kit" (G.E.C.K.) problems section in the wiki "Fallout NV Mod Conflict Troubleshooting" guide. Pay particular attention to the fact you will have to run the GECK as an "Administrator", which means everything will be under that "Users" account.
- Plan for the possibility of error. Backup the JSawyer file you will be editing.
- Suggest you open FNVedit and select the JSawyer plugin. Then FNVEdit will automatically load all the "master files" needed for that plugin. Once it has finished loading, scroll down to the JSawyer plugin and "<Left-Click>" on the "+" to the left of that plugin. This will expand the list of records categories so you can then select the "File Header" record. Make note of the "master files" listed there. You are going to need to tell the GECK to load those "master files" next. Once you have your list, just close FNVEdit. (You shouldn't have changed anything and don't need to save anything.)
- Open the GECK, and select for loading the JSawyer plugin and all of it's "master files". Set the JSawyer plugin as the "Active File". (This is very important.)
- Once the loading is completed, look on the toolbar for the "Scripts" button. (See the Toolbar - GECK page for the icons and their descriptions.)
- When you "<Left-Click>" on the "Scripts" icon, it will open to an empty page. You need to "<Left-Click>" on the "Open Folder" icon (or select "File | Open") and scroll down through the list of scripts until you find and select "NVJSawyerFnMCMConfig".
- Once the script has loaded, find the line [SetNumericGameSetting "iXPRewardKillNPCVeryEasy" 0]. Change the reward amount (0) to what you want, and save.
- If the script refuses to save, you messed up the syntax of the command. (DO NOT EVER use the "Compile All" button. This will not do anything you want.) Note the use of "[square brackets]" (which should be ignored/skipped) so you can more clearly see where quotes are used. The quotes are required.
- Once the script has been saved, exit the GECK and it will save the "active file" (i.e. "NVJSawyerFnMCMConfig").
- The modified JSawyer plugin will now be used when you load the game. You might want to back it up somewhere also, but keep straight which is the original and which is your customized version.
Issue - Obnoxious Companion Asshole
- Thanks to user automanic for tracking down and reporting the following:
Issue - Plugin Limit Warning despite Limit Fix mod
Symptoms: There is a message displayed in the upper left-hand corner of the HUD about exceeding 140 plugins even though the mod FNV Limit Fix is installed.
- Cause: The warning message is included in the mod JIP Companions Command and Control (JIP CC&C) and is based upon the smaller "plugin cap" of the original game. It predates the release of the mod "FNV Limit Fix" and has not been updated since.
- Solution-1: This message is now removed by using underlying required plugin JIP LN NVSE "Version 55.65" or later.
Issue - Project Nevada Sprint suddenly not working
- Cause-1: Sometimes the sprint scripts crash.
- Solution-1: Turn the feature off (in "Mod Configuration Manager", aka MCM), save and exit the game, then reload and restart it. This clears all instances out of memory, and then restarts the managing quest, usually fixing the problem. (Don't use the version of MCM that comes with PN. Install the latest "stand alone" version, after PN, instead. See the wiki HUD-UI-Menu issues article.)
- Cause-2: Sometimes the script or another remaps or even completely unbinds the walk/run key.
- Solution-2a: Check in your control settings to make sure that walk/run is bound to whatever key you had it set to. It's a rare bug, but does happen. If you're wondering why in the world it unbinds it, it's due to the way the sprint feature works, otherwise you'd actually wind up just walking.
- Solution-2b: Sometimes another, later installing mod overrides PN's keybinding. This is usually an "install order" rather than a "load order" problem. Please see the wiki HUD-UI-Menu issues article which discusses this in depth.
Issue - QUEST - is hung and will not advance
This is a general situation and solutions need to be tailored to the specific quest in question.
- Cause-1: varies. The first suspects are either "too many plugins" or a "mod conflict".
- Solution-1a: Move any "inactive" plugins out of the game "Data" folder. They count against the "plugin cap" of roughly 128-140 because they get loaded by the game engine if found, and can cause "Missing Master" problems. Please see the wiki Missing Masters article if you get that error message.
- Solution-1b: Please see the Mod Conflict Isolation entry of this document.
- Especially look into potential conflicts between various "bug fix" mods like YUP and MMUE. (Please see the Towards Game Stability article.) Older "fix" mods that have not been continuously updated are more likely to have conflicts with later versions of mods they are designed to "patch", which are in turn more likely to already include those corrections. Check and compare the "last updated" entries on each mod's download page.
- The mod Perk per Level - Level Cap at 100 (file: "Level100PerkPerLevel.esp") was in at least one instance found to cause a conflict with the ending of the Gomorrah Casino quest "How little we know".
- Cause-2: Sometimes your choices can cause a quest to get into an unanticipated situation and it can't progress as intended. Resolving this usually requires using "console commands" (toggle <~> key in-game).
- Solution-2a: What follows are a series of steps you will need to undertake to identify where you are in the quest and how to reset it so you can take a different set of actions to enable proceeding.
- Look up your main game quest name (as presented in the Pipboy list of active quests under the "Data" tab) on the Nukapedia wiki site.
- Make note of the "Base-ID" of the quest. You will be using this information in later console commands. (Leave the web page(s) up for later reference, or copy the "Quest Stages" information.)
- Back in the game, toggle on the "console" command line by tapping the "<~>" key.
- This will display an "underscore" ("_") character in the lower left corner of the screen.
- Enter the command GetStage <quest Base-ID> (without quotes or the <angle braces> on the console command line, followed by "<Enter>". From various examples it appears you can also use the quest "Editor-ID" name.
- This will return the current active "quest stage" number. This is the highest stage completed so far, most likely after which you have gotten hung up. Note that some quest stages can be completed "out of sequence", so it is possible an earlier stage has not been completed.
- Look up that quest stage in the "Quest Stages" information identified earlier, either on the web page or from your notes. It is possible for your Pipboy (Data tab) to list more than one stage in your "Active Quest" list, while the console command returned only one stage. Depending upon the quest, this might be the source of the problem: incompatible quest stages active and the game can't decide how to proceed.
- Solution-2b: You can use the SetStage <questID> <StageIndex> command to tell the quest it has completed through that given stage (including the end). Pay attention to the "Notes" of that command description. See also the JIP NVSE command SetStageAlt as a way to set a lower stage as the currently "highest completed" value returned by "GetStage".
- Solution-2c: Quest stages get set as "results" of actions or dialog: conversations with NPCs or by picking up specific objects or activating specific markers (locations). It's dialog choices that will usually get you into an impasse. You need to figure out the most likely source of triggering a quest stage, and "reset" things "back to zero" on that Actor using the reset dialog flags (rdf) command. (Be careful with this command as it can mess with other quests if you didn't first use the "GetStage" command and don't select the correct Actor whose dialog you want to reset.)
- Select (<Left-Click> on) the "quest trigger" in console mode, and enter the command: "rdf <quest Base-ID>".
- Here is an example to illustrate this process:
- Thanks to olistr644 of the New Vegas Mod Troubleshooting forum for researching the basis of the following.
- Solution-2d: The following procedure utilizing FNVedit can produce the IDs of any Quests, including Mods, that are recorded in the game Pipboy "Quests log" under the "Data" tab.
- In the game, note the quest you want to know about.
- That is "Track it" under the "Data" tab of your Pip-Boy on the "Quests" page. Select the quest in question.
- Then open the console (<~> key) and type "sqt" (show all of the current quest targets).
- You should then get "Active quest: <The Editor-ID of the quest name>" displayed.
- Open FNVedit.
- Load your entire "load order". (This ensures you get the correct "mod index" in the Quest-ID.)
- Choose the "Quest" folder in the left-hand pane list of categories.
- Up top of that left-hand pane you will see an "Editor ID" box. Type your Quest Editor-ID (obtained from the console) into there. (Assume capitalization matters.)
- Alternatively, if you don't have a Quest Editor-ID to search for, you have to expand (click on the "+" sign to the left of) each of the plugins listed in the left-hand pane and then scroll down to and expand the "Quests" category of each to look through the "Editor-ID" of each quest to find a likely candidate to select (<left-click>).
- Hit <Enter> and the editor will load for a short while until your quest should then be highlighted (if found), in the left-hand pane. (If not found, you entered an invalid Quest-ID in the search field.)
- Make sure that Quest-ID is "selected" (highlighted) by <left-clicking> on it.
- If it is "selected", a whole lot of different variables will appear under the "Information" tab in the right-hand pane.
- If you scroll down the variables in the right-hand pane under the "Record Header" you should find a "FormID" field with "<EditorID>[QUST:<XXnnnnnn>]" for a value. That "XXnnnnnn" value is your actual Quest Ref-ID (where "XX" is the mod index and "nnnnnn" is a six-character hexadecimal value). Make note of it as you will need it later in the "setstage" command.
- If you scroll down further in the right-hand pane you should (for a Quest) find one or more "INDX - Stage Index" entries. In the column to right of each such entry is the "stage number" (e.g. "0", represented in "<ii>" form). Those are the different phases in the quest, i.e. "stages".
- Scroll down until you find the one relevant to you by examining the "SCTX" and "SCRO" entries under the "Embedded Script" category of each. These are your clues as to the purpose of each stage. (If the script names are not descriptive enough, all you can do is open the scripts in the GECK "script editor" and examine the contents in more detail.)
- Note the quest "stage index" ("ii") to the right of the "INDX - Stage Index" of the particular line of interest for use in the "setstage" command.
- Then you type the just acquired information into the console: e.g. "setstage <XXnnnnnn> <ii>", where <XXnnnnnn> is the Quest Ref-ID, and <ii> is the "StageIndex" number.
- If all you need is to have completed that quest stage, you should now be able able to proceed.
- Solution-2e: Sometimes using the "Kill" and "Resurrect" commands on an Actor are necessary to cause them to become "unstuck".
- First you have to identify the "Reference-ID" of the Actor in question. See the Issue - Find the source mod-index of an object in-game entry under the "Solutions to Mesh -Red Kite- icon or Texture -solid or off color- problems" section.
- Once you have the Actor's "Reference-ID" you can use it in the prid <Reference-ID> and (if desired, subsequent) command to designate whom the following console commands are applied to (i.e. becomes the "calling ref"). Note that according the GECKWiki "Help" entry beside the "Syntax" field, function arguments in italics are optional.
- For example:
- Solution-2f: Add the Actor to the Player faction (0001b2a4), diable, enable, and finally remove from the faction with:
- These sets of example solutions is designed to achieve the particular desired outcome. With any quest the choice of dialog or actions depends upon that desired solution so adapt as needed.
- People often are worried about the effect of using "console commands" upon their progress towards particular game "achievements". The use of the console suspends activities counting towards "achievements" only for the game session once the console command was given. Simply exit the game to the desktop once your situation is resolved, and when you next load the game you will resume working towards your "achievement" as if nothing had happened. OR you can install the NVSE Plugin Using the console doesn't disable achievements.
Issue - Recommended Project Nevada master file load order
While only a few of the many "Project Nevada" (PN) plugins require more than the "PN-Core.esm" as a master, the order in which the master files are listed in a given plugin can cause some "master file" conflicts ("orange boxes" in Wrye Flash). The usual resolution is to get such plugin "masters" sorted to conform to the overall "game load order", using xEdit. However, the difference in how xEdit loads files from the game's sorted "load order" (i.e. by LOOT) can make this more difficult than expected, because PN has two ESP "master" files that are "false ESM flagged" in their "File Header" record.
- Cause: According to Zilav 27 Apr 2017 06:19 in "TES5Edit Support Forum":
- The file's "Modified Date" is used for sorting. For some unknown reason, the "PN-Extra Options.esm" file always gets loaded in xEdit immediately after the "PN-Core.esm", regardless of the date/time stamps even if "PN-Equipment.esm" is placed before "PN-EO".
- Solution: Even though the PN download page doesn't recommend a specific load order, placing the PN "master" files in the following sequence seems to have eliminated conflicts when using xEdit to "sort masters" of PN-related ESP plugin masters to conform to it. They do not need to be "contiguous" or immediately next to one another. You can then "sort" each plugin's "master files" in xEdit so they will ALL thereafter match up with the game load order as well.
- PN-Core.esm
- PN-Extra Options.esm
- PN-Equipment.esm
- PN-Cyberware.esp (ESM flag)
- PN-Rebalance.esp (ESM flag)
- Other PN ESP files simply must load after any "master files" in their xEdit "File Header".
Issue - Record conflicts in xEdit aka FNVEdit
The documentation for xEdit/FNVedit is the Tome of xEdit. It is an indispensable tool for tracking down record conflicts between plugins, so it is worth the time to learn how to use it. Because you can change (and therefor "break" things), don't try to use it without a basic understanding of how it works. This is the merest outline of how it can be used for a specific purpose.
You are looking for the "record-ID", "Editor-ID" or "Base-ID" in "hexadecimal" number format for each record (row) in the plugin in question. The "record number" consists of a "mod index" and it's sequential position within the plugin. (Please see the short article Help:Form IDs on how to interpret the "mod index".) The "Editor-ID" is the "human readable" name for that record, while the "Base-ID" is that of the "template Form-ID" each specific "Reference-ID" copy placed in the "game world" is based upon. The "vanilla" ones provided by the base game and DLCs can be found on the The Vault and Nukapedia wikis in the page describing each. Please see the GECK Form-ID, Base-ID, Ref-ID, and Editor-ID section of the wiki Getting started creating mods using GECK article for a more complete explanation of these terms. The differences between them are important to understand.
If a mod has added it's own new record (for example: a new "Perk" or "Trait"), then you have to find the information in that mod's documentation, description, or comments page. Failing that, then you have to use FNVEdit (base name is xEdit. FNVEdit is xEdit renamed to work specifically with FNV format records) to load the plugin (in the "Module Selection" popup window):
- First <RClick> in a blank area of the "Module Selection" window.
- When the context menu window pops up, choose the "Select none" option. (This will "uncheck" all the plugins.)
- Now <LClick> on the checkbox of only the ESP plugin(s) you want to examine.
- <LClick> the "OK" button.
Any required "master" plugins will automatically be selected for you. Then wait for the plugins to all be loaded (see the "messages" tab in the right-hand pane for the "done loading" message.
Now look down the list of plugins in the left hand pane for your chosen plugin to examine (it should be the last):
- Expand it (<LClick> on the "+" symbol to the left of the plugin name).
- Scroll down the list of "record types" to select (and expand) the (in this example: "Perks") group, and then find a specific record (row).
- (The "traits" are "spells" affecting SPECIAL stats and are listed under "Actor Effect". The game ones are listed here.)
- The first column is the "record-ID". If you select the record (row) of a specific "Perk" then in the right-hand pane you will see all the plugins (as columns) which affect that record.
Unfortunately it only provides the first couple of words of the description of the "Perk" in question, which often is not enough to tell you what it affects. But it will often give you enough information to know if you need to look it up further in the documentation for the parent plugin (which will be the first column in the right-hand pane), or if you need to open the plugin in the GECK and examine the record there where you can see more detail.
Typically you will see the first mention of a record in the "FalloutNV" ESM or EXE plugin. Other plugins on that row will be modifying values in that record. But a brand new record introduced by a plugin will not have any other plugin in a column to the left of the one introducing that "new" record. Any to the right of that plugin will be modifying it's original record. Any plugins to the right of any given column are "potential conflicts".
See the Tome of xEdit for how you can choose which values from which plugin will actually be used.
Issue - Regional - non-English version has different FormIDs
This is informational to explain the underlying cause. There is no "fix" to implement. (Thanks to JustChill of the "Fallout New Vegas Mod Troubleshooting" forum for identifying and investigating the issue, as well as sandbox6 of the "Yukichigai Unofficial Patch" (YUP) mod and RoyBatterian of the "Tales of Two Wastelands" team for confirmation and details.)
Unfortunately, each regional language version of the Fallout New Vegas game other than English has completely different FormIDs for all records from 0017b75a and above, which also affects all references to those records in all records below that as well. (Please see the 'GECK Form-ID, Base-ID, Ref-ID, and Editor-ID' section of the wiki "Getting started creating mods using GECK" article if you need help understanding the term "FormID".)
RoyBatterian wrote:
While this has obvious implications for translators, it also means mods developed for a different language version of the game won't work "out of the box" in another language. The FormIDs won't match. Conversion would require determining what the FormID in one language version is in the other language version.
Luckily, loading up mods in xEdit/FNVedit with the language-specific "FalloutNV.esm" and the mods which are desired to be translated, will often result in errors (displayed in the "Messages" box of FNVEdit) similar to the following with which you can recognize the issue:
What's important is not the "record type" part (e.g. "GMST:"), but rather that the record number in both files is supposed to be the same. But in a "Regional" language version of the game, the record number from "FalloutNV.esm" would be different (i.e. "0017BCB1" in the German version). Changing the FormID in the mod (e.g. "Project Nevada - Equipment-ENG.esm") to the one in the regional language-specific master file (e.g. the German "FalloutNV.esm") resolves the problem.
The following images show how such FormID conflicts can be identified in FNVEdit/xEdit.
Fig 1
Fig 2
Fig 3


- (See Figs. 1-3. Click the link/thumbnail to see the enlarged image. Use your browser "<back page>" control to return to this page.)
You can't just change the name of a "language specific" plugin to keep compatibility with other later-loading "English language" mods. It might sound like a good idea at first, but it would run the very real risk of less knowledgeable people attempting to run incompatible mods without even knowing it until something goes wrong, and then having no way to work out what is causing their issue and not knowing which mod is at fault.
Issue - Remove active effects
Sometimes an active effect that is supposed to have a duration fails to expire. "Ingestibles" (food item, drug, or chemical), "Actor Effects" (spells), and "Object Effects" (enchantments) produce "Base Effects" which are treated as fundamental "magic effects" in the GECK. Mods can create their own "Base Effects" as well as delete existing effects. Unless an "Actor Effect" has a "condition" it is permanent.
- Cause: Varies. Check the "Pipboy | S.P.E.C.I.A.L." tab display "Eff(ects)" section for the list of "active effects". Also check for "Perks" and "Traits". Look for "+" or "-" signs in the Pipboy display, indicating "effects" in play. Try "player.getavinfo <ActorValueName>" on each stat you believe is "affected". (See the GECKWiki Stats List for a list of "Actor Values". IF you try to modify an ActorValue directly, ONLY use the "Get/Mod/RestoreActorValue" functions. "Set/Force" alter the baseActorValue" and will cause problems.)
- Solution-1a: Use the console comand "player.DispellAllSpells". Note this will cancel out any beneficial effects as well.
- Solution-1b: Try a "cheat" mod such as "Fallout NV Cheat Terminal Redux".
- Solution-1c: For other effects such as "specific Spell-IDs", "Magic Shader Effects", "Magic Effect Visuals" see the "TUTORIAL: REMOVING UNWANTED MAGIC EFFECTS FROM THE PLAYER" thread. While specific to Skyrim (most of the thread is identifying specific effects), it's basic commands apply (with minor modifications) to other Bethesda games. You may find once you identify the effect, you need to first "player.addspell <Spell-ID>" and immediately follow it with "player.removespell <Spell-ID>" to get rid of it.
Issue - Restore vanilla animations
You tried some animation replacement file(s) and want to go back to the vanilla version.
- Cause: Animations, like most "replacers", either place loose ".kf" files in the appropriate folders, or overwrite any that are already there. The vanilla version of the animation files are in the "Fallout - Meshes.bsa" file under the path "("Data\Meshes\Characters\_male\Locomotion", so any "loose files" found under that path are "replacements".
- Solution: First see if uninstalling the mod cleans up the issue.
- Otherwise, examine the archive package of the "replacer" mod you are removing to determine the folder structure where the mod places it's files. These should be under "Data\Meshes\Characters\_male" and "Data\Meshes\Characters\_1stperson", but may or may not be placed in deeper sub-folders.
- If this was the only set of "animation replacement" files installed, then simply delete the "Locomotion" sub-folder if it exists. (The game will use the vanilla animations from the BSA file.)
- Some mods place their files directly in the "Data\Meshes\Characters\_male" and "Data\Meshes\Characters\_1stperson" instead of a "Locomotion" sub-folder under them. Those folders are used by many mods, so rather than deleting the folder, you should delete "*.kf" files only.
- If you wish to try to preserve other replacements, then examine the archive package of the "replacer" mod you are removing, and delete any matching file names from the corresponding "Data\Meshes\Characters\_male" and "Data\Meshes\Characters\_1stperson" paths and sub-folders. However, if any other replacement files were overwritten, then you will need to re-install the other replacers as well.
Issue - SOUND - Background Noise bug
Occasionally hearing a rapid "thumping" or "slow buzzing" sound, like something is vibrating or falling off shelves.
- Cause-1: Companions are clipping into the ground or NPCs are clipping into the chair they are sitting in, or similar. This often happens when explosives were used in combat. NPCs/Companions stay in semi-ragdoll mode (even if they weren't knocked down) that freak out when you're not looking at them. If you have a "custom race" with a tail or some additional appendage, that might also be causing the sound. Sometimes "actors" like "creatures with wings" become trapped in the scenery and similarly clip.
- Solution-1a: A mod like Human Collision Sounds Removed might be the solution or at least confirm if this is the cause. There is a version for Robots as well.
- Solution-1b: The command "resurrect" after selecting the Actor in the console may correct the situation as well.
- Cause-2: If you are finding items that appear to have fallen from shelves, tables, or the walls, then you have a "havok (aka "ragdoll") physics" problem where objects placed on shelves or walls but not properly "grounded" with collision get triggered and fall when you enter into range.
- Solution-2: This has to be corrected by editing the placement of the objects or adding collision, and should be reported to the mod author.
- Cause-3: With "uncapped FPS", the higher your "frames per second" (FPS) gets the more likely the "havok physics" will go crazy and clip through the geometry of other artwork in the cell. This is not to say you can't play with higher FPS, just that the game engine was simply not designed for more than 60 FPS. If you have problems, try scaling the cap back.
- Solution-3: Set the "FPS" setting to a maximum of "=60".
- Make backups of the INI files before changing them.
- The Fallout INI files have an "iFPSClamp=" setting under the "[General]" section. Do not set this to other than "=0" if you have NVSR "bManageFPS = 1".
- New Vegas Stutter Remover (NVSR) "Data\nvse\plugins\NV_Stutter_Remover.ini" has to have "bManageFPS = 1" under the "Master = {" section before the setting "MaximumFPS = 60" under the "FPS_Management = {" section will take effect. Check that the "MinimumFPS" setting is not higher than the maximum; something like "= 20" is noticeable while still playable. If NVSR is managing FPS, do not leave the three Fallout INI files with a setting other than "iFPSClamp=0".
Issue - SOUND - Music Licenses and Sources
Symptoms: Questions regarding the ability to include "music" or "songs" in any form in a mod.
- Cause: Published music (instrumentals, digital, and vocals) is usually by default "copyright protected", which means you need to have purchased a license to include it in your mods or online videos published for use by others. This includes music (in whatever form or manner of production) included in other media (such as games, videos, and films) as well as downloaded from various websites.
- The following terms are taken from the Buffer.com Background Music Video page:
- Royalty Free
- Royalty free music gives users the right to use copyrighted music without having to pay “royalties” for recurring use of the content. In other words, royalty free music allows the buyer to pay the music license only once and use the music for as long as they want.
- Royalty free often gets mistaken for “free” music, which is not the case in many situations. The author or artist who has composed the music decides what kind of license it will have, and therefore, the costs associated.
- Public Domain
- Public domain refers to all works that are not protected by copyright and can be used without permission or without having to pay the original author/artist. Public domain essentially gives free use of the music in whatever manner a user sees fit.
- Essentially, that means that content within the public domain can be copied, distributed, interpreted, and displayed in public for free as if it belongs to everyone.
- Creative Commons
- Creative Commons is one of several public copyright licenses that enable the free distribution of an otherwise copyrighted work. At the core of the Creative Commons license is the idea that every CC license ensures copyright holders retain control and get the credit for their work they deserve. It’s a standardized way to grant copyright permissions to their creative work.
- Solution: Obtain music which is in the "public domain" either by explicit placement there in it's licensing terms, or expired copyright (dates vary by jurisdiction and number of authors); or which is explicitly published as "licensed royalty free" but probably still requires an initial purchase. This can get complicated as "music" consists of separate components such as "instruments", "performance" by particular artists, and "lyrics". "Licenses" usually must be purchased (otherwise how would the author/artists get any form of compensation for their work). See Composerish: Perils of buying instruments from Instagram, Meditation Music, Royalty Free vs Commercial Music for a discussion.
Download sources (representative, not all inclusive):
- Public domain & Creative Commons. Free to download.
- Free Music Archive
- YouTube Audio Library - Music
- SoundCloud
- ccMixter Free (with attribution).
- FreePlay Music Free (personal use only on YouTube) or $0.99 and up (business use)
- Royalty or Copyright Free but must purchase License or Download
- IncompeTech Free (with attribution) or starting at $20 per piece (no attribution).
- Bensound Free (with attribution) or 1-year unlimited downloads for $129.
- Amazon Music Free only for your personal, non-commercial purposes or premium tracks start at $0.99.
- Premium Beat Copyright Free Music Licensing $49 each or $13/month
- Epidemic Sound Royalty Free Music Licensing starting at $0.99 and Subscriptions starting at $12/month.
- AudioJungle Tracks starting at $1.
- Jamendo Standard licensing starting at $49.
- AudioBlocks Unlimited downloads start at $99/year.
- BeatPick Price varies depending on track.
- Storyblocks Monthly or Annual subscription licensing starting at $10/month.
Issue - Stuck effects or stats
Sometimes you find a chem or other temporary effect has caused a stat to become "stuck" in a "buff" (bonus) or "debuff" (penalty) state.
- Cause: Usually (but not always) this is the result of a script change that has not been reverted for some unknown reason. See also the related possible cause Issue: Can Timescale adjustments break certain quests, etc.?.
- Solution: The mod Fallout NV Cheat Terminal Redux allows adjustment of many (but not all) stats. Required: ALL FNV DLC.
Issue - Uninstall Fallout New California FNC aka FONC
Cannot seem to find an option to uninstall.
- Cause: "Fallout New California", though a mod for FNV, uses it's own installer program. Consequently uninstalling it, regardless of which mod manager you use, requires you to use it's provided "uninstaller" to restore things to normal.
- Solution: In the game root folder (where "FalloutNV.exe" is found), you should also find the file "FONCuninstall.exe". Run that like any other executable within your mod manager.
- If that doesn't work correctly, best place to ask would be their discord Help channel.
Issue - Weapon quick key binding fails unexpectedly
While previously working, suddenly the quick key binding for weapons no longer functions, and cannot be rebound.
- Cause: Unknown. Circumstances are uncertain, but at least one report was after exiting the "Dead Money" DLC, while another had not played any DLC as yet.
- Workarounds: The following have worked for some, but not others.
- Load a recent save game from prior to the point of failure to bind. Now rebind the keys to the weapons, and see if playing forward doesn't retain the key bindings. In a DLC that removes your equipment (i.e. "Dead Money"), this should be after you have had your original equipment returned, but before you have actually exited the DLC setting to the Mojave.
- Travel to some point where the weapons are removed from your possession (like a casino); and immediately upon exiting the location and the weapons are restored to your character see if binding the keys works again.
- Workarounds: The following have worked for some, but not others.
Solutions to Post-Processor ENB or SweetFX et al problems
Issue - ENB and NVR-NVGE conflict
New Vegas Reloaded - NVGE is a "post-processor" designed specifically to work with the older Bethesda "Gamebryo" engine for Oblivion, Skyrim, and now (22 Aug 2018) "Fallout New Vegas".
- Cause: NVR-NVGE is an alternative to other "post processors" such as ENB (including ENBoost) and SweetFX. They are not designed to work together, so you have to choose one.
- Solution: Please see the Technical Support forum on the TES Reloaded site for any issues with it.
Issue - ENB Blur
Symptom: Screen becomes immensely blurry when using ENB, like it is perpetually "out of focus".
- Cause-1: ENB settings.
- Solution-1a: Disable "remove blur" (depth of field) setting under the "[FIX]" section in "ENBlocal.INI".
- Solution-1b: Disable "EnableDepthOfField" by setting to "false" under the "[EFFECT]" section in "ENBSeries.INI".
- Solution-1c: Tweak settings in the "enbeffectprepass.fx" file. (These are usually set in a "pre-set" mod.) For a discussion of "depth of field" effects (with example pictures) from these settings, see this Nexus Skyrim forum thread.
- Solution-2: Make sure you have disabled any overlays such as "Steam" or "Overwolf".
- Solution-3: Some mods might cause or aggravate the problem. Use the in-game console (default key "<~>") and enter the command "sisme 0".
- Solution-4: Try the mod Blur Killer by sortitus. It removes "all blur effects in Imagespace Modifiers (but not depth of field effects, because it's simple to disable that without a mod)".
Symptom: Textures are pixelated and blocky at a NEAR distance but clear up when getting closer.
- Cause-2: This is the result of having Anistropic filtering set really low for ENB.
- Solution-2: Apparently (according to a single report) if you change the Anistropic filtering in the game "FalloutNVLauncher | Options | Graphics Settings" to zero, but are adjusting it in the graphics/video card driver control panel to a value that clears up the problem, it does not affect the ENB negatively at all, and thus you can play the game without this problem. NOTE: this runs counter to normal ENB configuration instructions which call for ALL Anistropic filtering in both the game settings and video drivers to be zeroed out.
Issue - ENB Interior windows are off-color
Symptoms: Interior windows are some off-color such as "blue".
- Cause-1: "Post processors" such as ENB or SweetFX/Reshade have interior darkness setting. The brighter the interior light level the brighter the "blue" RGB component.
- Solution-1: Adjust the interior darkness level setting of the "post processor" INI file.
- Cause-2: The imagespace adapters (IMODs) used for night weathers have a heavy dark blue tint added to them. Some interior lighting mods are affected by "weather" mods as well.
- Solution-2: Adjust the exterior darkness level setting of the "post processor" INI file.
Issue - ENB is not working
or only partially.
- Cause-1: Almost always this is due to faulty installation.
- Solution-1a: ENB expects the vanilla 2.0 shader files. If you are using any custom ones (to include switching to the vanilla 3.0 shader, aka "switching shaderpackage013"), or have included any from other post-processors, you can expect problems. This may manifest as an inability to correctly detect an interior cell or adjusting light levels. First, try disabling them and using just the vanilla shaders to see if that resolves the issue. Questions regarding how to use other specific shaders with ENB are best addressed to the ENB Series Support Forum.
- Solution-1b: General instructions for installing the ENB series (read everything first). In the event of conflicting instructions, go with those provided by ENB for the specific game.
- Download the latest ENB series Graphic Modifications version file for the game in question (i.e. FNV will be used as an example), along with any "Patch" file that may exist. This is explained in the description on that "Downloads" page, so please take the time to read it to avoid confusion. The files are in separate sub-sections lower down on the same page.
-
Note the "Installing" section contains important instructions regarding the placement of certain files, including specific versions of DirectX files. See "Cause-1" of Issue: Vanilla game Hangs on startup and the ENB download page for details. Copy these files if necessary. Failure to heed this is the second most common cause of failure.
- Scroll down to and select the game (i.e. "Fallout 3/New Vegas") under the "Graphic Modifications" section. This will take you to the game version page, where you should select the latest version. (At the time of this writing it's v0.322 for FalloutNV. There was an update without changing the version number, so re-download it to ensure you have the latest version.) If you intend to use a specific ENB preset, check that it does not require an older version first. If it is merely suggested, then try the latest version anyway.
- Clicking on a version number will take you to another page that provides a one-line summary of the changes for each version EXCEPT for the version you selected. (This is how you know you are on the correct page.) Scroll down to the bottom of the page and "click" on the "<down arrow> download" button's icon to start the download process of the version you selected on the previous page.
- If there was a patch file for your game listed, return to the "ENB Series Download" page, scroll down to the "Patches" section, and click on the Patch file (i.e. "Fallout 3/ New Vegas").
- This will take you to another page with the patch file. Select the "description" of the patch underneath the word "Download" on this page to start the download process. (The patches have their own numbering system independent of the "Graphic Modifications" file series.)
- The other "Tools" and "Converters" files are not needed for the Fallout games; though the "VRamSizeTest" tool can be useful when looking into the VRam requirements for various games which do not have ENB installed. (ENB will report the same VRam size information when properly installed.)
-
- Once you have downloaded the ENB Series files, follow the instructions you noted earlier from the "Installing" section on the "Downloads" page. Inside the "Graphic Modifications" version archive file, you will find two sub-folders: "wrapper" and "injector". Choose between either the "wrapper" or the "injector" method of installation. It is suggested you try the "wrapper" method first. If that fails, uninstall ENB and install the "injector" method instead. Failure to uninstall the "wrapper" method files first will result in confusion about the correct method files to place and edit. If you have installed ENB correctly you should see on the loading screens (in the upper left corner) something similar to:
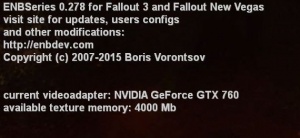
- I recommend you unpack the ENB version file archive to a folder outside of the game. Then copy the CONTENTS of the "wrapper" folder to the game root folder (i.e. "<Steam install path>\common\Fallout New Vegas"). (Do not drag the "wrapper" folder itself, only the files and folders inside of it.) This way you will be able to refer back to tell exactly which were copied over if you have to uninstall them.
If you do uninstall, be sure to remove the provided D3D9.DLL file. However, do note that it is required to use the ENBoost feature, which is separate from the post-processor effects.
- (Those needing to use the "injector" version may be interested in the mod ENBAuto for automatically opening and closing the injector with any game.)
-
-
Users of the older version of FNV4GB.exe called 4GB Fallout New Vegas Updated and similar should note that the "D3D9.DLL" file from ENB "wrapper" method needs to be placed in the "Fallout New Vegas\exes" folder, along with the "FalloutNV.EXE" file they moved there when installing that executable. This does not apply to the "injector" method, which requires the "D3D9.DLL" file to remain in the game root folder. The suggested ""<steampath>\Fallout New Vegas\FNV4GB.exe" -laaexe .\FalloutNV4GB.exe" shortcut forces the "FNV4GB.exe" file to be called "FalloutNV4GB.exe" instead when it loads into memory, and does *not* create a directory called "exes". This is suggested so that any files added to the game root folder (like ENB or Sweetfx) will work properly without any further work on the users part. The executable filename following the "-laaexe" switch can actually be anything to which the "LAA" flag has been applied. The parameter is optional and can be skipped if you do not need the filename changed upon loading.
Note that none of this is required with the newer "FNV 4GB Patcher" version.
- I recommend you unpack the ENB version file archive to a folder outside of the game. Then copy the CONTENTS of the "wrapper" folder to the game root folder (i.e. "<Steam install path>\common\Fallout New Vegas"). (Do not drag the "wrapper" folder itself, only the files and folders inside of it.) This way you will be able to refer back to tell exactly which were copied over if you have to uninstall them.
- Choose and download an ENB "Preset" configuration from the Nexus or other download site. For examples: the author of ENHANCED SHADERS - ENB by tapioks is focused on achieving a Balanced and Playable preset, while the author of Bone Fide ENB (Great Performance ENB) by Charmareian wanted a preset being "true to vanilla, had realism, and wasn't so crazy that the game becomes a screenshot simulator rather than an RPG!" Others are often focused on creating particular "atmospheres", but read their descriptions carefully. Expect that you may need to try several before finding the one best suited to your preferences and system performance. Again, unpacking the preset outside of the game and copying it's contents over will provide a means of determining what needs to be uninstalled if necessary, OR see the sub-topic Issue: Managing Post-Processor (ENB, SweetFX, FXAA) configurations on tools to manage multiple presets.
- Follow the installation instructions of that preset, which usually consist of placing it's contents in the game root directory (i.e. "<Steam install path>\common\Fallout New Vegas"), or wherever the game's original executable resides.
Such presets (along with ENB itself) generally cannot be installed successfully using a mod manager, because mod managers assume they belong in the game's "Data" folder. This is THE most common error. YOU HAVE BEEN WARNED!
Note that some presets make use of files that appear in the game "load order". Such files go after any "bashed/merged patch file" unless the author specifies otherwise.
- Now you need to make certain adjustments to the game "Graphics Settings". (Note: this part is specific to FNV. Other games may require other means to access these setting or the specific settings to be altered.) Use the original game launcher (not FNV4GB.exe or "NVSE_Launcher.exe" if you have them installed), and select "Options" to get to the "Graphics Adapter and Resolution" window.
- Turn off "Antialiasing".
- Turn off "Anistropic filtering".
- Enable "Screen Effects: HDR" instead of "Bloom". Failure to set this to "HDR" can cause a "black screen" upon startup.
- Click on the "Advanced" button and select the "Water" tab.
- Disable (uncheck) the "Water Displacement" check box.
- "Close" the "Advanced" window.
- Click on the "OK" button to close the "Options" window.
- Select "Play" to proceed to the Main Menu so the game will save the changes to your settings.
- Now "Exit" the game without proceeding any further.
- Now check the video card controller to ensure you have also disabled any of those same settings for the video card.
-
Make backup copies of any INI file before editing or overwriting.
-
- Usually an ENB preset will have already made specific edits to the default ENB INI files, which it will overwrite. However, this is not considered "best practice" because only about a third of the ENBLocal file is related to the preset and the remainder is specific to your system. Instead you should use their file as a guide to edit the ENB settings in your own files. You can choose to edit those settings either "in-game" (using the "<Shift+Enter>" key combination to enter and exit ENB "edit" mode), or by directly editing the ENBLocal.INI (or ENBInjector.INI) file, or other files as directed. See the Warning about ENBLocal.INI entry of the S.T.E.P. Project ENBseries Guide for specifics.
- Most of the ENB configuration settings you need to adjust for your particular game setup are found in the "ENBLocal.INI". See the S.T.E.P. Project ENBLocal INI Guide for their descriptions.
- If you want to adjust the "ENBSeries.INI" file settings yourself instead of using the ones provided by a "pre-set", see the S.T.E.P. Project ENBSeries INI Guide page, which "is intended as THE comprehensive reference to the functionality of all parameters found within enbseries.ini as it evolves." There is also the ENB Series Wiki page.
- See the sub-topic Issue: CTD without warning, "Out of Memory error", or stops responding for other settings that ENB users need to include.
- Cause-2: Unexpected CTDs (such as when attempting to use the < Shift+Enter > key combination to enter the ENB Editor) can be due to programs running in the background, such as "anti-virus", "anti-malware", Video Card configuration control programs, overlays like the Steam Overlay, etc.. Many of these use the same techniques to "hook" the key presses to determine if their functions are being called.
- Solution-2: Try turning off any unnecessary background processes, such as "anti-virus" or "anti-malware" programs (unneeded if you are running your game in "offline" mode), multiplayer "overlays" like "OverWolf" (this is single-player after all), the Steam overlay, etc., at least on a temporary basis to see if they are interfering.
Issue - ENB Nights are too dark even with nightvision
Specifically with combination of "darker nights" from Nevada Skies, preset ENHANCED SHADERS - ENB by tapioks and nightvision from Project Nevada, but possibly other mod combinations.
- Cause: Preset is not designed with non-vanilla lighting in mind.
- Solution-1: Check for a version of the "pre-set" in question specifically designed for the lighting mod.
- Solution-2: The preset ENHANCED SHADERS - ENB by tapioks has a version specifically for darker nights of the "Night Skies" mod. Use a program like the free Notepad++, WinMerge, or ExamDiff to compare that preset with yours for the differences in "lighting" settings to your tastes.
Issue - ENB Performance aka FPS drops
The foundation of game performance is to first optimize your system for gaming. See the sub-topic Issue: Game in slow motion.
ENB will cause a drop in "framerate per second" of around 30-50 FPS in it's default configuration. How much will vary depending upon hardware, mod texture resolutions (game normal is 512x512), and ENB INI settings. In order to increase performance (i.e. FPS), you HAVE to give up some graphic effects: either by reducing texture size or disabling some ENB settings. Which trade-offs matter to you the most is a very personal thing. What is presented here are merely a collection of setting others have recommended, primarily from the ENBDEV Performance Forum site.
Performance is reduced by two factors: 1) number of textures created in video memory; 2) total size of textures created in video memory. When there is not enough video memory, ENBoost begins deleting resources by their usage priority; it also removes unused after 5 seconds. Make sure the game video settings (i.e. "Low"=512x512, "Medium"=1024x1024, "High"=2048x2048, "Ultra"=4096x4096) match the highest texture resolution you are using so it deals with them efficiently. All your texture replacements should be of the same resolution. There are tools that will let you adjust them to other resolutions if needed. See the "Optimizer Textures" tool description under "Utilities" section of the TES Texture Guide (TESTG) site.
Do not try to use ENB without a PCI-Express ("PCIe") video card. This means no "integrated video on the motherboard". According to the author, ENB requires high bandwidth for a certain amount of VRam, which depends upon the screen resolution. When this amount goes above the internal on-GPU fast memory much slower system Ram is used which in turns drops the FPS.(Note this generally means "no laptops" not specifically designed for games.)
The following are other peoples suggestions that have helped them.
For extremely low FPS (~10 or less), try setting the following in "enblocal.ini":
- ExpandSystemMemoryX64=false
- ReduceSystemMemoryUsage=false
- DisableDriverMemoryManager=false (configure the "[MEMORY] parameters as well.)
If that doesn't help, check if a lower resolution affects performance. If it does, then it's the GPU as described above. Make sure these parameters are also set:
- WaitBusyRenderer=false
- EnableFPSLimit=false
ENB performance under Windows 10 is acknowledged to just be bad. The ENB author hasn't switched to it and can't really help with whatever is causing the issues. It is known, for instance, that the Win10 DirectX 9.0 drivers can't handle video memory greater than 4GB regardless of how much is on the card, whereas it wasn't a problem under Win7. These were design decisions by Microsoft and not much can be done until they address them.Note this VRAM limitation is reportedly fixed in the Win10 "Fall Creator's Update" scheduled for release 17 Oct 2017.
- For advanced users: If you have a Windows 10 Education, Professional, or Enterprise edition you can use the included Win10 Hyper-V system and try running the game in a Win7 "virtual machine". See HyperV on Windows compatibility for the hardware requirements and a walk-through of the installation process. Note this requires you to have or obtain an ".iso" file of the desired OS install media (i.e. Win7). (If none of this option makes sense, you probably don't want to mess with it. Otherwise, educate yourself as it is beyond the scope of this wiki.)
Please refer to the S.T.E.P. Project ENBseries Guide pages for each ENB INI file for information regarding the purpose of each setting before electing to make such changes. It is easy to forget the changes to all files when testing various presets. There are separate S.T.E.P. guides for each of the ENB INI files as well as Troubleshooting tips. Each game version of the ENB Series "Graphic Modifictions" file also documents settings in it's "readme" file.
If you are using the ENB Memory Manager (DisableDriverMemoryManager=false), be sure to configure it's "[MEMORY]" section properly or it will frequently fill all available VRam (which is bad). Use the "VRamSize" value displayed when ENB initializes in the game; or from the VRamSizeTest tool.
Changing other settings will have an impact upon the final visual result. Expect one tweak to lead to others. For this reason it is advisable for novices to search out other presets emphasizing performance and try them first.
ENB settings under "[EFFECT]" that most affect performance for all games:
- Ambient Occlusion (aka SSAO). "EnableOcclusion=0" to disable; or adjust "[SSAO]" section for tweaks.
- Shadows. "EnableShadow=0" to disable; or adjust "[SHADOW]" section for tweaks.
- Depth of Field shaders:
- UseWaterDeep=0 (under "[WATER]").
- UseIndirectLighting=0 (under "[SSAO]").
- ShadowQuality=2 (under "[SHADOW]").
Other tweaks:
- LimitFPS to a lower value. Too much over 60 FPS can cause rendering issues. Remember that TV and Movies are shown at a fixed 30 FPS which is all the eye needs to see a smooth transition from one frame to another.
- If "DisableDriverMemoryManager=false", be sure to configure the "[MEMORY]" parameters in "enblocal.ini".
- Try reducing these two settings to the following, in "enbseries.ini":
- SizeScale=0.5
- SourceTexturesScale=0.5
If you play in "windowed" or "borderless windowed" mode:
- EnableUnsafeMemoryHacks=true (may help, but only for those modes).
Issue - ENB Support for Windows versions later than Win7
- Cause: As of June 2017, the author of the ENB Series tools did not have, and had announced "no intention of paying for that crap", support for Windows 8 or 10. His official signature indicates support only for WinXP/Win7.
- Solution: There are some "workarounds" for some situations (see elsewhere in this section) that involve improved "Win7 compatibility" on Win10. However, if you can't find a "fix" here, then the author offers the following generic suggestions:
- Install DirectX Runtime from MS web site.
- Disable Steam overlay.
- Do not use Afterburner, EVGA, GeForce Experience.
- Do not use screen capturing tools, Razer and Logitek utils, etc. (which he calls "crapware").
- Do not use Avast; some other antiviruses also fail to work properly.
- Do not use later video drivers than recommended unless absolutely forced to. (Once they no longer test for older games, bugs can creep in.)
- The only other shot you have at a solution is from other users on the ENB Support Forum or elsewhere on the Internet. If you can't reproduce the problem under Win7, appeals to the author will fall on deaf ears. (While one may sympathize with his opinion, that position may change as his equipment ages.)
Issue - ENB Texture disappears or turns shiny or black
Occurs after passing rapidly between interior/exterior cells several times, such as through a doorway repeated times.
- Cause: A few ENB "pre-sets" have disabled the "EnableCompression" flag.
- Solution: Make the "enblocal.ini" file "[Memory]" setting "EnableCompression" flag to "true".
Issue - ENB Transparency or Translucency problem
See through some weapons, walls, or the ground in some locations with ENB enabled.
- Cause-1: Conflicting settings. ENB has better support for nVidia than AMD, as that is what the developer uses so bear that in mind. AMD users may need to use "work-arounds".
- Solution-1: Check the settings in both the GPU (video card) control panel AND the game options/INI. The following are separate solutions that have reported success, in order of popularity.
- The "anti-aliasing" option should be turned off in both.
- The "anistropic filtering" option should be turned off in both.
- "Water displacement" in the game options should be "off", and "HDR" should be "on".
- Set "iMultiSample=0" in your INI.
- Don't use the "Steam Overlay". Launch the game from a desktop shortcut after running the Steam Client, or go to Steam Options (in-game) and uncheck "Steam Overlay". Other DX overlays may also have a similar effect.
- Adjust ENB settings (in-game use "Shift-Enter" from the game's Main/Pause Menu to access the ENB menu; or edit the ENBLocal.INI file directly):
- Disable "Ambient Occlusion".
- Disable "Detailed Shadows".
- Save the changed settings, (and if in-game use "Shift-Enter" to return to the game and check the result).
- Cause-2: ENB incorporates a "Fix for Transparency bugs. From some people, this "fix" causes the problem instead.
- Solution-2: Use the in-game editor (or in the ENBLocal.INI file); locate the "[FIX]" section (at the bottom of the INI file) and change the "FixTransparencyBugs=true" line to "=false". Save.
Issue - ENB Weather effects near water are off color
Specifically, whenever entering a cell near the Colorado River, a strong purple hue affects the lighting and scenery.
- Cause: ENB preset is amplifying some weather effect color.
- Solution: Adjust the ENB settings values for:
- NVHooverDamWeather
- NVWastelandClearEast
- to exactly mention the regular wasteland weather. Include ambient light, fog, sky, etc, for all times of day.
- This will take trial and error experimentation. See Issue: Managing Post-Processor (ENB, SweetFX, FXAA) configurations for preset managers that can incorporate your changes into your preferred preset.
Issue - Get ENB to work while in GECK
- Cause: By default the ENBSeries is configured to not load when the GECK is started.
- Solution: To get GECK to work with ENBSeries loaded so you can see ENB's effects while in the editor as well, try the following.
- In the "enblocal.txt" file located in the game root folder (i.e. <SteamInstallPath>\steamapps\common\Fallout New Vegas"), set:
[FIX]
FixGameBugs=true
FixTransparencyBugs=true
IgnoreGECK=false ;<- set "false" from "true"
- And get ready for GECK to take >20 seconds to load on startup. But it'll look pretty.
Issue - Image Modifications aka IMODS aka fade to black etc do not work
- Cause: Known problem with ENB, which prevents them from working as intended.
- Solution-1: Try the mod Imod emulator for ENB by TommInfinite. Will pick up on any vanilla imod, but may not work for some quest mods that use their own imods. Safe to use with any save game as long as it's not in the middle of an imod effect. Requires New Vegas Script Extender (NVSE) and User Interface Organizer (UIO).
- Solution-2: Try to correct the problem with the console command:
-
SetImageSpaceModifiersEnable (aka "sisme"); "Set imagespace modifiers enable": 0-Off, 1-On.
Issue - Is ENBoost for everyone
4K textures put a massive strain on a game that never contemplated images greater than 2096x2096 pixels (generally considered "large" or "hi-rez" size images). Then you have to remember that graphic display resolutions are measured in "pixels per inch" ("ppi"), so a 4K UHD (Ultra HD), also referred to as UHDTV-1 or 4K × 2K, is a display resolution of 3840×2160 pixels (four times as many pixels as Full HD (FHD): 1920×1080 (aka 1080p, though more properly screens that use Interlacing instead of Progressive scan are referred to as 1080i), which was the usual design limit for later 32-bit games) in the same 16:9 aspect ratio. (Screens are measured diagonally, so it is not a simple "double each dimension" formula.) Then you have to account for "depth" as well as "color range" information as part of the memory requirement for each pixel.
ENBoost is considered virtually a requirement for 4K textures. Please see "Texture Size" on the TESTG site Overview page regarding the visual effects of higher resolution image sizes and their display in games before choosing to use larger than default size image textures.
ENBoost is a memory management feature of the ENBSeries to address some of the limitations of 32-bit games. In the context of that very general statement it is similar to the 4GB LAA flag fix (i.e. FNV 4GB Patcher) that enables 32-bit games to use more than 2GB of RAM. However, it works differently by providing dynamic "intermediate speed" caching of video object geometry in system memory when the video adapter runs out of room, instead of CTD. This most commonly occurs when higher resolution texture mods are used. (For a more detailed explanation, see the S.T.E.P. Project Guide:ENB article.)
ENBoost is a stand-alone component called "enbhost.exe"; considered a memory and optimization "patch" to the ENB Series graphics effects process for the specific game with it's own version numbers. It is not involved with nor require the post-processing, so it does not impose the FPS loss that the ENBSeries is known for. Therefore, it is recommended for all users. See the S.T.E.P. Project ENBoost Quickstart Instructions on how to install and configure for only this feature. If you have installed ENB correctly you should see on the loading screens (in the upper left corner) something similar to:
 .
.
Note the "available texture memory" line at the bottom. This should not be increased over the size reported before installing ENBoost by the VRamSizeTest tool available from the ENB download site.
Issue - Managing Post-Processor as in ENB or SweetFX or FXAA configurations
First you must recognize that any "post-processor" is going to have an adverse impact upon your game performance. They all add an "overhead", and often can cause some designed game and/or mod effects to no longer function. The choice is up to you, but remember that there are always trade-offs between "prettier" and "performance".
Some suggestions (thanks to s0cke of the Nexus FNV Forums) for those new to ENB and post-processors in general.
- Use an ENB Manager (below) if you plan to try out different "presets".
- In the "ENBSeries.INI" file, use the "[PROXY]" section with the following entries to add a DLL injector proxy library from another post-processor (like Reshade-SweetFX). See Issue: SweetFX not working "Solution-4" for instructions.
- Check which version of ENB you are using. Some people find the "v01xx" series performs better than the later "v02xx" versions, even though they are less refined, do not have "ENB Boost", and have some transparency issues.
- When searching on the web, pay attention to which version the advice is directed towards.
- Some people find "ENB Boost" causes stuttering and performance issues when moving the camera around quickly. Experiment with it turned off ("DisableDriverMemoryManager=false").
- If disabling Ambient Occlusion (SSAO), consider turning off "ubersampling" or decreasing the sampling range and quality instead.
- If disabling detailed shadows in the ENB config helps your performance, consider either making a choice between the two (SSAO and shadows) or looking into the variables for detailed shadow quality (set it to low, there is little to no difference on that one).
- Look at the "anti-aliasing" options: Turn off any temporal/accumulative/edge based AA here and use "Dynamic Super Resolution" (DSR: nVida)/Virtual Super Resolution (VSR: AMD/Radeon) to sample from a higher resolution instead. Also, turning down the ENB "enforced anisotropic filtering" a little, say to x12 can provide you with another 2 to 3 frames in some places.
The following management tools are intended primarily to allow you to keep track of and switch between different "preset" configurations, but may provide other capabilities. Most are for ENB, but one recognizes three different post-processors. Some provide the ability to include "in-game" changes in your own configuration files or back into the original preset. Read their download page descriptions carefully. Most are posted in the "Nexus Skyrim Mods" section, but are not specific to that game. Their ability to detect and work with other game folders is something to check. These are limited to Bethesda's Oblivion, FO3, FNV, and FO4 as well as Skyrim.
- ENB Manager and Changer by Legend Aeternus. Requires Java v7 (v8u45 jarfix seems to be the latest that will work according to comments). Last updated 15 Dec 2014. Supports FO3 according to comments, so likely others but not stated.
- ENB Man - An ENB Manager by Casmithy. Requires .NET Framework 4.5. Last updated 20 Jun 2016. Comments indicate support for FO3 and FNV, at least, so likely others but not stated.
- ENB Organizer by Breems. Requires .NET Framework 4.5. Last updated 24 Jul 2016. Multi-game support of at least Skyrim and FNV; others are likely but not stated.
- ENB FXAA SweetFX Manager and Remover by volvaga0. No requirements given. Last updated 09 Jun 2016. Supports all five games.
Issue - Problems using ENB or SweetFX - Long loading screen waits
- Cause: Versions of Windows since Win7 have implemented various "caching improvements" intended to speed up games by "pre-fetching" anticipated video files from disk into VRAM. For some people, this seems to have the opposite effect.
- Solution: Try disabling the Superfetch feature to see if it improves the situation. (See Superfetch: How it Works & Myths for more detail.)
Issue - Problems using ENB or SweetFX - alongside FNV4GB
The install instructions of "post-processors" generally don't anticipate the use of "indirect game launch" programs like FNV4GB.exe to enable the LAA Flag so the game will use more than 2GB of system memory. (See the wiki article 2-4GB game memory limits and solutions for more details about the "LAA Flag" subject.)
- Cause: FNV4GB.exe is a "launcher" designed to work around issues with Steam checks for modified (i.e. "corrupted") EXE files by moving the original EXE file to another folder and internally launching it from there. It does a fine job of this, but if you are going to use "post-processors", their installation instructions have to be adjusted to accommodate it's changes.
- Solution-1: The simplest solution is to switch to the newer FNV 4GB Patcher mod (by the same authors), which doesn't require moving the game EXE file to another folder, and thus let's you follow the originally provided install procedure for either ENB or SweetFX.
- Solution-2: If for some reason you can't switch to the "FNV 4GB Patcher" and have to remain with FNV4GB.exe, then you need to put the ENB provided D3D9.DLL file in the "EXES" folder with the original "FalloutNV.exe" file.
Some suggestions (thanks to s0cke of the Nexus FNV Forums) for those new to ENB and post-processors in general.
- Use an ENB Manager (below) if you plan to try out different "presets".
- In the "ENBSeries.INI" file, use the "[PROXY]" section with the following entries to add a DLL injector proxy library from another post-processor (like Reshade-SweetFX). See Issue: SweetFX not working "Solution-4" for instructions.
- Check which version of ENB you are using. Some people find the "v01xx" series performs better than the later "v02xx" versions, even though they are less refined, do not have "ENB Boost", and have some transparency issues.
- When searching on the web, pay attention to which version the advice is directed towards.
- Some people find "ENB Boost" causes stuttering and performance issues when moving the camera around quickly. Experiment with it turned off ("DisableDriverMemoryManager=false").
- If disabling Ambient Occlusion (SSAO), consider turning off "ubersampling" or decreasing the sampling range and quality instead.
- If disabling detailed shadows in the ENB config helps your performance, consider either making a choice between the two (SSAO and shadows) or looking into the variables for detailed shadow quality (set it to low, there is little to no difference on that one).
- Look at the "anti-aliasing" options: Turn off any temporal/accumulative/edge based AA here and use "Dynamic Super Resolution" (DSR: nVida)/Virtual Super Resolution (VSR: AMD/Radeon) to sample from a higher resolution instead. Also, turning down the ENB "enforced anisotropic filtering" a little, say to x12 can provide you with another 2 to 3 frames in some places.
The following management tools are intended primarily to allow you to keep track of and switch between different "preset" configurations, but may provide other capabilities. Most are for ENB, but one recognizes three different post-processors. Some provide the ability to include "in-game" changes in your own configuration files or back into the original preset. Read their download page descriptions carefully. Most are posted in the "Nexus Skyrim Mods" section, but are not specific to that game. Their ability to detect and work with other game folders is something to check. These are limited to Bethesda's Oblivion, FO3, FNV, and FO4 as well as Skyrim.
- ENB Manager and Changer by Legend Aeternus. Requires Java v7 (v8u45 jarfix seems to be the latest that will work according to comments). Last updated 15 Dec 2014. Supports FO3 according to comments, so likely others but not stated.
- ENB Man - An ENB Manager by Casmithy. Requires .NET Framework 4.5. Last updated 20 Jun 2016. Comments indicate support for FO3 and FNV, at least, so likely others but not stated.
- ENB Organizer by Breems. Requires .NET Framework 4.5. Last updated 24 Jul 2016. Multi-game support of at least Skyrim and FNV; others are likely but not stated.
- ENB FXAA SweetFX Manager and Remover by volvaga0. No requirements given. Last updated 09 Jun 2016. Supports all five games.
Issue - Problems using ENB or SweetFX - on Windows 10
- Cause: Win10 has DirectX12 drivers, but the DX9 driver the game is expecting is not being found.
- Solution: Please see 'Solution-1' under 'Cause-1' of Issue: Vanilla game Hangs on startup. Then, after installing ENB/SweetFX, copy and paste D3D11.dll and DXGI.dll from your System32 folder into your game root folder (where the game "EXE" file resides).
Issue - Render Error using ENB or SweetFX
- Cause: Both ENB and SweetFX install files to "help" with rendering their graphic effects. These usually take the form of "local folder copies" of system DirectX files. The problem is that different games may require compliant versions of these libraries for different versions of DirectX. AND the post processors use "effect search directories" (aka "search paths") to locate such files. If more than one version is found in those search paths, the conflict in libary versions can cause such errors. Some "pre-sets" or mods may unexpectedly include such files. Look for any log files used by the "pre-set" as well for other clues. These are usually found in the game "root" folder (where the game "EXE" file is found).
- Examples of such "helper files" include "dxgi.fx", "dxgi.dll", and "d3d9.dll". Look for any "*.dll" and "*.fx*" file extensions. Check the "Properties" for the "version" information.
- Solution: Remove your previous, unused preset or "post processor" "helper" files. These may not have been cleaned out when uninstalling the mod or "pre-set". You could simply rename any you find and re-install the mod or pre-set if unsure which belong.
- Check the "search paths" used by the "post-processor" to ensure other games' folders are not included. This may require setting up "batch/cmd" files to adjust such search paths for the respective games. These "search paths" are in "environmental variables" that can be displayed by entering just the single word "set" command in a command line prompt.
Issue - SweetFX is not working
- Cause-1: Attempted to install with a mod manager.
- Solution-1: Similar to ENB, SweetFX needs to place it's files in the game root folder, or wherever the original game executable resides. Do NOT attempt to install with a mod manager (they assume files need to go into the "Data" sub-folder).
- Cause-2: SweetFX uses much the same trick as overlays like FRAPS, Overwolf, and the Steam Overlay do; so they can conflict. It does have some allowance for working with the Steam Overlay, but this is not always successful.
- Solution-2: Disable the other overlays. See the sub-topic "Issue: How to disable the Steam Overlay".
- Cause-3: Can't SweetFX be used with FNV4GB?
- Solution-3a: Place the SweetFX DLL files in the "Fallout New Vegas\exes" folder, along with the original "FalloutNV.EXE" file moved there when installing the FNV4GB executable.
- Solution-3b: Switch to the newer FNV 4GB Patcher (by the same authors), which doesn't require any alterations to the installation instructions (such as moving the original "FalloutNV.EXE" file).
- Cause-4: Can't find "CreateDXGIfactory".
- Solution-4: "The entry point CreateDXGIFactory1 requires the support of DXGI 1.1 which is available on Windows 7, Windows Server 2008 R2, and as an update to Windows Vista (KB971644). If you are using Vista and only have DXGI 1.0, please install this Vista Platform DXGI v1.1 Update." - tomshardware.com. This is part of the DirectX drivers. See "Cause-1" under Issue: Vanilla game Hangs on startup.
- Cause-5: Can't SweetFX be used with ENB?
- Solution-5: Note that both SweetFX and ENB have their own D3D9.DLL files. It is necessary to enable both to be used. Reshade/SweetFX doesn't provide a "ProxyLibrary" mechanism, but ENB does. The following procedure assumes both post-processors are installed separately and are not packaged as a single combination archive.
- Uninstall any previous installations of both SweetFX and ENB.
- Install SweetFX and it's preset first.
- Configure it according to it's documentation.
- Open the game.
- Use the "<Scroll Lock> key" to toggle SweetFX on and off.
- Enable the "monochrome" setting to confirm visually that SweetFX is working correctly.
- Close the game.
- Rename the Reshade DLL file to either "d3d9_something.dll" (for DirectX 8 or 9 games), or to "dxgi_something.dll" (for DirectX 10 or 11 games). This filename is what you put in the "ProxyLibrary" line of the "ENBSeries.INI" file. In this example we rename it to "d3d9_SWEETFX.dll".
- Now install the ENB files: both the main series "Graphic Modifications" and any applicable patch, and the chosen preset files. See sub-topic Issue: ENB is not working for general installation instructions. If planning to test more than one preset, consider an ENB Manager (see sub-topic Issue: Managing Post-Processor (ENB, SweetFX, FXAA) configurations).
- Configure ENB and check that it is working correctly.
- Exit the game.
- Now, edit the "ENBseries.INI" file (in the game root folder: i.e. "<Steam install path>\common\Fallout New Vegas") with the following:
[PROXY]
EnableProxyLibrary=true
InitProxyFunctions=true (some say this needs to be "false".  If you have problems, try switching it.)
ProxyLibrary=d3d9_SWEETFX.dll (or whatever.)
- and save.
- When you start the game now you should be able to see effects from both post-processors. Look for the ENB message on the title screen, and use the "<Scroll Lock> key" to toggle SweetFX. You don't need to load a save to see the effects of both. If all appears well, then try loading a save game and check the results.
- If the game crashes, try temporarily disabling one or both of the effects.
- For ENB, use "<Shift+F12> key" to toggle entirely; or "<Shift+Enter>" to enter the editor mode and disable the "use effects" checkbox.
- For SweetFX, use the "<Scroll Lock> key" to toggle it's state.
References
(Generally in order of first appearance within the article.)
Refs Overview
Refs Checklist
- chkdsk
- restore point
- New Vegas Script Extender (NVSE)
- JIP LN NVSE Plugin
- NX
- How to read most Bethesda game error logs
- Mod Configuration Menu (MCM)
- One HUD (oHUD)
- User Interface Organizer (UIO)
- HUD-UI-Menu issues
- 2-4GB game memory limits and solutions
- 4GB Fallout New Vegas Updated
- FNV 4GB Patcher
- ENB
- SweetFX
- LOOT
- LOOT online manual
- Load order and you
- TES4LL
- TESTG
- FNVLODGen
- FNVEdit
- Missing Masters
- Tome of xEdit Current online manual for all games
- FNVEdit Training Manual (PDF)
- Wrye Flash
- S.T.E.P. Merging Plugins Guide
- Making a Merge Patch by Roy Batty
- Wrye Bash Pictorial Guide
- Fallout New Vegas Beginners guide to modding by gromulos
- FalloutNV minimum System requirements
- Installing Games on Windows Vista+
- One Tweak for FNV
- Speedfan (freeware)
Refs ArchiveInvalidation (by Manager)
- This post on manual invalidation
- Mod Organizer (MO)
- Fallout Mod Manager (FOMM)
- Nexus Mod Manager (NMM)
- Fallout Mod Manager - Forked (FOMM-Forked)
- Archive invalidation Wiki article
- TESTG Troubleshooting
Refs Mod Conflict Isolation
Refs Towards Game Stability
- Performance & Stability Guide YouTube video for "Tale of Two Wastelands (TTW)".
Refs Solutions to Starting the game problems
- How to fix error code 0xc0000005
- GOG Galaxy
- GOG forums for FNV
- KB4058043, December 15, 2017
- What are Meltdown and Spectre
- Windows Defender Exploit Guard (WDEG)
- WDEG video Video
- Configure Windows Defender Exploit Guard (WDEG) in Windows 10
- Enhanced Mitigation Experience Toolkit (EMET) 5.52
- Steam localization
- Voice Actor BSA files
- New Vegas AntiCrash (NVAC)
- Taking back control of Windows 10 driver updates
- DirectX End-User Runtimes (June 2010)
- How to make Win10 run DirectX 9.0
- Intel HD graphics Bypass package
- Dependency Walker
- New Vegas Technical Support Forum
- Wikia Fallout Portal: New Vegas Bugs
- New Vegas Stutter Remover (NVSR)
- Better Game Performance
- Yukichigai Unofficial Patch (YUP)
- Mission Mojave Ultimate Edition - FNV Community Patch (MMUE)
- New Vegas Enhanced Content (NVEC)
- Better Game Performance
- Merged Plugin Guidelines for Personal Use
- Attribute Changer
- How to FIX Steam Preparing to Launch Loop other Steam Problems
Refs Solutions to Performance problems
- Modding Fallout NV 'Ultimate Edition' part 7 : Performance 19:05 minute, 2012 Video by Gopher.
- OGG Vorbis Libraries by KaneWright.
- FNV BSA Decompressor by zilav.
- Process Explorer by SysInternals.
- Fake fullscreen by BUDA20.
- Game Companion - Fake FullScreen by BUDA20.
- Borderless Gaming by Codeusa.
- Complete System customization and optimization for Windows.
- Tweakguide's ATI Catalyst Guide (driver optimizations for all games.)
- Tweakguide's nVidia GeForce Guide (driver optimizations for all games.)
- Tweakguide's General Fallout game guide (specifically for FO3 and FNV.)
- NVAC support thread
- New Vegas Configator
- HyperV on Windows compatibility
- Fallout New Vegas | FPS & Stability (definitive guide) 12:11 minute, 2018 Video by GamerPoets.
- Tale of Two Wastelands (TTW) Performance Guide
- NVSR INI for Newer Processors Last updated 15 Dec 2017. Login to the TTW site is required for access.
- NVSR INI for Older Processors Last updated 15 Dec 2017. Login to the TTW site is required for access.
- Configuring ENB Fallout New Vegas & TTW by MajinCry.
- nVidia Inspector
- Increase nVidia GTX performance with nVidia Inspector
- NVIDIA Profile Inspector
- AMD Catalyst Control Center
- Radeon Pro
- AMD Gaming Evolved's Raptr
- Disk Defrag (freeware)
- Superfetch
- File Search Indexing
- How VSync works, and why people loathe it
- CCCP codec pack
- ffdshow tryouts
- K-Lite Codec Pack
- DirectShow Filter _Codec_ Reset by Blade FireLight
- HEED THE WARNING ABOUT CREATING A 'SYSTEM RESTORE POINT' FIRST!
- Tutorial - Fallout New Vegas Radio Fix video by KitsuneJimmy
- MP3Gain
- Create a Windows System Restore Point
- Use Reset to restore your Windows 10 PC
- Removing bad codec Tools
- Wikia's Nukapedia
- Gamepedia's The Vault
- Gamebryo and Creation console commands (all)
- Radio New Vegas Everywhere by EPDGaffney
- Music Pack for Radio NV - ver 1.3 by EPDGaffney
- Client for Microsoft Networks
- Virtual PC Network Filter Driver
- QoS Packet Scheduler
- File and Printer Sharing for Microsoft Networks
- Link-Layer Topology Discovery
- How VSync works, and why people loathe it
- Tale of Two Wastelands (TTW) Performance Guide
Refs Solutions to "Crash To Desktop" (CTD) problems
- CASM
- CASM with MCM
- Simple Saves
- Clean Quick Saves
- Skippable DLC Cutscenes
- Windows logo key equivalent in non-windows keyboards
- Kill Fallout 3 by raz3rITA
Refs Solutions to Control problems
- Console Fix Glasses by Random Unit
- Console Key Rebinder by Random Unit
- PxKeystrokesForScreencasts by Phaiax.
- QiPress by aalapshah. Lite version is free; Pro version $30.
- DarNified UI (DarnUI)
- Alternative fonts for DarNified UI
- Alternative Fonts Pack for DarNifiedUI (with cyrillic support)
- HD More Alternate Fonts for DarNified UI (in double resolution)
- DarnUI support thread
- DarnifiedUI Configuration
- Weapon Mods Expanded (WMX)
- The Weapon Mod Menu (WMM)
- Xpadder ($9.99)
- Xpadder v5.3 (last freeware version: 13 Apr 2008)
- Dual Monitor Tools (open source tool)
- OneTweak (NVSE plugin mod)
- FullScreenWindowedMode (NVSE plugin mod)
- GECK: DisableButton
- Gamebryo Console Commands
- Wikipedia on "Display resolution"
Refs Solutions to "Garden of Eden Construction Kit" (G.E.C.K.) problems
- GECK Wiki Download
- GECK 1.4 Powerup
- CIPSCIS Script Validator
- Microsoft Knowledge Base article 3000850
- Collapsed Text Field Figure
Refs: Solutions to Graphics problems
- Gun Follows Crosshairs in First Person by Grasscid
- First Person Gun No Follow by Azrael Dark
- TweakGuides
- FOV Slider by Roy Batty
- Weapon Mesh Improvement Mod by Roy Batty
- Ragdolls by MadAce
- BSArch
- GECK: Gun Spread Formula
- Centered 3rd Person Camera by Jahandar
- Dynamic Third Person Camera by claustromaniac
- 3rd-Person-Camera-FIX by humannature66
- Further 3rd Person Camera by Silverglade
- No Auto Aim by EddieV223
- Advanced VATS and FIXED Autoaim with Improved Binoculars by orgolove
- Greatly improved 3rd person aiming by Peste
- Improved Automatic Ironsight animations
- Enhanced Blood textures(EBT) by dDefinder.
- Fallout New Vegas Default Values for All Valid INI Settings
- Ragdolls by MadAce.
- Body Type Replacements
- Males:
- Breezes New Vegas Males by sesom.
- Roberts Male Body FNV by Nivea and Favoredsoul.
- Roberts and Brawler Body Complementary Resource for FNV and TTW by Good0593 and Nivea and Favoredsoul and RocketLombax.
- Females:
- BEWARE OF GIRL Type 3 HiRez HiDetailed Replacer by BlackBlossom.
- DIMONIZED TYPE3 female body by dimon99 (Copied from FO3 section unmodified. Not ported, so clothing portion doesn't work. See FO3 version for full description.)
- Lings Playable Races by Volek.
- Type3 Body and Armor replacer by Exeter.
- Type3 Narrowed Shoulder BerryHD Acup body by ChunchunMARU.
- Type3 F Body Replacer by Exeter. (FO3 version) Not ported to FNV.
- Type3BG by digimonkey.
- Type3M Body Replacer by MAK.
- Type V Female Body and Armor Replacer by Luchaire. ('Dimonized' FO3 version) Not ported to FNV.
- Type 6 Modification Body NV (T6M) by Izumiko.
- Type C Body Replacer by Cytiene/AusAllerWelt.
- Athletic Female Body by skims.
- Athletic Body Type Bouncing BNB by Tattooedillusions via Skims.
- Muscle Girl Project - NV by zomb_killer and Tigersan.
- SKINNY 6 Body BNB by tattooedillusions via Humannature66
- NPC overhauls:
- Fallout Character Overhaul by Drumber.
- Fallout New Vegas Redesigned 2 by Dracomies.
- Fallout New Vegas Redesigned 3 by Dracomies and Weijiesen.
- NVCE - New Vegas Character Expansions by Machienzo.
- Simple Vanilla Nude Body Replacers by Jokerine.
- Beauty Pack PLUS -Project Mikoto- Hair - Eyes - Presets by Matteius
- GUIDE: Replacing Vanilla Hair with Modded Hair Forum Thread outlines the basic procedure using the GECK.
- Hairs - Eyes - Races Auto - Patcher mod by Fallout 2AM attempts to automate this "patching" process for custom races.
- Lings Coiffure NV by earache42.
- Mojave Delight for Type3 by Glosshouse.
- How to Create a Custom Race by jim_uk.
- How to Create a Custom Race PDF by jim_uk.
- DIMONIZED presets for Vanilla races for FNV by dimon99.
- FCO Bugfixes by Lunarion Silver Fallout Character Overhaul (FCO) by Drumber.
- Fallout Character Overhaul - Pink Hands Fix by Vainlash.
- the FNVR3 forum thread
- FNV Redesigned 2 (FNVR2) by Dracomies.
- FNV Redesigned 3 (FNVR3) by Dracomies and Weijiesen.
- Hi-Res Eyes Replacer by Zenl for FCO2.
- Dead Money Type3 Outfits
- Honest Hearts Type3 Tribal Armors
- Old World Blues Armors for Type3
- Lonesome Road Armors for Type3
- T6M Equipment Replacer NV
- Help:Form IDs
- Wikia: RefID of the player
- GECK: Race (body part slots)
- GECK: Reference
- Wikipedia: Z-fighting
- S.T.E.P. Guide: Z-Fighting
- Gopher's "Mountain Flicker and Z-Fighting" video
- CAM - Chems Alcohol and Meds
- Oblivion: Creating Compatibility Patches - Worldbuilding - TES Alliance
- "Improved Automatic Ironsight animations"
- Dynavision 3
- The IMAGINATOR
- S.T.E.P. ENBSeries INI Guide
- Guides to Creating and Customizing Your ENB's
- LCD monitor test images
- S.T.E.P. ENBoost QuickStart
- TESTG Utilities
- Safe ShowRaceMenu
- Fallout NV Cheat Terminal Redux
- IMPACT
- Enhanced Blood Textures
- Wound Decal fix Example
- Nifskope
Refs Solutions to Mesh (Red "!" icon) or Texture (solid color) problems
- "TESTG: VWD/LOD Overview"
- How to fix hard-coded texture paths in NIF files
- hexadecimal
- GECK Wiki
- DirectX9 bug on Neowin.net
- TES5LODGen/xLODGen Tool.
- The difference between LODs and Billboards explained Thread.
- TES5LODGen for Trees LOD Thread.
- LOD additions and improvements Mod by tomzik.
- Tree LOD billboard creator for xLODGen Tool by zilav.
Refs Solutions to Miscellaneous problems
- Using the console doesn't disable achievements
- JIP LN NVSE Plugin
- Zion Exit Cave
- No Combat Gore No Environmental Gore
- Project Nevada - Rebalance
- Human Collision Sounds Removed
- Hardcore mode "Status Effects"
- Imps TimeScale Adjuster
- IMCNNV - Imps More Complex Needs
- Ambient Temperature
- Unlimited Companions
- Companions
- YUP
- Ragdolls
- Intel Temperature guide
- Intel® Extreme Tuning Utility
- Intel® Power Gadget
- Diagnostic and Performance Tools for Intel Desktop Boards
- Speedfan (freeware)
- Game Difficulty and Hardcore Mode
- GECK Category:Factions
- GECK Category:Faction Functions
- Securitron
- Securitron attack fix by DonkeyMonkey
- version 0.14.11.12 FOMM-Forked
- "Custom" version 0.14.11.13 of FOMM
- GPLv3
- Realistic Weapons Damage - New Vegas (RWD)
- Realistic Headshots (RHS)
- Bleed
- Project Nevada - Extra Options (PNO)
- Collision Meshes
Refs Solutions to Post-Processor (ENB/SweetFX et. al.) problems
- New Vegas Reloaded - NVGE
- Technical Support
- TES Reloaded
- ENB Manager and Changer
- ENB Man
- ENB Organizer
- ENB FXAA SweetFX Manager and Remover
- S.T.E.P. Project Guide:ENB
- ENBoost
- VRamSizeTest
- switching shaderpackage013
- ENB Series Support Forum
- ENB series Graphic Modifications
- ENB Series Download
- ENBAuto
- ENHANCED SHADERS - ENB by tapioks
- Bone Fide ENB (Great Performance ENB) by Charmareian
- Warning about ENBLocal.INI
- ENBseries Guide
- ENBLocal INI Guide
- ENBSeries INI Guide
- ENB Series Wiki
- ENBDEV Performance Forum
- PCI-Express
- Nevada Skies (mod)
- Project Nevada (mod)
- Blur Killer (mod) by sortitus
- Notepad++ (freeware)
- WinMerge (freeware)
- ExamDiff (freeware)
- Vista Platform DXGI v1.1 Update
- tomshardware.com
Nexus wiki articles referred to by this article
- How to ask for help
- How to read most Bethesda game error logs
- HUD-UI-Menu issues
- 2-4GB game memory limits and solutions
- Load order and you
- Missing Masters
- Installing Games on Windows Vista+
- Merged Plugin Guidelines for Personal Use
- How to fix hard-coded texture paths in NIF files
Nexus wiki articles that refer to this article:


