Difference between revisions of "Creating an armour for Fallout 4. Part 2"
m (→Export the armour from Blender as a Fallout 3 nif file) |
|||
| Line 71: | Line 71: | ||
* Niftools Object Panel: | * Niftools Object Panel: | ||
** Nif Version = 20.2.0.7 or 20.02.00.07 | ** Nif Version = 20.2.0.7 or 20.02.00.07 | ||
| − | : | + | :* '''''Note:''' The nif version has to be written exactly in the same format as it is written in the Skeleton that you've parented to your armour. Check how it it written there and write it in the same format in all the objects that form your armour or the exporting process won't work.'' |
** User version = 11 | ** User version = 11 | ||
** User version 2 = 34 | ** User version 2 = 34 | ||
| Line 83: | Line 83: | ||
* Niftools Shader Panel: | * Niftools Shader Panel: | ||
** Shader Type = BS Shader PP Lighting Property | ** Shader Type = BS Shader PP Lighting Property | ||
| − | : | + | :* '''''Note:''' It really doesn't matter what shader you select here as you will have to redo all this in NifSkope once your mesh is in the correct Fallout 4 format. Now you onky have to select some coherent options so the exporting process works.'' |
** BS Shader Pp Lighting = SHADER_DEFAULT | ** BS Shader Pp Lighting = SHADER_DEFAULT | ||
** Select the shaders: | ** Select the shaders: | ||
Revision as of 16:00, 28 March 2016
Contents
Overview
This is the part 2 of the tutorial for creating an armour or outfit for Fallout 4. You can find the first part of the tutorial here Creating an armour for Fallout 4. Part 1
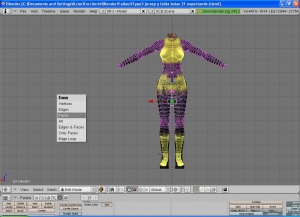
Once you've copied all the weights from the body to your armour and set the dismemberment vertext groups select the body in Object mode and go to Edit mode. In Edit mode select all the faces of the body that are completely hidden by the armour or outfit you are creating. Make sure that all the faces you are selecting are completely inside the armour because if you delete a face that is only partially hidden by the armour you'll see a hole in your character's body when using the armour.
This step is optional but it is worth doing it because:
- you won't have to solve clipping problems because in almost no pose the body will go through the armour
- the size of the mesh will be smaller, increasing performance
- Bethesda does it ;)
At this point it may also be wise to combine as many of your objects as you are comfortable with combining, as this will save you from repeating steps in Nifskope later. To do this select the objects you'd like to join and press "Ctrl + J" and click "Join selected meshes."
- Separating an object is usually easy to do as well. Hover over a vertex on the object you wish to separate and press the "L" key to select all linked vertices. Press "P" and then "Selected" to separate the selected vertices from the object.
Export the armour
Now you are ready to export your armour in nif format, that is the one Fallout 4's meshes use. As Blender doesn't support Fallout 4 nif format, yet, you'll have again to use 3ds as a bridge between Blender and Fallout 4:
- First export the meshes from Blender using Fallout 3 nif format
- Then import the Fallout 3 nif format into 3ds Max
- And finally, export the meshes from 3ds Max in Fallout 4 nif format.
Export the armour from Blender as a Fallout 3 nif file
In Blender 2.49
First thing is to import a new skeleton for your armour:
- Make sure that on the Blender screen you see all the objects that form the armour, including the parts of the body that are not hidden by the armour, and that you don't see anything that is not going to form part of your armour (like the light or the camera. If you see those objects move them to another Blender layer and set that layer to invisible or Blender will export those objects together with your armour).
- Make sure that you have deleted all the skeletons you imported with the parts of the body, as explained at the beginning of this tutorial.
- In Object mode select one of the objects that form part of your armour and press the A key twice so as to select all objects of the armour.
- Select the menu option File -> Import -> NetImmerse/Gamebyro and select the .nif file of the body you imported before for creating the armour (for example the modified femabody.nif).
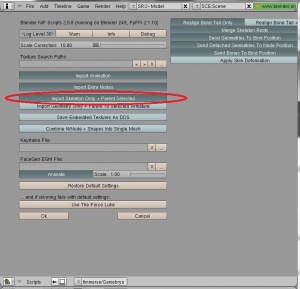
- In the screen that contains the importing parameters select the option Import Skeleton Only + Parent Selected as shown in picture Importing a new skeleton and press the OK button.
Now you have a skeleton in Blender and it is the parent of all the objects that form your armour.
To export the armour:
- In Object mode select the skeleton you've just imported and press A twice to select all parts of the armour and the skeleton.
- Press the Ctrl + A keys and select the option Scale and Rotation to ObData from the pop up menu.
- Keeping the skeleton and all the parts of your armour selected, select the menu option File -> Export -> NetImmerse/Gamebyro, enter the name of the nif file for your armour (for example MyArmour_0.nif) and the folder where you want to save it.
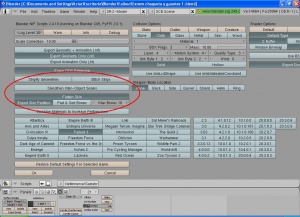
- Set the exporting parameters as shown in the picture Exporting the armour. It is important that the parameters are set like this:
- Fallout 3 -> selected
- Stripify geometries -> deselected
- Smoothen Inter-Object Seams -> deselected
- Flatten Skin -> selected
- Export Skin Partition -> selected
- Press the OK button and wait until Blender finishes saving the nif file.
In Blender 2.7x
The process is the same as the one explained for Blender 2.49, but things are done a little different here, as parenting an object to a skeleton works differently, and the nifscripts require that you set things manually for each object you are to export.
First thing is to import a new skeleton for your armour:
- Make sure that on the Blender screen you see all the objects that form the armour, including the parts of the body that are not hidden by the armour, and that you don't see anything that is not going to form part of your armour (like the light or the camera. If you see those objects move them to another Blender layer and set that layer to invisible or Blender will export those objects together with your armour).
- Make sure that you have deleted all the skeletons you imported with the parts of the body, as explained at the beginning of this tutorial.
- In Object mode select one of the objects that form part of your armour and press the A key twice so as to select all objects of the armour.
- Select the menu option File -> Import -> NetImmerse/Gamebyro and select the .nif file of the body you imported before for creating the armour (for example the modified femabody.nif). Dont press the Import nif button yet!
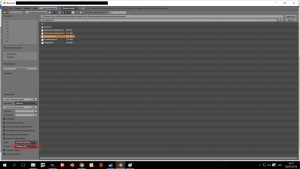
- In the left bottom part of the screen, that contains the importing parameters, select the option Skeleton Only as shown in picture Importing a new skeleton - Blender 2.7x and then press the Import nif button.
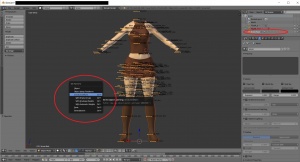
- In Blender, in Object mode, select one of the objects you want to parte to the skeleton and then the skeleton. Then press Ctrl + P and you'll see a pop up window like the one shown in picture Parent skeleton - Blender 2.7x. Click on Armature deform from the list.
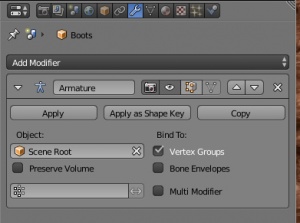
- If you've made the skeleton the parent of an object, you will see it linked to the skeleton in the right upper corner of Blender (the little triangles that are displayed at the right of the Scene root object, are the objects parented to the skeleton). Also, you will see that your object has a new Armature modifier as shown in picture Armature modifier - Blender 2.7x.
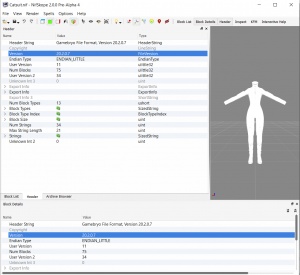
Now, before exporting the armour, you have to set some parameters manually. As ypou are going to export the nif file in Fallout 3 nif format, the parameters have to be set to the ones used by Fallout 3 nifs. You can check the values of those parameters opening a Fallout 3 mesh in NifSkope, like in picture "Fallout 3 nif properties". Check Version, User version 1, User Version 2 and also the shaders used by armours.
Now, in Blender, for each of the objects that form the armour you are to export (except the skeleton), fill the values in the NifTools Object Panel and Niftools Shader panel as shown in picture Setting nif properties - Blender 2.7x. The settings should be, for Falllout 3:
- Niftools Object Panel:
- Nif Version = 20.2.0.7 or 20.02.00.07
- Note: The nif version has to be written exactly in the same format as it is written in the Skeleton that you've parented to your armour. Check how it it written there and write it in the same format in all the objects that form your armour or the exporting process won't work.
- User version = 11
- User version 2 = 34
- Nif Root Node = NiNode
- BS Num UV Set = 0
- UPB = leave this blank
- BSXFlags = 0
- Consistency Flag = CT_STATIC
- Object Flag = 14
- Nif Long name = enter a name for your object here
- Niftools Shader Panel:
- Shader Type = BS Shader PP Lighting Property
- Note: It really doesn't matter what shader you select here as you will have to redo all this in NifSkope once your mesh is in the correct Fallout 4 format. Now you onky have to select some coherent options so the exporting process works.
- BS Shader Pp Lighting = SHADER_DEFAULT
- Select the shaders:
- Remappable textures
- Skinned
- Specular
- Z Buffer Test
To export the armour:
- In Object mode select the skeleton you've just imported and press A twice to select all parts of the armour and the skeleton.
- Press the Ctrl + A keys and select the option Rotation&Scale from the pop up menu.
- Keeping the skeleton and all the parts of your armour selected, select the menu option File -> Export -> NetImmerse/Gamebyro, enter the name of the nif file for your armour (for example MyArmour_0.nif) and the folder where you want to save it.
- Set the exporting parameters as shown in the picture Exporting the armour. It is important that the parameters are set like this:
- Fallout 3 -> selected
- Stripify geometries -> deselected
- Smoothen Inter-Object Seams -> deselected
- Flatten Skin -> selected
- Export Skin Partition -> selected
- Press the OK button and wait until Blender finishes saving the nif file.
