Difference between revisions of "Creating a cape using Blender"
(Created page with "==Overview== This tutorial will explain how to easily create a cape in Blender using the Cloth modifier. This technique can be used to create other hanging clothes like curtains,...") |
Scallywag38 (talk | contribs) m (→Overview) |
||
| Line 1: | Line 1: | ||
==Overview== | ==Overview== | ||
| − | This tutorial will explain how to easily create a cape in Blender using the Cloth modifier. This technique can be used to create other hanging clothes like curtains, | + | This tutorial will explain how to easily create a cape in Blender using the Cloth modifier. This technique can be used to create other hanging clothes like curtains, tablecloths, flags, etc. |
This tutorial assumes that you have a basic knowledge of Blender. If that is not the case I recommend you to read and practice with these tutorials [http://en.wikibooks.org/wiki/Blender_3D:_Noob_to_Pro Blender 3D: Noob to Pro] | This tutorial assumes that you have a basic knowledge of Blender. If that is not the case I recommend you to read and practice with these tutorials [http://en.wikibooks.org/wiki/Blender_3D:_Noob_to_Pro Blender 3D: Noob to Pro] | ||
Revision as of 23:16, 20 January 2011
Contents
Overview
This tutorial will explain how to easily create a cape in Blender using the Cloth modifier. This technique can be used to create other hanging clothes like curtains, tablecloths, flags, etc.
This tutorial assumes that you have a basic knowledge of Blender. If that is not the case I recommend you to read and practice with these tutorials Blender 3D: Noob to Pro
Required tools
Creating a cape
The steps involved in creating a cape are:
- Add a plane
- Subdivide the plane
- Create a vertex group
- Add the Cloth modifier
- Run the animation
- Add collision objects
- Choose an animation frame
- Freeze the shape of the cape
Add a plane
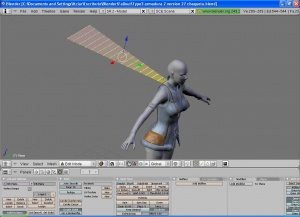
The first step is to add a plane (option Add->Mesh->Plane) then modify its shape a little making its bottom wider than the top and place it horizontally with respect to the character, adjusting the points where the cape is going to be linked to the body (or to the clothes or neck of the character) as shown in the picture.
Subdivide the plane
Next step is to subdivide the plane several times. You can either use the W key and select the Subdivide Multi option giving it a high value like 15, or in Edit Mode select the menu option Mesh -> Edges -> Subdivide and repeat the process 3 or 4 times.
Note: It is important that the cape has several vertices as it will fold and curve along them qhen applying the animation. So, if you are going to use modifiers that increment the number of vertices, as the Subsurf modifier, it is best to use them before adding the Cloth modifier. Then Blender will take those extra vertices into account when modifying the cloth shape.
Create a vertex group
Now you have to create a vertex group. This group is to include all the vertices of the cape that won't move from their place, i. e. the points of the cape that are fixed to the cloth or the neck of the character.
In Edit mode select those vertices. If you want the cape to create folds near the neck, select alternate vertices like in the example picture. Doing it this way the cape won't look too rigid.
Once you've selected the vertices go to the Vertex Groups area, at the bottom left part, and do the following:
- Click on New and give a name to the group you've just created (Capa, in the example).
- Put the Weight of the group to 1.000, so these vertices won't move.
- Click on the Assign button to assign the selected vertices to the vertex group you've created.
Note: Another way of doing the same is to assign all the vertices of the plane to the vertex group you've created and give them an initial weight of 0. Then go into Weight Paint mode and paint different weights to different places of the cape, painting with a weight of 1 the places where the cape doesn't have to move, a weight of 0 to the places where you want the cape to move freely and intermediate weights to the places where the cape moves but not too much.
Add the Cloth modifier
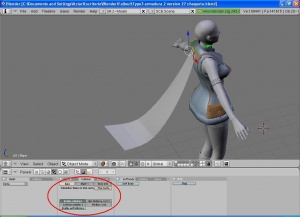
Press the Object button (F7) and then press the Physics buttons as shown in the picture.
Select the Cloth tab and press the Cloth button. From now on Blender will see the plane as a piece of cloth and will animate it as such.
Press the Pinning of cloth button and in the dropdown list select the vertex group you created previously (Capa in the example).
Notes: In the dropdown list Material preset you can select different cloth types that have their physics already set in Blender (Cotton, Silk, Denim, Rubber, Leather) or choose Custom and set your own values to the variables that control the physics of the cape.
In the three Gravity values you can set the forces that have to act on your cape along each of the three spatial axes. by default the values are set to those of the terrestrial gravity (x = 0, y = 0, z = - 9,81), but you can change them (to simulate the action of wind for example).
Run the animation
Go to the Collision tab and press the Enable collisions button.
Next press the Bake button and see how the cape animates.
You can modify any of the parameters you've set on the previous steps, press the Bake button again and see how they affect the movement of the cape and repeat the process several times until finding the configuration you prefer.
Add collision objects
With what we've done until niow the cape won't collide with the body of the character but will go though it. To make it collide with the body or clothes do the following:
- Set the body and the cape at the same Blender layer. If they are in different layers the collision won't work.
- Assure that none of the vertices of the cape are inside the body or clothes before the animation begins or the collision won't work properly.
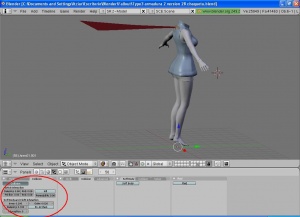
- Select the body and clothes and on the Collision tab that appears on the example picture press the Collision button.
Select the cape again and press the Bake button on the Cloth tab and you'll see that now the cape doesn't go through the body and clothes but collides with them. Take into account that when adding collision objects Blender makes more calculations and that will make the animation to play slower.
Choose an animation frame
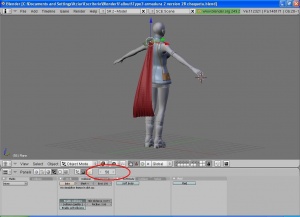
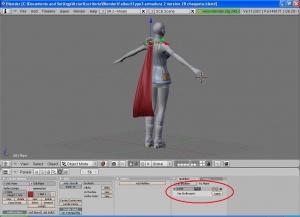
Choose the frame of the animation in which the cape has the shape you like the best. Once you've run the animation by pressing the Bake button Blender stores each frame and you can see them one by one changing the value of the current frame in the box encircled in the example picture. In the example I've chosen frame 56.
Freeze the shape of the cape
Once you've decided waht frame has the shape that you want to keep it is time to freeze the changes. until now you could repeat the process almost from the beginning and see how each change affects the animation of the cape but once you freeze the shape you won't be able to test that again so it is advisable that you save what you've done in a Blender file as a backup and work on a new copy.
To freeze the shape of the cape in Object Mode press the button Editting (F9) and on the Modifiers tab you'll see the Cloth modifier. While being in the frame you've chosen press the Apply button that is at the right side of the Cloth modifier. Once done the cape will have the shape you've chosen and won't look as a plane anymore.
From here you can work with the cape as you would do with any other object in Blender (reduce polygons, assign weights, add materials, etc) and then export it as a nif file to use it in your game.

