Animation tutorial by Seph
I've written this tutorial loong ago for a russian wiki, as a request from one good man.So i translated (as i could) this tutorial into english
Original tutorial - Rumor Wiki
Contents
A word from the author
When I first wanted to import a new animation into Oblivion, I was embraced by a dozen of problems. It was the first time when I opened 3d max, and I knew nothing, and I mean nothing about animating or modeling for that matter. I had to discover almost everything by trial and error, and this tutorial assumes that the reader also doesn’t have, or has little experience in 3d max. It won’t be easy, but it won’t be hard.
Tools needed
1)3dsMax the 8 version. Currently we can’t export human animation that works in without a flaw by using the 9 and further versions of 3dsMax
2)Civ4 exporter - Link
3)Templates created by Mister Cellophane - Link
4)Kf updater - Link
5)BVH sample, made by me - Link (link broken)
Step one
In this step we will see how to load an motion capture bvh file onto a biped, converting it to a bip file and after that correcting the animation to suit your look of things. In the process you will understand the basic animation methods that I discovered while trying to figure out how to do things.
Open 3dsMax
Press File -> Open and open Mr. Cellophane’s Biped Rig.max, which we downloaded.
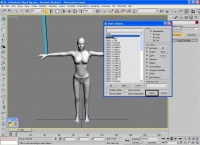
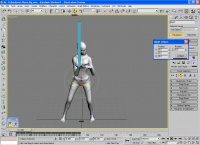
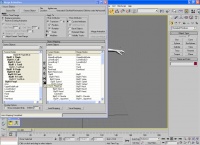
For easy bone selection press H on your keyboard and you will get a list of all the objects in the scene. Select the bip 01 bone. It’s the root of a biped, so if you want to move the model as a whole this bone is for you) Anyway select the bip01 bone and press select:
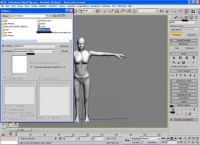
Remember in which the model is facing, because this is the way it must face so that in game you character faces forward. After you selected the Bip01, click on the weel-like icon in the upper right corner. In the opened menu click on + sign near the Motion Capture, to expand it. Click on a folderwithcampera-icon. In the opened window, change the file type from Bip to Bvh and choose the bvh file that I included.
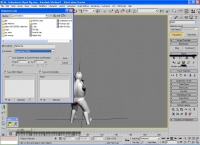
Click Open. A scary looking dialog window with many options will appear. Do nothing and press OK. Animation will be put onto a model and you will probably be scared to hell and won’t know what to do. You can play an animation if you wish to have a lough =) If I didn’t figure out what to do after this move, I probably would have abandoned animating long ago…But as luck would have it, the solution was simple.
In the biped scroll, click on floppydisc-like image and save the file as a bip file. You can name it whatever you want.
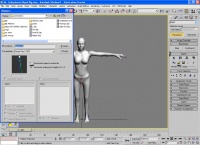
Now open the Mr.Cellophane’s Biped Rig.max again. Select the Bip01. Now go to the biped scroll again and open the folderlike-icon. In the opened window, select the file that you saved in the previous step. Make sure that the "Restructure biped to match file" is NOT selected. Otherwise you will have the same deformation.
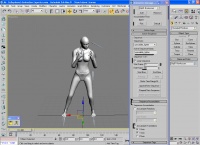
As we can see, the model no longer looks so deformed, but is still not quite right. Plus, the model has turned 180 degrees, which is not good, since in the game it will also be turned by 180 degrees. Make sure that you have the bip01 selected, and in the biped scroll press the icon that looks like bended mars symbol. It is the so called Move All Mode. After you pressed it, choose the Select And Move instrument in the main bar in the top, and move the model in such a way, so the “dot” on the ground was in the center of the grid. Use the select and rotate tool to make sure that the model is facing the right way. After you have finished, press Collapse and go out of the Move All mode.
But the animation still looks terrible, just look at those shoulders and hands. Not all mocap files that you find will perfectly fit your model. But the good news is, that is easily fixable, by using “layers”.
But before I start I should explain something about the bones. Everything in the list that has bip01 prefix is a bone, and work only with them. Don’t touch the bip01 prop. Almost every thing that you do in max can be undone and redone, look at the arrows in the main tool bar. Or press the ctrl+z to undo.
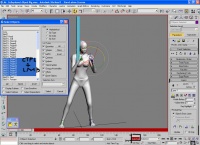
Open the Layers scroll, and press on the Create Layer. After that press the Auto Key button. Time bar has become red, indicating that you are ready to do terrible things to that animation =^.~= Using the Select and Rotate tool, fix the clavicle bones, lifting them a little up. After that rotate the right upper arm bone a little away from the body. In the same way, fix the hands. Fingers are easy, who said you couldn’t select many bones at once? Pres CTRL on the keyboard, and by clicking select what you need. Tip: remember if you want to quickly bend fingers into a knuckle, first rotate the main phalanges (1,2,3,4), and only after that the other ones. Oh, and I suggest you don’t do anything to the thumb finger for now. You can navigate the viewport by using the ArcRotate tool in the bottom right corner. Or you could press the ctrl and middle mouse button to do so. Experiment more, don’t be afraid) If you did terrible things in the viewport and can’t get back, press the shift+z combination (it’s for undoing viewport changes).
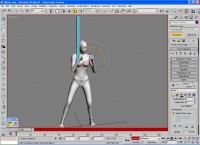
After you finished your diabolical experiments, click the the Autokey button (develop a habit to turn it off once you don’t need it anymore), and in the Layers Scroll press collapse. Play the animation and see if you have everything done right. After that File -> Save as… and save the max-file:
Congratulations! Your animation is ready to be exported!
Step two: Export the animation to oblivion
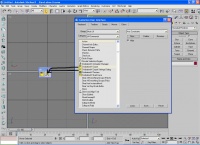
Before we start, make sure that you have installed the Civ4 exporter. After that, to make things easy, I recommend you do the following: Customise -> Customise User interface -> toolbars Press New and name it whatever you want. A small window will appear. Scroll the list of different tools down (or for sorting things you can change select Civ category in the, well…Category). Anyway, you need two icons, that start with CivilizationIV (to be more precise you need - CivilizationIV Animation Manager and CivilizationIV Export). Drag them in the newly created window.
Open the Mr. Cellophane’s Animation Exporter.max Select File -> Merge Animation. Press the Source File button in the upper left corner and select the max file that you created in the previous step (if you can’t see it, you probably didn’t change the file extension in the same window you are now in (by default there is the .anm extension, change it to max)) In the window that has appeared, press the Apply to all duplicates and press the Auto-rename merged Material. A list of bones has appeared. Press the Auto Name Mapping Button (forth from the top icon, in form of an arrow). After that remove the tics from Scale, Modifiers, Custom Attributes and press Merge Animation. Close the window.
Play the animation to make sure that you did everything right. Open the CivilizationIV Animation Manager (icon of a running man). Press Add, and after that open the list of bones by pressing H and choose the Bip NonAccum.
In the Anim Manager press Pick and choose Bip01
If you want to put your animation in a animation player mod like my Seph New Animations, or Actors In Charge, then in Active Sequence Name write specialidle_nameofyouranim (without spacing between words and only in English). For testing animation it is the best way.
And here you must decide whether you want your animation to have khm “physics” (there is no physics for character in oblivion until they are dead, but that is another topic of discussion), or without it. What’s the difference?
With physics, the animation will start from a point in space, where it ended (so if the character is running, he will run all the way forward), wont go through objects and ground, if they are in his way or on a different level. Without physics, it will be the same as if you entered the TCL command in the console, allowing you to go though walls and other characters. And the animation will have the “warp” feature, when the character warps to the place where the animations starts. So, what to choose? I noticed that the animation without physics are best suited for movie making. First, you don’t need to do many things with the console, second, it very easy to capture the necessary footage of your animation, since it is quite easy to capture the angle because the animation warps back. But in the end the choice is yours to make. Of course if you want to do an animation replacer (a run animation for example), the anim must have physics.
If you want to do the export without physics, then skip the next sentence. To make the animation with physics, press the plus sign near the Sequence Accumulation, tick the Accumulate Translations and make sure that the ticks are near X and Y axis, but NOT near the Z axis.
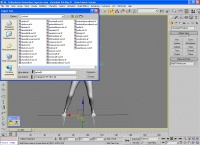
You can close the window anim manager if you wish so. Press the CivilizationIV Export (yellow floppydisk). Name the file whatever you want (but only with English letters and without spaces), and make sure the in the file type was ÑivilizationIV kf file. Save the exported file to the folder where you extracted the Kf Updater. Press Save.
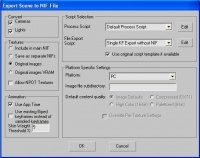
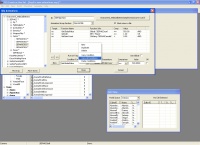
Make sure that the settings match the bellow picture:
Press OK. That’s all, 3dsMax can be closed now. When it asks you to save the file, choose no. Never save the Animation Exporter file.
Another underwater stone appears now. In the source where I first learned how to export the animation was said, that after reaching this moment you should do the following: Start-> Run -> navigate to the folder where you extracted the KF Updater, and then you must enter "UpdateKF XXX.kf" where XXX is the name of your KF animation file. Frankly I couldn’t figure out how to do it that way. Maybe because it was insane heat in my house when I followed that tutorial and my brain was fried X,x
Luckily I had a neat program called Total Commander. If you also have it (or a similar one) navigate to folder where you extracted KF updater, and in the empty line in the bottom enter "UpdateKF XXX.kf" where XXX is the name of your KF animation file. In my case it is the updateKF fighter.kf .
One way or another, you should have a file with the same name, but with “-out” in the end. In my case it is fighter-out.kf.
Copy the file to Oblivion\Data\meshes\characters\_male\idleanims\
Congratulations, you now have your own, fully working animation file!
Step three: Import the animation into oblivion
There are several ways to import your animation into Oblivion, from easy to very hard ones. It all depends how good you are with scripts. Scripts are not my thing, but I know a few ways how to get the animation in game.
Method one
Using an existing animation mod
It’s the first (and the easiest) method, that I usually use to quickly test how the animation is working in game.
So, your file is located in Oblivion\Data\meshes\characters\_male\idleanims\. Make sure that you have some animation mod installed, for example my Seph New Animations, then in that folder there will be other ones. From this point I will write things assuming that you have my mod installed (it’s easier for me that way). After installing my mod, you should have a folder named Seph. Open it, and then open the Varios folder (you can use any other, just don’t touch the idle_facegen.kf), copy the name of any file there. Let it be ramplunch-out.kf for example. Copy the name of the file and rename our animation file (the one exported from max) to ramplunch-out.kf. So it was fighter.kf and became ramplunch-out.kf. Copy our renamed file to Varios folder, and overwrite the original file. Open the game, and use the Mocap Ball. Choose the ramplunch and instead of the original anim you will see your animation. Congratulations!
Method two
Using the Construction Set to get the animation into a mod
This method allows you to put a animation in a mod by using CS (at least beginner knowledge is necessary).
Open CS. Load my mod for example.
Press Gameplay -> Idle Animations
Press the + near the SEPHAIC. Decide in witch folder you would put your animation. Let it be Varios.
Click on the SEPHAIC503 by using right mouse button and choose insert sibling.
In the empty ID write SEPHAIC504
After than, click with left mouse button on SEPHAIC503. Right mouse button on the place where there are many fields, and choose Copy All Conditions.
Return to SEPHAIC504, press the right mouse button on the fields and choose Paste Conditions. Click on the GetClobalValue and change Value to 504. Press the Select Animation File and, choose your animation file (it must be in the varios folder already). In my case it is the fighter-out.kf.
Click on Close. Open the SEPHAICdummy1Script. Scroll down to «; MESSAGE BOXES»
Now in the line
Elseif ( Page == 15 )
MessageBox "Various", "Laugh", "Ramplunch", "Yawn", "[MAIN MENU]"
Add, after comma, in the same way as the other words, write a word on how you would like to name the animation in game. Let it be
Elseif ( Page == 15 )
MessageBox "Various", "Laugh", "Ramplunch", "Yawn", "Fighter", "[MAIN MENU]"
The line with Elseif (Page == number) shows us the number of a page, that we must find bellow. In our case, we search for «; PAGE 15» After you find it, copy the last two line in front
Endif
set Counter to 2
Endif
Return
In our case
Elseif ( Button == 2 )
set SEPHAICnum to 503
Now paste them bellow. Something like this:
Else
If ( Button == 0 )
set SEPHAICnum to 501
Elseif ( Button == 1 )
set SEPHAICnum to 502
Elseif ( Button == 2 )
set SEPHAICnum to 503
Elseif ( Button == 2 )
set SEPHAICnum to 503
Endif
set Counter to 2
Endif
Return
Rise the numerical value by one, in the pasted line
Else
If ( Button == 0 )
set SEPHAICnum to 501
Elseif ( Button == 1 )
set SEPHAICnum to 502
Elseif ( Button == 2 )
set SEPHAICnum to 503
Elseif ( Button == 3 )
set SEPHAICnum to 504
Endif
set Counter to 2
Endif
Return
In the line
If ( Button == 3 )
Increase the value of Button by one:
If ( Button == 4 )
Save script. Save Mod. Open game. Test)))
Method three: Replacing vanilla animation (animation replacer)
In this method we are replacing an existing animation from Oblivion. Like I did in Seph's h2h animation replacer. In the latest version of the mod (2.0) there is a tutorial on how to do it. So download the mod here - Link
In the Battle Constructor folder, there is a readme file. Read it, it’s all there. Here I will write how to get the animation you want to replace from oblivion.
You will need a program called Oblivion Mod Manager, or any other BSA extractor.
Open Oblivion Mod Manager
Press Utilities -> BSA Browser -> Open and open Oblivion -> Meshes.bsa
If you have enough disc space, extract the whole folder, if not then press sort by folder All animations are in meshes/character/ - _1stperson (for 1rst person anims) or _male folder (for 3rd person) Choose the animation you need, and press Extract. After that follow my tutorial on how to replace animation))
That’s all!
Of course, there are a lot more aspects of animations left, and I don’t pretend to be the master and “know-it-all” in this question. But this tutorial should give you the base knowledge on how to import mocap animations in oblivion.
And lastly here is a video of the animation that you should get, if you did everything right!))
